
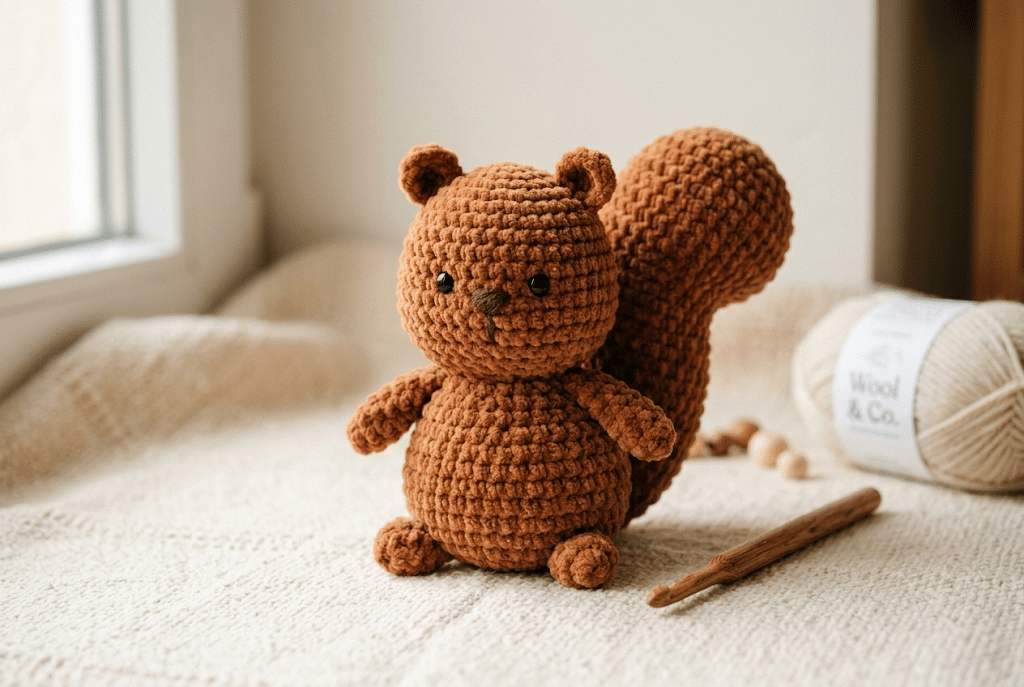
There is something extra charming about a tiny squirrel with a fluffy tail, round cheeks, and a curious little face. A crochet squirrel pattern lets you turn that woodland sweetness into a handmade friend you can hold, gift, or display.
This project uses simple amigurumi techniques and easy shapes, so you can enjoy it even if you are still building your crochet confidence. You will learn how to shape the body, create tiny ears, add a curled tail, and give your squirrel a lovable expression.
You will also find helpful yarn suggestions, stuffing tips, assembly guidance, and beginner-friendly tricks that make the process smoother. For a soft finish, Bernat Blanket yarn can make woodland amigurumi especially cuddly.
Now, grab your hook and let’s bring this little forest friend to life!
Table of Contents
Why This Crochet Squirrel Pattern Is So Adorable
A squirrel makes such a sweet amigurumi project because its shape naturally lends itself to cute crochet details. The rounded body gives you a simple starting point, while the large tail creates the feature everyone notices first.
This crochet squirrel pattern also gives you plenty of room to personalize your finished animal. You can choose a warm brown shade for a classic woodland look, or experiment with cream, caramel, gray, or reddish yarn.
The project works especially well as a small handmade gift. You can make one for a nature lover, a child, a teacher, or anyone who enjoys cute woodland animals.
What makes a crochet squirrel special?
The tail is the star of this project. A gently curved or oversized crocheted tail gives your squirrel its recognizable silhouette.
Small ears and tiny paws add even more personality. You can also embroider a little nose or smile if you prefer a softer finish without extra plastic pieces.
A beginner-friendly amigurumi project
You do not need complicated techniques to make a cute squirrel. Most of the project uses familiar amigurumi skills such as working in the round, increasing, decreasing, stuffing, and sewing pieces together.
If you are new to crochet animals, take your time with each section. Even tension matters more than speed, especially when you are shaping the body.
A fun project for customization
Your squirrel does not need to look exactly like another squirrel. Try changing the colors, tail size, ear shape, or facial expression.
You could even create a whole woodland collection with squirrels, foxes, bears, mushrooms, and little birds. That makes this project a wonderful starting point for a cozy handmade display.
Crochet Squirrel Pattern Materials and Preparation
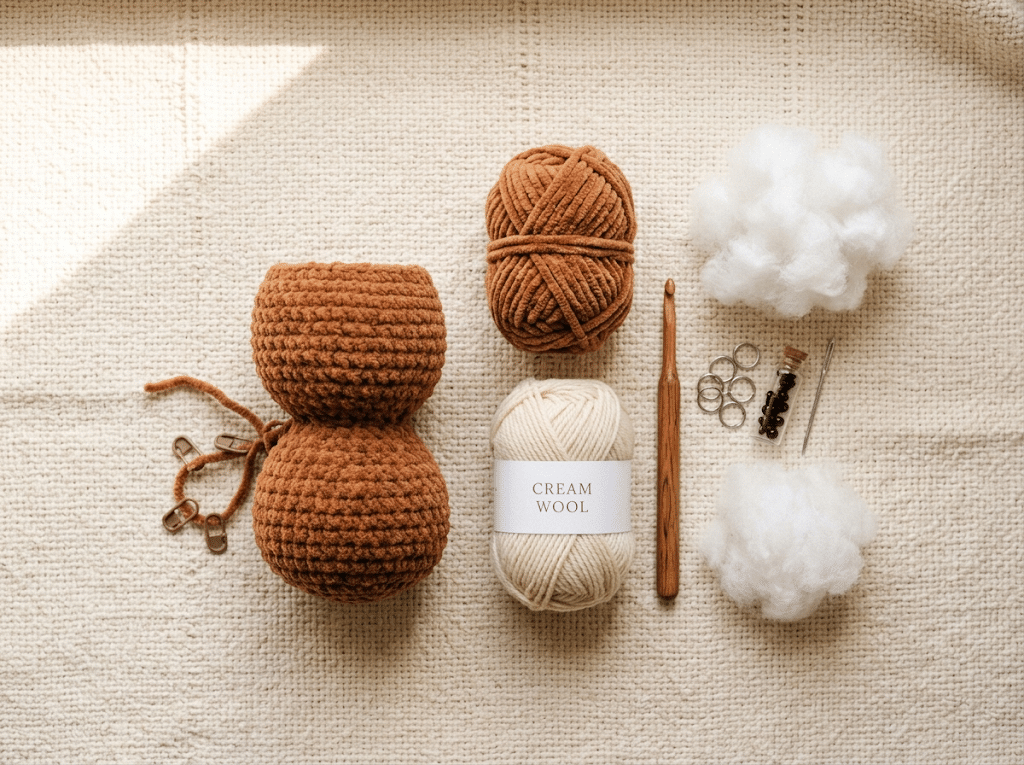
Before starting your crochet squirrel pattern, gather everything you need in one place. Having your supplies nearby keeps the project relaxing and helps you avoid stopping halfway through.
For a traditional squirrel, choose a medium brown yarn with a slightly lighter shade for the belly or muzzle. You can also use one color throughout if you prefer a simple design.
You will need a crochet hook that works comfortably with your chosen yarn. Amigurumi usually looks best with a firm fabric, so avoid using a hook that creates large gaps between stitches.
Choose the right yarn
Paintbox Simply DK yarn works beautifully when you want a lightweight squirrel with clearly defined stitches. Its smooth texture also makes small details easier to see.
A slightly thicker yarn creates a larger, softer squirrel. Chenille yarn can give your finished animal a plush appearance, while cotton blends create crisp stitch definition.
Choose your yarn based on the final look you want. Soft yarn creates cuddly squirrels, while smooth yarn makes detailed stitches easier to control.
Pick your crochet hook
Your hook size should match your yarn and your personal tension. For amigurumi, choose a hook that creates a firm fabric without making your stitches difficult to work.
A comfortable ergonomic hook can make a big difference during longer projects. I especially like the Clover Amour crochet hook when teaching beginners because the grip feels comfortable during repeated rounds.
Keep your hook, yarn, stitch markers, yarn needle, stuffing, and safety eyes together before you begin.
Prepare your workspace
Choose a bright, comfortable place where you can clearly see your stitches. Good lighting makes counting rounds much easier.
Keep a small bowl nearby for safety eyes and tiny pieces. A stitch marker can also help you remember where each round begins.
If you are following the pattern from your phone, keep it somewhere you can check without constantly moving your crochet. A calm setup makes the whole project feel much easier.
How to Crochet the Squirrel Body Step by Step
Now that your supplies are ready, it is time for the fun part. The body creates the main shape of your squirrel, so focus on keeping your stitches even as you work.
Most amigurumi bodies begin with a small rounded section. You gradually increase the shape, work several rounds without changes, and then decrease toward the top.
Step 1: Start the magic ring
Begin with a magic ring using your chosen squirrel color. Work your first stitches into the ring and pull it closed securely.
If the magic ring feels tricky, practice it with scrap yarn first. Once your fingers understand the movement, it becomes much easier.
Keep the center tight. A loose starting ring can leave an unwanted hole in the bottom of your squirrel.
Step 2: Build the rounded body
Continue working in the round while gradually increasing your stitches. Your shape should start looking like a small ball or oval.
Do not worry if it looks strange during the first few rounds. Amigurumi often looks nothing like the finished animal until the stuffing and shaping begin.
Use a stitch marker to identify the first stitch of each round. This simple habit can save you from losing your place.
Step 3: Shape the middle
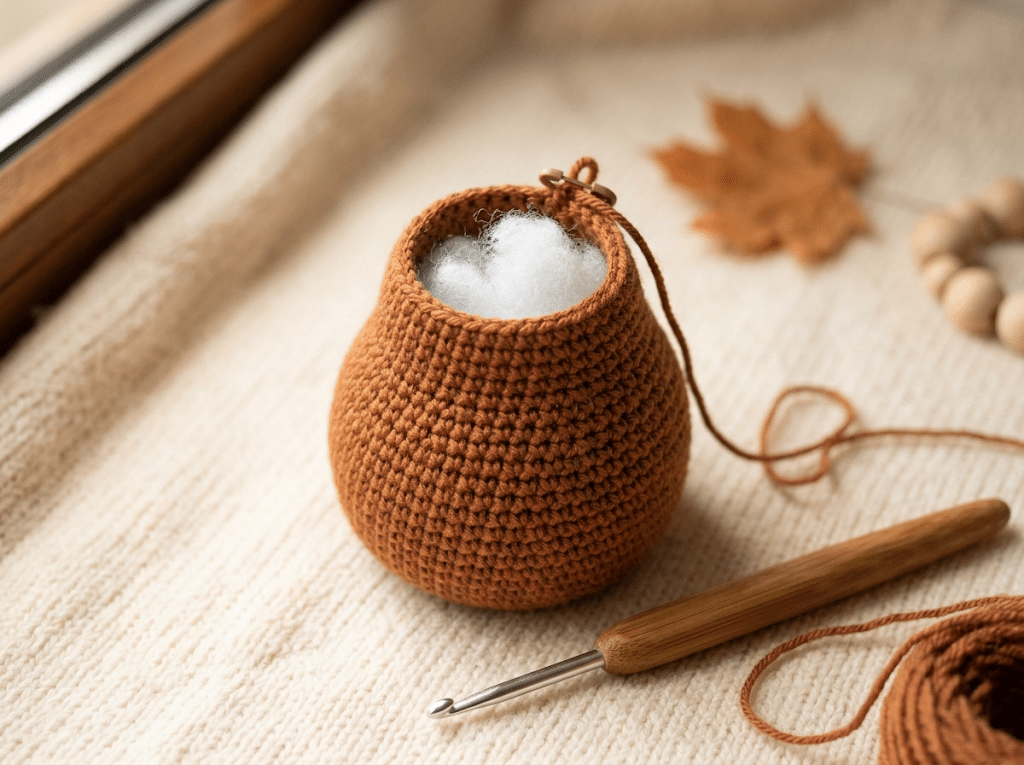
Once the body reaches its widest point, continue working evenly around. This section gives your squirrel its plump little belly.
Check your tension regularly. If your stitches become loose, stuffing may show through later.
Try gently squeezing the piece as you work. You want a firm but flexible fabric that can hold its shape.
Step 4: Add the stuffing
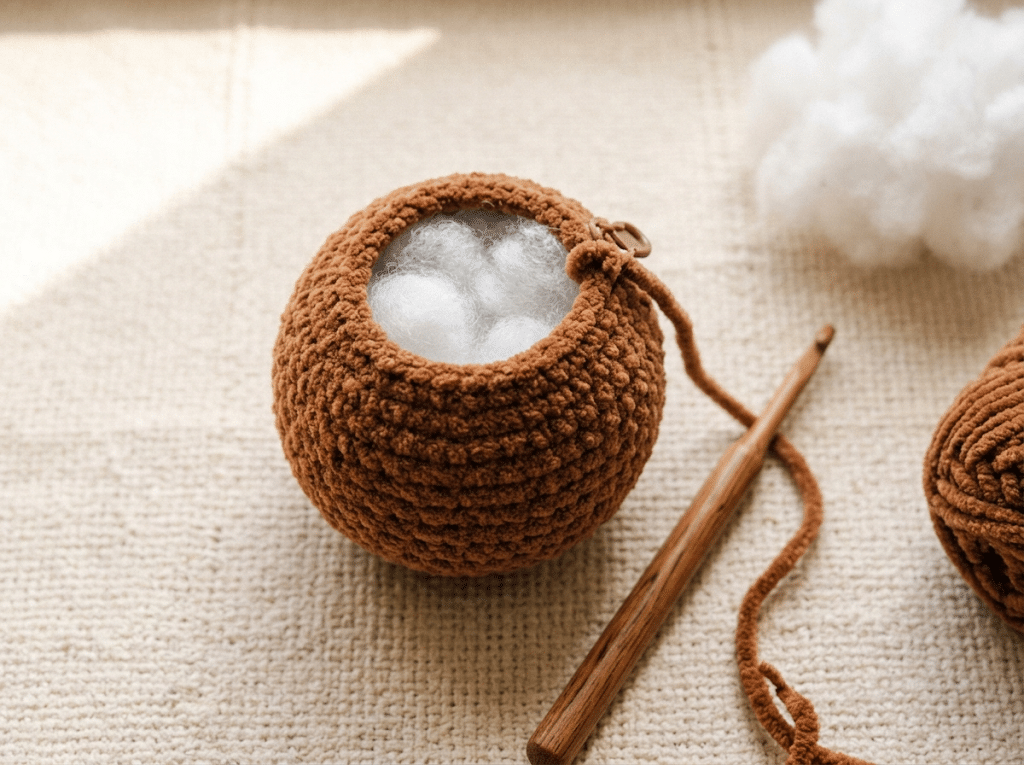
Start adding small amounts of Poly-fil Premium fiberfill as the body grows.
Do not wait until the final opening. Adding stuffing gradually gives you much better control over the shape.
Push the stuffing into the sides and bottom of the body. Keep adding small amounts until your squirrel feels pleasantly firm without becoming stiff.
Step 5: Close the body
Continue your decreases toward the top of the body. Add a little more stuffing before the opening becomes too small.
Once the body reaches its final shape, close the remaining stitches securely. Weave in the yarn end and hide it inside the body.
Take a moment to check the shape. If one side looks slightly fuller, gently adjust the stuffing before moving on.
Crochet Squirrel Pattern: Make the Cute Woodland Details
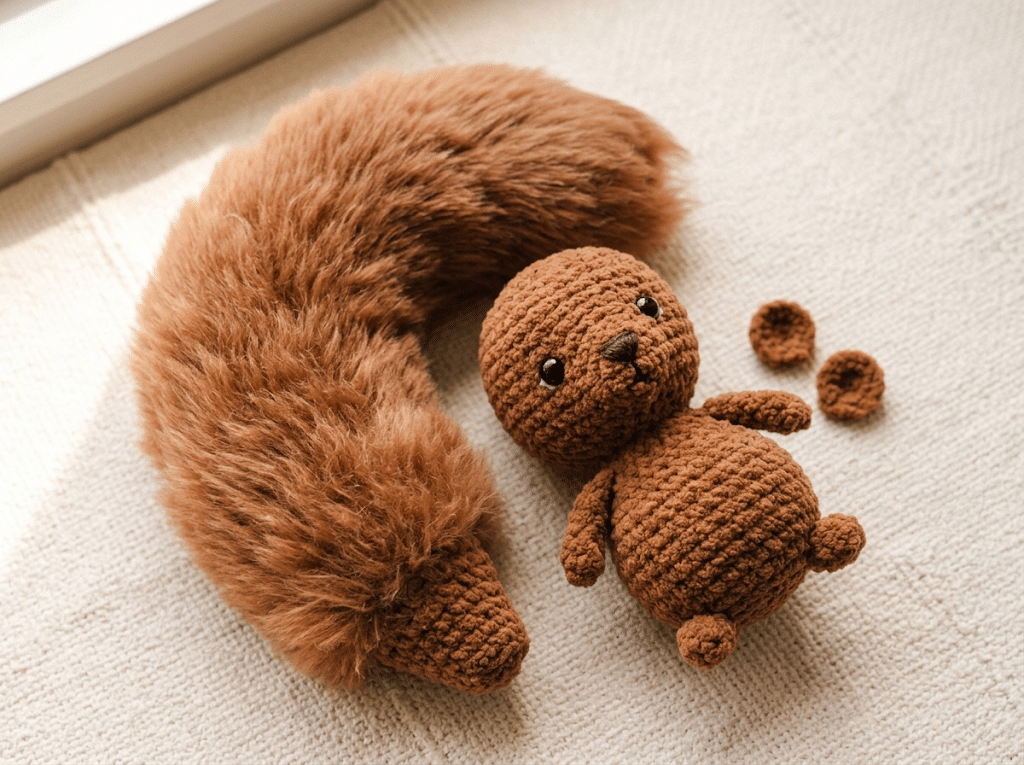
The body gives you the basic squirrel shape, but the smaller pieces create its personality. This is where your little woodland friend starts looking like an actual squirrel.
The ears, arms, feet, and tail each have a simple purpose. You do not need complicated shaping to create an adorable result.
Step 6: Crochet the ears
Make two small rounded ears using your main yarn color. You can keep them simple or add a lighter inner section.
The ears should sit toward the upper sides of the head. Place them symmetrically before sewing them permanently.
Use pins first if you have them. Step back and look at the squirrel from different angles before attaching the ears.
Step 7: Create the tiny arms and feet
Crochet two small arms and two little feet. Keep these pieces compact so they do not overwhelm the body.
Lightly stuff them if needed. Some small amigurumi limbs look better with minimal stuffing because they remain flexible.
Sew the arms onto the sides of the body. Position the feet near the bottom so your squirrel looks balanced when sitting.
Step 8: Make the fluffy squirrel tail
The tail deserves extra attention because it gives your squirrel its woodland personality.
Create a long, curved crocheted piece and shape it gently as you sew. A larger tail can curve upward behind the body for that classic squirrel silhouette.
You can also make the tail slightly wider toward the middle. This creates a fluffy appearance without requiring complicated stitches.
For an extra-soft result, choose a yarn with a plush texture. If you use smooth yarn, gently shape the tail with your fingers after sewing.
Step 9: Add the face
Place the safety eyes before attaching them permanently. Look at the face from several angles to make sure the eyes sit evenly.
For this medium-sized squirrel, 9mm safety eyes create a sweet, expressive look. Make sure you secure them firmly and follow the safety recommendations for the intended recipient.
Add a tiny embroidered nose using black or dark brown yarn. You can also stitch a small smile beneath it.
If you want a more kawaii expression, place the eyes slightly lower and closer together. A tiny blush detail can make the face look even sweeter.
Step 10: Assemble your squirrel
Sew all the pieces securely onto the body. Take your time because positioning changes the entire personality of your finished squirrel.
Attach the tail slightly to one side if you want a playful pose. Positioning it higher can make the squirrel look like it is sitting proudly.
Once everything feels secure, hide all yarn ends inside the body. Give your finished squirrel one final gentle squeeze and adjust the stuffing if necessary.
Easy Tips for Better Squirrel Amigurumi
Ready to move on? A few small improvements can make your handmade squirrel look much more polished.
The biggest secret is not complicated crochet. It is careful shaping, consistent tension, and thoughtful placement of the facial features.
Keep your stitches tight
Small gaps can appear when your tension becomes too loose. These gaps may reveal the stuffing inside your amigurumi.
Try using a slightly smaller hook if your chosen yarn allows it. Your fabric should feel firm while remaining comfortable to crochet.
The goal is a smooth fabric, not extremely tight stitches. If your hands feel strained, loosen your grip instead of forcing every stitch.
Stuff gradually
Too much stuffing can stretch the stitches and distort your squirrel. Too little stuffing can make the body look flat.
Add fiberfill in small sections. Push it into corners using the blunt end of your crochet hook or a stuffing tool.
Check the silhouette frequently. You want a rounded belly with enough firmness to hold its shape.
Check facial placement
The eyes can completely change your squirrel’s expression. Before securing them, experiment with different positions.
Move them slightly closer together for a younger, cuter look. Place them farther apart for a more curious expression.
Take a quick photo with your phone before finalizing the face. Sometimes the camera reveals uneven placement that your eyes miss.
Make the tail expressive
The tail can point upward, curve around the body, or sit slightly to one side. Each position creates a different personality.
For a classic woodland squirrel, angle the tail upward behind the body. For a playful kawaii squirrel, curl it toward one side.
Do not worry about perfect symmetry. A little personality often makes handmade amigurumi more charming.
Color Ideas for Your Crochet Squirrel Pattern
Before you get into that, think about the personality you want your squirrel to have. Color can completely change the finished look.
Traditional woodland colors work beautifully, but cute amigurumi gives you permission to experiment.
Classic woodland brown
Warm medium brown creates the most recognizable squirrel. Pair it with a cream muzzle and belly for extra contrast.
This combination looks especially cozy during autumn. Add a tiny crocheted acorn for an adorable seasonal display.
Soft caramel and cream
Caramel gives your squirrel a lighter, sweeter appearance. Cream details around the face can make the eyes stand out.
This palette works beautifully for nursery decor and handmade gifts. You can also use darker brown embroidery for the nose and mouth.
Gray squirrel style
A soft gray squirrel offers a more modern look. Add a pale cream belly and tiny pink inner ears for a gentle color palette.
Gray also pairs nicely with pastel accessories. A tiny scarf or miniature crochet leaf can turn the finished piece into a cute seasonal decoration.
Kawaii fantasy colors
Nothing says your squirrel must look realistic. Try dusty pink, sage green, lavender, cream, or soft peach.
A pastel squirrel can fit beautifully into a kawaii collection. Choose colors that make you smile, especially if you plan to display the finished piece.
Common Mistakes When Making a Crochet Squirrel
Even experienced crocheters occasionally make mistakes with amigurumi. The good news is that most problems have simple solutions.
If your squirrel does not look right immediately, do not unravel everything. Check the shape, stuffing, tension, and placement first.
The body looks lumpy
Uneven stuffing often causes lumps. Remove a little fiberfill and redistribute it around the body.
You can also gently massage the shape with your fingers. This helps spread the filling without changing your stitches.
The stuffing shows through
Visible stuffing usually means your stitches are too loose for the yarn and hook combination.
Try a smaller hook on your next attempt. You can also work with slightly firmer tension.
If only tiny areas show stuffing, carefully push the fiberfill deeper inside before closing the piece.
The squirrel looks flat
Your body may need more stuffing. Add small amounts until the shape becomes rounded.
Check that the stuffing reaches the sides rather than collecting only in the center. A well-filled body should feel firm but not hard.
The face looks different from the sample
That is completely normal. Small changes in eye placement can create surprisingly different expressions.
Move the eyes before permanently securing them whenever possible. Your squirrel does not need to match a sample perfectly to look adorable.
The tail keeps falling
A large tail can pull the body backward. Sew it securely at more than one point if needed.
You can also attach the tail slightly lower on the body. This gives it extra support while maintaining the fluffy appearance.
How to Make Your Squirrel Even More Special
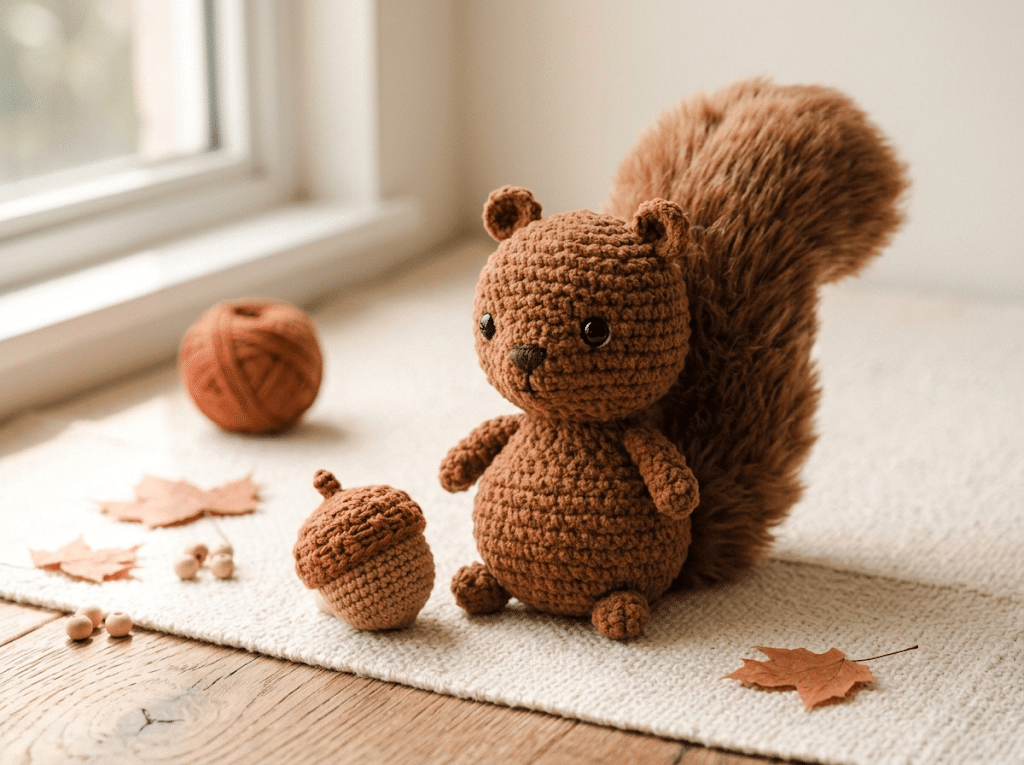
Here is the fun part: once you finish the basic animal, you can turn it into a tiny woodland character.
Handmade details make wonderful gifts because they show that you spent time creating something specifically for someone.
Add a tiny acorn
A miniature crocheted acorn makes a perfect accessory. Place it beside your squirrel or sew it lightly into one of its paws.
This small detail immediately reinforces the woodland theme.
Create a seasonal squirrel
For autumn, use warm brown, rust, cream, and golden shades. Add a tiny leaf or acorn for extra character.
For winter, make a cream squirrel with a tiny scarf. Spring colors work beautifully for a pastel woodland collection.
Turn it into a gift
A finished squirrel makes a sweet handmade present for birthdays, baby showers, holidays, or nature lovers.
You can place it in a small gift box with a handmade note. Handmade gifts feel special because someone can see the time and care behind them.
Make a woodland collection
Once you finish one squirrel, you may want to create more woodland animals.
Try making a fox, hedgehog, bear, owl, or mushroom next. Different animals can share the same yarn palette to create a coordinated collection.
If you want to explore more crochet inspiration, Ravelry has a large crochet community and pattern library worth browsing for general project ideas.
You can also explore crochet terminology and tutorials through The Crochet Guild of America if you want to strengthen your crochet skills while making more amigurumi.
How to Care for Your Finished Amigurumi Squirrel
Once your squirrel is finished, a little care will help keep it looking cute for years.
Dust can collect between crochet stitches, especially on plush yarn. Gently clean the surface rather than aggressively rubbing the fabric.
Keep your squirrel clean
Check the yarn label before washing your finished animal. Different fibers react differently to water and heat.
For many handmade amigurumi pieces, gentle spot cleaning works well. Use a soft cloth and a small amount of mild soap when appropriate.
Allow the squirrel to dry completely before storing it. Never put a handmade piece away while it remains damp.
Protect the shape
Avoid crushing your squirrel under heavy objects. Store it somewhere dry and away from direct sunlight.
If the tail becomes flattened, gently reshape it with your hands. You can also lightly fluff textured yarn with your fingers.
Keep safety in mind
Safety eyes can create a cute professional finish, but they are not appropriate for every recipient.
For babies and very young children, embroidered facial features offer a safer alternative. Always consider the intended recipient before choosing small attached parts.
Frequently Asked Questions About Crochet Squirrel Pattern
How long does it take to crochet a squirrel?
A small squirrel can take several hours, depending on your crochet speed and experience. Beginners may need extra time for shaping, counting rounds, and sewing pieces together.
If you work slowly, consider completing the project over several short sessions. This keeps your hands comfortable and makes the process feel much less overwhelming.
What yarn is best for a crochet squirrel?
Smooth acrylic or cotton-blend yarn works well for beginners because you can clearly see the stitches. Paintbox Simply DK yarn creates a neat, lightweight squirrel with good stitch definition.
For a plush squirrel, chenille yarn creates a softer texture. Choose yarn based on the finished size, texture, and appearance you want.
Is a crochet squirrel pattern good for beginners?
A small squirrel can take several hours, depending on your crochet speed and experience. Beginners may need extra time for shaping, counting rounds, and sewing pieces together.
If you work slowly, consider completing the project over several short sessions. This keeps your hands comfortable and makes the process feel much less overwhelming.
What yarn is best for a crochet squirrel?
Smooth acrylic or cotton-blend yarn works well for beginners because you can clearly see the stitches. Paintbox Simply DK yarn creates a neat, lightweight squirrel with good stitch definition.
For a plush squirrel, chenille yarn creates a softer texture. Choose yarn based on the finished size, texture, and appearance you want.
Is a crochet squirrel pattern good for beginners?
Yes, especially if you already know basic single crochet, increases, decreases, and working in the round.
The body uses simple amigurumi shapes, while the smaller pieces provide useful practice. If you are completely new to crochet, practice the basic stitches first.
What size safety eyes should I use for a squirrel amigurumi?
For a medium-sized squirrel, 9mm safety eyes can create a cute balanced expression. Smaller squirrels may look better with 6mm eyes, while larger designs may suit 12mm eyes.
Always choose the eye size according to your finished animal rather than following a number blindly. Test the placement before securing the eyes.
Can I sell squirrels I make from a crochet pattern?
You can usually sell handmade items you personally crochet, but the rules depend on the specific pattern designer and pattern terms.
Always check the designer’s stated usage policy before selling finished pieces. Never sell, copy, or redistribute the written pattern itself unless you have permission.
Can I make a crochet squirrel without safety eyes?
Absolutely. Embroidered eyes work beautifully for handmade squirrels and give them a softer appearance.
Use black embroidery yarn and stitch small eyes carefully. This option works especially well when making toys for young children because it avoids detachable plastic parts.
Conclusion: Make Your Own Tiny Woodland Friend
Making a crochet squirrel pattern is such a lovely way to practice amigurumi while creating something full of personality. You learned how to shape the body, add tiny ears and limbs, create an expressive tail, and position the face for a cute woodland look.
Remember that your first squirrel does not need to be perfect. Every stitch gives you more confidence, and those tiny handmade details are what make your finished animal special.
Once your squirrel is sitting proudly with its fluffy tail, you will have that wonderful feeling of “I actually made this!” It makes a sweet gift, a cozy decoration, or the beginning of an entire woodland collection.
Save this pin to your crochet board on Pinterest so you can find this pattern anytime!
Looking for more free crochet animal patterns? Visit Yarned Animals for new amigurumi patterns, kawaii plushies and beginner crochet tutorials added every week at yarnedanimals.com