
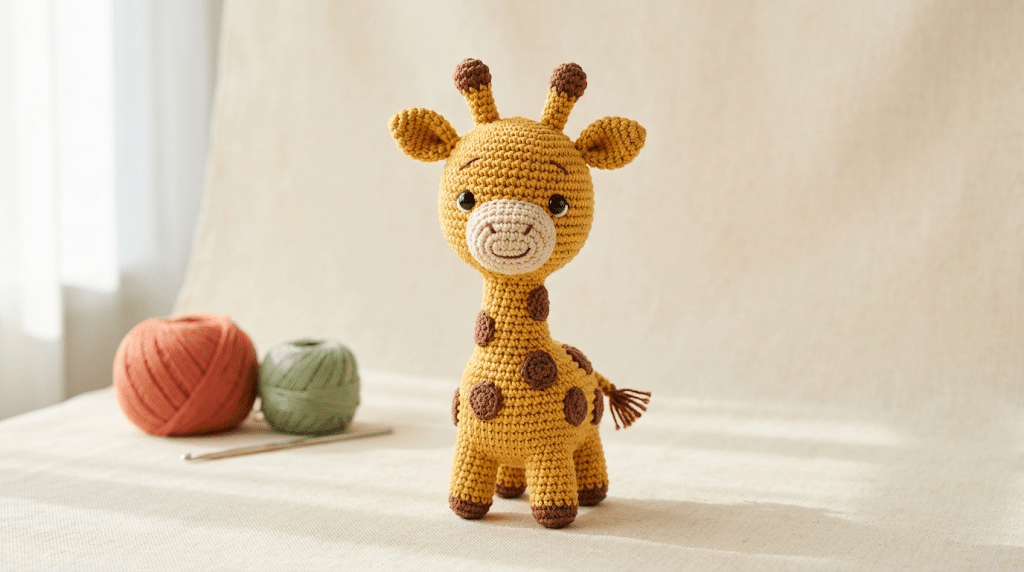
There is something extra sweet about a tiny handmade giraffe standing on your craft table. With its long neck, little horns, floppy ears, and adorable spots, a crochet giraffe feels like a tiny safari friend you made yourself. This crochet giraffe pattern gives you a simple way to create that charm with beginner-friendly techniques and easy-to-follow steps. You’ll learn how to choose your yarn, shape the body, create the giraffe’s signature details, add stuffing, and finish your amigurumi neatly. You’ll also find helpful tips for making your giraffe soft, sturdy, and gift-ready. If you’re new to amigurumi, don’t worry—you can take this one small step at a time. Now, let’s gather your supplies and bring your little giraffe to life!
Table of Contents
Why This Crochet Giraffe Pattern Is So Adorable
Giraffes are perfect for amigurumi because their recognizable features translate beautifully into yarn. A tiny long neck instantly gives your project personality, while the little horns and spotted body make it unmistakably giraffe-inspired.
This crochet giraffe pattern focuses on simple shapes rather than complicated techniques. You’ll work with familiar amigurumi basics, then combine those pieces into one cute finished animal.
The finished giraffe makes a lovely handmade decoration, nursery companion, or thoughtful gift. You can also change the colors to create your own playful safari character.
What makes a crochet giraffe special?
The magic comes from the details. A rounded head, tall neck, small ears, and four chunky legs create the classic silhouette without requiring advanced shaping.
Giraffe spots add another layer of personality. You can crochet small spots separately and sew them onto the body, or embroider simple patches directly onto the finished piece.
A traditional palette uses golden yellow, warm brown, and cream. However, pastel pink, sage, peach, or lavender can create an adorable kawaii version.
A beginner-friendly amigurumi project
If you already know how to make a magic ring, single crochet, increase, and decrease, you have a great starting point.
You don’t need complicated lacework or advanced colorwork. Most of the project involves building simple stuffed shapes and joining them carefully.
Beginner tip: Keep your stitches snug when making amigurumi. Tight stitches help prevent stuffing from showing through your finished giraffe.
Choose a size that feels comfortable
Your yarn and hook choice will affect the final size. DK yarn creates a smaller, lightweight giraffe, while chunky chenille yarn produces a soft, squishy plushie.
For a classic handmade look, Paintbox Simply DK yarn works beautifully for smaller amigurumi projects.
You can also experiment with different hook sizes, but always check your tension. A smaller hook usually creates tighter stitches and helps keep the stuffing inside.
Crochet Giraffe Pattern Materials and Setup
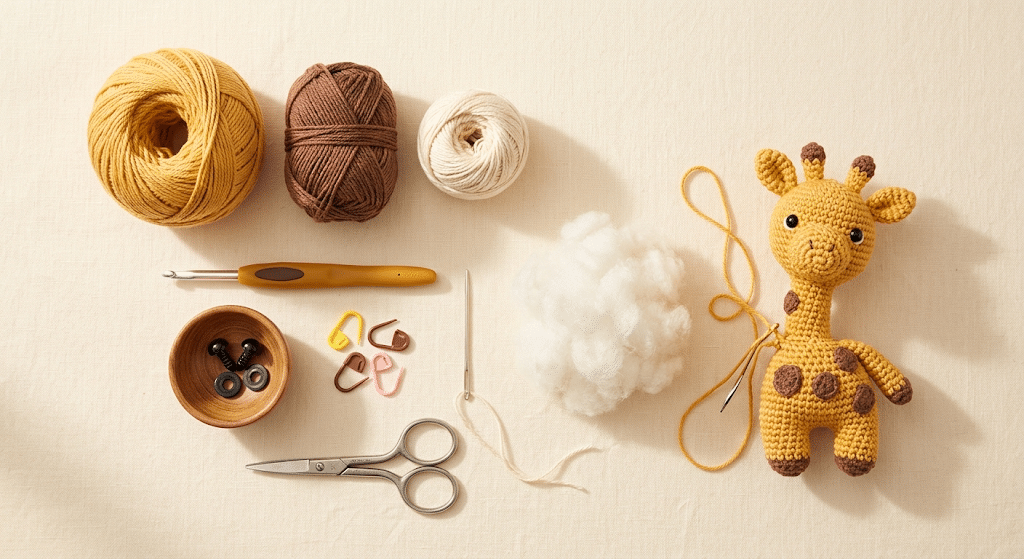
Before starting your crochet giraffe pattern, prepare everything beside you. Having your tools ready makes the project much more relaxing.
You’ll work with a main body color, a darker shade for the spots, and a small amount of a contrasting color for the muzzle and horns.
Gather your crochet supplies
For this giraffe, prepare:
- Yellow or golden yarn
- Brown yarn for spots and details
- Cream or light beige yarn
- A suitable crochet hook
- 9mm safety eyes
- Poly-fil Premium fiberfill
- Stitch markers
- Yarn needle set
- Scissors
Choose colors that make you smile. A warm mustard yellow creates a classic safari look, while pale yellow gives your giraffe a softer nursery style.
For a particularly cuddly version, Bernat Blanket yarn creates a plush texture that works beautifully for soft amigurumi.
Choose your safety eyes carefully
Safety eyes give your giraffe that instantly recognizable kawaii expression. Position them evenly on the head before securing them permanently.
For a medium-sized giraffe, 9mm safety eyes create a balanced look. Smaller giraffes may look better with 6mm eyes, while larger plush versions can handle 12mm eyes.
Always consider who will receive the finished toy. For very young children, embroidered eyes can offer a safer alternative to plastic safety eyes.
Prepare your stuffing
Poly-fil Premium fiberfill works well because you can add it gradually as the pieces take shape.
Avoid stuffing everything at the very end. Instead, add small amounts as you crochet around the body, head, and neck.
Important tip: Stuff firmly enough to maintain the shape, but avoid packing the fiberfill so tightly that your stitches stretch open.
Keep your workspace organized
Amigurumi uses several small pieces. Losing one ear or horn can turn a relaxing project into a frustrating search.
Keep completed pieces in a small bowl or pouch. Use stitch markers to identify the beginning of rounds and prevent accidental counting mistakes.
If you crochet while watching television, keep your pattern beside you and mark each completed section.
How to Crochet the Giraffe Step by Step
Now that your supplies are ready, here is the fun part. You’ll build your giraffe from several simple pieces before joining everything together.
The exact stitch counts can vary depending on the size and style you want. Focus on the shape first, then adjust your tension as needed.
Step 1: Crochet the giraffe body
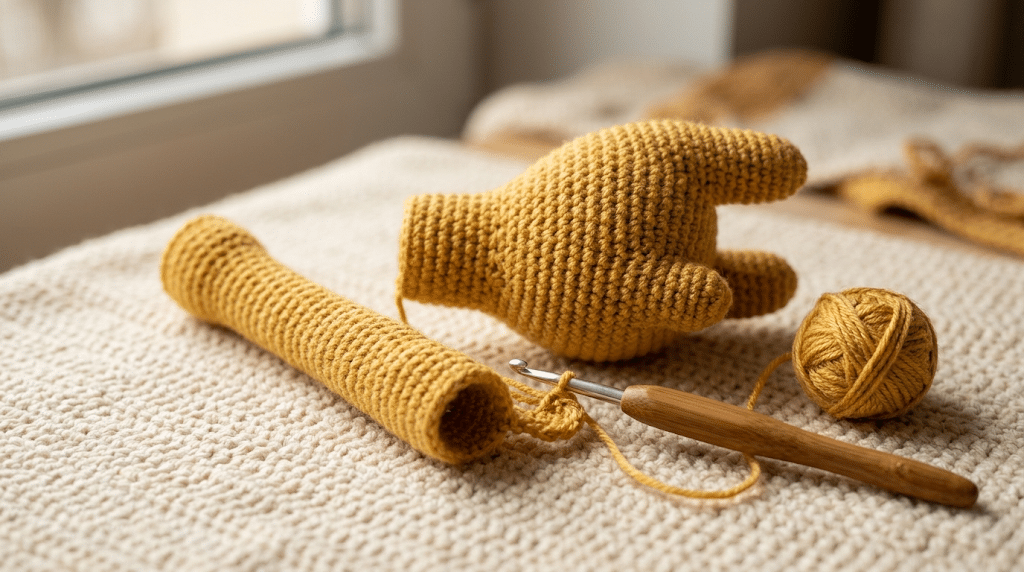
Start with the rounded body using your main yellow yarn. Work in continuous rounds and use increases to create the wider middle section.
As the body becomes taller, keep your stitches even. A stitch marker helps you identify the beginning of each round.
Begin decreasing near the top to create a gently rounded shape. Add stuffing gradually before closing the opening.
Tip: Shape the body with your fingers as you stuff it. This helps create a smooth, plump silhouette instead of a lumpy one.
Step 2: Build the long giraffe neck
The neck is one of the most recognizable features in this crochet giraffe pattern. Create a narrow cylindrical piece using yellow yarn.
Keep the neck firm enough to stand upright. You don’t want it so loose that the head droops forward.
Add fiberfill little by little as you crochet. Push the stuffing gently into the lower part before continuing upward.
A firm neck also makes attaching the head easier later.
Step 3: Shape the giraffe head
The head starts as a rounded amigurumi shape. Use increases to create the cheeks and forehead, then decrease toward the back.
Keep the front slightly fuller than the rear. This gives your giraffe a cute, gentle expression.
Before closing the head, insert your safety eyes and add enough stuffing to hold the shape.
Step 4: Add the muzzle
The muzzle gives your giraffe its sweet face. Crochet a small oval piece using cream, beige, or light tan yarn.
Sew the muzzle onto the lower front of the head. Keep it centered between the eyes.
You can add a tiny embroidered smile using brown or black yarn. A small smile makes the giraffe look especially friendly.
Step 5: Make the giraffe ears
Giraffe ears have a lovely rounded shape. Crochet two small pieces, then flatten them slightly before attaching them near the top sides of the head.
Use yellow for the outer section and a small amount of brown or cream for the inner ear.
Position both ears at the same height. Step back and look at the head before sewing them permanently.
Step 6: Crochet the little horns
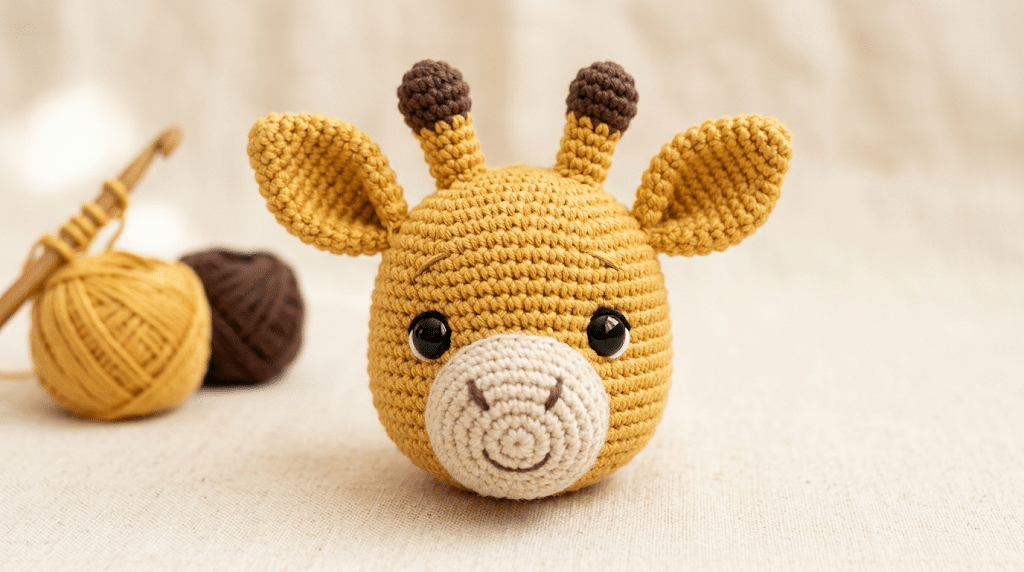
The horns, sometimes called ossicones, are tiny but important details.
Make two narrow pieces and add small rounded tips. Use brown for the tips to create a traditional giraffe appearance.
Attach them between the ears, leaving enough space so the head does not look crowded.
Beginner tip: Pin every facial piece in place before sewing. You can move them around until the expression looks exactly right.
Step 7: Create the four legs
Crochet four short, rounded legs using your main color. Each leg should have enough stuffing to remain plump.
Keep the legs similar in length. Small differences can make your giraffe sit unevenly.
You can add darker yarn to the bottom of each foot for cute little hooves. This small detail makes the finished animal look much more polished.
Step 8: Add the giraffe spots
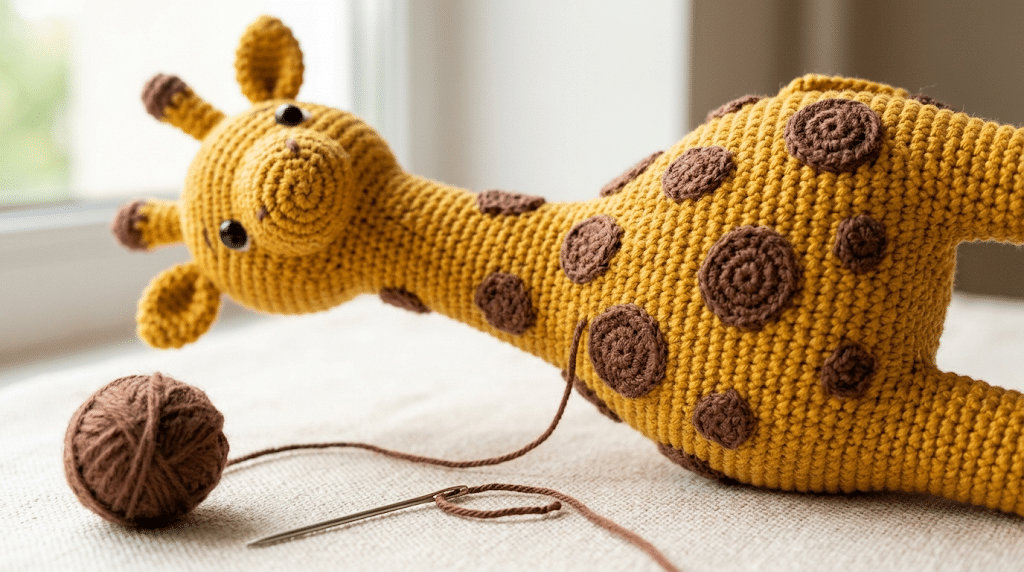
Here is where your giraffe really comes alive.
Crochet several small brown spots in different shapes and sizes. They don’t need to match perfectly because natural giraffe markings have plenty of variation.
Place larger spots across the body and smaller ones around the neck and legs.
Sew each spot securely with your yarn needle. Spread them out instead of placing them in perfectly straight rows.
Step 9: Attach the tail
A small tail completes the safari look. Crochet or create a thin yellow tail and finish it with a darker tuft.
Attach it toward the back of the body. Make sure the stitching holds firmly because tails can get tugged during handling.
You can make the tail slightly curved for extra personality.
Step 10: Assemble your giraffe
Now bring all the pieces together.
Attach the neck securely to the body first. Then position the head and sew it firmly onto the top of the neck.
Next, attach the legs, ears, horns, and tail. Check the balance after each piece.
Finally, weave in every loose end and trim the excess yarn carefully.
Stand your finished giraffe upright and gently reshape it with your hands. That little moment when everything comes together is incredibly satisfying.
How to Make Your Crochet Giraffe Look More Professional
A handmade animal becomes extra special when the finishing touches look clean. You don’t need advanced skills to achieve that polished appearance.
Small adjustments can make a surprisingly big difference in your final amigurumi.
Keep your tension consistent
Uneven tension can make one part of the giraffe look tighter than another. Try to keep your yarn movement relaxed and consistent.
If your stitches become extremely tight, your hands may get tired. Take short breaks and gently stretch your fingers.
Consistent tension matters more than speed.
Hide your yarn ends neatly
Loose yarn tails can make an otherwise beautiful project look unfinished.
Use a yarn needle to weave each end through several stitches. Pull gently, then trim the excess.
Avoid cutting too close to the surface. A little extra yarn gives you more security.
Check symmetry before sewing
Place the ears, eyes, legs, and horns without attaching them first.
Look at the giraffe from the front and side. This simple check helps you catch uneven placement before the needle comes out.
Trust me on this one—pinning first saves so much frustration.
Give your giraffe a personality
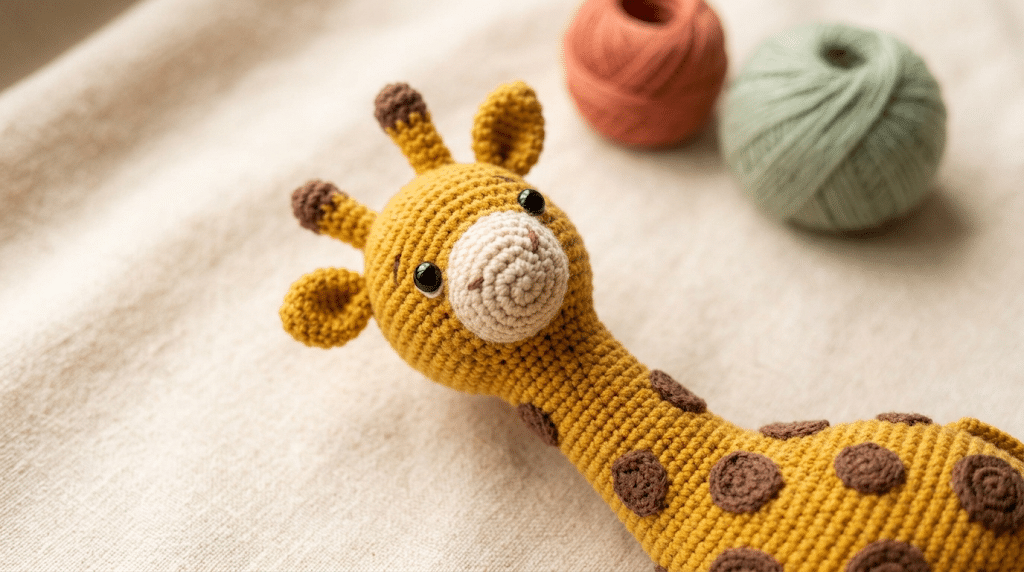
You can make the same basic pattern look completely different with small changes.
Try sleepy eyes, raised ears, a curved tail, rosy cheeks, or a tiny embroidered smile.
For a kawaii giraffe, slightly oversized eyes and a rounded head create an especially cute expression.
For a realistic version, use muted yellow and brown shades and smaller facial details.
Cute Ways to Customize Your Giraffe Amigurumi
Once you understand the basic construction, you can turn your giraffe into a character that feels completely yours.
Customization also makes this project perfect for handmade gifts. You can match the colors to a nursery, favorite outfit, or special occasion.
Try different giraffe colors
Classic golden yellow and brown will always look adorable, but you don’t have to stop there.
Try:
- Cream and caramel
- Mustard and chocolate
- Peach and brown
- Sage and beige
- Soft pink and tan
- Lavender and cream
Pastel colors create a sweet kawaii style, while deeper colors give your giraffe a cozy woodland feel.
Add a tiny scarf or bow
A miniature accessory can instantly change the character.
A small crocheted scarf works beautifully around the giraffe’s neck. You can also add a simple bow near one ear.
Choose a contrasting color so the accessory stands out without overwhelming the animal.
Make a mini giraffe keychain
If you reduce the size and use thinner yarn, you can create a tiny giraffe suitable for a bag charm.
Use lightweight materials and make sure every attachment remains secure.
This variation also makes a sweet handmade gift for a friend who loves animals.
Turn it into a nursery decoration
A larger giraffe can become a beautiful handmade nursery accent.
Create several safari animals using similar colors, such as an elephant, lion, zebra, or monkey.
Place them together on a shelf for a coordinated handmade safari theme.
For inspiration on crochet tools and yarn options, you can also browse the official Clover website and Yarnspirations for general crochet resources.
Troubleshooting Your Crochet Giraffe Pattern
Even experienced crocheters occasionally end up with a wobbly head or an oddly shaped leg. Don’t panic when something looks different from your plan.
Most amigurumi problems have a simple fix.
Why does my giraffe look too floppy?
The most common reason is insufficient stuffing or a neck that lacks enough structure.
Add fiberfill gradually and shape the piece with your fingers. If the neck still bends too much, check your stitch tension.
A slightly smaller hook can also create firmer fabric when you restart the piece.
Why can I see the stuffing?
Visible stuffing usually means your stitches are too loose or the hook is too large for your yarn.
Try using a smaller hook. You can also reduce the amount of stuffing slightly.
The goal is a firm surface without stretching the stitches.
Why does my giraffe look uneven?
Uneven limbs or facial features often come from attaching pieces before checking their placement.
Lay the pieces against the body first. Compare both sides carefully.
If one leg sits higher, remove it and reposition it before securing the stitches.
What if my spots look messy?
That’s completely normal.
Giraffe markings don’t need to look perfectly geometric. Slight differences can make your handmade animal look more charming and natural.
If you prefer a polished kawaii style, use similar-sized spots and arrange them with more spacing.
Gift Ideas for Your Finished Crochet Giraffe
A handmade giraffe makes a thoughtful gift because it feels personal from the moment someone sees it.
You can create one for a baby shower, birthday, nursery decoration, or animal-loving friend.
Create a safari animal gift set
Pair your giraffe with other handmade animals.
A small safari collection could include a lion, elephant, zebra, and monkey. Keep the yarn colors coordinated so the animals look like a matching set.
This idea works especially well for nursery gifts.
Make a personalized giraffe
Choose colors based on the recipient’s favorite shades.
You can also embroider a small initial onto the body or add a personalized scarf.
Those little details can turn a simple amigurumi into a keepsake.
Package it beautifully
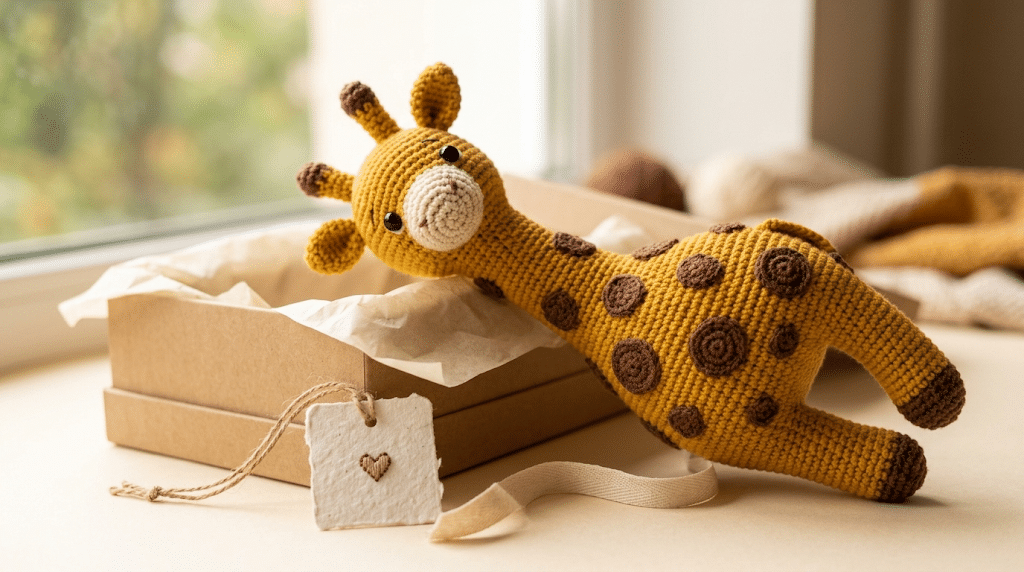
Place your finished giraffe in a small gift box or soft fabric bag.
Add a handmade card with a short message. You could write something as simple as, “Made with lots of love and cozy stitches.”
The recipient will appreciate knowing that you spent your time creating something just for them.
Frequently Asked Questions About Crochet Giraffe Pattern
How long does it take to crochet a giraffe?
A small giraffe can take several hours, depending on your crochet speed and experience. Beginners may need extra time for counting, shaping, sewing pieces together, and adding spots. Experienced crocheters can often work more quickly. Give yourself plenty of time, especially if this is your first amigurumi project.
What yarn is best for a crochet giraffe?
DK cotton or acrylic yarn works well for a structured giraffe with clearly defined stitches. Chenille yarn creates a softer, plushier result and works beautifully for cuddly animals. Choose a yarn that feels comfortable in your hands and matches the size you want. Always check your tension because different yarn weights change the finished size.
Is a crochet giraffe pattern good for beginners?
Yes, especially if you already know basic amigurumi stitches. The project uses simple shapes that you can practice separately before assembling the animal. Beginners should take their time with stuffing and sewing because those finishing steps strongly affect the final shape. If you can make single crochet stitches, increases, and decreases, you have a good foundation.
What size safety eyes should I use for a giraffe amigurumi?
For a medium-sized giraffe, 9mm safety eyes usually create a cute balanced appearance. Smaller projects may look better with 6mm eyes, while larger plush giraffes can use 12mm eyes. Always consider the finished size and facial proportions before attaching them. For toys intended for very young children, embroidered eyes may be a safer choice.
Can I sell giraffes made from this pattern?
You can generally sell finished handmade items you personally crochet, but always check the specific pattern designer’s terms if you use a published pattern. Avoid selling or distributing the written pattern itself unless you have permission. If you sell finished pieces, consider describing them as handmade and crediting the pattern source when required.
How do I keep my crochet giraffe standing?
Use firm stuffing in the legs and lower body, then position the legs evenly. A giraffe with a long neck can become top-heavy, so balanced construction helps. Keep the body slightly fuller and the neck firm. If you want a decorative piece that stands reliably, make the feet broad enough to support the body.
Final Thoughts on This Crochet Giraffe Pattern
Making a giraffe from yarn is such a rewarding little adventure. You start with simple crochet shapes, then slowly add the neck, ears, horns, spots, and sweet face until a tiny safari friend appears.
This crochet giraffe pattern gives you plenty of room to make the project your own. Change the colors, add a bow, create a mini version, or make a whole safari collection for an extra-special handmade gift.
Most importantly, don’t worry if your first giraffe isn’t perfectly symmetrical. Handmade charm comes from those tiny differences, and every stitch represents time, patience, and creativity.
Save this pin to your crochet board on Pinterest so you can find this pattern anytime!
Looking for more free crochet animal patterns? Visit Yarned Animals for new amigurumi patterns, kawaii plushies and beginner crochet tutorials added every week at yarnedanimals.com