
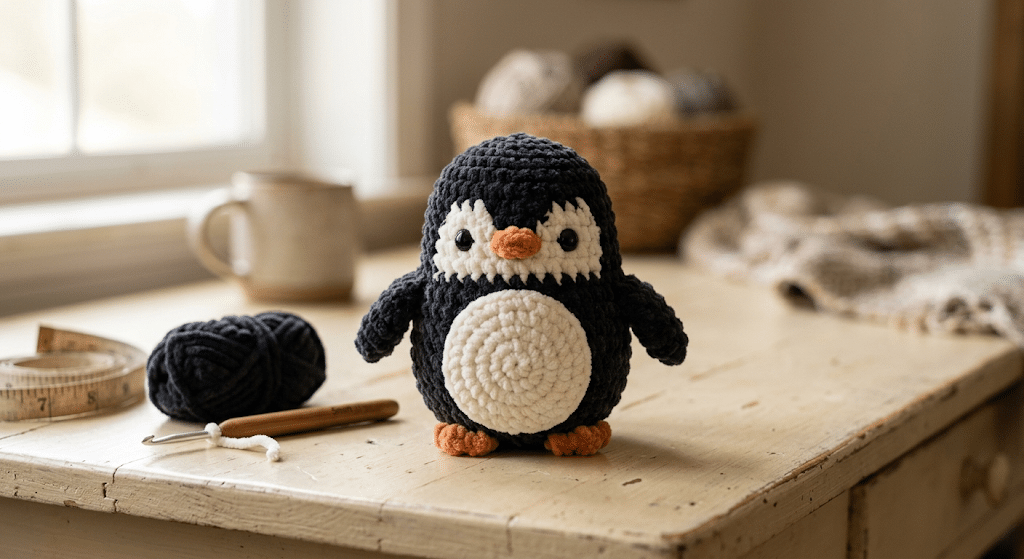
There is something extra sweet about a tiny penguin made with soft, squishy chenille yarn. With its round belly, little wings, tiny feet, and cheerful face, this crochet penguin pattern makes a lovely handmade friend for your shelf, desk, or gift basket. The best part is that the body takes shape as you crochet, so you do not have lots of separate limbs waiting for you at the end.
This project uses bulky chenille or velvet-style yarn and a 3.5 mm crochet hook. The pattern uses US crochet terms and continuous spiral rounds. You will also learn how increases, decreases, puff stitches, color changes, and simple shaping can create a complete amigurumi character.
The original pattern is designed around a one-piece construction, including the body, legs, tail, wings, and beak.
Grab your yarn, place a stitch marker, and let’s start with the supplies and simple techniques that make this penguin so adorable.
Table of Contents
Why This Crochet Penguin Pattern Is So Much Fun
A small amigurumi project can feel surprisingly satisfying. You start with yarn and a hook, then slowly watch a recognizable little animal appear in your hands.
This crochet penguin pattern has a particularly cute construction because many of the character details become part of the body while you work. The legs, tail, wings, and beak do not require a long assembly session afterward.
That makes the project appealing when you want the finished penguin to look detailed without sewing lots of pieces together.
A cute project for confident beginners
The pattern works best if you already understand basic crochet stitches and feel comfortable working in rounds. You should also feel familiar with stitch increases and decreases.
The original instructions describe the project as suitable for confident beginners who have worked a magic ring before.
If you are still learning, do not worry if your first few rounds feel slow. Chenille yarn can make individual stitches harder to see, so patience matters more than speed.
The one-piece construction saves finishing time
One of the most enjoyable features is the integrated construction.
Instead of crocheting separate legs, wings, a tail, and a beak, the shaping happens during the rounds. The source pattern specifically describes the whole penguin body, legs, tail, wings, and beak as one continuous piece.
That means you can spend more time crocheting and less time joining tiny pieces.
Chenille gives your penguin a plush finish
Bulky chenille or velvet-style yarn gives this project its soft, cuddly character.
The original materials call for bulky chenille or velvet yarn for the main body, with white bulky chenille for the belly and face. Orange yarn or scraps add the beak and feet details.
For another soft option in your crochet basket, I especially like Bernat Blanket yarn when I want that fluffy chenille-style texture.
Crochet Penguin Pattern Supplies and Stitch Guide
Before you begin your crochet penguin pattern, gather everything beside you. Having your supplies ready makes the first few rounds much easier.
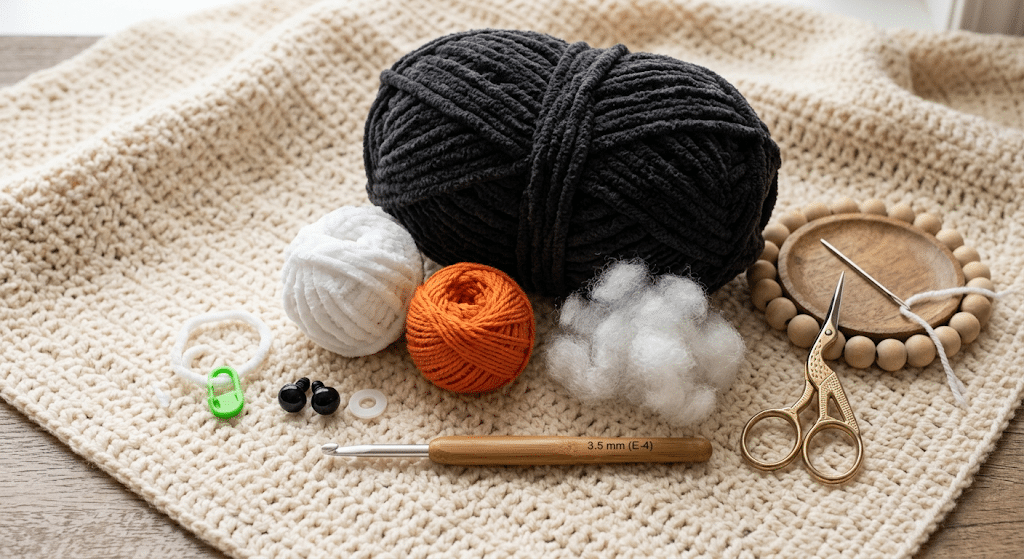
The original pattern uses bulky chenille or velvet-style yarn, a 3.5 mm hook, 8 mm safety eyes, polyester fiberfill, a stitch marker, and a yarn needle.
You will also need scissors. A fabric marker or pen can help with placement, although the source lists it as optional.
Choose your penguin yarn
Use bulky chenille or velvet-style yarn for the main body.
You will need a main body color, plus a small amount of white for the belly and face. Orange yarn or scraps create the beak and feet details.
The source also notes that substituting another bulky chenille or velvet-style yarn should maintain a similar soft plush effect. Switching to smooth worsted-weight cotton can change both the appearance and finished size.
Pick the right hook and eyes
The pattern calls for an E-4, 3.5 mm crochet hook and a pair of 8 mm safety eyes.
For this project, keeping the hook size consistent helps you follow the stitch counts as written.
The safety eyes attach between Rounds 13 and 14, with three stitches between the eye posts.
Understand the crochet abbreviations
This pattern uses US crochet terminology. The stitch list includes chain, double crochet, decrease, half double crochet, increase, puff stitch, single crochet, and slip stitch.
Here is a quick reference:
- ch = chain
- dc = double crochet
- dec = decrease
- hdc = half double crochet
- inc = increase
- puff st = puff stitch
- sc = single crochet
- sl st = slip stitch
The Craft Yarn Council also provides a useful reference for standard US crochet abbreviations.
Before You Start This Crochet Penguin Pattern
Now that your supplies are ready, take a few minutes to understand how the body works.
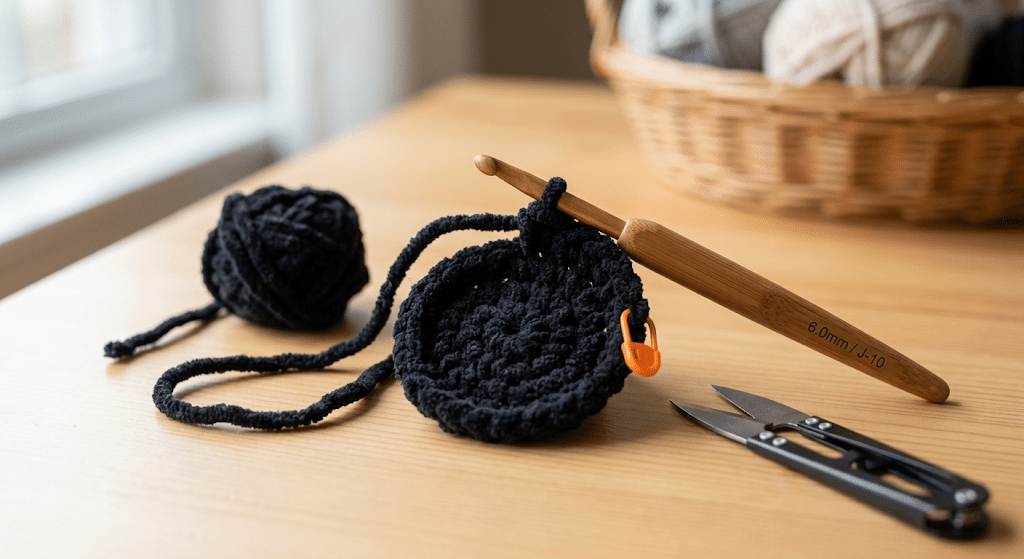
This crochet penguin pattern uses continuous spiral rounds. You do not join at the end of every round or chain before beginning the next one.
Instead, keep crocheting around the piece and use a stitch marker to show where each round begins.
This small habit makes a huge difference.
Keep your stitch marker close
Place your marker at the beginning of the current round.
Move it as you progress. This helps you avoid accidentally adding or losing a stitch.
The source gives a stitch count at the end of each round. Use those numbers as checkpoints while you work.
Keep your tension snug
Chenille yarn feels soft and stretchy, so a loose tension can make the stuffing show through.
The original instructions recommend tighter tension to help the stitches hold their shape.
You do not need to pull your yarn extremely tight. Aim for firm, even stitches that still allow your hook to move comfortably.
Stuff as you go
Do not wait until the final round to add all the stuffing.
The pattern recommends stuffing firmly and evenly while you work. It also asks you to keep the base flat rather than rounded so the penguin can stand.
That small detail helps create a much more stable amigurumi.
10 Easy Steps for Your Crochet Penguin Pattern
Here is the fun part. Your little penguin now starts taking shape.
Follow the rounds carefully and check your stitch count at the end of each round. The original pattern works from a foundation chain and continues around the body without joining.
Step 1: Create the foundation
Start with Chain 6.
Beginning in the second chain from your hook, work continuously around the chain.
For Round 1, work:
- Increase
- 3 single crochet
- 4 single crochet in the same stitch
- 3 single crochet
- Increase
The round ends with 14 stitches.
Take your time here. This foundation creates the base that supports the penguin.
Step 2: Shape the base
Round 2 increases the base further.
Work:
- 2 increases
- 3 single crochet
- 4 increases
- 3 single crochet
- 2 increases
You should have 22 stitches at the end.
The increases help create the rounded body shape.
Step 3: Add the tail and tiny legs
Round 3 introduces several of the penguin’s signature details.
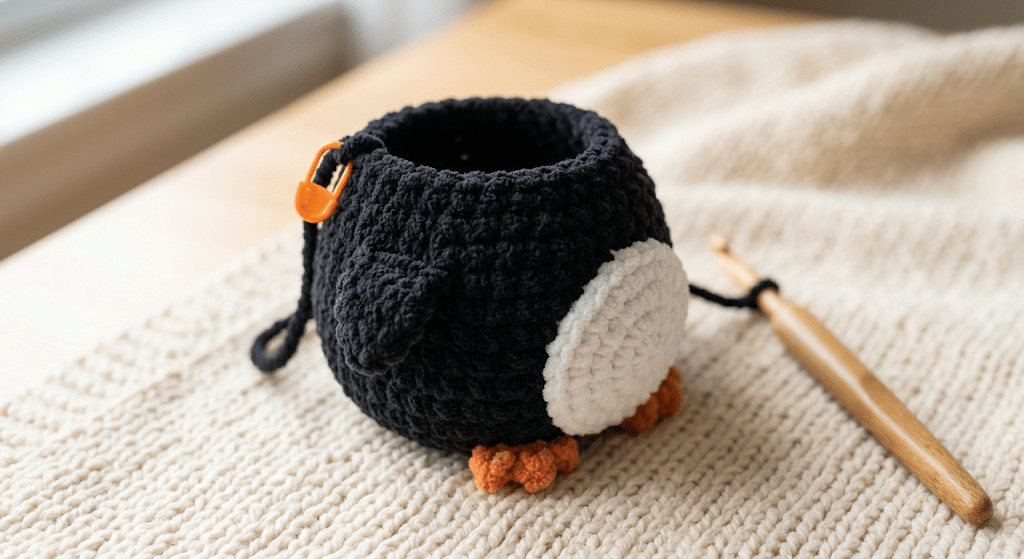
Work 5 single crochet, then a 3-hdc increase for the tail. Continue with 8 single crochet, followed by a 4-dc puff stitch for one leg.
Change to white for 3 single crochet, then make another 4-dc puff stitch for the second leg. Finish with 3 single crochet.
The round finishes with 24 stitches.
This is one of the most interesting parts because the character starts becoming recognizable without separate sewn pieces.
Step 4: Build the belly
Round 4 continues the body and white belly section.
Work 5 single crochet, 3 half double crochet for the tail, 7 single crochet, then 7 single crochet in white.
Finish with 2 single crochet for a total of 24 stitches.
Keep the white section neat because it creates the front of the penguin.
Step 5: Shape the tail
Round 5 brings the tail shaping inward.
Work 5 single crochet, then the decrease over the three half double crochet tail stitches. Continue with 7 single crochet, 7 single crochet in white, and 2 single crochet.
The round ends with 22 stitches.
The tail is built directly into the body instead of being crocheted separately.
Step 6: Continue the body and add the wings
Rounds 6 through 8 keep the main body structure moving upward.
Work 13 single crochet, 7 single crochet in white, and 2 single crochet. Repeat that sequence for three rounds. Each round contains 22 stitches.
Round 9 is where the wings appear.
For each wing, chain 7. Starting in the second chain from the hook, work 1 slip stitch, 1 single crochet, 1 half double crochet, and 3 double crochet.
The source identifies the wings as one of the trickier parts because you create the shape in the middle of the round.
Step 7: Add the beak
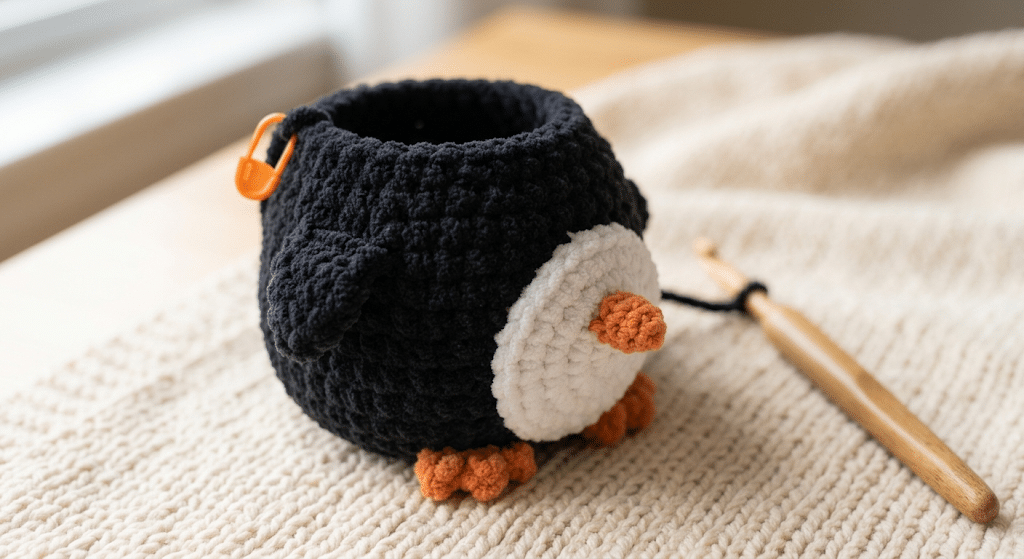
Rounds 10 and 11 continue the body with the same general color pattern.
Round 12 introduces the beak using a 2-hdc puff stitch.
Work 13 single crochet, 3 single crochet in white, the 2-hdc puff stitch for the beak, 3 single crochet in white, and 1 single crochet.
This round finishes with 21 stitches.
The source specifically notes that Round 12 does not complete the usual round sequence. Move your stitch marker to the new end-of-round position before continuing.
Step 8: Place the safety eyes
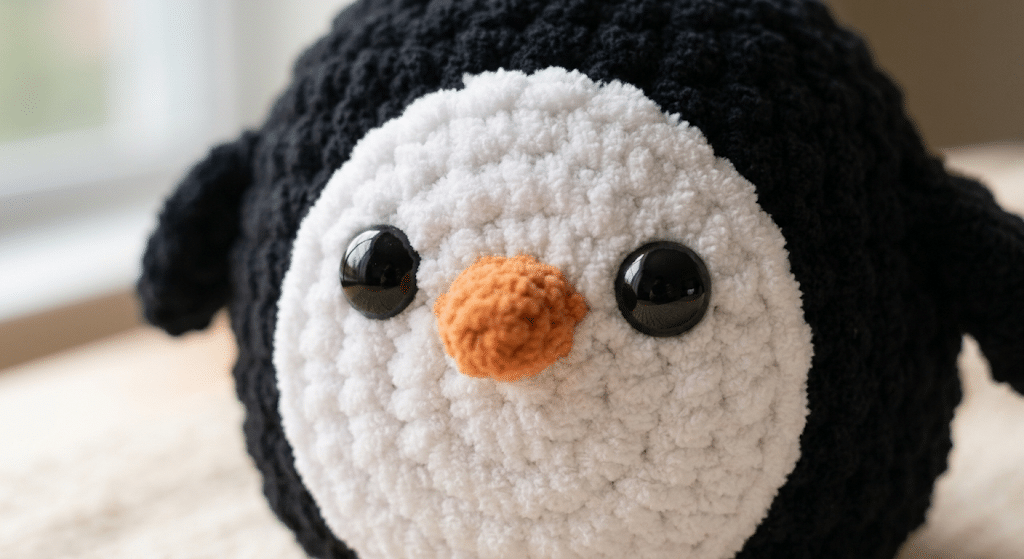
Round 13 begins the face shaping.
Work the decreases and single crochet as written, then continue through the white face section. The round finishes with 20 stitches.
Attach the 8 mm safety eyes between Rounds 13 and 14.
Keep three stitches between the eye posts. This gives the penguin a balanced expression.
If you want your amigurumi to have a slightly different personality, eye placement can make a surprisingly noticeable difference.
Step 9: Shape the head
Rounds 14 through 16 continue the head.
Round 14 uses 12 single crochet, 7 single crochet in white, and 1 single crochet for 20 stitches.
Round 15 uses 13 single crochet, 5 single crochet in white, and 2 single crochet.
Round 16 uses 14 single crochet, 3 single crochet in white, and 3 single crochet. Each round contains 20 stitches.
Now the penguin should have a clearly defined face and rounded head.
Step 10: Close and finish your penguin
Round 17 decreases around the body.
Work 3 single crochet followed by a decrease, repeating four times. You should finish with 16 stitches.
Round 18 uses 8 decreases around, leaving 8 stitches.
Stuff the head firmly before closing.
Fasten off, weave through the remaining stitches, and pull the opening snug. Then redistribute the stuffing toward the tail area so your penguin balances upright.
Finishing Touches That Make Your Amigurumi Penguin Adorable
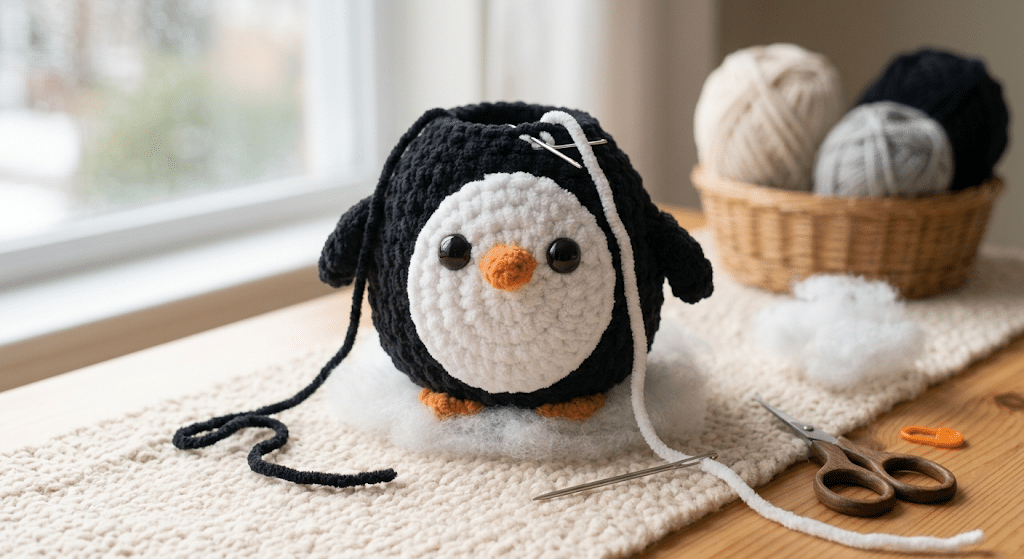
Ready to move on? The crochet itself may be finished, but a few small details can give your penguin a polished personality.
The finishing instructions recommend checking the stuffing, shaping the beak, defining the eyes with contrasting yarn if desired, adding a small bow, and weaving in the remaining ends.
Give the belly a firm shape
Feel around the entire body before you finish.
The belly should feel comfortably firm without becoming rock hard. Even stuffing helps prevent obvious dents and gives the penguin its rounded silhouette.
If one side looks flatter, gently move the fiberfill before closing the head.
Reshape the beak
Use your fingers to gently adjust the beak so it points forward.
Because the beak comes from a puff stitch, small adjustments can change its appearance.
Avoid pulling aggressively. A gentle reshaping is enough.
Add a tiny bow
A small bow can turn the same basic penguin into a completely different character.
The original finishing instructions suggest attaching a small bow at the side of the head.
This makes the project especially cute for gifts, nursery decorations, or a handmade winter display.
For long crochet sessions, I also like using a Clover Amour crochet hook because its soft grip feels comfortable in your hand.
Helpful Tips for a Neat Crochet Penguin
Trust me on this one: chenille amigurumi becomes much easier when you slow down during the shaping rounds.
The fuzzy texture hides stitches more easily than smooth yarn. That makes stitch counting especially important during decreases and small chain-based details.
Count every decrease near the head
Rounds 17 and 18 are important shaping rounds.
The source specifically recommends working slowly and checking your stitch count during these decreases because missing one can create an uneven head.
If your stitches become difficult to see, feel for the top loops with your hook.
Pay extra attention to the wings
Round 9 can feel different from the earlier rounds.
The wings use a chain-based shape worked directly into the round. The source recommends keeping your stitch marker in place and counting carefully when you return to the main round.
Do not rush this round.
Give the tail enough stuffing
The tail does not come from a separate crocheted piece.
Its shape develops through the increases and decreases around Rounds 3–5. The original instructions recommend pushing extra stuffing toward the tail area after finishing.
That helps the penguin sit and stand with better balance.
Keep your base flat
Your penguin should have a stable bottom.
While stuffing, check that the base does not become overly rounded. A flatter base gives the finished amigurumi a better standing position.
This tiny check can make a big difference in the final display.
How to Make This Crochet Penguin Your Own
Once you understand the basic shaping, you can have fun with the personality.
The original design already includes an optional bow, but you can also experiment with different main colors while keeping the white belly and face recognizable.
Try different penguin color combinations
Keep the belly and face white while changing the main body color.
A charcoal penguin can look classic. A soft gray version can feel gentle and modern. A deep navy version can create a cute winter-inspired look.
Stay with a similar bulky chenille or velvet-style yarn if you want the plush appearance to remain close to the original.
Make a tiny penguin family
Once you understand the construction, making another one becomes much easier.
Try a darker penguin beside a lighter one. Add different bows or small decorative touches to give each character a different personality.
You can even create a little group for a shelf, craft room, or seasonal display.
Turn your penguin into a handmade gift
A handmade amigurumi penguin makes a sweet gift because it feels personal without requiring a huge project.
Place one inside a gift basket with a handwritten note. You can also make a matching pair for friends, sisters, coworkers, or anyone who loves cute handmade animals.
The compact size makes this kind of project especially satisfying when you want a thoughtful gift that you can actually finish.
Frequently Asked Questions About Crochet Penguin Pattern
How long does it take to crochet a penguin?
The uploaded pattern does not give a specific completion time. Your time will depend on your crochet speed, experience with chenille yarn, and how comfortable you are with continuous rounds and shaping. If this is your first plush project, give yourself extra time for counting, stuffing, and checking the shaping.
What yarn is best for a crochet penguin?
The source pattern calls for bulky chenille or velvet-style yarn for the main body, with white bulky chenille for the belly and face. Orange yarn or scraps create the beak and feet details. Another bulky chenille or velvet-style yarn can keep a similar soft, plush appearance.
Is this crochet penguin pattern good for beginners?
The pattern suits confident beginners who already understand basic crochet and have experience with a magic ring or similar foundational skills. The more challenging sections include the integrated wings, color changes, puff stitches, and final decrease rounds. Take your time and use the stitch counts as checkpoints.
What size safety eyes should I use?
This pattern uses a pair of 8 mm safety eyes. They are attached between Rounds 13 and 14, with three stitches between the eye posts.
Do I need to sew separate legs and wings?
No. One of the special features of this design is its integrated construction. The body, legs, tail, wings, and beak are worked as one continuous piece, so you do not need to sew those separate parts onto the body afterward.
Can I use a different yarn weight?
The source recommends staying with another bulky chenille or velvet-style yarn for a similar plush finish. Using a smooth worsted-weight cotton can create a noticeably different texture and may change the finished size.
Ready to Stitch Your Own Crochet Penguin?
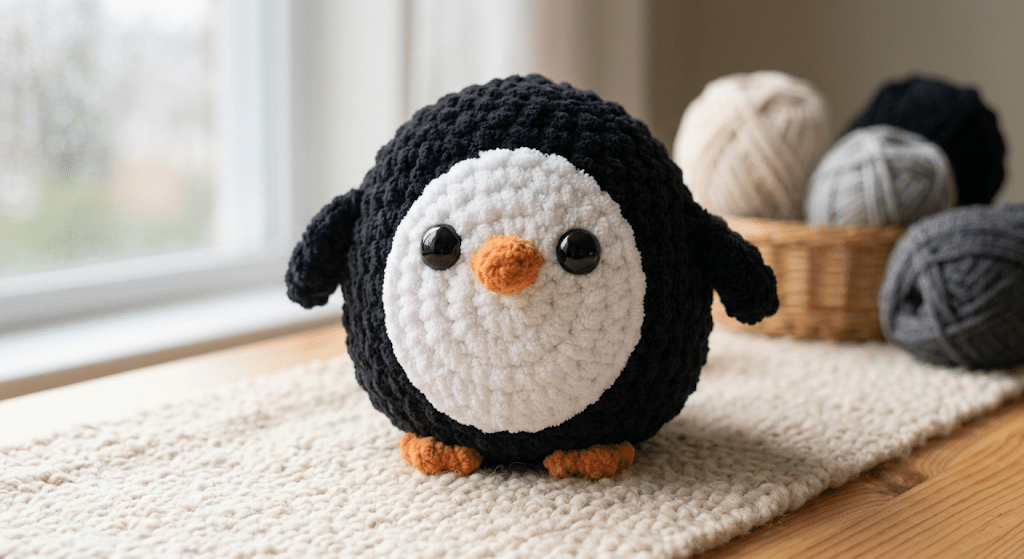
There is something magical about watching a few simple rounds become a tiny character with a face, wings, feet, and a little belly.
This crochet penguin pattern gives you plenty of satisfying shaping without leaving you with a pile of separate pieces to assemble. You can practice increases, decreases, puff stitches, color changes, stuffing, and amigurumi finishing while creating a plush little friend.
Take your time with the wings and final decrease rounds. Keep your stitch marker close, count your stitches, and stuff gradually as the body grows.
Most of all, enjoy the moment when you finally place the finished penguin on your shelf and realize you made it yourself. That handmade feeling is the best part of crochet.
Save this pin to your crochet board on Pinterest so you can find this pattern anytime!
Looking for more free crochet animal patterns? Visit Yarned Animals for new amigurumi patterns, kawaii plushies and beginner crochet tutorials added every week at yarnedanimals.com