
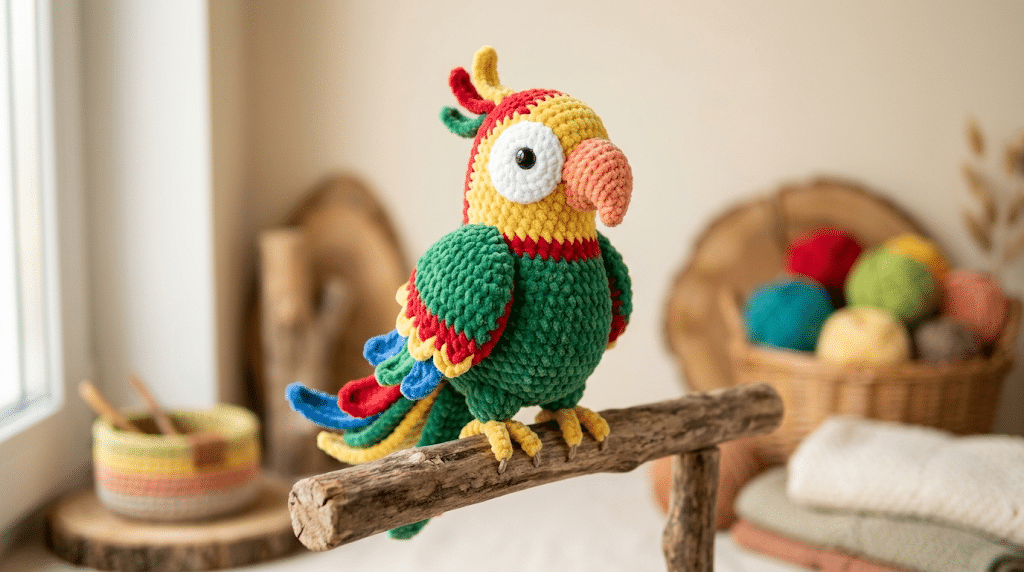
🧶 Yarn: worsted weight yarn | ⏱️ Time: 2–3 hours | 🪝 Hook: 3.5 mm | 🔄 Rounds: 28 body rounds | 📏 Finished size: about 7 in / 18 cm
Your Starting Point
A colorful little parrot can bring so much personality to your crochet shelf. This crochet parrot pattern gives you a cheerful bird with a rounded body, colorful wings, a curved beak, and a layered tail.
You do not need advanced crochet skills to make this bird. The body uses familiar amigurumi stitches, and most of the shaping comes from simple increases and decreases.
The parrot is crocheted in separate pieces. You will make the body, two wings, two feet, a beak, a tail, and a few small face details before assembling everything.
Your most useful tool will be a stitch marker. Place it in the first stitch of every round so you always know where each round begins.
Take your time with stuffing, too. Add small amounts as you crochet instead of filling the body all at once. This helps you create a smooth, rounded parrot.
Table of Contents
1. WHAT YOU ARE MAKING
This crochet parrot pattern creates a soft amigurumi bird with a plump body and bright tropical colors. It is designed as a small decorative toy, shelf friend, or handmade gift.
The construction is beginner-friendly because the main body is crocheted from the bottom upward, while the smaller pieces are made separately and sewn on.
The anatomy
- Body and head: 28 rounds, finishing at 36 stitches
- Left wing: 14 rounds, finishing at 12 stitches
- Right wing: 14 rounds, finishing at 12 stitches
- Upper beak: 8 rounds, finishing at 12 stitches
- Lower beak: 5 rounds, finishing at 12 stitches
- Left foot: 6 rounds, finishing at 10 stitches
- Right foot: 6 rounds, finishing at 10 stitches
- Tail feather: 8 rows, 12 stitches at the widest point
- Eye patches: 6 rounds, 12 stitches each
Why this suits a beginner
You only need basic single crochet, increases, decreases, chains, and slip stitches.
The body also has a simple rounded shape. There are no complicated colorwork charts, and the wings are small enough to remake if your tension is not quite right the first time.
If you enjoy small animal projects, you may also like:
[INTERNAL LINK: related pattern]
2. SUPPLIES
| Item | What to use | Why it matters |
|---|---|---|
| Main yarn | Worsted weight, red or green | Creates the rounded body |
| Accent yarn | Yellow, blue, orange, and black | Adds tropical parrot colors |
| Hook | 3.5 mm crochet hook | Gives a firm amigurumi fabric |
| Eyes | 8 mm safety eyes or black embroidery | Creates the face |
| Stuffing | Polyester fiberfill | Keeps the bird plump |
| Notions | Stitch marker, yarn needle, scissors | Needed for shaping and assembly |
Choosing the yarn
Worsted weight yarn is a great choice because it gives the parrot enough structure without making the stitches difficult to see.
A common problem with amigurumi is using a hook that is too large. If you can see stuffing through the stitches, switch to a smaller hook.
You can also use a smooth DK-weight yarn. If you do, try a 3.0 mm hook and expect a slightly smaller parrot.
3. ABBREVIATIONS
| Abbreviation | Meaning | Abbreviation | Meaning |
|---|---|---|---|
| ch | chain | sc | single crochet |
| inc | increase | dec | decrease |
| sl st | slip stitch | MR | magic ring |
These instructions use US crochet terms. A US single crochet is called a double crochet in UK terminology.
Magic ring
A magic ring gives you a tight center for amigurumi pieces. Make the ring, crochet your starting stitches inside it, then pull the yarn tail firmly to close the opening.
Tip: After tightening the ring, weave the tail through the back stitches before trimming it. This helps prevent the center from loosening.
Marking your rounds
Place your stitch marker through the first stitch of every continuous round. Move it upward as you finish each round.
This simple habit makes counting much easier, especially when you reach the longer body rounds.
4. SIZING
Before starting the full parrot, you can make a tiny test swatch to check your tension.
- Chain 10 stitches.
- Work 8 rows of single crochet.
- Measure the fabric without stretching it.
- Your stitches should feel firm and compact.
- If the fabric is loose, try a smaller hook.
- If the fabric feels extremely stiff, try a slightly larger hook.
| Yarn | Hook | Finished height | Feels like |
|---|---|---|---|
| Worsted weight | 3.5 mm | 7 in / 18 cm | Firm and plush |
| DK weight | 3.0 mm | 5.5–6 in / 14–15 cm | Small and soft |
| Worsted weight | 3.0 mm | 6.5 in / 16.5 cm | Dense and firm |
| Bulky yarn | 4.5 mm | 9–10 in / 23–25 cm | Large and squishy |
Gauge is a guide, not a rule—the most important thing is creating tight stitches so the stuffing does not show.
5. STEP-BY-STEP INSTRUCTIONS
Part 1: Body and Head
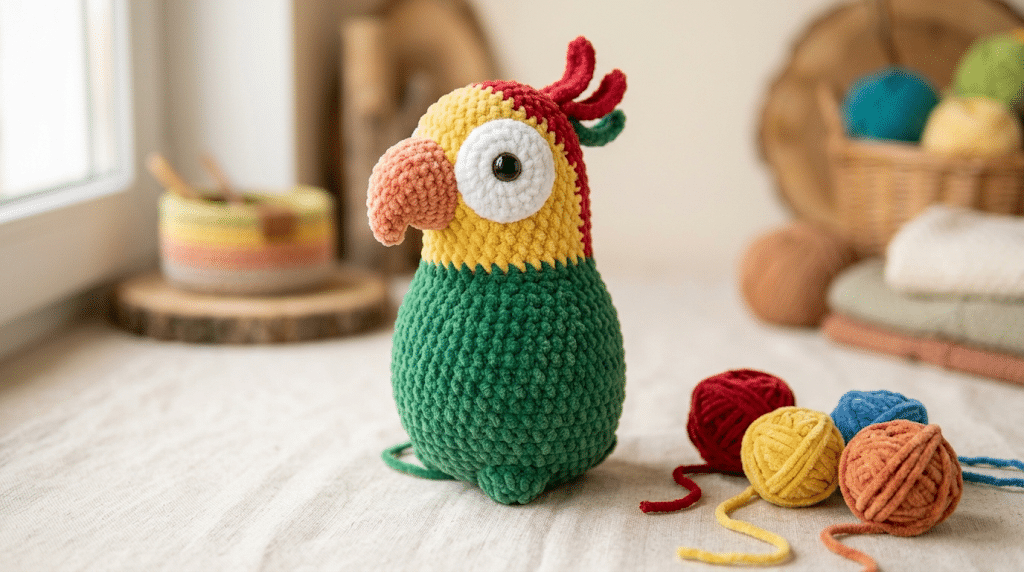
Use your main body color.
- R1: 6 sc in MR [6]
- R2: inc around [12]
- R3: (sc, inc) ×6 [18]
- R4: (2 sc, inc) ×6 [24]
- R5: (3 sc, inc) ×6 [30]
- R6: (4 sc, inc) ×6 [36]
- R7: (5 sc, inc) ×6 [42]
- R8–R12: sc around [42]
- R13: (5 sc, dec) ×6 [36]
- R14–R18: sc around [36]
- R19: (4 sc, dec) ×6 [30]
- R20: sc around [30]
- R21: (3 sc, dec) ×6 [24]
- R22: sc around [24]
- R23: (2 sc, dec) ×6 [18]
- R24: sc around [18]
- Add the safety eyes between R16 and R17, about 7 stitches apart.
- R25: (sc, dec) ×6 [12]
- Stuff the body firmly but gently.
- R26: dec around [6]
- R27: sc around [6]
- R28: dec ×3 [3]
- Fasten off and close the remaining opening.
Tip: Add stuffing gradually from R19 onward. If you overstuff before shaping the head, the decreases can become stretched and uneven.
The rounded body and head form the main shape of the amigurumi parrot.
Part 2: Left Wing
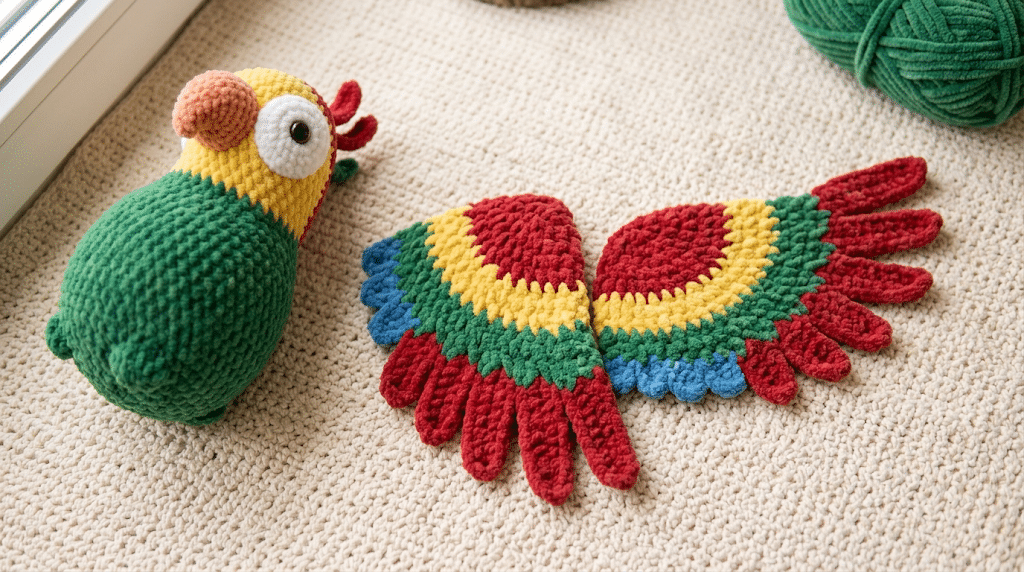
Use a bright accent color such as blue or green.
- R1: 6 sc in MR [6]
- R2: inc around [12]
- R3: (sc, inc) ×6 [18]
- R4–R6: sc around [18]
- R7: (sc, dec) ×6 [12]
- R8–R10: sc around [12]
- R11: (2 sc, dec) ×3 [9]
- R12: sc around [9]
- R13: (sc, dec) ×3 [6]
- R14: sc around [6]
- Fasten off, leaving a long sewing tail.
- Do not stuff the wing heavily. A small amount of stuffing is enough.
Part 3: Right Wing
Repeat Part 2 to make the second wing.
For a symmetrical look, place both wings at the same height before sewing.
Tip: Lay both wings flat beside each other before attaching them. This makes it easier to spot differences in size or shaping.
The two small wings add bright tropical color to the parrot.
Part 4: Upper Beak
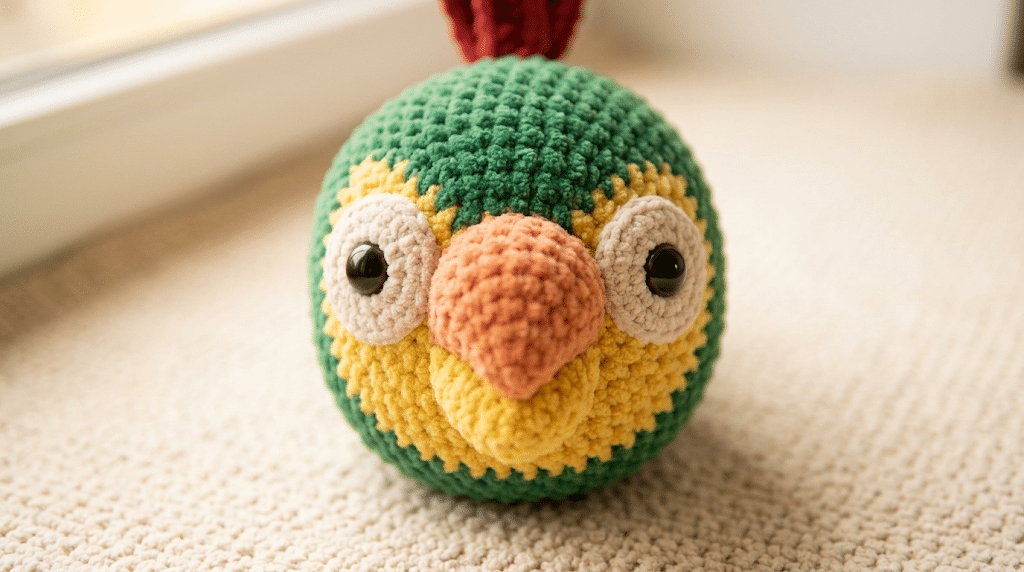
Use orange, yellow, or another warm accent color.
- R1: 6 sc in MR [6]
- R2: (sc, inc) ×3 [9]
- R3: (2 sc, inc) ×3 [12]
- R4: sc around [12]
- R5: (3 sc, inc) ×3 [15]
- R6: sc around [15]
- R7: (3 sc, dec) ×3 [12]
- R8: sc around [12]
- Fasten off with a long tail.
- Add a tiny amount of stuffing.
Part 5: Lower Beak
Use a contrasting color.
- R1: 6 sc in MR [6]
- R2: inc around [12]
- R3: sc around [12]
- R4: (2 sc, dec) ×3 [9]
- R5: sc around [9]
- Fasten off and leave a sewing tail.
Sew the lower beak directly underneath the upper beak.
Tip: Do not overstuff either beak. A lightly stuffed beak keeps the curved parrot shape instead of becoming round.
A lightly stuffed curved beak gives the parrot its recognizable bird profile.
Part 6: Eye Patches
Use white, cream, or a lighter shade that contrasts with your body.
Make two.
- R1: 6 sc in MR [6]
- R2: inc around [12]
- R3: (sc, inc) ×6 [18]
- R4: sl st around [18]
- Fasten off and leave a sewing tail.
Place each eye patch behind the safety eye and sew it securely around the edge.
If you prefer embroidered eyes, skip the safety eyes and embroider a small black oval in the center.
Tip: Pin both eye patches first. Step back and check the face from several angles before sewing them permanently.
The eye patches frame the eyes and make the colorful face stand out.
Part 7: Feet
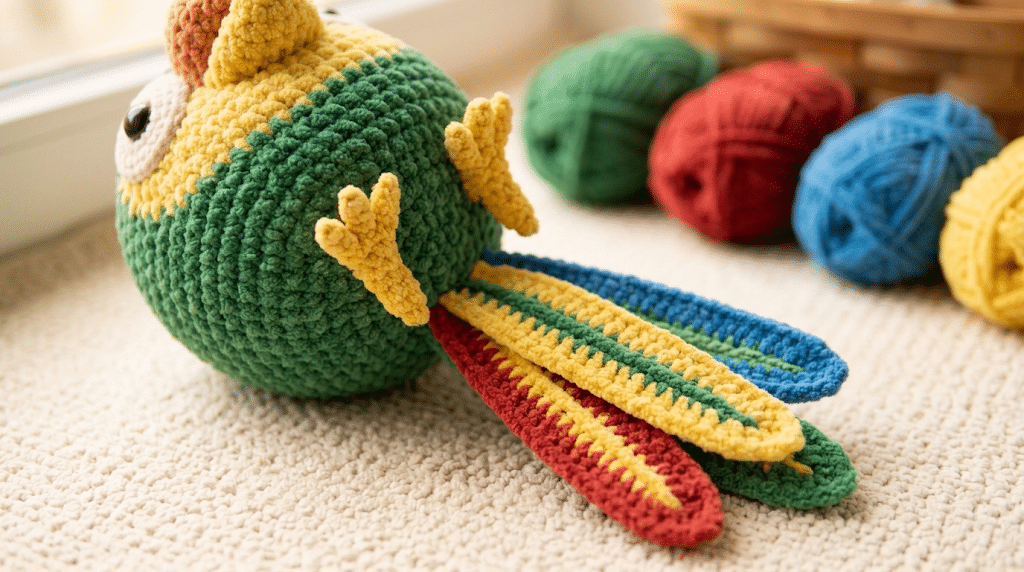
Use yellow or orange yarn.
Make two feet.
- R1: 5 sc in MR [5]
- R2: inc around [10]
- R3–R4: sc around [10]
- R5: (3 sc, dec) ×2 [8]
- R6: sc around [8]
- Fasten off, leaving a long sewing tail.
- Flatten each foot slightly before attaching it.
Sew the feet to the bottom front of the body.
Tip: Keep the feet level. Place the parrot upright on a flat surface before finishing the sewing.
Small yellow feet give the parrot a cute standing position.
Part 8: Tail Feather
Use blue, green, red, or a combination of colors.
Make three feathers.
- Chain 12.
- Row 1: sc in the 2nd ch from hook and across [11]
- Row 2: ch 1, turn, sc across [11]
- Row 3: ch 1, turn, dec, 7 sc, dec [9]
- Row 4: ch 1, turn, sc across [9]
- Row 5: ch 1, turn, dec, 5 sc, dec [7]
- Row 6: ch 1, turn, sc across [7]
- Row 7: ch 1, turn, dec, 3 sc, dec [5]
- Row 8: ch 1, turn, dec, sc, dec [3]
- Fasten off and weave in the tail.
Stack the three feathers with the longest feather in the center. Sew them together at the top and attach them to the lower back of the body.
Tip: Pull the sewing stitches firmly but not tightly. The tail should stay flat instead of curling toward one side.
Layered crochet tail feathers create a bright fan shape.
Part 9: Assembly
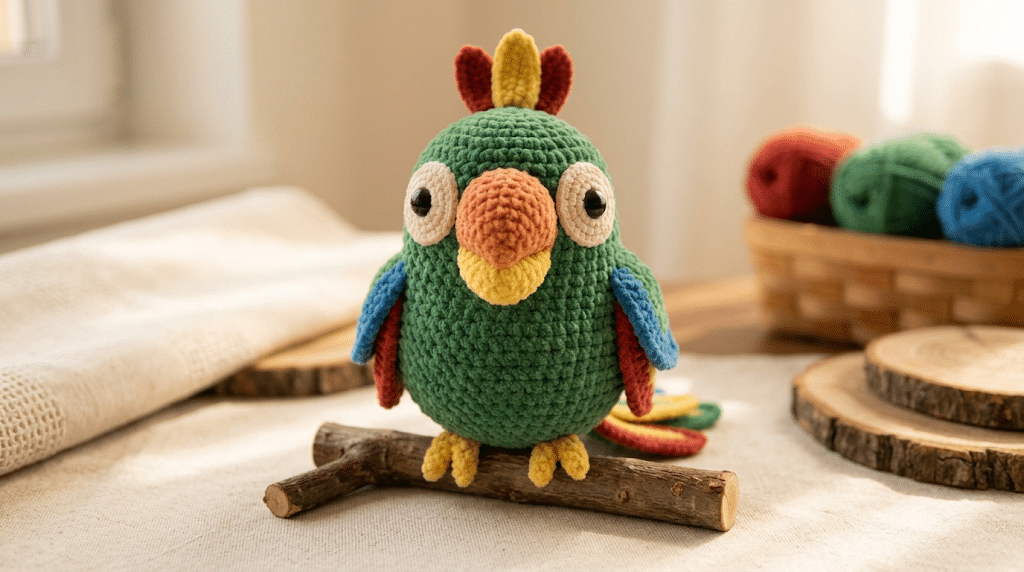
Now bring all your pieces together.
- Position the wings on the left and right sides of the body.
- Pin them approximately between R10 and R19.
- Sew around the top and side edges.
- Leave the lower wing edge slightly loose for a natural look.
- Position the upper beak below the eyes.
- Sew the upper beak securely to the face.
- Place the lower beak directly beneath it.
- Sew the lower beak in place.
- Attach the eye patches.
- Sew both feet underneath the body.
- Attach the layered tail feathers to the back.
- Hide every yarn tail inside the body.
The parrot should now sit upright with the wings slightly angled away from the body.
Tip: Assemble the face before sewing the feet. Facial placement changes the personality of the finished bird, so make sure you love the expression first.
Sew the pieces together carefully to create the finished tropical bird.
Part 10: Face and Finishing Details
Give your parrot a little personality with a few final details.
- Check that both eyes are level.
- Tighten any loose sewing stitches.
- Add a tiny embroidered nostril to the upper beak if desired.
- Add a small curved black line between the beak sections if desired.
- Brush the finished parrot gently with your fingers to even out the stitches.
- Push any visible stuffing back inside with the blunt end of your crochet hook.
- Trim only the yarn tails that have already been securely hidden.
You can also add a tiny blush detail to the cheeks with embroidery thread.
Tip: Never pull decorative embroidery so tightly that it changes the shape of the head.
Your colorful crochet parrot is ready to sit, perch, or become a cheerful handmade gift.
6. TROUBLESHOOTING, VARIATIONS AND CARE
| What you are seeing | What caused it | What to do |
|---|---|---|
| Stuffing is visible | Hook is too large | Try a smaller hook |
| Body looks lumpy | Uneven stuffing | Add smaller amounts gradually |
| Head leans sideways | Uneven decreases | Check your stitch count each round |
| Eyes look uneven | Patches were sewn differently | Pin both before sewing |
| Wing points outward too much | Too much stuffing | Remove some stuffing |
| Tail twists | Sewing tension is uneven | Loosen the attachment stitches |
| Beak looks too round | Too much stuffing | Use less stuffing and reshape |
Ways to change it
- Make the body green and the wings blue for a classic tropical look.
- Use red, yellow, and blue yarn for a brighter rainbow parrot.
- Make a tiny version with DK-weight yarn and a smaller hook.
- Add a contrasting feather stripe to each wing.
- Make the tail feathers in three different colors for extra personality.
Approximate making time
| Part | Rounds | Roughly |
|---|---|---|
| Body and head | 28 | 45–60 minutes |
| Wings | 14 each | 15–20 minutes each |
| Beak | 8 + 5 | 15 minutes |
| Feet | 6 each | 10 minutes each |
| Tail | 8 rows each | 15 minutes |
Care instructions
| Situation | What to do |
|---|---|
| Dusty | Wipe gently with a damp cloth |
| Small stain | Spot-clean with mild soap |
| Needs refreshing | Air dry completely |
| Wet | Press gently with a towel |
| Long-term storage | Store somewhere dry and clean |
| Needs washing | Hand wash only when yarn allows |
Safety: For children under 3, embroider the eyes and facial details instead of using safety eyes, felt pieces, or glued decorations. Small parts can become choking hazards.
CROCHET PARROT PATTERN FAQ
Can I use a different yarn for this crochet parrot pattern?
Yes. DK-weight yarn works well if you want a smaller bird. Bulky yarn can create a larger, softer parrot, but you should adjust your hook size so the stitches remain tight.
Why are my parrot parts wobbly?
Wobbly pieces usually come from inconsistent tension or incorrect stitch counts. Count every round and use a stitch marker at the beginning of each continuous round.
How do I hide the yarn tails?
Use a yarn needle to weave each tail through several stitches on the back of the piece. Pull gently, trim the excess, and tuck the remaining end inside the stuffing.
Can I make the parrot in different colors?
Absolutely. Parrots are perfect for experimenting with color. Try green and yellow, red and blue, turquoise and orange, or a completely pastel palette.
Why is my finished parrot smaller or larger than expected?
Your yarn weight, hook size, and crochet tension all affect the final size. The listed height is approximate, so focus on making firm stitches and keeping your proportions consistent.
Can I make this parrot safe for a baby?
For babies and toddlers under 3, avoid safety eyes, glued felt, and other small pieces. Embroider the eyes and face instead, and make sure every part is securely attached.
How much yarn do I need?
One small skein of the main color is generally more than enough for one parrot. You will only need small amounts of the accent colors for the wings, beak, feet, eyes, and tail.
Should I join every round?
No. The body and most small pieces are worked in continuous rounds. This avoids a visible seam, but it means you should use a stitch marker so you can track the beginning of each round.
CONCLUSION
Making a colorful bird does not have to be complicated. This crochet parrot pattern uses simple shapes and basic stitches to create a cheerful amigurumi that you can customize with your favorite colors.
Take your time with the face and assembly. Those little details are what give your handmade parrot its own personality.
Before you call it done
- Check that both eyes are level.
- Make sure the beak is securely sewn.
- Confirm that both wings are firmly attached.
- Hide and trim all yarn tails.
- Give the finished parrot a final shape and stuffing check.