
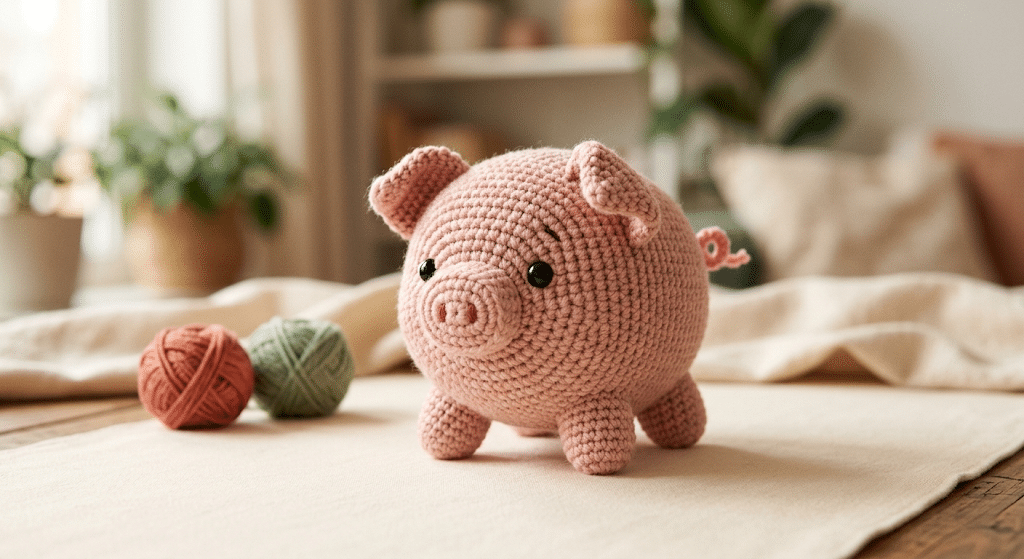
There’s something extra sweet about a tiny handmade pig with a round little snout, floppy ears, and a squishy belly. A crochet pig pattern makes a wonderful first amigurumi project because the basic shapes stay simple while the finished pig looks incredibly cute.
This beginner-friendly tutorial walks you through five adorable stages, from choosing your yarn to adding the final details. You’ll learn how to shape a cuddly pig, create its recognizable snout and ears, and give your amigurumi plenty of personality without complicated techniques.
Whether you’re making a pocket-sized friend, a nursery decoration, or a handmade gift, this project gives you plenty of room to make the pig your own. Grab your hook, choose your favorite pink yarn, and let’s get started!
Table of Contents
Why This Crochet Pig Pattern Is Perfect for Beginners
Amigurumi can look complicated when you first see those perfectly shaped little animals on Pinterest. The good news is that you don’t need advanced crochet skills to create an adorable pig.
This crochet pig pattern focuses on simple rounded shapes and easy details. You’ll work mainly with basic crochet techniques, then assemble the pieces to create the finished character.
The pig also makes an excellent practice project because its shape doesn’t need to look perfectly symmetrical. A slightly wonky ear can make your handmade pig look even more charming.
A simple project with a cute result
Pigs naturally have rounded bodies, tiny legs, little ears, and a prominent snout. Those features translate beautifully into amigurumi.
You can create the body as one rounded piece, then add smaller pieces around it. This approach keeps the project manageable and makes assembly less intimidating.
Tip: Keep your stitches firm when crocheting stuffed animals. Tight stitches help prevent stuffing from showing through the fabric.
Great for gifts and handmade collections
A small crochet pig makes a sweet handmade present for birthdays, baby showers, holidays, or anyone who loves farm animals.
You can also create several pigs in different shades. Try soft pink, dusty rose, cream, peach, or even a playful lavender version.
If you’re making your first amigurumi, Paintbox Simply DK yarn gives you plenty of cheerful color choices and a smooth texture that makes stitches easy to see.
You can personalize every little detail
The best part of handmade crochet is the personality you add yourself.
Change the ear position, embroidery, colors, or facial expression. A sleepy pig can have tiny embroidered eyes, while a playful pig can have wide safety eyes and a little smile.
You can even turn your finished pig into a key decoration, shelf buddy, nursery accent, or part of a larger farm-animal collection.
Crochet Pig Pattern Materials and Preparation
Now that you know why this project works so well for beginners, it’s time to prepare your supplies. Having everything nearby makes crocheting much more relaxing.
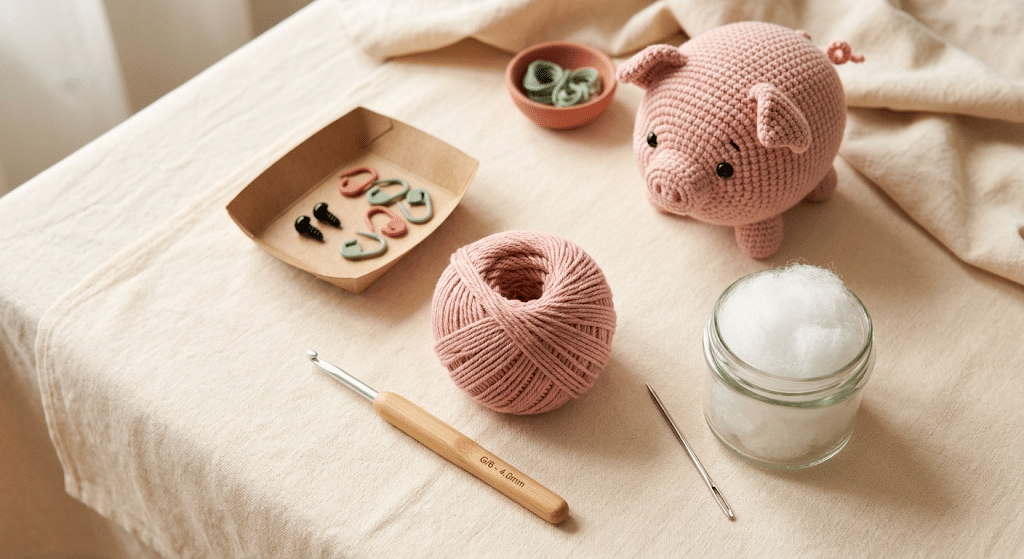
You don’t need a huge collection of tools. A few basic supplies will take you from the first stitch to the finished pig.
Choose the right yarn and hook
For a classic amigurumi pig, choose a medium-weight yarn in a soft pink or rosy shade. You can add a second color for the snout, inner ears, or tiny belly details.
Your crochet hook should create a firm fabric. Avoid using a hook that is too large for your yarn because loose stitches can leave visible gaps after stuffing.
A Clover Amour crochet hook feels comfortable during long crochet sessions and gives you good control while working small amigurumi pieces.
Prepare your stuffing
Stuffing gives your pig its adorable rounded shape.
Add Poly-fil Premium fiberfill gradually rather than packing the entire body at once. Small amounts allow you to shape the body evenly as you crochet.
Use your hook, yarn needle, or fingers to gently push stuffing into smaller areas. The body should feel firm but still have a soft, cuddly finish.
Keep your tools organized
A few simple accessories can make your project much easier.
Use stitch markers to keep track of your rounds, especially when working continuously. A yarn needle set helps you weave in ends and attach the ears, legs, and snout neatly.
Before starting, place your yarn, hook, stuffing, safety eyes, marker, and needle within easy reach. You’ll spend less time searching and more time crocheting.
5 Easy Crochet Pig Steps to Create Your Amigurumi
Here is the fun part! These five stages break the project into small, comfortable tasks.
You can work slowly and check the shape after every stage. Amigurumi becomes much less intimidating when you focus on one piece at a time.
Step 1: Crochet the round pig body
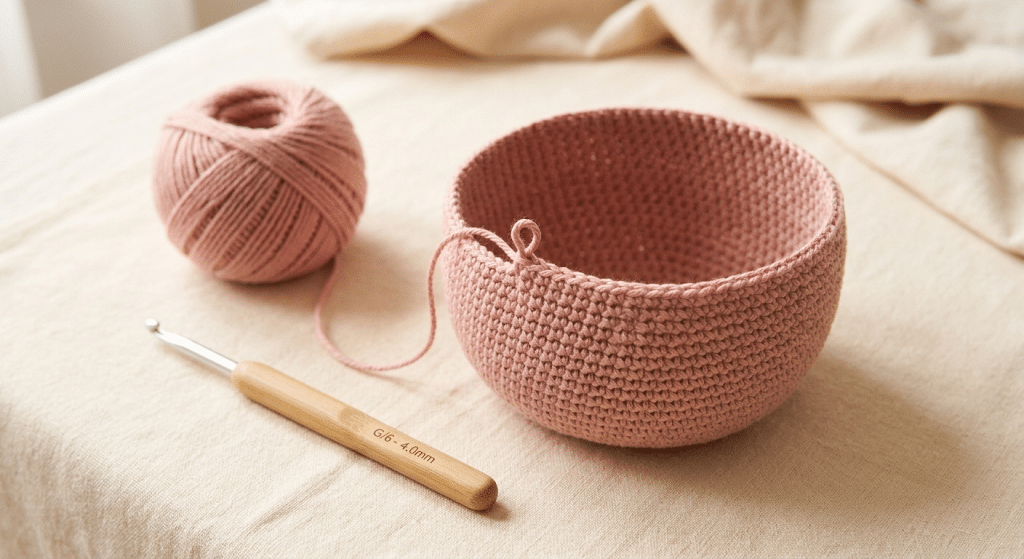
Start with the main body because it creates the foundation for your pig.
Use a magic ring or your preferred amigurumi starting method. Work in continuous rounds while gradually increasing to create a rounded shape.
As the body grows, check its shape regularly. You want a plump, slightly oval form rather than a long cylinder.
Once the body reaches the desired size, begin decreasing gradually. Add stuffing before the opening becomes too small.
Beginner tip: Don’t wait until the final stitches to add all your stuffing. Adding it gradually makes shaping much easier.
Step 2: Shape the tiny pig legs
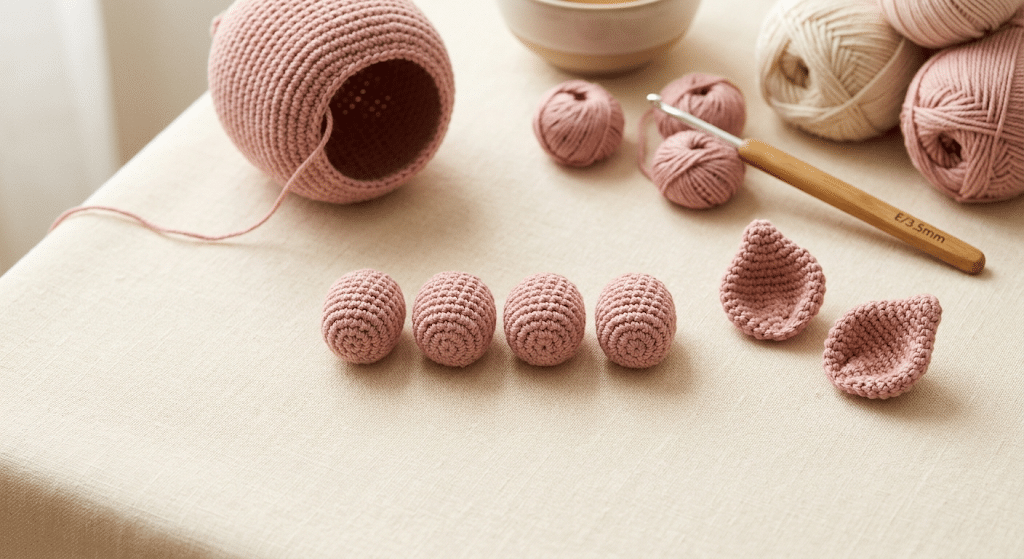
Next, create four short legs.
Keep these pieces small and rounded. You can crochet each leg separately and attach them around the lower part of the body.
Try placing the legs evenly before sewing them permanently. This simple test helps you create a balanced standing pig.
For a sitting pig, position the back legs slightly farther forward. That small adjustment creates a completely different pose.
Step 3: Add the adorable pig ears
The ears bring your little character to life.
Crochet two small ear pieces with a slightly pointed or rounded shape. Fold or shape them gently before attaching them near the top of the head.
You can make the ears stand upward for an alert pig. For a softer kawaii appearance, let them flop slightly to either side.
LSI keyword: amigurumi pig tutorial techniques work especially well here because small flat pieces are easy to customize.
Step 4: Create the signature snout
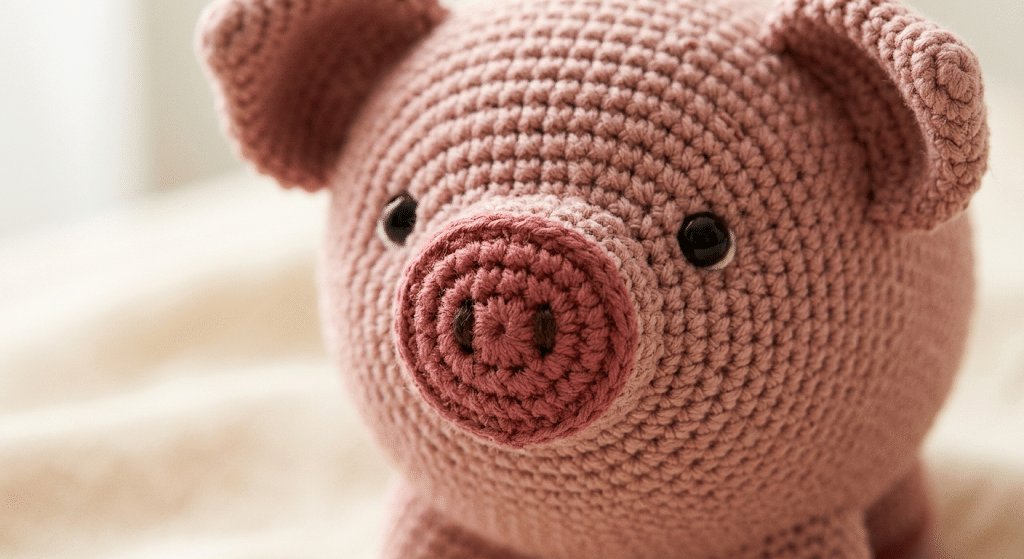
The snout is one of the most recognizable parts of a crochet pig.
Make a small oval or rounded piece and attach it to the front of the face. Use a contrasting shade if you want the snout to stand out.
Add two tiny nostrils with black embroidery thread or your chosen darker yarn. Keep them close together for a cute kawaii expression.
Take a moment to check the placement before sewing. The snout should sit comfortably between the eyes and toward the lower part of the face.
Step 5: Finish the face and curly tail
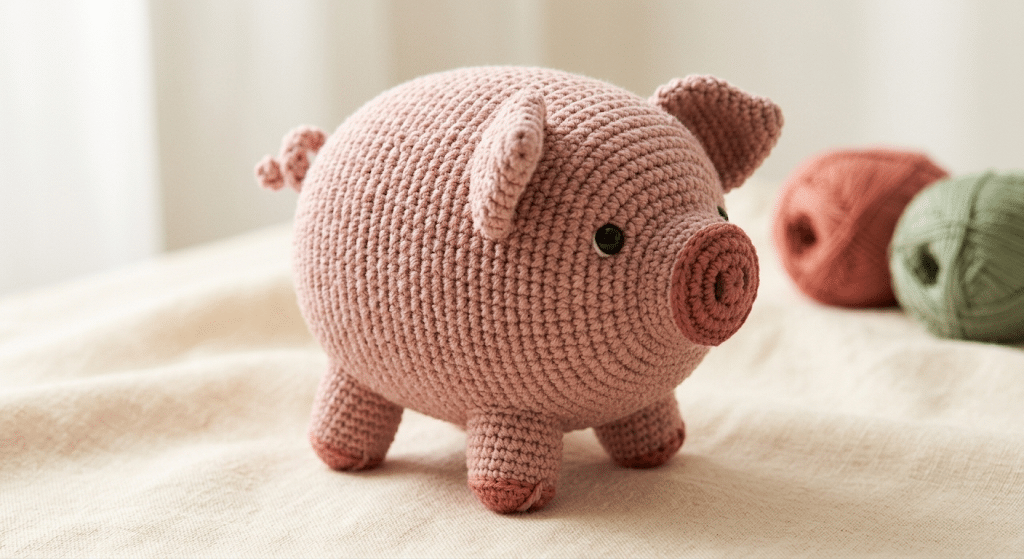
Finally, add the eyes and tail.
Place the safety eyes evenly on either side of the snout. If you’re making the pig for a young child, consider embroidered eyes instead of safety eyes.
For a classic piggy detail, create a tiny curled tail and attach it to the back. You can make the curl subtle or exaggerated depending on your preferred style.
Once all the pieces sit correctly, securely weave in your yarn ends.
Your little farm friend is ready!
How to Make Your Crochet Pig Look Extra Cute
The basic shape gives you a pig, but the finishing details give it personality.
Small changes can completely transform your finished amigurumi. That’s why two people can follow the same pattern and end up with two completely different characters.
Give your pig a kawaii expression
Kawaii amigurumi usually relies on simple facial features.
Place the eyes fairly close together for a sweet expression. Keep the snout centered and use tiny embroidered details rather than adding too many facial elements.
A small blush detail on the cheeks can also create a warm, playful look.
Remember: facial placement matters more than complicated stitches. Take your time before permanently attaching anything.
Experiment with pig colors
Pink is the classic choice, but you have plenty of options.
Try dusty pink for a vintage-inspired pig. Soft peach creates a warm nursery aesthetic, while cream can give your amigurumi a gentle neutral appearance.
You can also make the snout slightly darker than the body. This simple contrast makes the face easier to recognize.
If you’re creating a whole farm collection, choose related colors across your animals so they look like they belong together.
Create different personalities
Your pig doesn’t have to look exactly like every other amigurumi pig.
Try adding tiny embroidered eyelashes for a sweet character. Move the ears lower for a relaxed expression, or angle them upward for an energetic pig.
You can also make one pig sleepy, one curious, and one mischievous. Small changes in facial positioning create surprisingly different personalities.
Crochet Pig Pattern Tips for Better Amigurumi Results
Before you finish your project, take a few minutes to check your tension, stuffing, and assembly.
These small details can make your finished pig look much cleaner. They also help you feel more confident with your next amigurumi project.
Keep your crochet tension consistent
Consistent tension creates a smoother shape.
If your stitches become very loose in some rounds, stuffing may become visible. If your tension becomes extremely tight, the project may become difficult to crochet.
Try to keep your hand relaxed and maintain the same rhythm throughout each round.
Don’t worry if your first few rounds look imperfect. Your technique will become more natural as you continue.
Stuff the body evenly
Uneven stuffing can create lumps.
Add small amounts and gently distribute them around the body. Pay attention to the sides, bottom, and top so the finished shape stays nicely rounded.
Avoid compressing the fiberfill too aggressively. You want a firm body that still feels soft when squeezed.
Beginner tip: Rotate your project as you stuff it. Looking at it from different angles makes uneven areas much easier to spot.
Secure every small piece carefully
Ears, legs, snouts, and tails need secure attachment.
Before sewing, use pins or temporary positioning to check that everything looks balanced. Step back and look at the pig from the front and side.
Once you’re happy with the placement, stitch each piece securely.
A clean finish comes from taking your time during assembly rather than rushing through the final stage.
Creative Ways to Use Your Finished Amigurumi Pig
Your finished pig can become much more than a simple crochet project.
Handmade animals make lovely gifts because they carry the time and care you put into creating them. They also work beautifully as seasonal decorations or part of a handmade collection.
Make a sweet handmade gift
A crochet pig can make a charming gift for an animal lover.
Add it to a handmade gift basket with other crocheted farm animals. You can also make a pair of pigs in different colors for a cute matching set.
For birthdays, wrap your amigurumi in tissue paper or place it inside a small gift box. A handmade card makes the presentation feel even more personal.
Create a farm animal collection
Once you’ve made one pig, you may want to create an entire little farm.
Pair your pig with crochet cows, sheep, chickens, horses, or ducks. Keeping similar proportions makes the collection look cohesive.
You can also create different sizes. A tiny piglet beside a larger adult pig creates an especially adorable display.
Turn your pig into seasonal décor
Pink pigs aren’t limited to farm-themed displays.
Add a tiny scarf for winter décor or a little bow for a birthday-themed character. For a nursery, choose soft neutral colors and keep the design simple.
You can even create a small group for a shelf, craft room, or children’s reading corner.
Common Crochet Pig Problems and Easy Fixes
Even experienced crocheters sometimes run into little problems with amigurumi.
The good news is that most issues have simple solutions. If your pig doesn’t look perfect immediately, don’t unravel everything in frustration.
Why does my pig have visible gaps?
Gaps usually happen when your crochet tension is too loose or your hook is too large for the yarn.
Try using a smaller hook while keeping your stitches comfortable. You want a dense fabric that holds the stuffing securely.
Also check your tension around increases and decreases. These areas can sometimes loosen without you noticing.
Why does my pig look lumpy?
Lumps often come from uneven increases, decreases, or stuffing.
Check the body as you crochet instead of waiting until the end. If one area looks fuller, redistribute the stuffing gently.
Your finished pig doesn’t need to look perfectly machine-made. A little handmade charm is part of the fun.
Why does the face look different from the example?
Facial placement can change the entire personality of an amigurumi.
Before permanently attaching the eyes and snout, experiment with several positions. Take a quick photo from the front because the camera can reveal spacing issues that your eyes miss while crafting.
Once you find an expression you love, secure everything carefully.
Frequently Asked Questions About Crochet Pig Pattern
How long does it take to crochet a pig?
A small amigurumi pig can take several hours, depending on your crochet experience, yarn thickness, and finishing details. Beginners may need extra time while learning the basic techniques. More experienced crocheters can usually work faster once the body shape becomes familiar.
What yarn is best for a crochet pig?
Soft acrylic or cotton yarn works beautifully for a crochet pig. Choose a yarn that creates firm, even stitches and matches the hook size you plan to use. Bernat Blanket yarn can create an especially cuddly, plush finish when you want a larger, softer pig.
Is a crochet pig pattern good for beginners?
Yes. A pig makes a friendly beginner amigurumi project because the main shapes stay simple and rounded. You can practice increases, decreases, stuffing, joining pieces, and basic embroidery without needing complicated stitch patterns.
What size safety eyes should I use for a pig amigurumi?
The best safety-eye size depends on your finished pig’s dimensions. Smaller pigs usually need smaller eyes, while larger designs can handle bigger ones. Always check the proportions before attaching them, and consider embroidered eyes when making toys for very young children.
Can I sell pigs made from a crochet pattern?
You can generally sell finished handmade items when the pattern designer allows it, but always check the specific pattern’s terms first. Selling the finished item differs from selling, copying, or redistributing the written pattern itself. Never claim someone else’s pattern as your own.
How do I make my amigurumi pig extra fluffy?
A plush yarn can give your pig a soft, cuddly appearance. Work with firm tension and choose a yarn suited to your hook. You can also use gentle brushing techniques when appropriate for the yarn, but test a small area first to avoid damaging the fibers.
Final Thoughts on This Crochet Pig Pattern
Making a tiny pig from yarn feels surprisingly rewarding. With just a few simple shapes, you can create a handmade character that looks adorable sitting on a shelf or waiting inside a gift box.
This crochet pig pattern gives you a simple foundation for practicing amigurumi while leaving plenty of space for your creativity. Change the colors, move the ears, adjust the expression, or create an entire family of tiny pigs.
Most importantly, don’t worry about making every stitch perfect. Your handmade pig carries something a store-bought toy never can: the time, creativity, and care you put into making it.
If you want an especially soft finish, Bernat Blanket yarn can be a fun choice for experimenting with a plush version.
Now grab your hook, enjoy those first few rounds, and watch your little piggy come to life.
Save this pin to your crochet board on Pinterest so you can find this pattern anytime!
Looking for more free crochet animal patterns? Visit Yarned Animals for new amigurumi patterns, kawaii plushies and beginner crochet tutorials added every week at yarnedanimals.com