
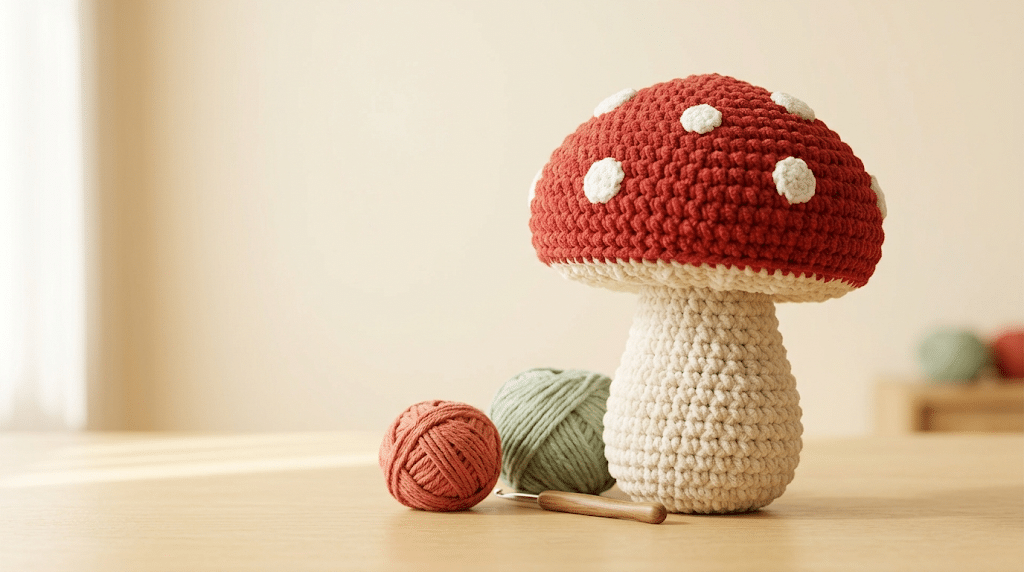
There is something wonderfully cozy about a tiny mushroom made from soft yarn. With its round cap, little stem, and sweet woodland look, a crocheted mushroom feels like a tiny piece of forest magic you can hold in your hands.
This crochet mushroom pattern gives you a simple amigurumi project that works beautifully for beginners. You will learn how to crochet the cap, shape the stem, add cute spots, stuff the pieces neatly, and assemble everything into one adorable mushroom.
For a soft, plush finish, I especially like using Bernat Blanket yarn for larger mushrooms. Its chenille texture creates a cuddly finish that works beautifully for kawaii amigurumi.
You can also make this design smaller with a lighter yarn. Grab your hook, choose your favorite mushroom colors, and let’s get started!
Table of Contents
Why This Crochet Mushroom Pattern Is So Fun to Make
Mushrooms make fantastic crochet projects because their basic shapes are wonderfully simple. You mostly work with rounded pieces, which means you can focus on your stitches without juggling complicated shaping.
This design also gives you plenty of room to add your own personality. A classic red cap with white spots creates a cute woodland mushroom, while pink, purple, orange, or even pastel colors can create something completely different.
The finished mushroom makes a sweet amigurumi decoration, desk buddy, shelf accessory, or handmade gift. You can even make several mushrooms in different sizes and display them together.
A beginner-friendly amigurumi project
If you are new to crochet, this project gives you useful practice with the basic skills you will use again and again.
You will work with single crochet, increases, decreases, stuffing, and simple sewing. These techniques appear in countless crochet animal patterns and amigurumi projects.
The mushroom shape also makes mistakes easier to spot. If your cap looks slightly uneven, you can usually correct the tension before moving much further.
A cute project for your yarn stash
You do not need large amounts of yarn for a small mushroom. That makes this pattern perfect for leftover yarn from previous projects.
Try a bright cap with a neutral stem. You can also reverse the colors for a fun fantasy mushroom.
For an extra kawaii appearance, choose soft yarn and slightly oversized proportions. A wide cap and short stem instantly create that adorable plush-toy look.
A handmade gift with personality
A crocheted mushroom can become a thoughtful little gift for a friend who loves handmade decorations.
Make one in their favorite color, add a tiny embroidered face, or create a whole group of woodland mushrooms. Handmade gifts feel special because they carry your time and creativity with them.
Now that you know why this project is so charming, let’s gather everything you need.
Crochet Mushroom Pattern Materials and Basic Skills
Before starting your mushroom, set up your workspace with everything within easy reach. A tidy setup makes amigurumi much more relaxing.
For this pattern, you will use US crochet terms. You will mainly work in continuous rounds, so a stitch marker helps you keep track of your first stitch.
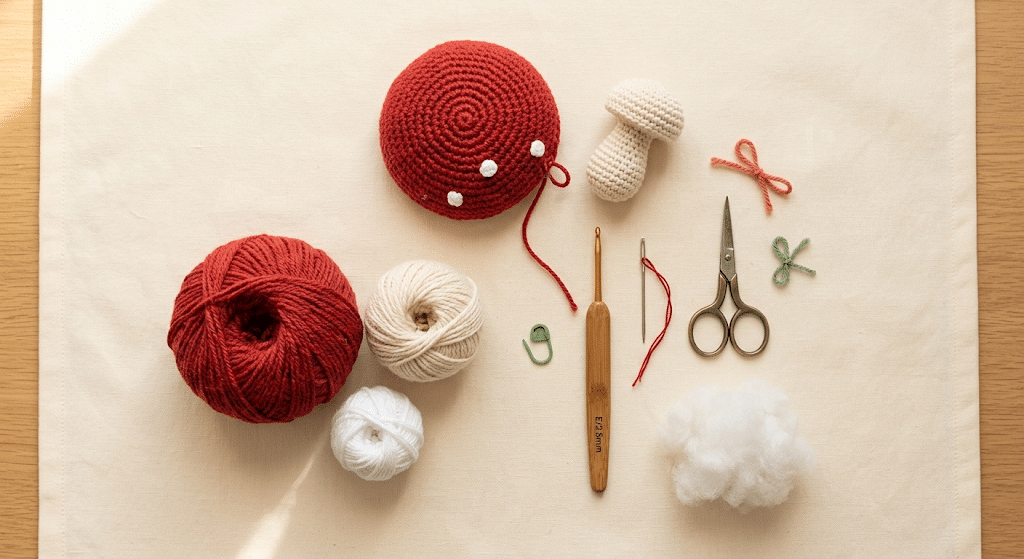
Yarn and hook choices
For a medium-sized plush mushroom, choose a bulky or worsted yarn depending on your preferred finished size.
You can use red for the cap, cream or beige for the stem, and white for the spots. These colors create the traditional mushroom look.
If you prefer a softer, smaller mushroom, Paintbox Simply DK yarn works nicely with a smaller hook. The tighter stitches also help keep the stuffing from showing.
Choose a crochet hook that creates firm stitches. You generally want a smaller hook than the yarn label suggests for amigurumi.
Helpful crochet supplies
You will also need:
- Crochet hook suited to your yarn
- Red yarn for the cap
- Cream or beige yarn for the stem
- White yarn for the spots
- Poly-fil Premium fiberfill
- Stitch marker
- Yarn needle set
- Scissors
Before starting, make sure your stitches feel firm. Loose stitches can leave visible gaps after stuffing.
Crochet abbreviations
Here are the main abbreviations used in this pattern:
- MR — magic ring
- ch — chain
- sc — single crochet
- inc — increase
- dec — decrease
- sl st — slip stitch
- FO — fasten off
If the magic ring feels difficult, do not worry. You can use a chain ring instead and work your first stitches into the center.
Ready to move on? Here is the fun part: making your mushroom from the bottom up.
Crochet Mushroom Pattern — 10 Easy Steps
This section walks you through the entire mushroom. Take your time and check your shape after each major section.
You can place a stitch marker in the first stitch of every round. This small habit makes continuous-round amigurumi much easier to follow.
Step 1: Create the mushroom stem base
Start with your cream or beige yarn and make a magic ring.
Work single crochet stitches into the ring, then continue crocheting in rounds. Increase gradually so the base grows into a small circle.
Your first few rounds should remain fairly flat. Avoid adding too many increases at once because the piece can become wavy.
Keep your tension even throughout the round.
Step 2: Build the stem upward
Once your base reaches the desired width, stop increasing.
Continue working single crochet around the piece. The sides will begin rising and create the mushroom stem.
Keep the lower section slightly wider than the upper section if you want a natural mushroom shape.
For a kawaii mushroom, make the stem short and chunky. A taller stem gives your mushroom a more woodland or realistic appearance.
Step 3: Shape the top of the stem
Continue crocheting until the stem reaches your preferred height.
Begin decreasing near the top so the stem becomes slightly narrower. This creates a gentle transition beneath the mushroom cap.
Do not make the top extremely narrow. You want enough surface area for the cap to sit securely.
Start adding small amounts of stuffing as the stem grows. This gives you better control over the shape.
Step 4: Stuff the stem firmly
Add Poly-fil Premium fiberfill through the opening.
Use small pieces instead of pushing one large piece inside. Small pieces distribute more evenly and help prevent lumpy spots.
The stem should feel firm but still soft when you squeeze it.
Keep checking the silhouette from different angles. If one side looks flatter, add a little stuffing to that area before closing.
Step 5: Close the stem
Once the stem feels nicely filled, continue with your decreases.
When only a small opening remains, add one final bit of stuffing if needed.
Fasten off and leave a long yarn tail.
Thread the tail onto your yarn needle and weave it through the remaining stitches. Pull gently to close the opening.
Secure the yarn and hide the remaining tail inside the stem.
Your stem is now finished.
Step 6: Start the mushroom cap
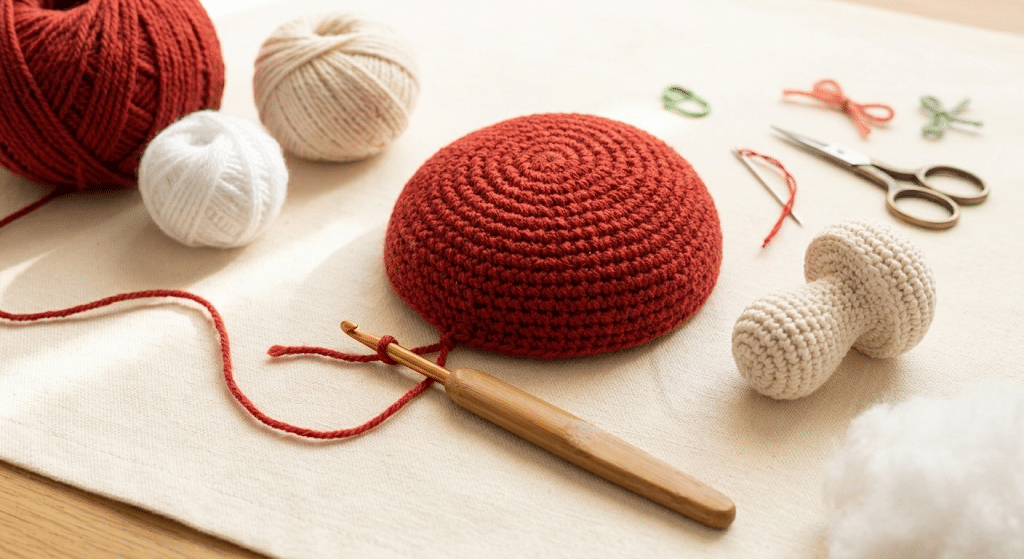
Switch to your cap color.
Begin with a magic ring and work single crochet stitches into the center.
Increase evenly around the next few rounds. Your goal is to create a smooth, rounded disk.
Do not worry if the cap looks flat at first. The shaping will become much clearer as you add more rounds.
For a wider mushroom, continue increasing for another round. For a smaller cap, stop earlier.
Step 7: Shape the rounded cap
Once the cap reaches the width you want, work a few rounds without increases.
This allows the outer edge to curve downward instead of remaining completely flat.
Begin decreasing gradually around the lower portion of the cap. The opening should slowly become smaller.
Try the cap against your stem before closing it. This is the perfect time to adjust the size.
The cap should sit comfortably over the top of the stem without looking too loose.
Step 8: Add stuffing and finish the cap
Add fiberfill through the remaining opening.
Use enough stuffing to give the cap a rounded appearance. Avoid overfilling because excessive stuffing can stretch the stitches.
Gently shape the cap with your fingers.
Close the opening using your yarn needle and secure the yarn inside the cap.
Leave enough structure underneath so the cap can attach securely to the stem.
For an extra polished finish, lightly massage the cap into a smooth dome shape.
Step 9: Make the mushroom spots
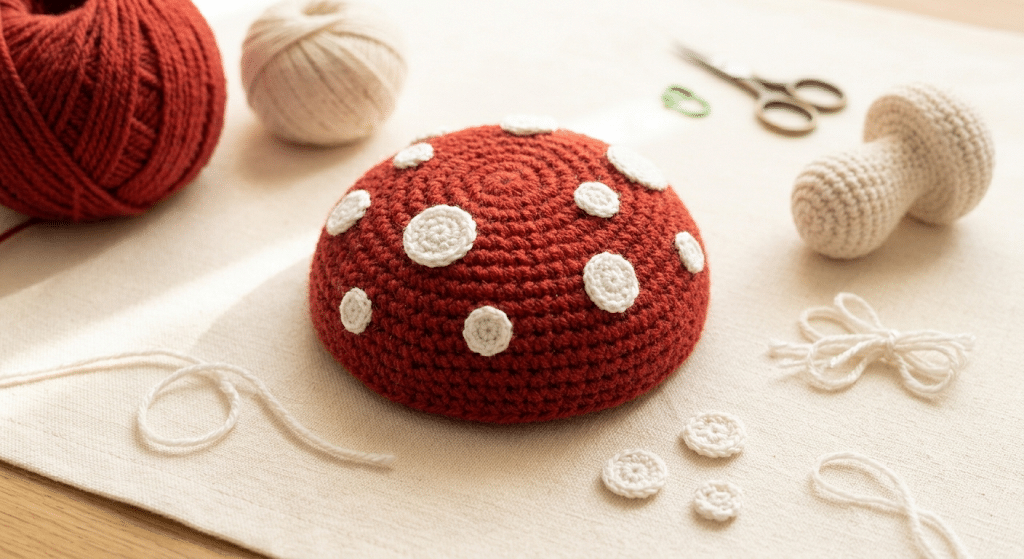
Now you can add the little white spots that make the mushroom instantly recognizable.
The easiest method uses tiny crocheted circles.
Make several small circles with white yarn using a magic ring or a short chain ring. Keep some spots larger and others smaller for a playful handmade appearance.
You can make five to ten spots depending on the size of your mushroom.
If you prefer an even simpler method, embroider small white dots directly onto the cap.
This is also where you can experiment with colors. White spots look classic, while pale yellow or pink spots create a fantasy mushroom.
Step 10: Attach the cap and finish your mushroom
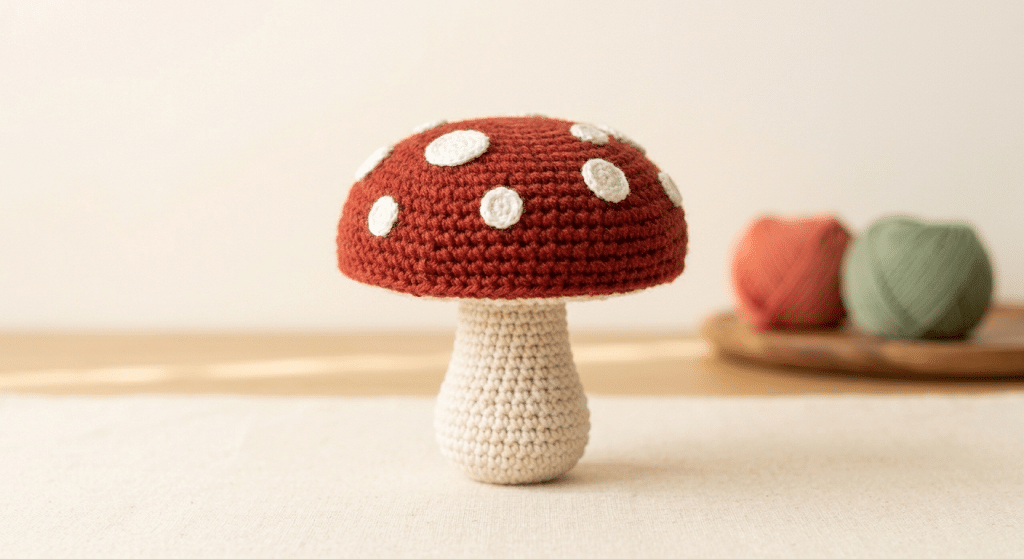
Place the finished cap over the stem.
Use the yarn tail and your yarn needle to sew the two pieces together around the lower edge of the cap.
Take small, neat stitches and keep checking the mushroom from different angles.
You want the cap to sit evenly without tilting too far to one side.
Once the cap feels secure, weave in the remaining yarn ends.
Give your mushroom one final shaping pass with your fingers.
And there you have it — your own adorable crochet mushroom!
How to Make Your Crochet Mushroom Look Extra Cute
The basic mushroom already looks sweet, but a few small changes can completely transform its personality.
Amigurumi becomes especially fun when you stop worrying about making every project identical. Small differences can make each mushroom feel handmade and unique.
Choose a kawaii color palette
Traditional red and white will always look adorable, but do not feel limited to classic mushroom colors.
Try:
- Dusty pink with cream spots
- Sage green with white spots
- Lavender with pale yellow spots
- Orange with cream spots
- Chocolate brown with beige spots
- Soft cream with pastel spots
For a nursery-style decoration, use gentle colors and a simple embroidered face.
For a fantasy mushroom, try a bright cap with contrasting spots.
Add an embroidered face
A tiny face can turn your mushroom into a cute amigurumi character.
Use black embroidery yarn to create two small eyes and a tiny smiling mouth.
Keep the features low on the cap or near the upper stem depending on the look you want.
You can also add tiny blush marks with pink embroidery thread.
If you want your mushroom to remain a simple decoration, skip the face entirely.
Change the proportions
Small changes in proportions can create completely different personalities.
A wide cap with a short stem looks extra chubby and kawaii. A tall stem with a smaller cap looks more like a woodland mushroom.
You can also make several mushrooms in different sizes.
Place them together in a little crochet mushroom family for an adorable display.
Tips for Perfect Amigurumi Shape and Stitch Tension
Now that you have the basic pattern, let’s talk about the details that make your finished mushroom look polished.
Amigurumi does not require perfect tension. It does require consistent tension.
Keep your stitches tight
Tight single crochet stitches help create a smooth surface.
If your stuffing shows through the fabric, try using a smaller hook.
Your stitches should still feel comfortable to work. Extremely tight tension can make your hands tired and make increases difficult.
Stuff gradually
One of the biggest beginner mistakes happens during stuffing.
Adding too much fiberfill at the end can create lumps and stretch the stitches.
Instead, add small amounts as you crochet.
Press the stuffing gently into the sides and corners. Then continue crocheting.
Watch your increases
Your mushroom cap needs smooth increases to create a rounded shape.
If you notice ruffles, you may have too many increases in one round.
If the cap becomes very flat, you may need additional shaping.
Remember that yarn thickness changes the final result. A chunky yarn behaves differently from lightweight cotton.
Use a comfortable hook
A comfortable hook makes a noticeable difference when working repeated single crochet rounds.
I often reach for a Clover Amour crochet hook because the soft handle feels comfortable during longer crochet sessions. Clover describes the Amour line as having comfortable grips and a hook shape designed for smooth crocheting.
[AMAZON AFFILIATE LINK: Clover Amour crochet hook]
You can also explore Clover’s official Amour crochet hook collection for available sizes.
Hide your yarn tails neatly
Do not simply cut your yarn tails close to the surface.
Thread each tail onto your yarn needle and weave it through several stitches.
Then trim the excess.
This keeps your mushroom neat and helps prevent loose ends from appearing later.
Easy Ways to Customize Your Crochet Mushroom
One of the best things about this project is how easy it is to customize.
Once you understand the basic shape, you can create an entire collection without learning a completely new pattern.
Make a tiny mushroom
Use lightweight yarn and a smaller hook.
Keep the same basic construction but reduce the number of increase rounds.
Tiny mushrooms work beautifully as keychain charms, ornaments, or miniature decorations.
Make a giant plush mushroom
For a large cuddly mushroom, choose a bulky chenille yarn.
Bernat Blanket is a #6 super bulky polyester yarn, and its chenille-style texture creates a soft, plush appearance.
You can explore Bernat Blanket yarn and patterns at Yarnspirations.
A larger mushroom also gives you more room for oversized spots and embroidered details.
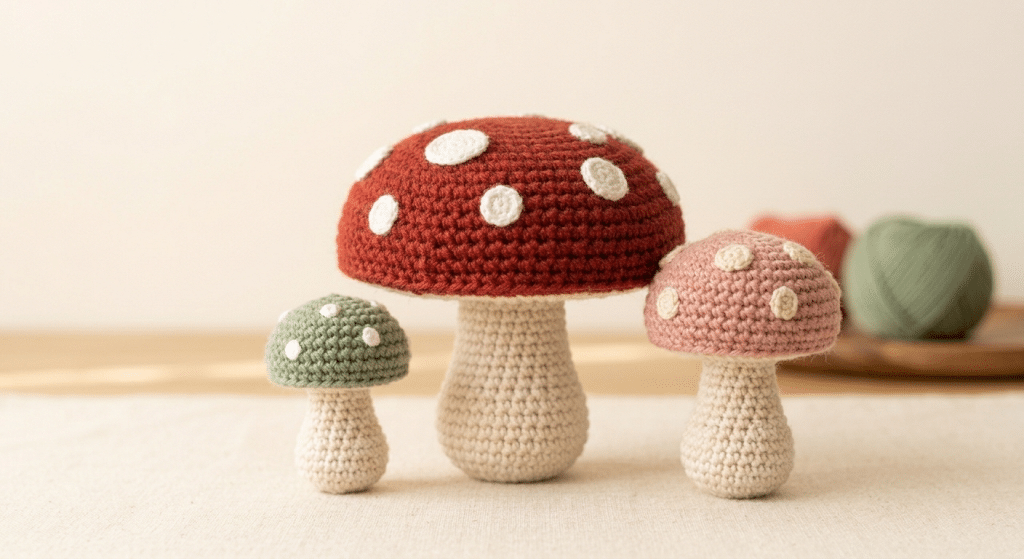
Turn it into a mushroom family
Make three mushrooms instead of one.
Use different cap colors and slightly different proportions.
You could create:
- A tiny pink mushroom
- A medium red mushroom
- A large orange mushroom
Arrange them together on a shelf or craft table.
This creates a charming little woodland scene with very little extra work.
Make seasonal mushrooms
Change the colors throughout the year.
Use warm orange and brown shades for autumn. Try pastel pink and yellow for spring.
For Halloween, black, purple, and orange can create a playful spooky mushroom.
For Christmas, use deep red, forest green, and cream.
This simple pattern can become a year-round crochet project.
Common Crochet Mushroom Problems and Easy Fixes
Even simple amigurumi can have little surprises.
The good news is that most problems have easy solutions.
Why does my mushroom cap look flat?
A flat cap usually means you need more shaping.
Try adding another increase round before working the straight rounds.
You can also add a few extra rounds without increases to create more depth.
Why can I see the stuffing?
Your stitches may be too loose for the yarn.
Try a smaller crochet hook.
You can also use smaller pieces of stuffing and distribute them more evenly.
Do not pack the stuffing too tightly because it can stretch your stitches.
Why is my stem leaning?
Check the stuffing first.
An uneven amount of fiberfill can make the stem curve to one side.
You can also check your decreases. Uneven shaping may cause the top of the stem to pull sideways.
Before sewing the cap on, gently straighten the stem and inspect it from the front and side.
Why does my cap not fit the stem?
Your cap and stem may have different widths.
Place the cap over the stem before finishing either piece.
If the cap looks too large, reduce the number of increase rounds next time.
If it looks too small, add one more increase round.
This simple fitting check can save you from having to remake an entire piece.
More Beginner Crochet Resources to Keep Practicing
Once you finish your mushroom, you may want to keep practicing small amigurumi shapes.
That is a great way to build confidence because each new project teaches you another useful technique.
Practice basic crochet skills
If you are still learning basic stitches, look for beginner-friendly tutorials that explain each movement slowly.
Yarnspirations has a beginner crochet section with patterns, lessons, and video support for basic techniques.
You can explore Yarnspirations beginner crochet patterns and tutorials when you want another easy project.
Try other amigurumi shapes
After making this mushroom, try a ball, pumpkin, bee, frog, or small animal.
Most amigurumi projects rely on the same core techniques.
You will notice that increases and decreases become much easier with practice.
Experiment with different yarn textures
Different yarns can completely change the personality of your project.
Smooth yarn shows stitch definition clearly. Chenille yarn creates a soft plush finish.
For beginners, smooth yarn can sometimes make stitches easier to see.
Once you feel confident, experiment with textured yarns and larger hooks.
Keep a small project notebook
Write down your hook size, yarn type, color, and any changes you make.
This becomes especially helpful when you create several mushrooms.
You can record which proportions you liked best and repeat them later.
It also gives you a little record of how your crochet skills improve.
Frequently Asked Questions About Crochet Mushroom Pattern
How long does it take to crochet a mushroom?
A small mushroom can take around one to two hours, depending on your experience and yarn choice. Beginners may need longer while they get comfortable with continuous rounds, increases, decreases, and sewing. Larger plush mushrooms can take several hours because they require more rounds and more stuffing.
What yarn is best for mushroom amigurumi?
Smooth worsted-weight yarn works well for beginners because your stitches remain easy to see. Chenille yarn creates a softer plush mushroom with a cuddly appearance. Bernat Blanket yarn works especially well for larger mushrooms because its super bulky chenille-style texture creates a soft finish.
Is this crochet mushroom pattern good for beginners?
Yes. This project uses beginner-friendly amigurumi techniques such as single crochet, increases, decreases, stuffing, and simple sewing. If you can make basic single crochet stitches, you can work through the mushroom one section at a time. Take your time with the shaping, and do not worry if your first mushroom looks slightly different.
What size safety eyes should I use for a mushroom?
A mushroom does not need safety eyes because the design works perfectly as a simple woodland decoration. If you add a face, 6mm safety eyes can work well on a small mushroom, while larger mushrooms can use 9mm or 12mm eyes. Always choose safety features carefully when making items for young children.
Can I sell amigurumi I make from this pattern?
You can generally sell finished handmade items you create from a pattern, but pattern designers can set their own terms. Always check the specific pattern’s usage policy before selling finished pieces. Do not sell, copy, or redistribute the written pattern itself unless you have permission.
Can I make this mushroom with different colors?
Absolutely. Color changes are one of the easiest ways to personalize this project. Try pastel caps, earthy woodland colors, bright fantasy shades, or seasonal combinations. You can also change the spot colors or embroider tiny faces for a kawaii finish.
Final Thoughts on This Crochet Mushroom Pattern
Making a tiny mushroom from yarn is such a satisfying project.
You start with a few simple stitches and slowly watch the cap and stem take shape. Then the little spots bring everything together and turn a simple crochet project into something full of personality.
This crochet mushroom pattern is also a lovely way to practice amigurumi basics. Once you finish one, you may find yourself planning an entire little woodland collection.
The best part is the feeling you get when you hold something you created yourself. Whether you keep your mushroom on your desk, give it to a friend, or make a whole mushroom family, you can be proud of every stitch.
For your next project, choose a new color combination and make another one. Your crochet skills will grow with every mushroom you make.
Save this pin to your crochet board on Pinterest so you can find this pattern anytime!
Looking for more free crochet animal patterns? Visit Yarned Animals for new amigurumi patterns, kawaii plushies and beginner crochet tutorials added every week at yarnedanimals.com