
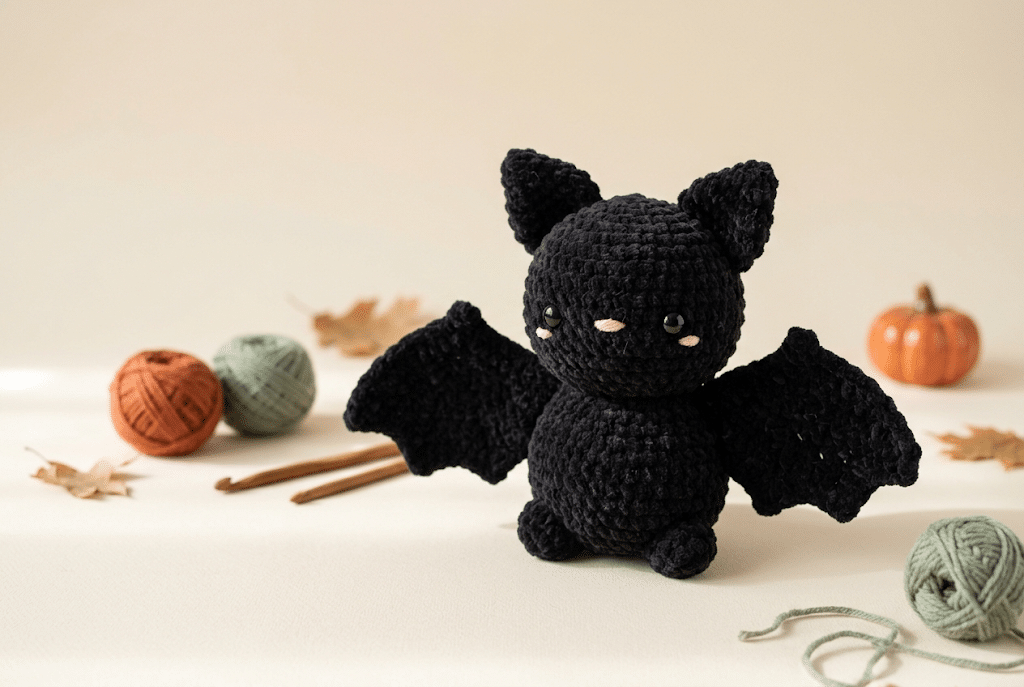
There is something extra magical about a tiny crochet bat appearing on your craft table. With its little wings, round body, and sweet sleepy face, this crochet bat pattern makes Halloween feel cozy instead of spooky. It also makes a wonderful handmade gift for anyone who loves cute amigurumi.
This project keeps the shapes simple, so you can enjoy the fun parts of making an adorable bat without feeling overwhelmed. You will learn how to create the body, shape the ears, attach the wings, add facial details, and finish your little Halloween friend neatly.
For a soft, beginner-friendly finish, I often reach for Bernat Blanket yarn when teaching plush-style crochet projects. Its chenille texture creates that squishy look that makes amigurumi incredibly huggable.
Now, grab your favorite hook and let’s turn a few simple stitches into the cutest little night creature.
Table of Contents
Why This Crochet Bat Pattern Is So Fun to Make
A handmade bat has a special kind of charm. It can look spooky enough for Halloween while still feeling soft, friendly, and completely adorable.
This crochet bat pattern uses basic amigurumi shapes that you can practice without juggling complicated construction. The body gives you a great chance to work in rounds, while the wings add a fun flat piece that brings the character to life.
You can also personalize almost every detail. Make your bat classic black, soft gray, chocolate brown, purple, or even a playful pastel shade.
The finished toy works beautifully as a Halloween crochet toy, desk decoration, shelf companion, or handmade gift. You can make several bats in different sizes and create your own little flying family.
A beginner-friendly amigurumi project
If you are new to amigurumi, this is a lovely project to practice. You will mainly focus on single crochet, increases, decreases, working in rounds, and joining small pieces.
Those skills appear in countless crochet animal patterns. Once they feel comfortable, you can use them to make cats, frogs, rabbits, bears, and other kawaii creatures.
You do not need perfect tension from the beginning. Your stitches may look slightly uneven while you learn, and that is completely normal.
The stuffing will also help shape the body. Take your time and check your stitches as you go.
Why bats make great handmade gifts
A crochet bat feels personal because you made every little detail yourself. That makes it especially sweet for birthdays, Halloween parties, classroom gifts, or cozy autumn surprises.
You can even customize the colors to match someone’s personality. Add a tiny bow, embroidered cheeks, or a colorful belly for an extra special touch.
For more inspiration about yarn choices for amigurumi, Lion Brand’s current amigurumi guide highlights the value of good stitch definition, low stretch, and softness for stuffed projects.
A cute project for Halloween lovers
Halloween decorations often focus on ghosts, pumpkins, witches, and spiders. A little crochet bat gives your collection something different.
Place your finished bat beside a pumpkin, hang several from a seasonal display, or let one sit on your bookshelf all year.
The best part is that this project does not need to look frightening. A round body and tiny facial features can turn your bat into a lovable kawaii character.
Crochet Bat Pattern Materials and Simple Setup
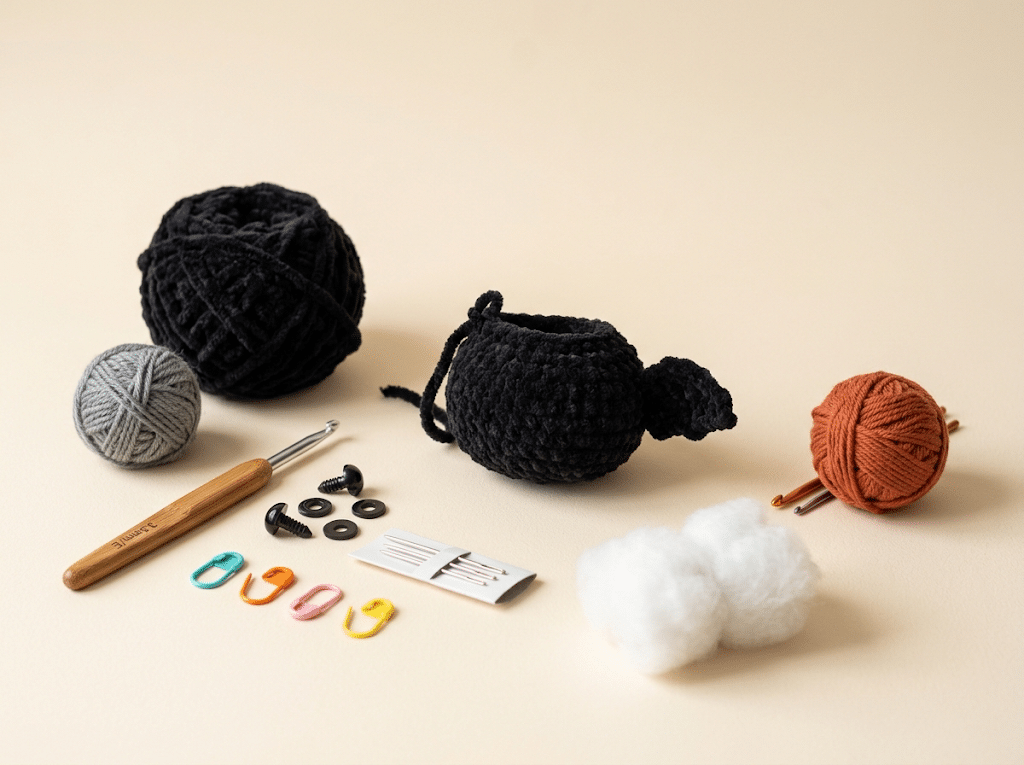
Before you start crocheting, gather everything you need in one place. Having your supplies ready makes the project much more relaxing.
For this amigurumi bat, choose a yarn that gives you clear stitches and enough structure to hold the stuffing securely. A smooth worsted or DK yarn works especially well for beginners.
You can use black yarn for a traditional Halloween look. Gray, brown, purple, cream, and deep burgundy can also create beautiful results.
Choosing the right yarn
Paintbox Simply DK yarn works nicely when you want a lightweight bat with clear stitch definition. Red Heart Soft yarn gives you another flexible option with a smooth finish.
For a more plush appearance, Bernat Blanket yarn creates a much softer and chunkier result. Remember that thicker yarn will also make your finished bat larger.
Lion Brand’s amigurumi guidance notes that cotton, acrylic, and cotton-acrylic blends can all work well for stuffed crochet projects.
Picking your crochet hook
Use a hook that creates tight stitches. Loose stitches can leave visible gaps where your stuffing may show.
A Clover Amour crochet hook can be especially comfortable during longer crochet sessions because of its soft-grip handle. Clover describes the Amour line as having a comfortable grip and hook shape designed for smooth crocheting.
For most DK or worsted yarn, start around the 3.0 mm to 4.0 mm range and adjust based on your tension.
The exact hook size can change the finished size. Always check whether your stitches look dense enough before continuing.
Small supplies that make a big difference
You will also want 9mm safety eyes, Poly-fil Premium fiberfill, a yarn needle set, and stitch markers.
Stitch markers help you identify the beginning of each round. That small detail can save you from losing your place while crocheting the body.
A yarn needle helps you sew the wings and ears securely. Keep a small pair nearby so you can trim yarn ends neatly.
How to Crochet the Bat Body Step by Step
Here is the fun part. Once your supplies are ready, you can start building the main body of your little bat.
The body uses a simple rounded shape. You will begin small, gradually increase the width, work through the middle, and then decrease toward the top.
This construction appears in many amigurumi crochet patterns, so learning it here gives you a useful skill for future projects.
Step 1: Start the magic ring
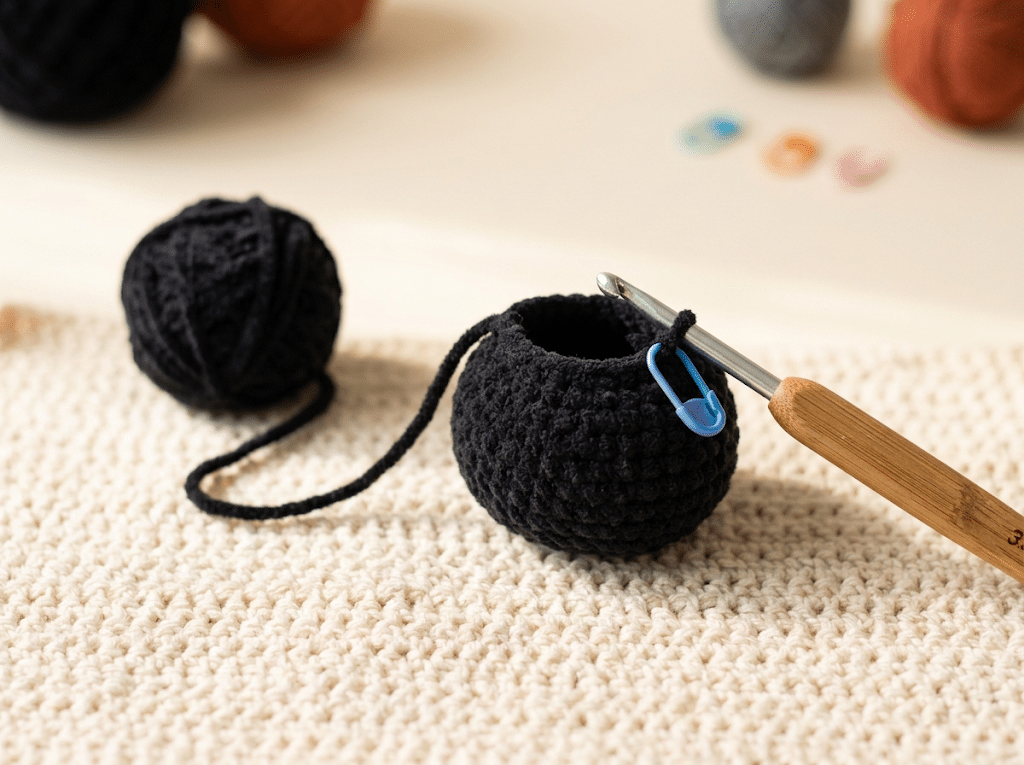
Begin with a magic ring and work your first round of single crochet stitches into it.
Pull the ring closed carefully. Keep the center tight so there is no large opening at the bottom of your bat.
If the magic ring feels difficult, practice it several times before continuing. It becomes much easier once your hands remember the movement.
Step 2: Build the rounded body
Continue working single crochet rounds while adding increases where needed.
The increases gradually widen the body. Keep your stitches consistent so the shape stays smooth.
Use a stitch marker at the beginning of each round. This simple habit makes counting and checking your progress much easier.
Step 3: Create the main body shape
Once the body reaches the desired width, continue working even rounds.
You should start seeing a small rounded form appear. This is usually the moment when your project starts looking like a real character.
Do not stuff too early. Leave enough room to finish the lower shaping without fighting against a fully packed body.
Step 4: Add the safety eyes
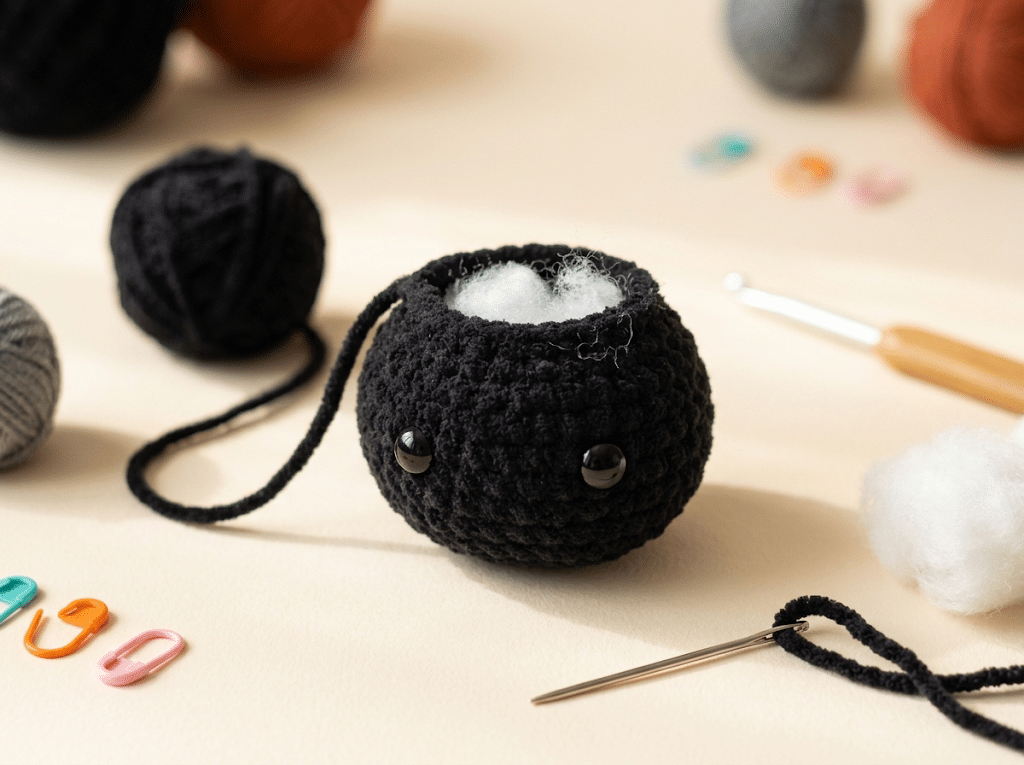
Position the eyes before you close the body completely.
For a medium-sized bat, 9mm safety eyes create a cute, expressive look. Place them evenly on the face and check their position from several angles.
If you plan to give the finished toy to a young child, consider embroidered eyes instead. Safety eyes contain small components and require appropriate supervision.
Step 5: Add the stuffing
Start adding Poly-fil Premium fiberfill gradually as the body closes.
Use small amounts at a time. Gently push the stuffing into the lower corners and sides.
Avoid packing the body too tightly. You want a firm shape that still feels soft and cuddly.
Step 6: Shape the top
Continue your decrease rounds until the opening becomes small.
Add a little more stuffing if you notice soft or empty areas. Then finish the final stitches and secure the yarn.
Use your yarn needle to weave the remaining tail through the stitches. Pull gently and hide the end inside the body.
Making the Wings, Ears, and Adorable Face
Now that the main body has taken shape, your bat needs the details that give it personality.
The wings create the unmistakable bat silhouette. The ears add character, while the face turns a simple stuffed shape into a kawaii Halloween friend.
Take your time with placement. Small details can completely change the personality of an amigurumi.
Creating the bat ears
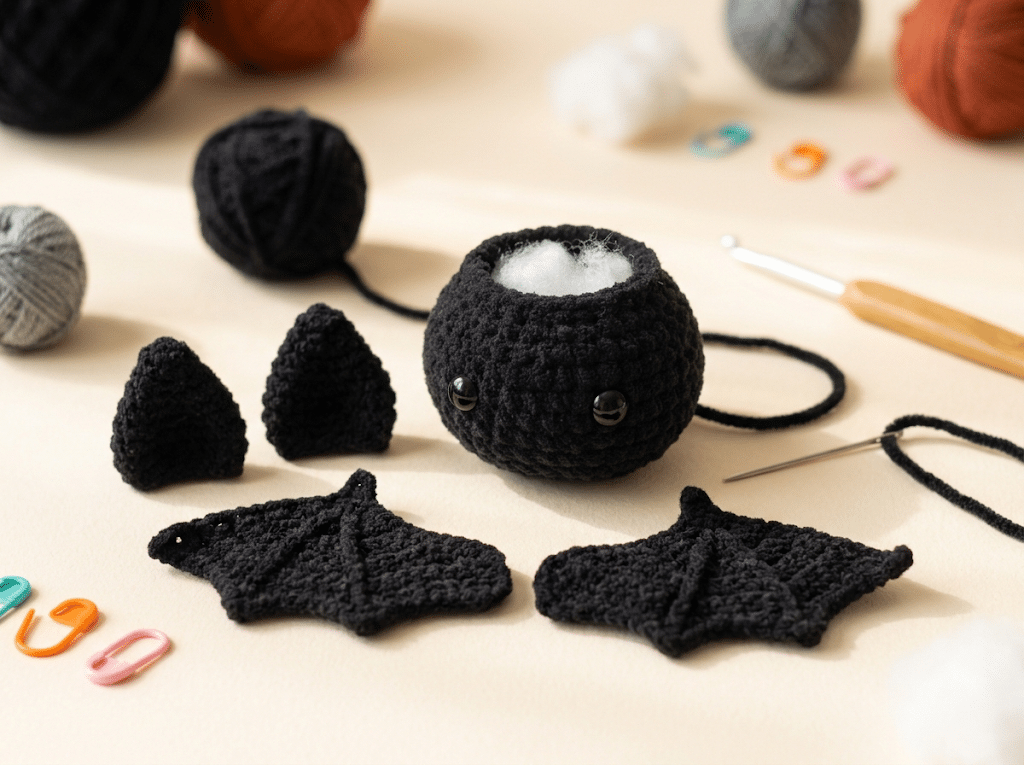
Crochet two small triangular ear pieces using your main yarn.
Keep both ears similar in size. You can make them slightly wider at the base and narrower toward the top.
Before sewing them on, place both pieces against the head. Move them around until the expression feels right.
Sew each ear securely using a yarn needle. Keep your stitches hidden inside the body whenever possible.
Shaping the bat wings
The wings can look complicated, but simple flat crochet shapes work beautifully.
Create two matching wings with a pointed or slightly scalloped outer edge. The top edge should attach neatly to the sides of the body.
You can make the wings small for a sitting bat. Make them wider if you want your finished toy to look like it is ready to fly.
For a more dramatic Halloween style, use a slightly contrasting yarn shade. Dark purple wings against a black body can look especially cute.
Adding the sweetest facial details
Once the eyes are attached, add a tiny embroidered nose or mouth if you like.
A small pink or burgundy accent can make the face look softer. You can also add tiny blush marks for a more kawaii style.
Avoid adding too many details. The charm of a handmade bat often comes from its simple expression.
Trust me on this one: tiny eyes, little ears, and chubby proportions do most of the work.
Easy Ways to Customize Your Crochet Bat
One of my favorite things about handmade crochet toys is how easily you can make them your own.
You can follow the basic shape while changing the colors, size, facial expression, and accessories. That means one pattern can inspire several completely different bats.
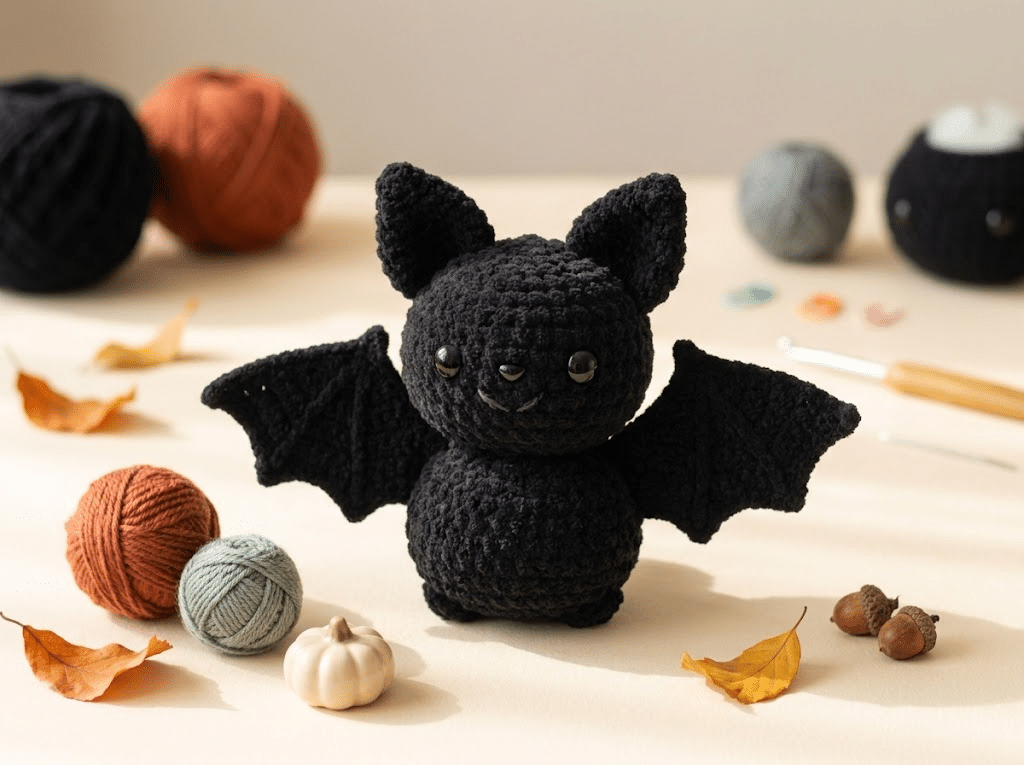
Try different Halloween colors
Classic black always works, but you have plenty of options.
Try charcoal gray for a softer look. Deep purple creates a magical Halloween feeling, while burgundy gives your bat a warm autumn personality.
You can also make a cream or pale pink bat if you prefer cute over spooky.
For children, bright colors can make the toy feel playful rather than mysterious.
Make a tiny bat keychain
A smaller version can become a cute bag charm or Halloween accessory.
Use thinner yarn and a smaller hook to create a miniature bat. Keep the stitches tight and use a smaller amount of stuffing.
You can attach a keychain finding after finishing the piece. This creates a fun handmade accessory for backpacks, craft bags, or seasonal decorations.
Create a whole bat family
Once you finish your first bat, making another usually feels much faster.
Create one large parent bat and several tiny baby bats. Give each one a different color or facial expression.
You could even create a Halloween shelf display with bats surrounding a crocheted pumpkin.
This is also a lovely idea for handmade gifts. A small group of matching amigurumi can feel much more special than a single store-bought decoration.
Tips for Making Your Amigurumi Bat Look Polished
Even simple crochet projects can look professionally finished with a few small habits.
You do not need advanced techniques. You simply need to slow down during the final steps and pay attention to shaping.
Keep your stitches tight
Tight stitches create a cleaner surface and help keep stuffing from showing through.
If you can see large gaps between stitches, try going down one hook size.
Your hands may need a little time to adjust. Once your tension becomes consistent, the body will look much smoother.
Stuff gradually and evenly
Too little stuffing can make your bat look flat. Too much can stretch the stitches and make the body look lumpy.
Add small amounts throughout the body instead of filling one section completely.
Use the back of your crochet hook or your fingers to gently move stuffing into small spaces.
Check symmetry before sewing
Before attaching the wings and ears permanently, place them on the body.
Look at your bat from the front. Check whether the ears sit at similar angles and whether the wings line up.
This tiny pause can prevent a lot of frustration later.
Hide your yarn tails carefully
Clean finishing makes a handmade toy look much more polished.
Weave each yarn tail through several stitches before trimming it. Pull gently so the end disappears into the body.
Do not cut your tails too short before securing them. You want enough yarn to anchor the pieces safely.
Common Problems When Crocheting a Bat
Even experienced crocheters have moments when an amigurumi does not look quite right.
The good news is that most problems have simple fixes.
Why does my crochet bat look lumpy?
Uneven tension often causes lumps.
Try slowing down and keeping your stitches similar in size. Also check your increases and decreases carefully.
If one side has more stitches than the other, the body may lean or become uneven.
Why can I see the stuffing?
Visible stuffing usually means your stitches are too loose or your hook is too large.
Try using a smaller hook. You can also use smaller pieces of stuffing instead of pushing one large piece inside.
A dense fabric gives your crochet animal toy a smoother appearance.
Why don’t my wings look even?
Measure the wings against each other before sewing.
If one looks larger, gently reshape it with your fingers. If needed, remake the smaller piece.
Remember that handmade does not mean perfectly identical. Tiny differences often give amigurumi its charm.
Why does my bat look more cute than spooky?
That may actually be the best outcome!
Amigurumi works beautifully because it transforms animals into soft, friendly characters.
If you want more Halloween personality, use darker yarn, slightly larger wings, pointed ears, or a tiny embroidered mouth.
How to Display and Gift Your Finished Bat
Once your bat is finished, do not hide it in a craft basket.
This little character deserves a place where you can enjoy your hard work.
Place it beside a pumpkin, autumn candle, stack of books, or seasonal crochet decoration.
You can also hang several bats from a wall or shelf for a playful Halloween display.
A sweet handmade Halloween gift
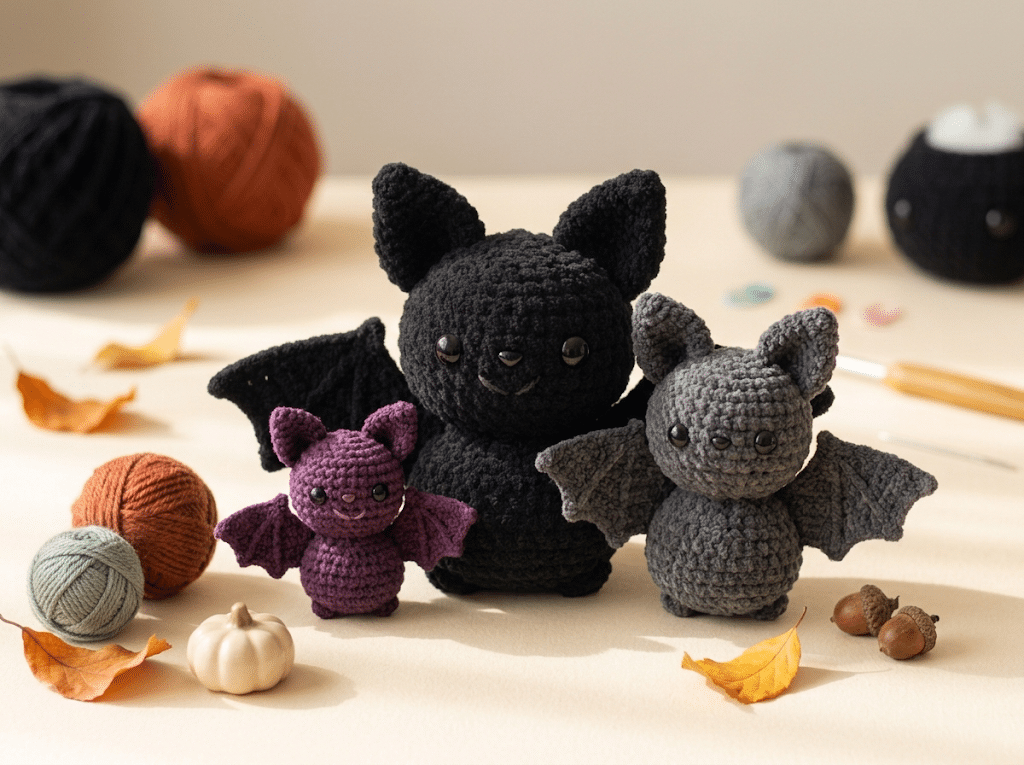
A finished bat makes a thoughtful gift for a crochet-loving friend, teacher, coworker, or family member.
Add a small handwritten note to make the gift even more personal.
You could write something simple like, “Made especially for you,” and include the date.
That little detail turns your crochet project into a keepsake.
Make a spooky crochet collection
If you love seasonal crochet, your bat can become the first piece in a larger Halloween collection.
Pair it with a crochet pumpkin, ghost, spider, witch hat, or black cat.
Keep the colors coordinated so the collection feels intentional. Black, cream, terracotta, purple, and muted green create a beautiful autumn palette.
Photograph your finished amigurumi
Good photos help you remember your project and share it with other crochet lovers.
Place your bat near a window with soft natural light. Use a simple background and keep distracting objects away.
A small pumpkin or yarn ball can add seasonal atmosphere without taking attention away from your finished toy.
Frequently Asked Questions About Crochet Bat Pattern
How long does it take to crochet a bat?
A small amigurumi bat can often be completed in a few hours, depending on your crochet speed and experience. Beginners may need extra time for shaping, counting, sewing, and attaching details. If you are making several bats, the second and third usually feel much faster because the basic construction becomes familiar.
What yarn is best for a crochet bat?
Smooth DK or worsted-weight yarn works well for a crochet bat because it makes stitches easy to see. Cotton blends, acrylic yarn, and soft yarn can all create attractive results. For a fluffy Halloween crochet toy, chenille yarn can give the body a plush texture, while smooth yarn creates sharper details.
Is a crochet bat pattern good for beginners?
Yes. A simple bat is a friendly beginner amigurumi project because the main body uses familiar techniques such as single crochet, increases, decreases, and working in rounds. The wings and ears also give you practice sewing small crochet pieces together. Start slowly and use a stitch marker to keep track of your rounds.
What size safety eyes should I use for a crochet bat?
For a medium-sized amigurumi bat, 9mm safety eyes create a cute balanced expression. Smaller bats may look better with 6mm eyes, while larger plush bats can suit 12mm eyes. Always choose the eye size based on the finished proportions, and consider embroidered eyes if the toy will be used by a very young child.
Can I sell amigurumi I make from this pattern?
You can generally sell handmade items you personally crochet from a pattern, but you should check the specific pattern designer’s terms before doing so. Avoid selling, copying, or redistributing the written pattern itself. When possible, describe the item as handmade and credit the pattern source according to its stated permissions.
Can I make this Halloween crochet toy in different colors?
Absolutely. Black creates a classic bat, but purple, gray, brown, burgundy, cream, and pastel shades can all work beautifully. You can also make contrasting wings or add tiny embroidered details. Changing colors is one of the easiest ways to turn the same basic amigurumi design into several unique characters.
Finish Your Crochet Bat With Confidence
There is something incredibly satisfying about watching a few simple stitches become a tiny character with personality.
With this crochet bat pattern, you can practice essential amigurumi skills while creating a sweet Halloween decoration, handmade gift, or cuddly seasonal friend. You can keep the design classic or make it completely yours with different colors, expressions, and wing shapes.
Most importantly, do not worry about making every stitch perfect. Your handmade bat should feel like your creation, and those tiny handmade details are part of its charm.
If you are making this project for Halloween, start early and make a few different bats. One can decorate your shelf, another can become a gift, and another can stay beside your favorite crochet supplies.
Save this pin to your crochet board on Pinterest so you can find this pattern anytime!
Looking for more free crochet animal patterns? Visit Yarned Animals for new amigurumi patterns, kawaii plushies and beginner crochet tutorials added every week at yarnedanimals.com