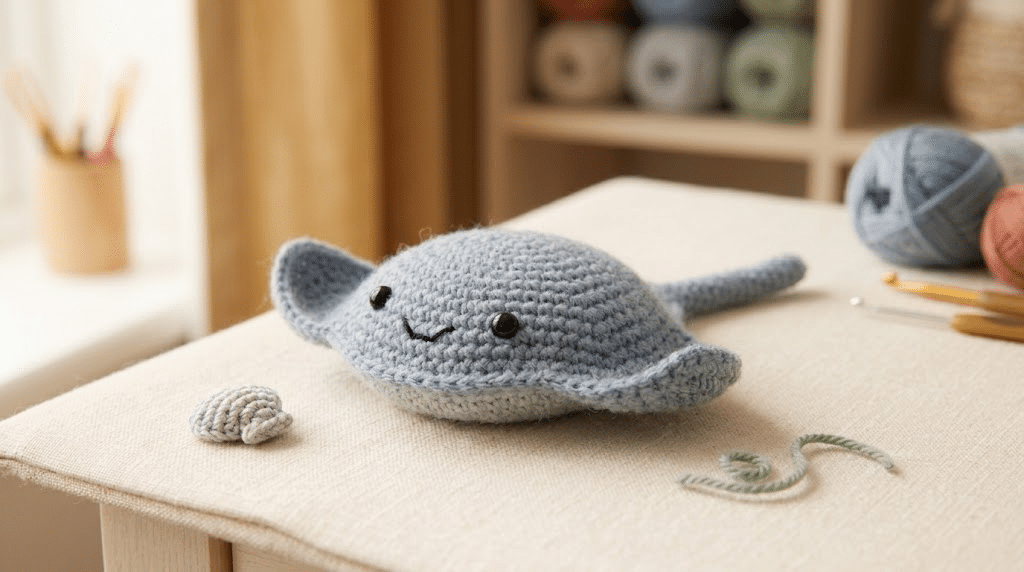
There is something so sweet about a tiny stingray gliding through the sea, and crocheting one makes that magic even cuter. This crochet stingray pattern turns a simple handful of stitches into a soft, kawaii ocean friend with a wide body, tiny eyes, and a playful tail.
You do not need advanced crochet skills to make this amigurumi. The shape comes together with basic increases, decreases, and simple sewing, making it a fun project for beginners who want to try something different.
You will learn how to choose your yarn, shape the stingray, add adorable details, and finish your plushie neatly. You will also get helpful tips for stuffing, embroidery, assembly, and gifting your finished sea creature.
So grab your hook and yarn, and let’s make this little ocean friend together!
Table of Contents
Why You’ll Love This Crochet Stingray Pattern
A stingray might not be the first animal that comes to mind when you think about amigurumi. That is exactly what makes it such a fun project.
Its unusual body shape gives you a chance to practice shaping while creating something that looks completely different from the usual crochet animals. The wide wings and long tail create an instantly recognizable silhouette.
This design also has a lovely kawaii look. A pair of small safety eyes gives your stingray a sweet expression, while a softly stuffed body makes it perfect for cuddling or decorating a nursery shelf.
A beginner-friendly ocean crochet project
This pattern focuses on basic amigurumi techniques. You will mainly work with single crochet, increases, decreases, and slip stitches.
If you already know how to crochet a simple ball, you have many of the skills needed here. The body uses gradual shaping rather than complicated stitch combinations.
That makes this a great next project after your first crochet animal.
A cute alternative to traditional amigurumi
Crochet whales, turtles, octopuses, and fish are adorable, but a stingray brings something special to an ocean-themed collection.
The flat body gives it a playful flying-through-the-water appearance. You can also experiment with colors to create your own little underwater family.
Try soft gray, dusty blue, sandy beige, lavender, or even a cheerful pastel shade.
Perfect for gifts and ocean lovers
A handmade stingray makes a thoughtful gift for anyone who loves marine animals.
You can make a small version for a child’s room or create several stingrays in different colors for a cute ocean display. They also make charming handmade gifts for birthdays, baby showers, and craft fairs.
For an especially soft finish, Bernat Blanket yarn can create a plush, squishy texture that feels wonderful in your hands.
Now that you know why this little sea creature is such a fun project, let’s gather everything you need.
Materials and Crochet Stingray Pattern Basics
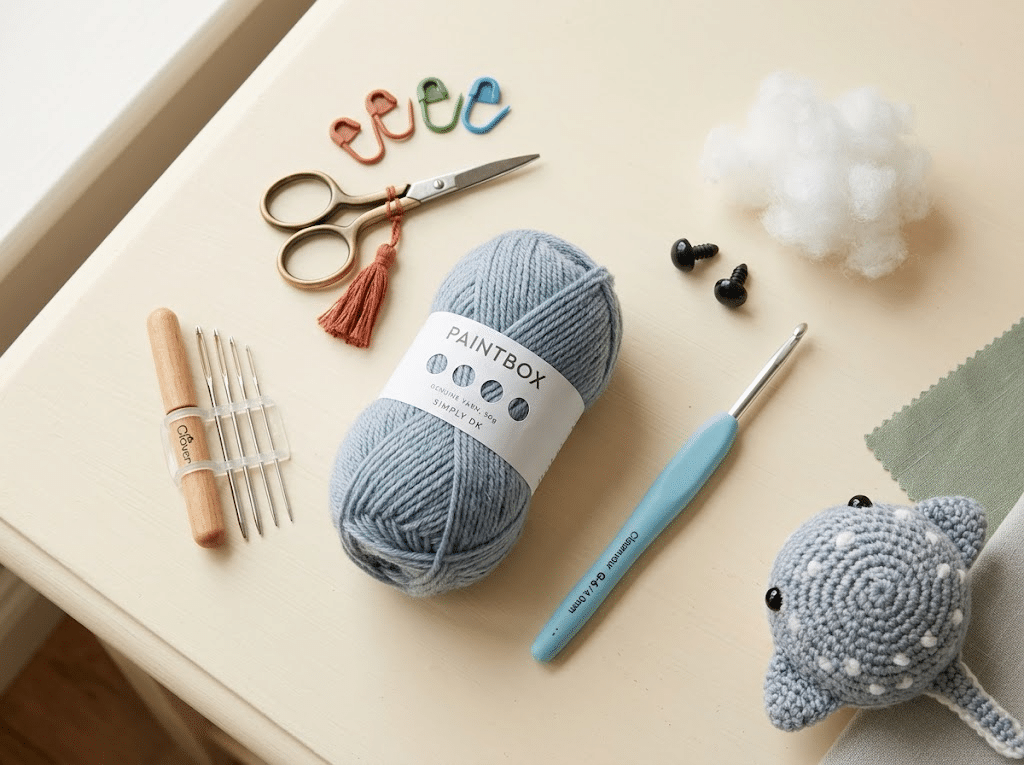
Before you begin your crochet stingray pattern, take a few minutes to prepare your materials.
Good preparation makes crochet much more relaxing. You will spend less time searching for supplies and more time enjoying the project.
For this design, choose a yarn that lets you see your stitches clearly. Smooth yarn works especially well when you are learning amigurumi because you can easily spot increases and decreases.
Yarn and hook
Choose a smooth yarn in your favorite ocean-inspired color.
Paintbox Simply DK yarn works nicely for a lightweight stingray with clear stitch definition. You can also choose another yarn with a similar thickness if you already have something in your stash.
Your hook should create firm stitches. Amigurumi usually looks best when the stuffing cannot easily show through the fabric.
The Craft Yarn Council’s yarn weight guide provides useful information about yarn categories and suggested hook ranges.
For beginners, remember one simple rule: your stitches should feel firm but not impossible to work.
Other supplies
You will also want:
- Clover Amour crochet hook
- 9mm safety eyes
- Poly-fil Premium fiberfill
- Stitch markers
- Yarn needle set
- Scissors
- Small amount of contrasting yarn for optional details
Before you start, a set of 9mm safety eyes is handy for giving medium-sized amigurumi a balanced kawaii expression.
Crochet abbreviations
This pattern uses familiar amigurumi abbreviations:
- MR — magic ring
- ch — chain
- sc — single crochet
- inc — increase
- dec — decrease
- sl st — slip stitch
- FO — fasten off
If crochet abbreviations still feel confusing, keep a small reference beside you while working.
The Craft Yarn Council also provides standardized crochet symbols and abbreviations that can help you become more comfortable reading patterns.
Before you begin
Keep your tension fairly tight throughout the body.
Loose stitches can create visible gaps, especially after stuffing. If you notice large holes between stitches, try using a smaller hook.
Do not worry about achieving perfect tension immediately. Your first stingray can simply be your practice project.
Ready to move on? Here comes the fun part.
How to Crochet a Stingray in 10 Easy Steps
This section walks you through the complete construction process.
The stingray consists of a broad body, two wing-like sides, a tapered tail, and a few simple facial details.
Work slowly and use a stitch marker to identify the beginning of each round. This small habit can save you from losing your place.
Step 1: Start the stingray body
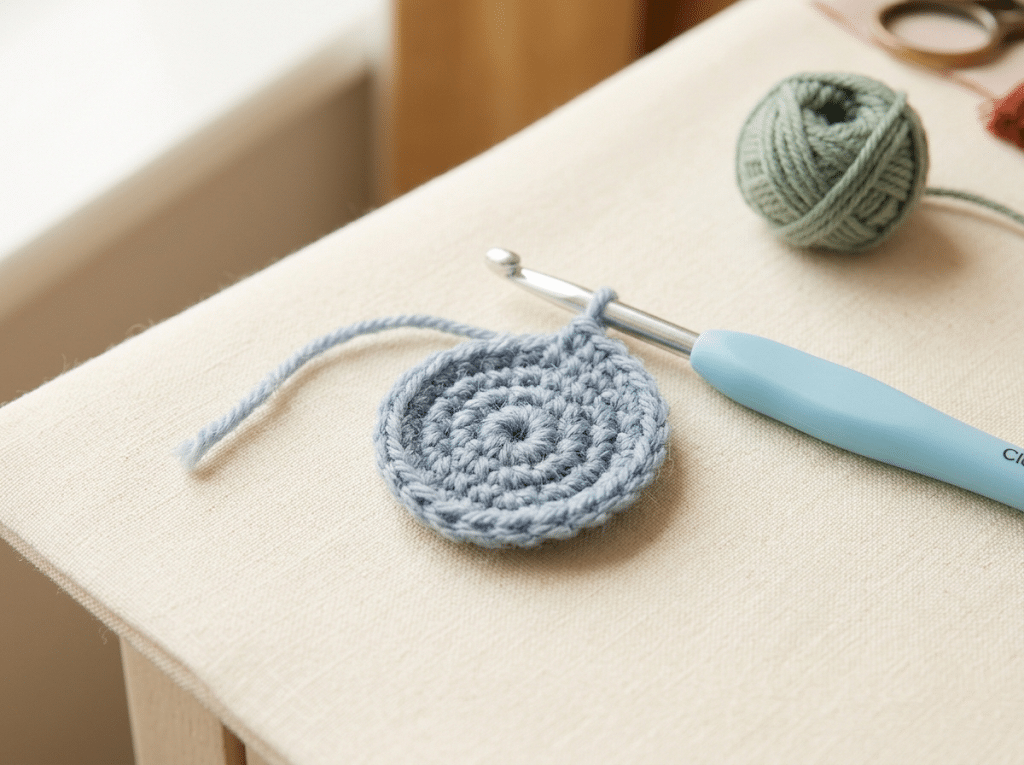
Begin with a magic ring.
Work several single crochet stitches into the ring, then pull the yarn tail gently to close the center.
Continue crocheting in the round.
Your first few rounds should create a small, rounded center. This becomes the middle of the stingray’s body.
Keep your stitches firm and even.
At this stage, the project may look more like a tiny crochet circle than a sea creature. That is completely normal.
Step 2: Build the center shape
Continue working rounds of single crochet while adding increases evenly.
The increases allow the body to grow outward.
Try to space your increases consistently. Even spacing creates a smooth shape and prevents unwanted bumps.
As the circle becomes wider, you will start seeing the foundation of the stingray’s body.
Do not stuff the piece yet.
The body needs room to expand while you create the wide silhouette.
Step 3: Create the wide stingray wings
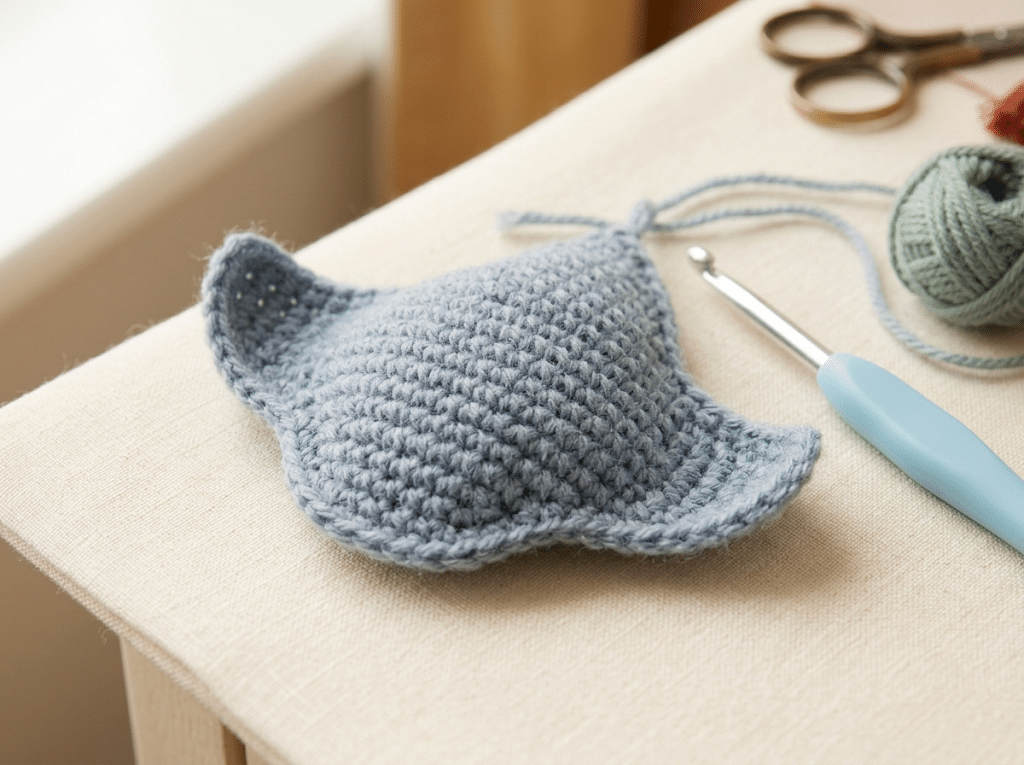
Here is where your little sea creature really starts to appear.
Instead of continuing with a simple round shape, gradually add increases toward the sides.
The goal is to create a broad, slightly triangular body.
Think of the shape as a soft diamond with rounded edges.
You do not need sharp corners. A kawaii stingray looks especially cute when the wings have gentle curves.
Keep checking your shape as you crochet. If one side looks larger than the other, count your stitches and adjust before continuing.
Step 4: Shape the front edge
The front of the stingray should have a smooth, slightly curved edge.
Work across the body using single crochet.
Reduce the number of increases as the body reaches its final width.
This gives you a flatter center without making the edges too floppy.
Keep the stitches neat around the outer edge. This area will remain visible on the finished plushie, so consistent tension makes a big difference.
At this point, place your project flat on your table.
You should see something resembling a tiny stingray.
That is always the exciting moment!
Step 5: Shape the body and add gentle decreases
Now begin using decreases to refine the body.
A decrease combines stitches and gradually brings the shape inward.
Work your decreases symmetrically so both sides remain balanced.
Do not pull your stitches too tightly. A stingray needs a soft, flexible shape rather than a stiff one.
If you want a slightly plumper plushie, leave enough space for stuffing later.
This part also gives you valuable practice with amigurumi shaping.
Once you understand how increases make a piece wider and decreases make it narrower, you can create many different animal shapes.
Step 6: Crochet the long tapered tail
The tail is one of the easiest parts of this design.
Attach your yarn near the back center of the body.
Crochet a narrow tube or tapered chain of stitches, depending on the look you prefer.
Keep the tail slightly thinner than the body.
For a playful kawaii stingray, a longer tail creates a cute silhouette. For a younger child’s plushie, you may prefer a shorter, thicker tail.
Continue until you reach your desired length.
Fasten off and weave the yarn securely into the body.
Step 7: Add the safety eyes
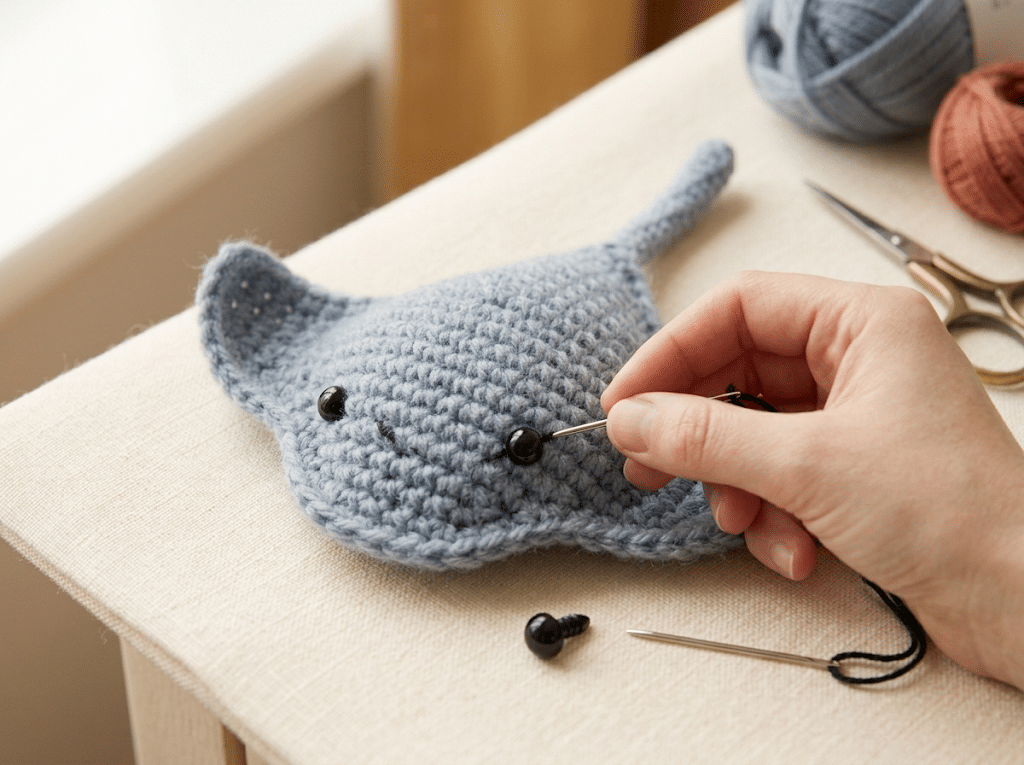
Now your stingray gets its personality!
Place the safety eyes toward the front of the body.
Try holding the eyes in position before permanently attaching them. Move them slightly closer together or farther apart until you like the expression.
For a very kawaii look, position the eyes a little lower than you might expect.
You can also embroider tiny highlights or a small smile using contrasting yarn.
If the finished stingray is intended for a young child, always consider age-appropriate construction and secure facial details carefully.
Step 8: Stuff your stingray evenly
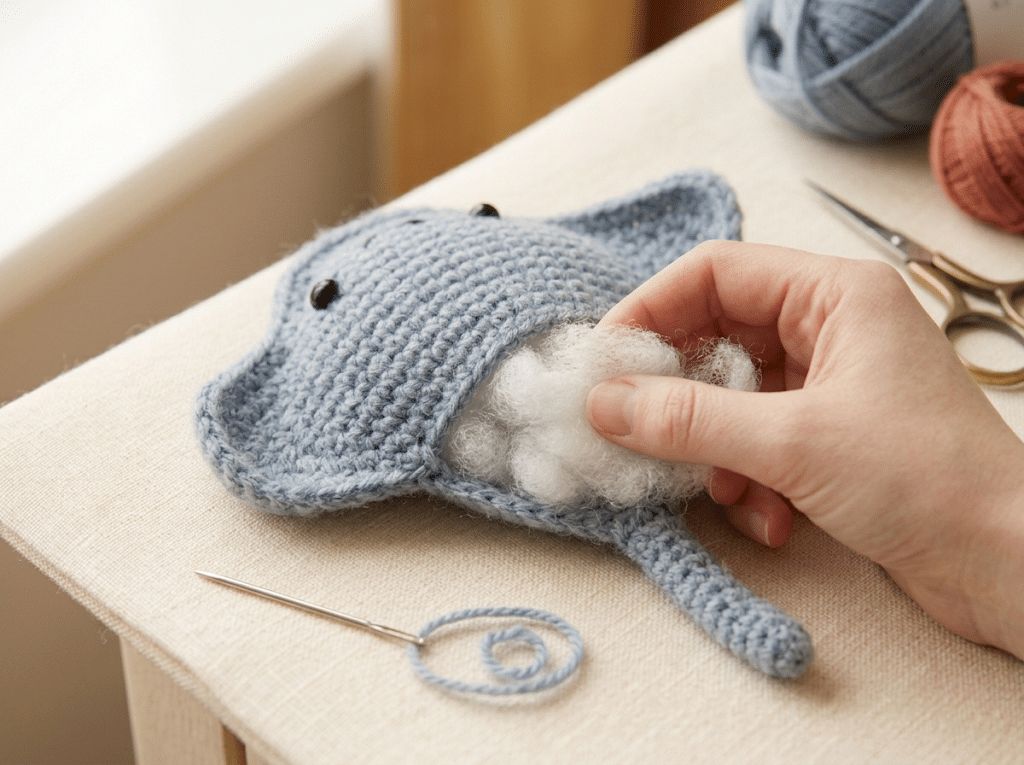
Now it is time to add the stuffing.
Use small amounts of Poly-fil Premium fiberfill rather than adding one large handful.
Place stuffing into the center first.
Then gently work it toward the wing areas and edges.
Avoid overstuffing. Too much filling can stretch the stitches and change the flat stingray shape.
The goal is a soft body that holds its shape without becoming hard.
Use your fingers to distribute the stuffing evenly.
If you notice a thin area, add a little more filling before closing the opening.
Step 9: Close and finish the body
Once you are happy with the stuffing, continue your final decreases.
Close the remaining opening carefully.
Use a yarn needle to weave the yarn tail through the final stitches.
Pull gently until the opening closes.
Do not yank the yarn too hard. Excessive tension can create a puckered finish.
Hide the remaining yarn inside the body.
Give the stingray a gentle squeeze from different directions.
This helps distribute the stuffing and creates a smoother shape.
Step 10: Add the finishing touches
Your stingray is almost finished!
Take a moment to inspect the wings, tail, eyes, and overall shape.
You can add small embroidered details if you want more personality.
A tiny smile creates an adorable expression. Small decorative stitches can also suggest gills or subtle markings.
For a more realistic ocean animal, use muted gray or blue shades.
For a kawaii plushie, try pastel pink, lavender, mint, cream, or peach.
And just like that, you have a handmade crochet stingray!
Easy Tips for Making Your Stingray Look Adorable
Once you know the basic construction, small finishing choices can completely change the personality of your plushie.
The most charming amigurumi usually comes from simple details rather than complicated techniques.
Choose the right yarn texture
Smooth yarn makes the stitches easier to see.
Chenille yarn creates an incredibly soft plushie, but it can hide stitches. If you are new to amigurumi, consider starting with smooth yarn first.
The Craft Yarn Council notes that yarn categories provide general guidance rather than guaranteeing that every yarn behaves identically.
That is why experimenting with your yarn and hook can help.
Keep your tension consistent
Consistent tension creates cleaner increases and decreases.
Try not to change your grip dramatically while crocheting.
If your stitches suddenly become loose, your finished shape may look uneven.
A stitch marker also helps you keep track of your rounds.
Place it into the first stitch of each round and move it as you continue.
Make the wings symmetrical
The wings give a stingray its recognizable shape.
Before finishing, lay the piece flat and check both sides.
If one wing appears wider, gently reshape the fabric with your fingers.
You can often correct small differences while sewing and stuffing.
Give your stingray a personality
This is where you can really make the project your own.
Try sleepy eyes for a calm sea creature.
Use larger eyes for an extra kawaii expression.
Add embroidered cheeks with pink yarn.
You could even make several stingrays with different expressions.
Trust me on this one: tiny facial details can turn a simple crochet animal into a character you adore.
Color Ideas for Your Crochet Stingray Pattern
One of the best things about this crochet stingray pattern is how easily you can customize it.
You do not need to copy a traditional stingray color.
Instead, choose shades that match your personality or your existing crochet collection.
Classic ocean-inspired colors
Gray is an obvious choice for a stingray.
Try combining medium gray with a lighter belly for a natural appearance.
Soft blue also works beautifully.
A slightly dusty blue gives the finished amigurumi a calm underwater feeling without looking too bright.
Cute pastel stingrays
If you love kawaii crochet, pastel colors are perfect.
Try:
- Soft lavender
- Blush pink
- Mint green
- Cream
- Peach
- Pale yellow
A pastel stingray can look especially sweet sitting beside other handmade ocean animals.
Make a mini ocean collection
Why stop at one?
You could create a whole collection of crochet sea creatures.
Pair your stingray with a whale, turtle, octopus, fish, or seahorse.
Use a similar color palette across the collection so everything looks coordinated.
This also makes a wonderful handmade gift set.
You can create different sizes and expressions while keeping the same overall theme.
Try a two-color design
A contrasting belly can make your stingray look more dimensional.
Use a darker shade on top and a lighter shade underneath.
You can also add a contrasting tail.
When changing colors, keep your joins neat so the transition looks intentional.
A color change can transform the same basic pattern into a completely different character.
Troubleshooting Common Amigurumi Problems
Even experienced crocheters sometimes end up with a shape that looks a little wonky.
That does not mean you failed.
Crochet is flexible, and many small problems have simple solutions.
Why does my stingray have holes?
Large gaps usually happen because your stitches are too loose.
Try using a smaller crochet hook.
You can also adjust your tension slightly.
Remember that stuffed amigurumi stretches, so a fabric that looks fine before stuffing can show gaps afterward.
Why does my body look uneven?
Check your stitch counts first.
Missing one increase can change the entire shape.
That is why stitch markers are so useful.
If you notice an uneven section early, unravel a few rounds and correct it.
It is much easier to fix the shape before you finish.
Why does my stingray look too round?
A stingray needs a wider body than a typical ball-shaped amigurumi.
If your project looks too circular, you may need more shaping toward the sides.
Focus on the wing area.
Gentle increases can create a broader silhouette.
Avoid adding too many increases in one round because that can create ruffles.
Why can I see the stuffing?
First, check your hook size and tension.
If the fabric feels too loose, use a smaller hook.
Also avoid stuffing the body too aggressively.
Press the filling gently into place rather than forcing more and more into the center.
Why does the tail point strangely?
The tail can shift slightly during sewing.
Before securing it permanently, position the stingray flat.
Make sure the tail sits directly behind the center.
Pin or hold it in place while checking the shape from above.
Small adjustments can make the finished animal look much more balanced.
How to Use Your Finished Crochet Stingray
Your finished stingray can become much more than another project sitting in your craft basket.
A handmade ocean animal has plenty of possibilities.
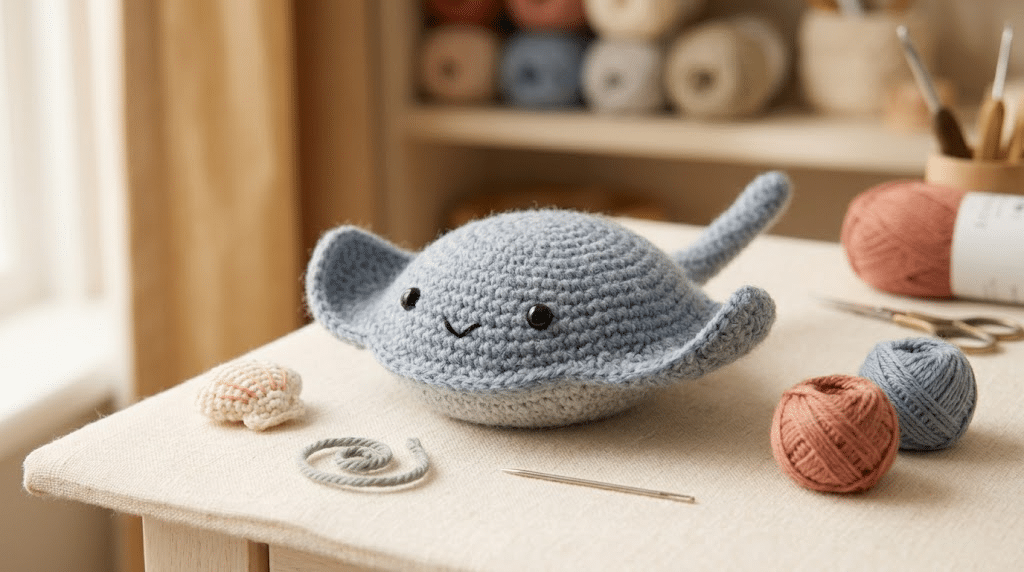
Make a thoughtful handmade gift
Give your stingray to someone who loves marine life.
It can become a sweet birthday present or part of a handmade ocean-themed gift basket.
You can also make several small stingrays in coordinating colors and package them together.
Create an ocean-themed nursery
A stingray looks adorable alongside other crochet sea creatures.
Place several handmade animals on a shelf or use them as decorative pieces.
Always keep plush decorations and small detachable parts safely away from babies and young children.
Add it to your amigurumi collection
If you collect handmade animals, this project adds an unusual shape to your display.
The wide wings make the stingray instantly recognizable.
You can create different versions over time and experiment with colors, sizes, and facial expressions.
Make craft-fair inventory
If you sell your own handmade work, small ocean animals can make lovely additions to your collection.
Consider making several color variations.
A few different expressions can also encourage shoppers to choose their favorite character.
If you plan to sell finished items made from a particular designer’s pattern, always check that designer’s stated selling policy.
Frequently Asked Questions About Crochet Stingray Pattern
How long does it take to crochet a stingray?
A small stingray can take a few hours depending on your experience, yarn thickness, and finishing details. Beginners may need extra time while learning increases, decreases, stuffing, and sewing. Once you become comfortable with amigurumi shaping, you can usually work much faster.
What yarn is best for stingray amigurumi?
Smooth DK or worsted-weight yarn works well because it makes your stitches easy to see. Soft chenille yarn can create a plush finish, but beginners may find it harder to see individual stitches. Choose a yarn that creates firm fabric with your selected hook.
Is this stingray pattern good for beginners?
Yes. This project uses basic amigurumi techniques such as single crochet, increases, decreases, stuffing, and simple sewing. If you can crochet a basic amigurumi ball, you already know many of the skills needed. Work slowly and use stitch markers to make the shaping easier to follow.
What size safety eyes should I use for a stingray?
For a medium-sized kawaii stingray, 9mm safety eyes create a cute balanced expression. Smaller 6mm eyes can work for a tiny version, while 12mm eyes can create a more exaggerated kawaii look. Always check the proportions of your finished body before attaching the eyes.
Can I sell stingrays I make from this pattern?
You can generally sell finished handmade items when the pattern designer allows it, but you should always check the specific pattern’s terms before selling. Do not sell, copy, redistribute, or claim the written pattern itself as your own. Selling finished pieces and selling pattern instructions are different matters.
How do I make a crochet stingray softer?
Choose a soft yarn and avoid overstuffing the body. Chenille-style yarn can create a plush texture, while smooth yarn gives you clearer stitch definition. Gentle stuffing also helps maintain a soft, flexible shape. Your hook size and tension affect the final fabric, so test your stitches before making the full project.
Final Thoughts on This Crochet Stingray Pattern
Making a tiny ocean creature from a simple strand of yarn feels surprisingly magical.
With this crochet stingray pattern, you can practice essential amigurumi skills while creating something unique, cuddly, and full of personality. The wide wings, sweet eyes, and playful tail make this project especially fun for ocean lovers and kawaii crochet fans.
Do not worry if your first stingray is not perfectly symmetrical. Every handmade stitch carries a little piece of your creativity, and that makes your finished plushie special.
Once you finish one, you may find yourself planning a whole underwater collection. Imagine a tiny stingray swimming beside your handmade whale, turtle, and octopus!
Save this pin to your crochet board on Pinterest so you can find this pattern anytime!
Looking for more free crochet animal patterns? Visit Yarned Animals for new amigurumi patterns, kawaii plushies and beginner crochet tutorials added every week at yarnedanimals.com