
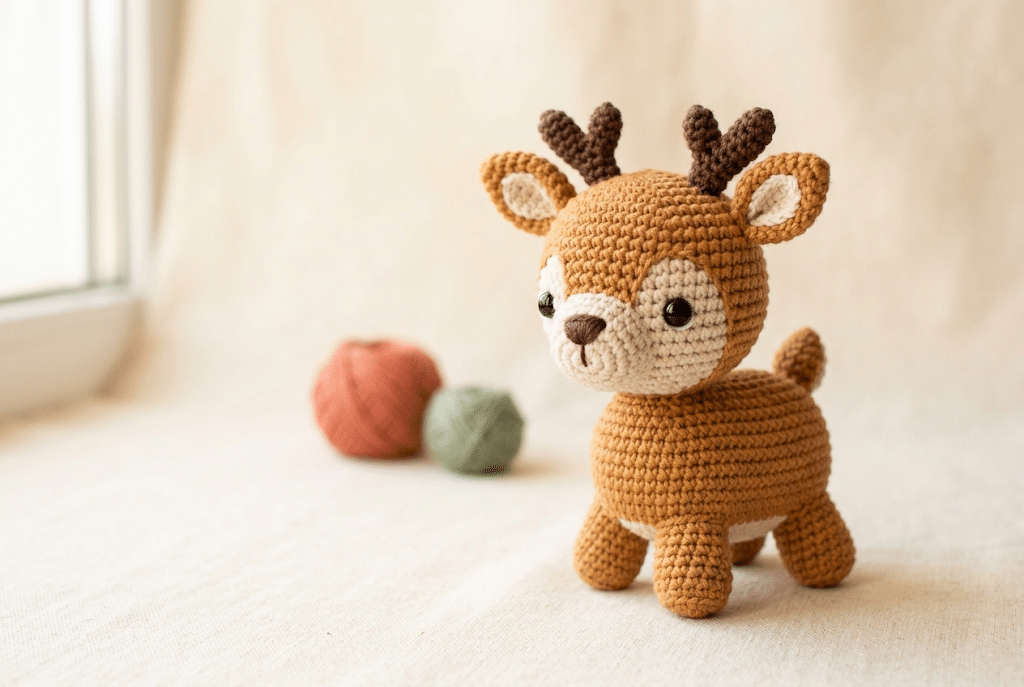
There is something magical about a tiny handmade deer sitting quietly on a shelf, especially when you made every little stitch yourself. A crochet deer pattern free project gives you that cozy woodland feeling without requiring a complicated crochet routine.
This adorable amigurumi deer makes a sweet handmade gift, nursery decoration, Christmas companion, or cute addition to your crochet collection. You can keep the colors natural with warm browns and cream, or add your own playful touches with pastel yarn and a tiny scarf.
This beginner-friendly guide walks you through the process from choosing your yarn to adding the final antlers and facial details. You will also discover simple ways to make your deer softer, cuter, and more polished.
So grab your hook, settle into your favorite crochet spot, and let’s bring this little woodland friend to life.
Table of Contents
Why This Crochet Deer Pattern Free Project Is So Adorable
A crochet deer has a special charm because its design combines several classic amigurumi details. You get a rounded body, sweet little legs, floppy ears, a tiny muzzle, and those unmistakable antlers.
The best part is that you can personalize almost every detail. A soft brown deer feels rustic and woodland-inspired, while cream, blush, or caramel colors create a more kawaii look.
Many amigurumi deer patterns use simple construction techniques and basic crochet stitches. Some designs work the body and head together, while others create separate pieces that you sew together afterward.
What Makes a Crochet Deer Beginner-Friendly?
You do not need advanced crochet skills to create an adorable deer.
You will mainly work with single crochet, increases, decreases, magic rings, color changes, and simple sewing. These techniques appear frequently in amigurumi projects, so this makes a deer a useful project for practicing your skills.
If your magic ring feels awkward at first, take your time. The first few rounds often feel slower than the rest of the project.
Tip: Keep your stitches tight and even. A firm fabric helps prevent stuffing from showing through your finished toy.
Choose a Cute Woodland Color Palette
Traditional deer colors work beautifully for this project.
Try warm brown for the body, cream for the muzzle and belly, and dark brown for the hooves and antlers. You can also add white spots to create a sweet fawn-inspired look.
For a softer kawaii deer, try caramel, beige, cream, and blush pink.
If you want a plush finish, Bernat Blanket yarn creates an especially soft texture that makes small animals feel wonderfully squishy.
Decide on Your Deer’s Personality
Before you start crocheting, imagine your finished deer.
Will it look sleepy and gentle? Cheerful and playful? Rustic and woodland-inspired?
Small details change the personality dramatically.
A slightly lower eye placement can make your deer look sleepy and sweet. Wider eyes create a more playful kawaii expression.
You can also add a tiny scarf, bow, flower, or sweater once your deer is finished.
Crochet Deer Pattern Free Materials and Preparation
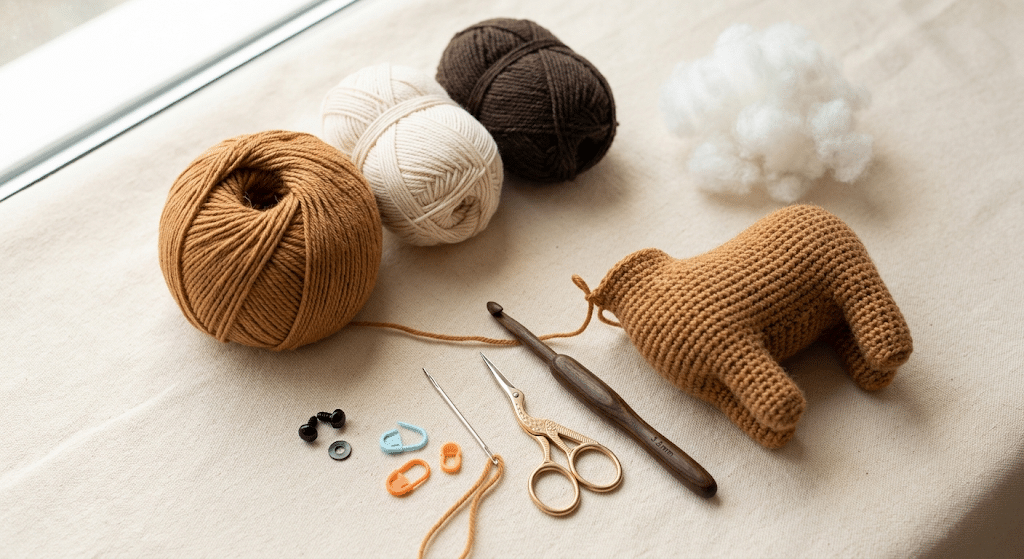
Now that you know what makes this little woodland animal so special, it is time to prepare your supplies.
You do not need a huge collection of crochet tools. A small, organized workspace makes the process much easier.
Choose yarn that feels comfortable in your hands. For traditional amigurumi, a smooth yarn makes stitch definition easier to see.
For a fluffy deer, chenille-style yarn creates a cuddly result, although it can make individual stitches harder to see.
Pick the Right Yarn
Your yarn choice affects the size, texture, and personality of your deer.
Paintbox Simply DK yarn works nicely when you want clear stitches and a classic handmade appearance. You can combine brown, cream, and dark brown shades for a natural woodland palette.
A cotton-blend option can also create a neat, structured toy.
Remember that your finished size depends on your yarn weight, hook size, tension, and construction choices.
Choose a Comfortable Crochet Hook
Your hook should create a tight enough fabric for amigurumi.
A Clover Amour crochet hook is one option I like for comfortable crochet sessions because the soft handle makes repetitive stitching easier to manage.
The exact hook size depends on your yarn.
For amigurumi, crocheters commonly use a smaller hook than they would for a loose scarf using the same yarn. That tighter fabric helps keep the stuffing contained.
Prepare the Small Details
Set aside your stuffing, yarn needle, stitch markers, scissors, and safety eyes before you begin.
You can use Poly-fil Premium fiberfill to create a firm but cuddly body.
Safety eyes add a polished finish, but embroidered eyes can work beautifully too. Embroidered features may also suit baby-focused projects better.
Keep all small components away from young children unless the finished toy meets appropriate toy-safety requirements.
How to Crochet a Deer in 10 Easy Steps
Here is the fun part.
This construction follows the general logic of a beginner-friendly amigurumi deer without copying another designer’s published pattern. You can use your preferred stitch counts and adapt the proportions as you go.
Take your time with every section. Amigurumi becomes much easier once you understand how each rounded piece is shaped.
Step 1: Crochet the Head
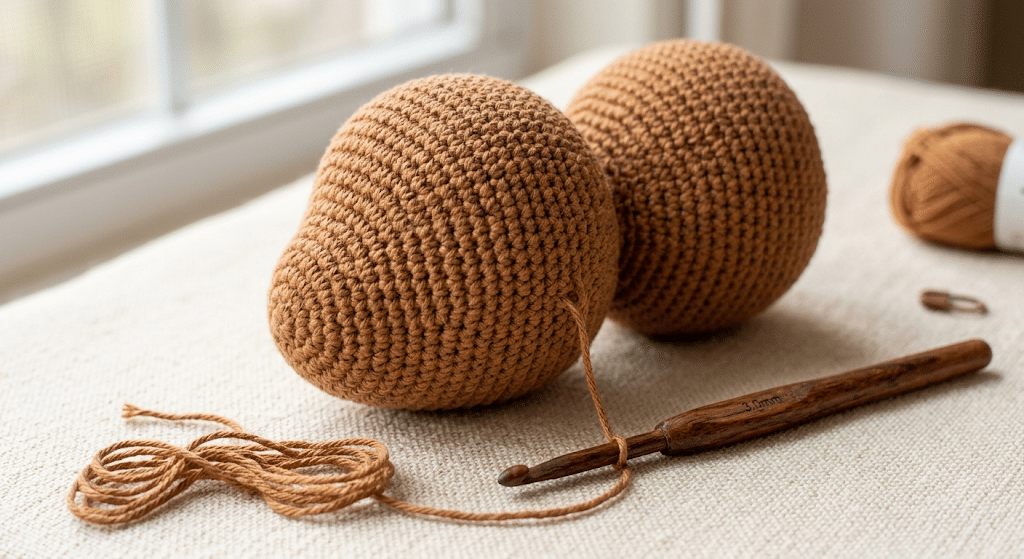
Start with the deer’s head using your main body color.
Work in continuous rounds if that feels comfortable for you. Begin with a magic ring and gradually increase your stitches until you create a rounded shape.
Keep your tension consistent.
As the head grows, check its shape regularly. You want a gently rounded head rather than a completely flat or elongated shape.
Place your stitch marker at the beginning of each round if you tend to lose track.
Beginner tip: Count your stitches after every increase round. Fixing a missed increase early feels much easier than finding it several rounds later.
Step 2: Shape the Muzzle
The muzzle gives your deer its sweet expression.
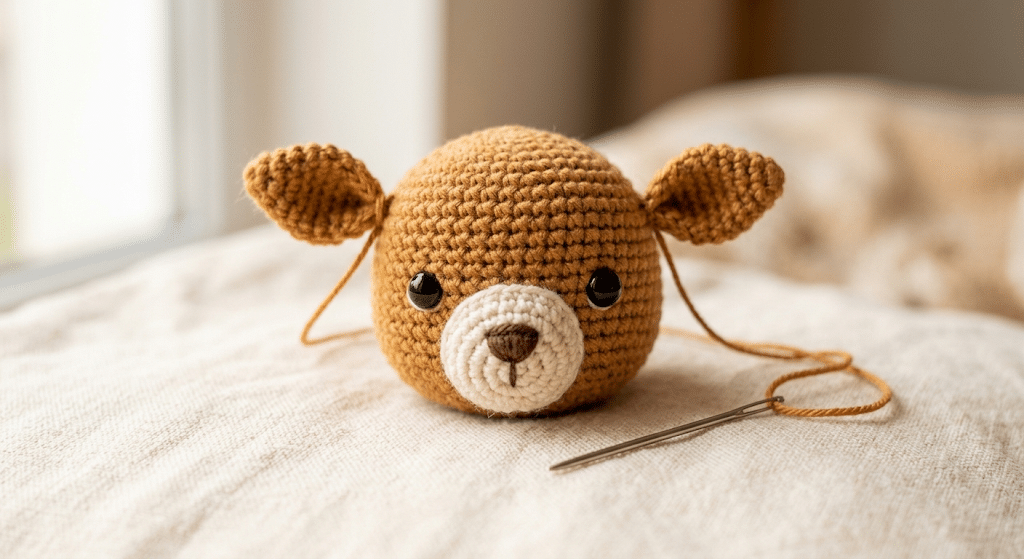
Use cream or a lighter shade for contrast. Crochet a small rounded muzzle that sits comfortably on the lower front of the head.
Once attached, gently shape it with your fingers.
Add a tiny dark nose using embroidery or a small crocheted piece. Keep the nose centered so your deer has a balanced face.
A few simple stitches underneath the nose can create a tiny mouth.
Step 3: Add the Safety Eyes
Place the eyes before completely closing the head.
This gives you room to reach inside and secure them properly.
For a classic amigurumi deer, medium-sized safety eyes create a cute expression. Some existing deer patterns use sizes around 8–12 mm, while larger designs may use bigger eyes.
Try holding the eyes against the face before attaching them permanently.
Important: Move them slightly closer together for a sweet expression or slightly farther apart for a more playful look.
Step 4: Crochet the Ears
Deer ears should feel soft and slightly pointed.
Create two matching ear pieces using your main color. Add a lighter inner section if you want extra detail.
Fold each ear gently before sewing it onto the head.
Do not attach them too high.
Place them slightly toward the sides and upper portion of the head. Then step back and look at your deer from the front.
The ears can instantly change the character of the toy.
Step 5: Build the Body
Next, create the rounded body.
Start from the lower section and gradually increase until you reach the widest point. Then crochet several even rounds before beginning your decreases.
This creates the classic plump amigurumi shape.
Add stuffing gradually as you work.
Do not wait until the final opening to stuff the body. Adding small amounts throughout the shaping process gives you better control over the firmness and prevents empty areas.
Step 6: Make the Four Little Legs
The legs can look complicated, but they use the same basic shaping ideas as the body.
Create four small cylindrical or slightly tapered pieces.
Use dark brown yarn near the bottom if you want cute little hooves. A cream or contrasting color can also create a sock-like appearance.
Keep the stuffing light in the legs.
Overstuffed legs can become stiff and difficult to sew neatly onto the body.
Once all four legs match, arrange them underneath the body before attaching them.
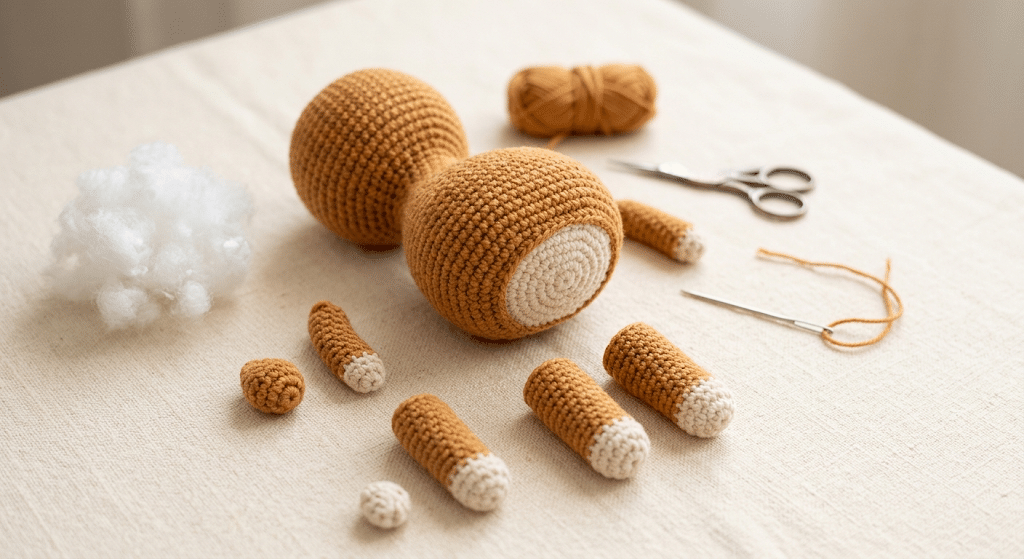
Step 7: Crochet the Arms and Tail
Small arms add extra personality to your deer.
Create two matching arms and stuff them lightly.
The tail can stay very simple. A small rounded tail works beautifully, especially if you add a cream or white tip.
If you want a fawn-inspired design, add a few white spots across the back after assembly.
Surface embroidery gives you plenty of freedom because you can place the spots exactly where you want them.
Step 8: Create the Antlers
The antlers are the detail that instantly makes your amigurumi look like a deer.
Use dark brown yarn for a natural appearance.
Keep your first antlers simple. Small branching shapes look adorable on a beginner-friendly deer.
You can make them symmetrical or slightly different for a handmade character.
Avoid making the antlers excessively large. Small antlers often balance better with a rounded kawaii head.
If you prefer a doe rather than a buck, simply leave the antlers off.
Step 9: Assemble Your Amigurumi Deer
Now it is time to bring everything together.
Lay all your pieces beside the body before sewing anything permanently.
Check the placement from the front, side, and back.
Use pins to temporarily hold the legs, arms, ears, and tail in place.
This small preparation step makes a huge difference.
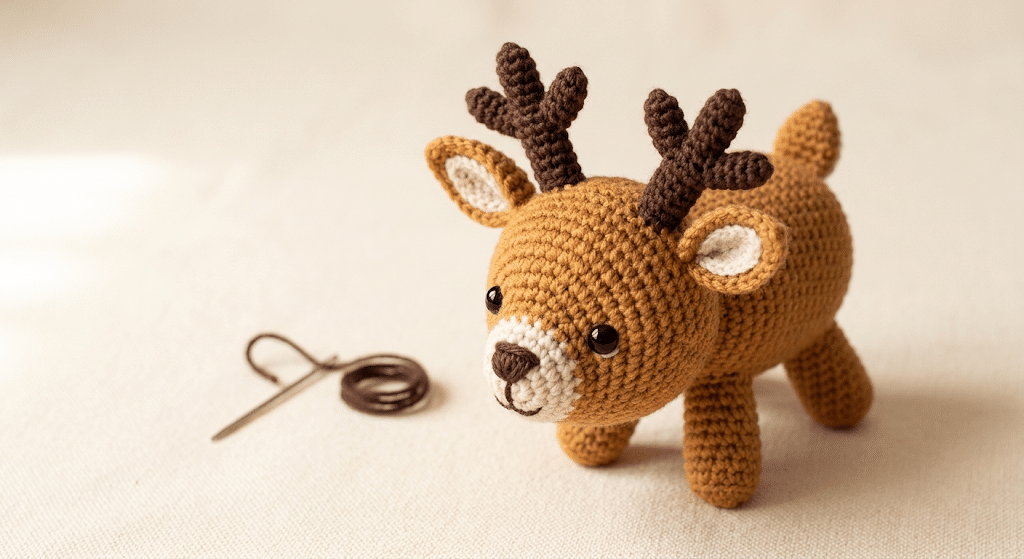
Step 10: Add the Final Details
Your deer is almost finished.
Use your yarn needle to secure every sewn piece firmly. Hide the yarn tails inside the body whenever possible.
Then inspect the face.
Does the nose sit in the center? Are the eyes level? Do the ears have similar angles?
Tiny adjustments can transform a cute deer into an adorable handmade keepsake.
Add embroidered eyelashes, tiny blush cheeks, white spots, or a miniature accessory if you want more personality.
Easy Ways to Make Your Amigurumi Deer Extra Cute
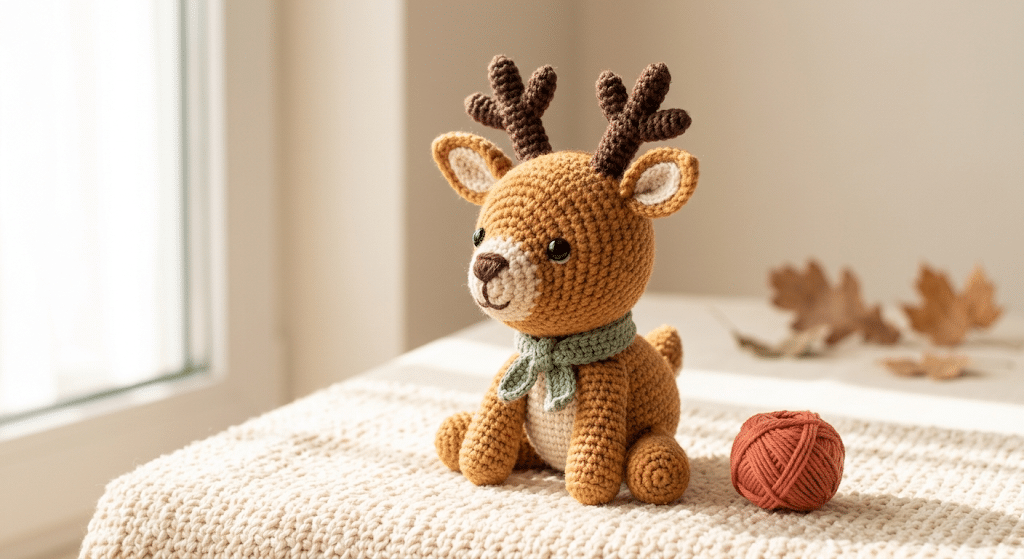
Your basic deer already has plenty of charm, but small creative details can make it feel completely unique.
This is where you can stop following a traditional woodland palette and let your imagination take over.
Try a Kawaii Face
Kawaii amigurumi usually relies on simple facial features.
Large eyes, a tiny nose, soft cheeks, and a small mouth create a gentle expression.
Do not add too many details.
A simple face often looks cuter than an overly decorated one.
Add White Fawn Spots
White spots instantly give your deer a fawn-inspired appearance.
You can embroider small dots across the back and sides.
Keep the spacing irregular.
Natural-looking spots do not need perfect symmetry, and handmade imperfections can make your deer feel even more charming.
Add a Tiny Scarf
A miniature scarf makes your deer perfect for autumn and winter displays.
Choose cream, rust, sage, or dusty pink.
You can also make several scarves and switch them depending on the season.
For Christmas, add a tiny red scarf.
For spring, choose a soft pastel shade.
Common Crochet Deer Mistakes and Simple Fixes
Before you get frustrated, remember that almost every crocheter makes mistakes.
Amigurumi often looks strange while you are still assembling it. The separate pieces may seem too small, too large, or oddly shaped.
Trust the process.
Your Stuffing Shows Through
If you can see stuffing between your stitches, your fabric may be too loose.
Try using a smaller hook or tightening your tension slightly.
Do not pull your stitches so tightly that your hands become uncomfortable.
You want a firm fabric that still allows your hook to move smoothly.
Your Deer Looks Lopsided
Uneven sewing often causes this problem.
Before attaching the pieces permanently, use pins to test their positions.
Look at your deer from multiple angles.
A leg that looks perfectly placed from the front might look crooked from the side.
The Face Looks Different From Your Inspiration
That is completely normal.
Small changes in eye spacing, muzzle placement, and ear position create different expressions.
Instead of trying to make every deer identical, use the differences to create your own character.
Your handmade deer does not need to look factory-perfect.
That handmade personality is part of its charm.
How to Customize Your Crochet Deer Pattern Free Project
Once you understand the basic construction, you can create an entire little deer family.
This is one of my favorite things about amigurumi.
One basic design can become dozens of different characters simply by changing colors, accessories, and proportions.
Make a Tiny Fawn
Use lighter brown yarn and add cream spots.
Keep the body compact and the facial features soft.
A tiny fawn works beautifully as a shelf decoration or handmade gift.
Make a Christmas Reindeer
Switch the palette to warm brown, cream, and red.
Add a miniature scarf or festive collar.
You can even add tiny embroidered snowflakes to the body.
Avoid attaching loose decorations if you plan to give the toy to a young child.
Make a Woodland Nursery Deer
Choose muted shades such as beige, oatmeal, warm gray, cream, and sage.
Keep the expression simple.
A soft, neutral deer can complement woodland nursery décor without overwhelming the room.
Helpful Amigurumi Tips for Better Results
Ready to move on?
A few small habits can make your crochet deer much easier to construct.
Use a Stitch Marker
A stitch marker helps you identify the beginning of each round.
This matters especially when working in continuous rounds.
Move the marker upward as your project grows.
Stuff Gradually
Add stuffing little by little.
Use the end of your crochet hook or a stuffing tool to gently reach small areas.
Avoid packing the stuffing too tightly.
A soft but firm texture usually creates the cutest finished deer.
Sew With Patience
Assembly often takes longer than crocheting the individual pieces.
Do not rush this stage.
Pin everything first, check the symmetry, and then sew.
This simple approach gives your deer a much more polished finish.
Where to Find More Crochet Deer Inspiration
Before creating your own deer, it can help to look at different construction styles.
For example, Grace and Yarn has a free deer design that uses a traditional amigurumi approach with a body, head, legs, safety eyes, stuffing, and basic crochet techniques.
You can also find deer designs ranging from tiny fawns to larger stuffed animals. Some patterns use separate body parts, while others combine the head and body into one piece.
These examples can help you understand how different proportions affect the finished animal.
Just remember to follow the individual designer’s copyright and selling instructions when using another person’s pattern.
Frequently Asked Questions About Crochet Deer Pattern Free
How long does it take to crochet a deer?
A small amigurumi deer can take several hours, depending on your crochet speed and experience. Beginners may need extra time for shaping and sewing. A larger deer can take considerably longer. Plan extra time for assembly because attaching the ears, legs, arms, tail, and antlers requires careful positioning.
What yarn is best for a crochet deer?
Smooth DK or worsted-weight yarn works well for a classic amigurumi deer because you can clearly see your stitches. Chenille or blanket yarn creates a softer plush effect. Your yarn choice also affects the finished size, so check your tension before committing to the entire project.
Is a crochet deer pattern free good for beginners?
Yes, a simple deer can make a lovely beginner amigurumi project. You will practice useful techniques such as single crochet, increases, decreases, stuffing, and sewing. Start with a simple design if you are new to amigurumi, then add details like spots and antlers once you feel comfortable.
What size safety eyes should I use for deer amigurumi?
The best size depends on your deer’s finished dimensions. Small deer often suit 6–9 mm eyes, while medium designs may look better with 9–12 mm eyes. Always test the placement before securing the eyes. For young children, consider embroidered facial features instead of detachable safety components.
Can I sell a deer made from this tutorial?
You can generally sell your own finished handmade item when you create it from an original tutorial, but you should not copy, redistribute, or claim another designer’s written pattern as your own. If you use someone else’s pattern, check that designer’s specific selling and credit requirements before listing finished items.
How do I make my crochet deer look more realistic?
Use natural colors, smaller eyes, subtle color changes, and carefully shaped ears and antlers. Adding small cream spots can create a fawn appearance. However, for kawaii amigurumi, exaggerated eyes, rounded proportions, and tiny facial details usually create a sweeter result.
Final Thoughts on Your Crochet Deer Pattern Free Project
There is something incredibly satisfying about watching a few simple stitches turn into a tiny woodland friend.
With this crochet deer pattern free guide, you have learned how to plan your colors, shape the head and body, create the legs and ears, add antlers, and finish your deer with personality.
Most importantly, you do not need perfect stitches to make something beautiful.
Your first deer may have slightly uneven ears or a wonderfully silly expression. That is part of handmade crochet, and those little details can make your creation feel truly yours.
Imagine gifting your finished deer to someone you love, placing it in a cozy nursery, or adding it to your growing amigurumi collection. That little handmade animal carries something special that a store-bought toy simply cannot.
So pick up your hook, enjoy each round, and let your creativity lead the way.
Save this pin to your crochet board on Pinterest so you can find this pattern anytime!
Looking for more free crochet animal patterns? Visit Yarned Animals for new amigurumi patterns, kawaii plushies and beginner crochet tutorials added every week at yarnedanimals.com