
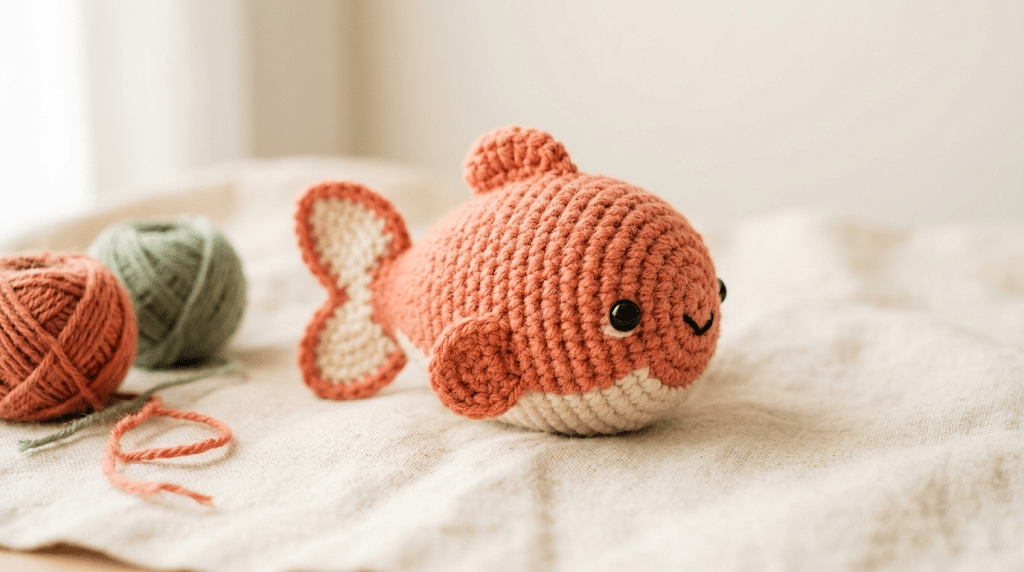
There is something extra cute about a tiny crochet fish with a round body, sweet little eyes, and colorful fins. It feels like bringing a little piece of an underwater world right into your craft room. A crochet fish pattern free project is also a lovely choice when you want something quick, playful, and beginner-friendly.
This adorable amigurumi fish works beautifully as a handmade gift, nursery decoration, desk buddy, or cute addition to an ocean-themed collection. You can make yours in bright tropical colors or keep it soft and simple with just two shades of yarn.
This guide walks you through the entire project in 10 easy steps, from choosing your yarn to shaping the body, adding fins, stuffing your fish, and giving it that final kawaii expression. Grab your hook, choose your favorite colors, and let’s dive in!
Table of Contents
Why This Crochet Fish Pattern Free Project Is So Much Fun
A tiny fish makes a wonderful first ocean-themed amigurumi because the basic shape stays simple. You are mainly creating a rounded body and then adding a few small pieces that bring the character to life.
The project also gives you plenty of room to experiment. You can make a cheerful orange fish, a pastel aquarium fish, a bright tropical fish, or even a tiny rainbow version.
The best part is that you do not need complicated shaping to create a charming result. Simple increases and decreases can transform a basic crocheted tube into a plump little fish.
A beginner-friendly amigurumi project
If you are new to amigurumi, this project gives you useful practice without becoming overwhelming. You will work with familiar stitches and learn how small changes in shape create a three-dimensional toy.
Most of the body can be worked in continuous rounds. That means you can focus on keeping your tension even rather than worrying about complicated row changes.
If crochet abbreviations make patterns feel confusing, keep a small reference nearby. The Craft Yarn Council provides a useful guide to common crochet abbreviations and terms.
Why the shape works so well
Fish have naturally simple silhouettes. A rounded body, pointed tail, small fins, and eyes are enough to make the animal instantly recognizable.
That makes this pattern especially forgiving. Even if your stitches are not perfectly identical, your finished fish can still look adorable.
Do not chase perfection on your first attempt. Handmade charm comes from those tiny differences.
A perfect project for gifts
A handmade fish can make a sweet birthday gift for a child who loves ocean animals. It can also become a cute baby-shower decoration or a fun little stocking stuffer.
You could even create several fish in different colors and turn them into a small underwater collection.
Before you start, I recommend keeping your stuffing nearby. Poly-fil Premium fiberfill gives small amigurumi projects a soft, lightweight shape without making them feel overly heavy.
Crochet Fish Pattern Free Materials and Color Ideas
Now that you know why this little project is so beginner-friendly, let’s talk about the materials and colors that will make your fish shine.
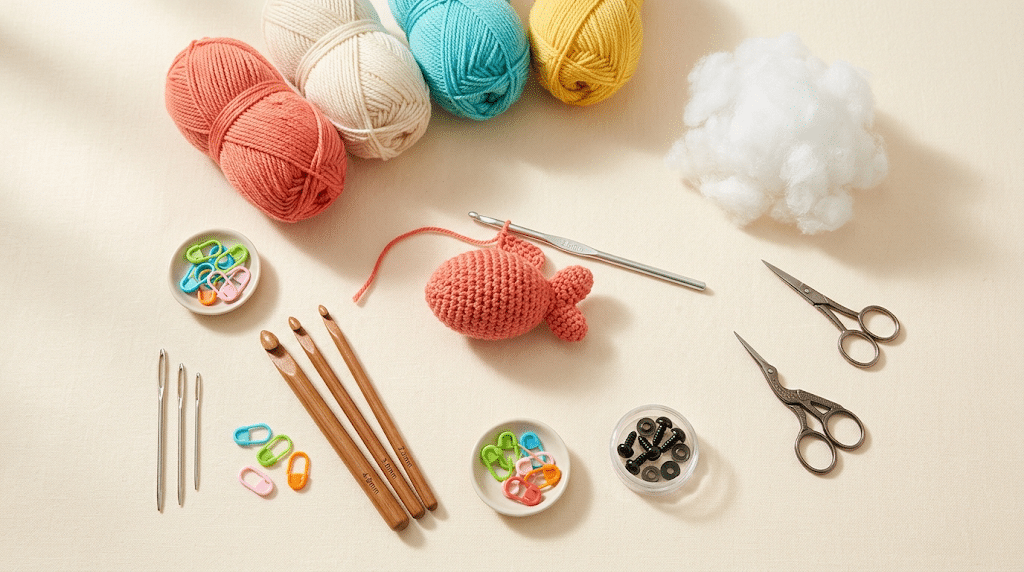
You do not need a huge supply collection. A small amount of yarn, one crochet hook, stuffing, safety eyes, and a yarn needle can take you a long way.
Choosing your crochet yarn
For a classic amigurumi fish, choose yarn that creates a firm, neat fabric. Your stitches should sit close together so the stuffing does not show through.
Paintbox Simply DK yarn works beautifully when you want a lightweight fish with crisp stitch definition. You can also choose Bernat Blanket yarn if you want a larger, extra-soft and cuddly version.
Color is where this project becomes especially fun.
Try combinations such as:
- Coral and cream
- Turquoise and white
- Yellow and orange
- Lavender and pink
- Blue and mint
- Red and cream
- Peach and sage
- Rainbow colors
You can also make the body one solid color and use a contrasting shade for the fins and tail.
Choosing the right crochet hook
Your hook size should match your yarn and your tension. For amigurumi, you generally want your stitches to feel snug rather than loose.
A Clover Amour crochet hook is one of my favorite choices for comfortable crochet sessions because the grip feels lovely in your hand.
If your stitches look very open, try a slightly smaller hook. Tight stitches help create a cleaner stuffed shape.
Safety eyes and finishing supplies
For a medium-sized fish, 9mm safety eyes can create a cute balanced expression. Smaller fish may look better with 6mm eyes, while larger designs can handle 12mm eyes.
You will also want a yarn needle for sewing the fins and tail securely.
Keep your stitch markers close while working in continuous rounds. They make it much easier to see where each round begins.
Helpful resources before you begin
If you are still learning crochet terminology, the Craft Yarn Council also explains how to read common crochet patterns and abbreviations.
These resources can make your first amigurumi experience much less intimidating.
How to Crochet the Fish Body in 10 Easy Steps
Here is the fun part! Your fish starts with a simple rounded shape that gradually becomes recognizable as you work.
The instructions below focus on the construction process rather than overwhelming you with a wall of stitch counts. That makes it easier to understand what each section is doing.
Step 1: Start with the foundation
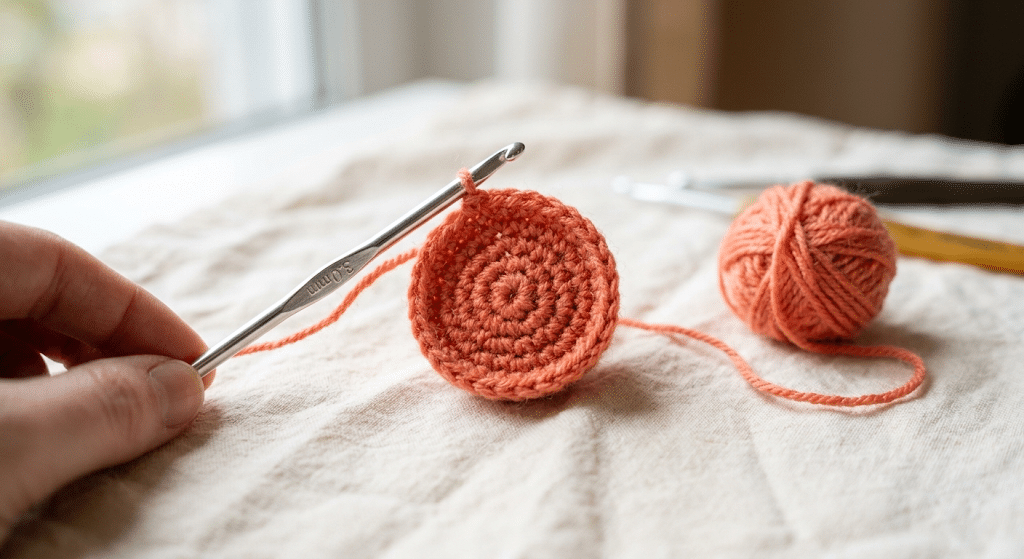
Begin with a magic ring or another small adjustable starting loop.
Work your first stitches into the ring and keep the center snug. This creates the closed beginning needed for the rounded body.
If the magic ring feels tricky, do not worry. It often takes several attempts before your fingers remember the movement.
Tip: Leave enough yarn tail to secure your starting point neatly later.
Step 2: Build the rounded body
Continue crocheting around the beginning section while gradually increasing your stitches.
The increases allow the fabric to spread outward. Think of them as tiny building blocks that transform your small starting circle into a rounded body.
Keep your tension consistent as you work.
You should notice the shape becoming wider and fuller after several rounds.
Step 3: Keep the middle nice and plump
Once the body reaches its widest point, work several rounds without adding many increases.
This creates the fuller middle of your fish.
This section gives the amigurumi its cute, chubby appearance. If you want a rounder fish, spend a little more time shaping the middle.
For a slimmer fish, move toward the decreases sooner.
Step 4: Begin shaping the head and tail area
Next, gradually decrease the stitches to bring the body inward.
Work slowly during this section because decreases change the overall silhouette.
Your fish should begin looking less like a simple ball and more like an elongated underwater animal.
Check your shape before continuing. If the body looks too short, add another round before decreasing further.
Step 5: Add the stuffing gradually
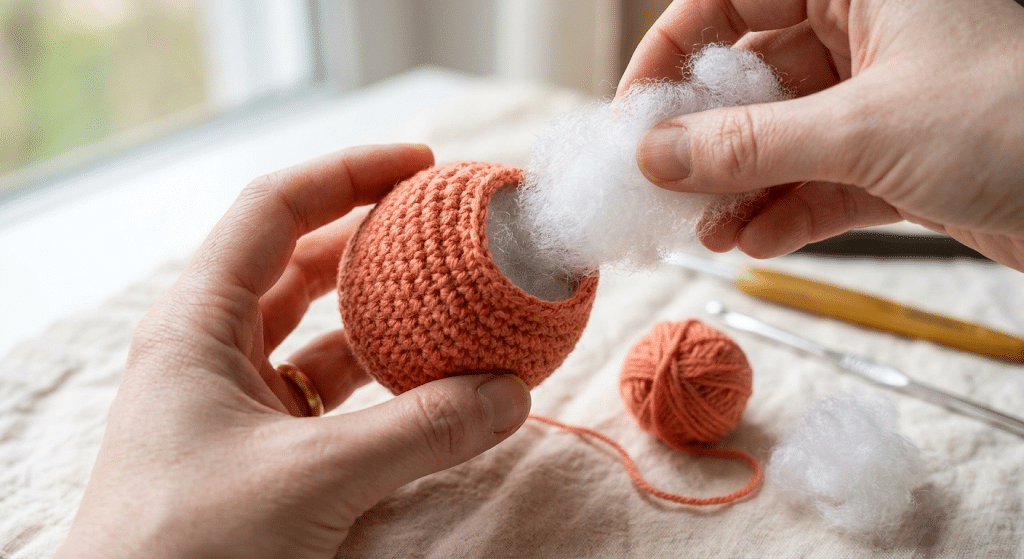
Begin adding fiberfill while the opening remains large enough to reach inside.
Add small amounts at a time instead of pushing in one giant handful.
Gently distribute the stuffing around the inside of the body. You want a firm shape, but you do not want the stitches stretched so tightly that the filling becomes visible.
A lightly stuffed fish can look floppy, while an overly stuffed fish can lose its soft handmade appearance.
Step 6: Finish the body
Continue decreasing until only a small opening remains.
Add the final stuffing adjustments before closing the opening completely.
Use your yarn needle to weave through the remaining stitches and pull them gently together.
Secure the yarn firmly and hide the remaining end inside the body.
At this stage, you should have a cute little fish shape ready for its personality pieces.
Step 7: Crochet the tail
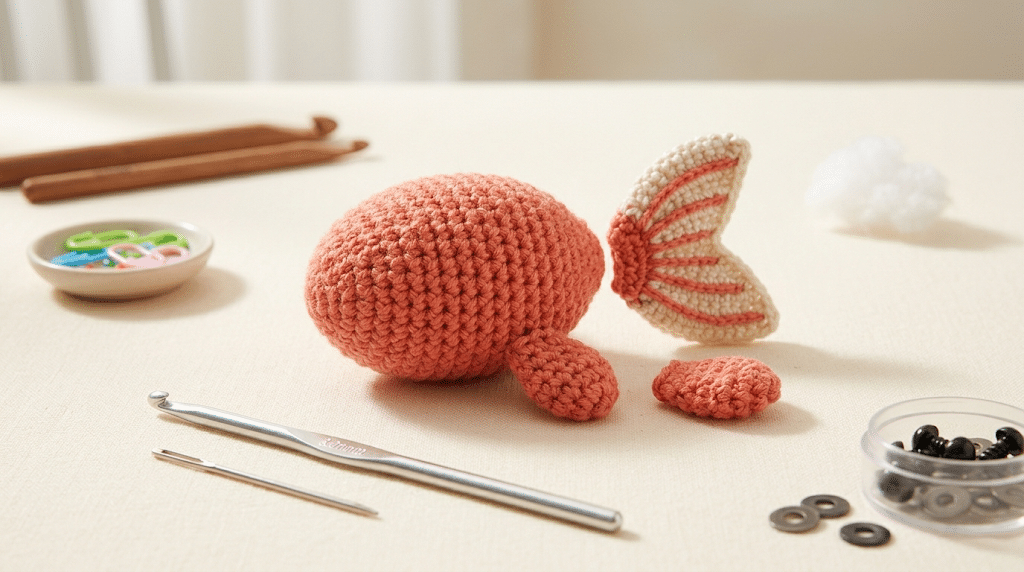
The tail gives your fish its unmistakable silhouette.
Create two small tail sections that fan outward from the narrow end of the body. You can make the tail rounded, pointed, or slightly heart-shaped.
For a kawaii look, keep the tail slightly oversized compared with the body.
That exaggeration makes the finished fish look more playful.
Step 8: Add the fins
Now create the side fins.
Small triangular or rounded fins work beautifully. You can use the same color as the body or choose a contrasting shade.
Sew each fin securely against the sides of the fish.
Take a moment to check their placement from the front and side.
Symmetry helps, but your fins do not need to match perfectly. Handmade details often make amigurumi feel more charming.
Step 9: Add the eyes and facial details
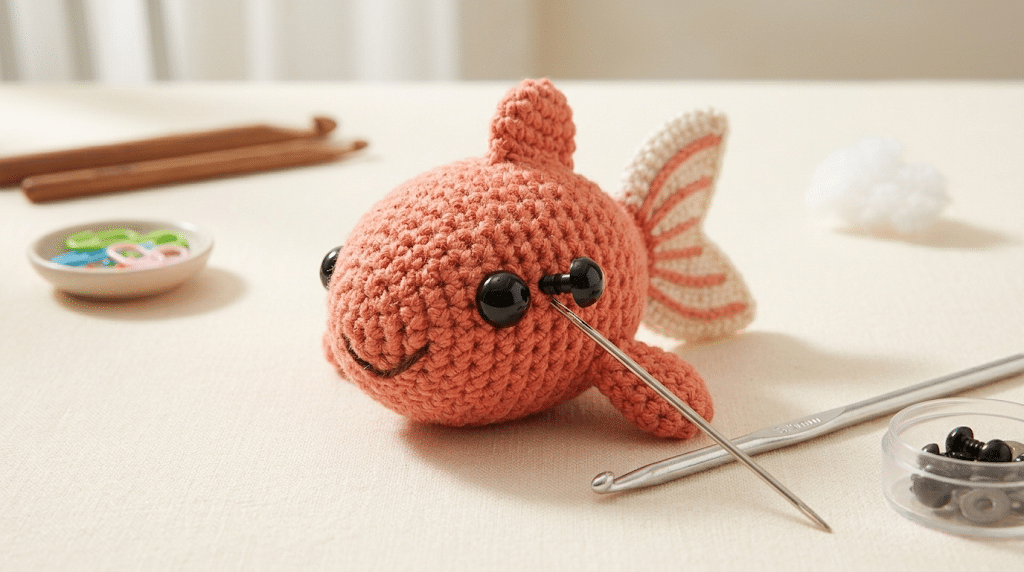
This is where your fish suddenly gets a personality.
Place the safety eyes evenly on the front portion of the body. Before locking them into place, step back and check their position.
Moving the eyes even slightly can change the entire expression.
You can also embroider a tiny mouth using a small amount of black yarn.
For an extra kawaii touch, add subtle embroidered cheeks using pink or coral yarn.
Step 10: Finish and fluff your fish
Give the entire fish a gentle squeeze and check the seams.
Make sure the tail and fins feel secure. Hide any remaining yarn ends inside the body.
Finally, shape the fish with your fingers.
Press the sides gently, fluff the stuffing, and adjust the fins until you love the silhouette.
That little handmade fish is finished!
Easy Ways to Customize Your Crochet Fish
One of the biggest advantages of making amigurumi is that you can change the design without starting from scratch.
Once you understand the basic body shape, you can create an entire school of fish.
Make a colorful tropical fish
Use bright colors for the body and contrasting colors for the fins.
Try yellow with orange fins, turquoise with coral fins, or purple with pink details.
You can even alternate colors across the body to create stripes.
Create a tiny ocean-themed collection
Make several fish in different sizes.
Add a whale, turtle, jellyfish, starfish, or octopus to create a complete underwater display.
A collection looks especially adorable when every animal shares the same yarn texture and color palette.
Turn your fish into a gift
A handmade fish makes a sweet little gift because it feels personal without requiring weeks of work.
Add a few fish to a handmade ocean-themed basket for a child.
You could also attach one to a gift bag as a reusable decoration.
Experiment with facial expressions
Small changes can create completely different personalities.
Place the eyes slightly closer together for a sweet expression. Move them farther apart for a sillier look.
You can also change the mouth.
A tiny smile feels cheerful, while embroidered surprised lips can make your fish look comically curious.
Try different yarn textures
Smooth yarn gives you crisp stitches and a classic amigurumi appearance.
Soft chenille creates a plush, squishy fish that feels wonderful in your hands.
If you change yarn thickness, remember that the finished size will change too.
Always check your tension before committing to the full project.
Common Crochet Fish Mistakes and Easy Fixes
Even simple amigurumi can have a few tricky moments.
The good news is that most problems have simple solutions.
The body looks lumpy
Uneven increases can create bumps in the body.
Try placing your increases more evenly around each round. A stitch marker can also help you keep track of where each round begins.
Do not immediately unravel everything.
Sometimes gently shaping the stuffed body with your fingers smooths out small imperfections.
The stuffing shows through
This usually means your stitches are too loose or the body contains too much stuffing.
Try using a smaller hook next time.
You can also add smaller amounts of stuffing and distribute them more evenly.
The goal is a firm body with closed, tidy stitches.
The fish looks flat
A flat fish usually needs more shaping or more stuffing.
Check whether you stopped increasing too early.
Then add stuffing gradually and shape the body with your fingers.
The rounded center should feel full without becoming hard.
The fins look uneven
Do not worry if your first fins look slightly different.
Lay them side by side before sewing them onto the fish.
If one looks larger, gently adjust it before attaching it.
You can also make a paper template first if you want matching fins.
The eyes look wrong
This is one of the easiest details to fix before you secure the safety eyes.
Hold them against the body without pushing the backs into place.
Try several positions until the expression feels right.
Take a quick photo with your phone. Sometimes the camera shows an imbalance that your eyes miss.
Tips for Making a Professional-Looking Amigurumi Fish
Ready to move on? A few finishing habits can make your handmade fish look much more polished.
Keep your tension consistent
Consistent tension creates smoother fabric.
Try to avoid pulling some stitches very tightly while leaving others loose.
Relax your hand and let the hook do the work.
Stuff in small layers
Add stuffing little by little.
Start around the edges, then fill the center.
This technique helps prevent empty spaces and gives your fish a more even shape.
Secure small pieces carefully
Fins and tails can receive plenty of handling.
Sew them through several stitches rather than relying on one attachment point.
Hide your yarn ends securely inside the body.
Keep your color changes neat
If you create stripes, try to keep each color transition at the same location.
A stitch marker can help you maintain a consistent starting point.
Clean color changes make the finished fish look much more intentional.
Choose your finishing details carefully
Tiny details have a huge effect on amigurumi.
A small embroidered mouth can completely change the expression.
A contrasting fin can make a simple fish look colorful and finished.
Less can be more. You do not need dozens of decorations to create a lovable character.
Fun Ideas for Your Finished Crochet Fish
Once your fish is complete, you may find yourself wanting to make another one immediately.
Here are a few ways to use your finished creations.
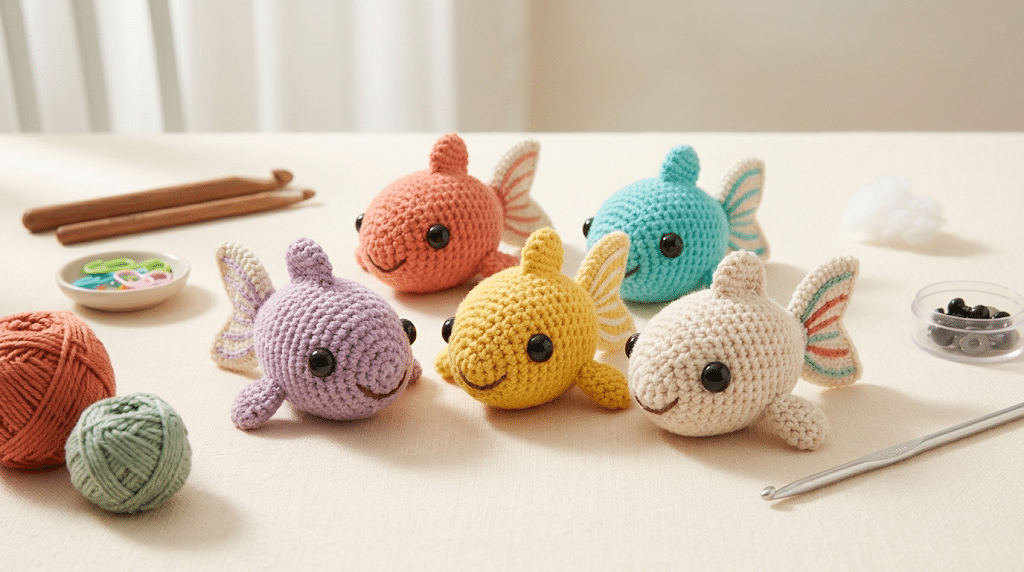
Make an ocean nursery decoration
Place several handmade fish around a nursery shelf.
Combine soft blue, cream, coral, and sage shades for a calm underwater-inspired palette.
Create a handmade mobile
Several lightweight crochet fish can become part of a decorative mobile.
Use different colors and sizes to create movement.
If you make a mobile for a baby, keep safety and secure construction as your top priorities.
Turn it into a keychain
A smaller version can become a cute bag charm or keychain.
Use a compact design and secure every component firmly.
Make an ocean-themed gift basket
Pair several crochet sea animals with a handmade card.
You could create a small underwater collection featuring fish, turtles, whales, and jellyfish.
This makes a thoughtful gift for anyone who loves marine animals.
Create a school of fish
This might be my favorite idea.
Make the same design in five or six colors.
Line them up together and give each one a slightly different facial expression.
The result feels like a tiny handmade aquarium.
Frequently Asked Questions About Crochet Fish Pattern Free
How long does it take to crochet a fish?
A small amigurumi fish can often be completed in a few hours, depending on your experience, yarn thickness, and design details. Beginners may need additional time while learning increases, decreases, stuffing, and sewing. Once you become comfortable with the shape, making another fish usually becomes much faster.
What yarn is best for crochet fish amigurumi?
A smooth DK-weight yarn works well for a classic crochet fish because it gives you clear stitches and a neat shape. Chenille yarn works beautifully when you want a soft, plush result. Choose yarn that lets you maintain firm stitches so the stuffing does not show through the body.
Is this crochet fish pattern free and beginner-friendly?
Yes, this project is designed around simple amigurumi construction and beginner-friendly techniques. You will practice working in rounds, increasing, decreasing, stuffing, sewing pieces together, and adding facial details. If you already know single crochet, you have a great foundation for trying this project.
What size safety eyes should I use for a crochet fish?
For a medium-sized fish, 9mm safety eyes create a cute balanced look. Smaller fish can use 6mm eyes, while larger designs may suit 12mm eyes. Always position the eyes before securing them permanently, because even a small change can dramatically affect your fish’s expression.
Can I sell amigurumi I make from this pattern?
You can generally sell finished handmade items you personally crochet, but you should not sell, copy, or redistribute the written pattern itself. If you sell your finished fish, consider mentioning the designer or pattern source when appropriate. Always check the specific pattern’s terms if you use a designer’s original instructions.
Can I change the colors and size of the fish?
Absolutely. Changing yarn colors is one of the easiest ways to personalize your fish. You can also make a larger or smaller version by changing yarn weight and hook size. Remember that changing materials can affect the finished proportions, stitch tension, and amount of stuffing needed.
Final Thoughts on This Crochet Fish Pattern Free Project
There is something so satisfying about watching a simple ball of yarn turn into a tiny underwater friend.
With this crochet fish pattern free project, you can practice essential amigurumi skills while creating something genuinely cute. You learned how to shape a rounded body, add stuffing, create fins and a tail, position safety eyes, and personalize your finished fish.
Most importantly, you do not need perfect stitches to make something special. Every little handmade detail gives your fish its own personality.
So choose your favorite colors, pick up your hook, and enjoy the process. Whether you make one fish or an entire colorful school, you will have something handmade that feels uniquely yours.
Save this pin to your crochet board on Pinterest so you can find this pattern anytime!
Looking for more free crochet animal patterns? Visit Yarned Animals for new amigurumi patterns, kawaii plushies and beginner crochet tutorials added every week at yarnedanimals.com