
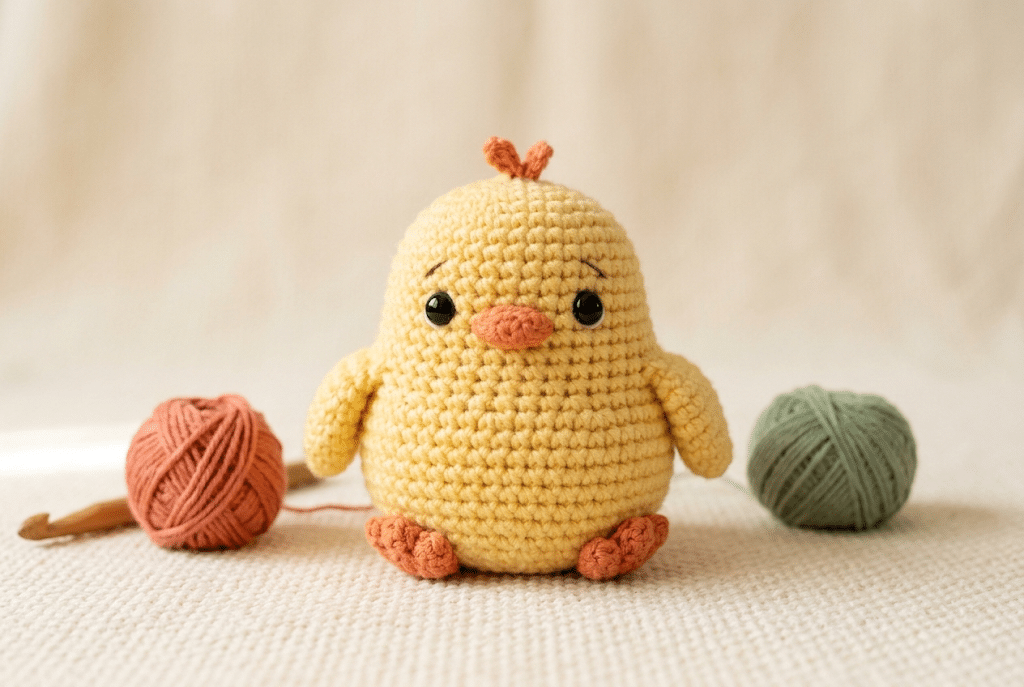
There is something wonderfully cheerful about a tiny yellow chick made from yarn. Its round little body, soft wings, and sweet face can brighten your craft table before you even finish the last stitch.
This crochet chick pattern gives you a simple way to create your own adorable amigurumi chick without complicated techniques. You’ll learn how to shape the body, add tiny wings, create the beak, embroider the details, and bring everything together into one cuddly little bird.
This project works beautifully for spring decorations, Easter baskets, handmade gifts, nursery décor, or a cute desk companion. Even if you’re still gaining confidence with amigurumi, the small pieces make this project feel manageable.
Grab your yarn and hook, because your tiny chick is ready to hatch!
Table of Contents
Why This Crochet Chick Pattern Is So Cute
Tiny amigurumi projects have a special kind of charm. You can finish them fairly quickly, customize their colors, and turn simple stitches into something that feels full of personality.
This crochet chick pattern keeps the shape intentionally simple. You’ll work mainly with single crochet, increases, and decreases, which are some of the most useful techniques for beginner amigurumi.
A cheerful beginner crochet project
The rounded body gives you excellent practice with working in continuous rounds. You’ll gradually increase the shape, maintain the middle section, then decrease it toward the top.
That construction appears in many amigurumi animals. Once you understand it, you can use the same basic idea for chicks, birds, bears, cats, penguins, and many other plushies.
If crochet abbreviations still feel confusing, keep a small reference beside you. The Craft Yarn Council provides a useful guide covering common terms such as sc, inc, dec, sl st, and ch.
Perfect for spring and Easter crafting
A handmade chick naturally fits spring crafting. Use sunny yellow yarn for a traditional look, or experiment with pastel shades for a softer nursery-style decoration.
You can also make several chicks in different colors. Imagine a little group of yellow, cream, peach, and pale pink chicks sitting together in an Easter basket.
A project with lots of personality
The best part comes when you add the face.
A tiny pair of safety eyes, a small orange beak, and two little wings can completely change the personality of your chick. You can make the expression sleepy, curious, cheerful, or extra kawaii simply by changing the placement of the details.
For a soft, plush finish, Bernat Blanket yarn can create an especially cuddly texture. It works beautifully when you want your finished chick to feel more like a tiny plush toy than a decorative ornament.
Now that you know why this little bird makes such a fun project, let’s prepare everything you need.
Materials for Your Crochet Chick Pattern
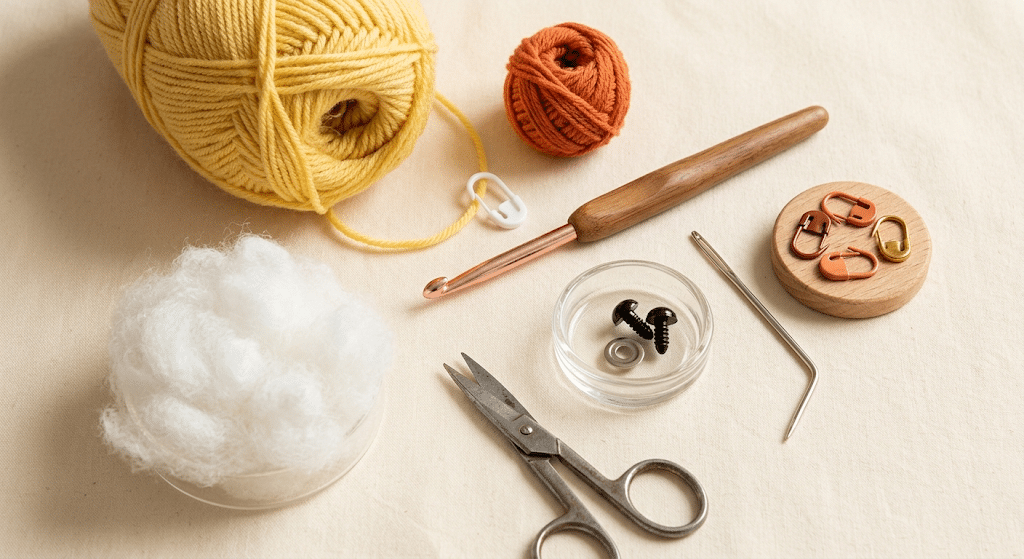
Before you begin, gather your supplies and choose your colors. Having everything nearby makes the crocheting process smoother and keeps you from stopping halfway through your project.
You don’t need a huge collection of supplies. A small amount of yarn and a few basic tools can create one adorable chick.
Choose the right yarn
For a classic chick, choose yellow yarn for the body. You’ll also need a small amount of orange yarn for the beak and feet.
A smooth yarn makes your stitches easier to see. That can be especially helpful when you’re learning amigurumi or working with small pieces.
Paintbox Simply DK yarn works nicely for a crisp, colorful chick with clearly defined stitches. You can also choose a softer yarn if you prefer a plushier result.
Pick your crochet hook
Your hook size should match your yarn while creating a firm fabric. Amigurumi usually looks best when the stitches sit closely together.
A slightly smaller hook can help prevent stuffing from showing through the body. Avoid making your stitches so tight that your hook becomes difficult to move.
A Clover Amour crochet hook is one comfortable option for longer crochet sessions, especially when you’re making several small pieces.
Gather your finishing supplies
You’ll also need:
- Yellow yarn
- Orange yarn
- A suitable crochet hook
- 6mm or 9mm safety eyes
- Fiberfill stuffing
- Stitch markers
- Yarn needle
- Scissors
- Black embroidery thread if you prefer embroidered eyes
Poly-fil Premium fiberfill gives the body a soft, springy shape without making your chick feel overly heavy.
If you’re making the chick for a young child, consider embroidered facial features instead of safety eyes. Safety eyes contain small components that require appropriate supervision.
Crochet abbreviations you’ll use
This beginner crochet chick uses common U.S. crochet terminology:
- MR = magic ring
- sc = single crochet
- inc = increase
- dec = decrease
- sl st = slip stitch
- ch = chain
- st = stitch
- rnd = round
The Craft Yarn Council also explains common crochet abbreviations and pattern terminology if you want a handy reference while crocheting.
Ready to move on? Your little bird starts with the body.
How to Crochet a Chick Body Step by Step
The body creates the main shape of your amigurumi chick. Take your time during the first few rounds because this is where the rounded form begins.
Work in continuous rounds unless your pattern instructions tell you to join. A stitch marker can help you identify the beginning of each round.
Step 1: Start the magic ring
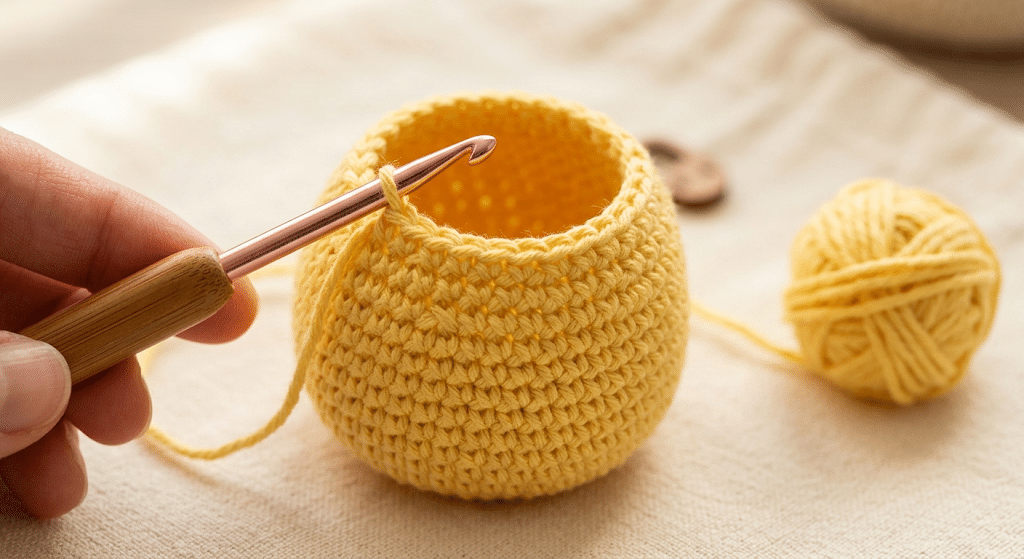
Begin with your yellow yarn and create a magic ring.
Work single crochet stitches into the ring, then gently pull the yarn tail to close the center. Keep the opening tight enough that you don’t see a large hole.
If you struggle with the magic ring, you can begin with a small chain loop instead. The goal is simply to create a neat center for the first round.
Step 2: Build the rounded base
Continue working single crochet stitches around the first round.
Increase evenly around the circle. An increase means working two single crochet stitches into the same stitch.
As you add increases, your flat circle begins expanding. Keep your tension consistent because uneven tension can create a wobbly body.
Step 3: Shape the chick’s widest section
Continue increasing for another round or two until your body reaches the desired width.
Now work several rounds without increases. These even rounds create the rounded middle of your chick.
This is where the little bird begins to look three-dimensional. Keep checking your stitches so the body stays smooth rather than becoming oval or lumpy.
Step 4: Add the eyes
Place the safety eyes before you completely close the body.
For a classic kawaii appearance, position them slightly below the upper center of the face. Leave enough space between them for the beak.
You can gently place the eyes first without securing them. Step back and look at the face from different angles before pressing the backs into place.
Step 5: Start decreasing
Once the body reaches its desired height, begin decreasing evenly.
A decrease combines two stitches into one. This gradually closes the upper part of the chick.
Keep your decreases neat and avoid pulling the yarn too tightly. A smooth decrease helps maintain the rounded shape.
Step 6: Add the stuffing
Start adding fiberfill before the opening becomes too small.
Add small amounts at a time. Push the stuffing gently toward the bottom and sides, then continue filling the upper area.
Tip: Don’t overstuff the chick. You want a plump, cuddly shape, but excessive stuffing can stretch your stitches and make the fabric look uneven.
Step 7: Close the body
Continue decreasing until only a small opening remains.
Add a final bit of stuffing if needed. Then cut your yarn, leaving a long enough tail for sewing.
Thread the tail onto your yarn needle and weave around the remaining stitches. Pull gently to close the opening.
Secure the yarn inside the body and hide the remaining tail.
Your chick now has its main shape. Here is the fun part: adding those tiny details that make it unmistakably adorable.
Add the Wings, Beak, and Tiny Feet
A simple round body becomes a recognizable chick once you add the small features. These pieces don’t need to be perfect.
In fact, tiny variations can make your finished bird look handmade and unique.
Step 8: Crochet the little wings
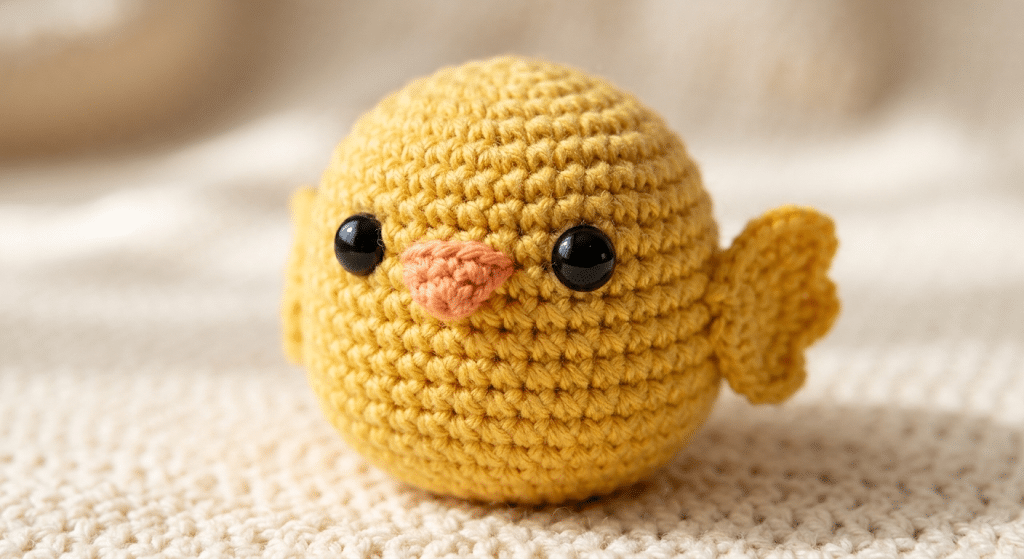
Use your yellow yarn to create two small wings.
You can make each wing as a simple rounded piece using single crochet. Start with a small foundation shape, work around it, and gently flatten it when finished.
The wings should look slightly curved rather than completely flat.
Sew one wing onto each side of the body. Position them slightly below the eyes so the chick looks balanced.
For a more playful pose, angle one wing upward. This can make your chick look as though it’s waving.
Step 9: Make the beak
Switch to orange yarn for the beak.
A tiny triangular or pointed crochet piece works beautifully. You can also embroider a small triangle with orange yarn if you want an even simpler option.
Place the beak between the eyes, leaving a little breathing room around each facial feature.
Tip: The beak placement can dramatically change the expression. A slightly lower beak gives your chick a younger look, while a centered beak creates a classic kawaii face.
Step 10: Finish the feet and details
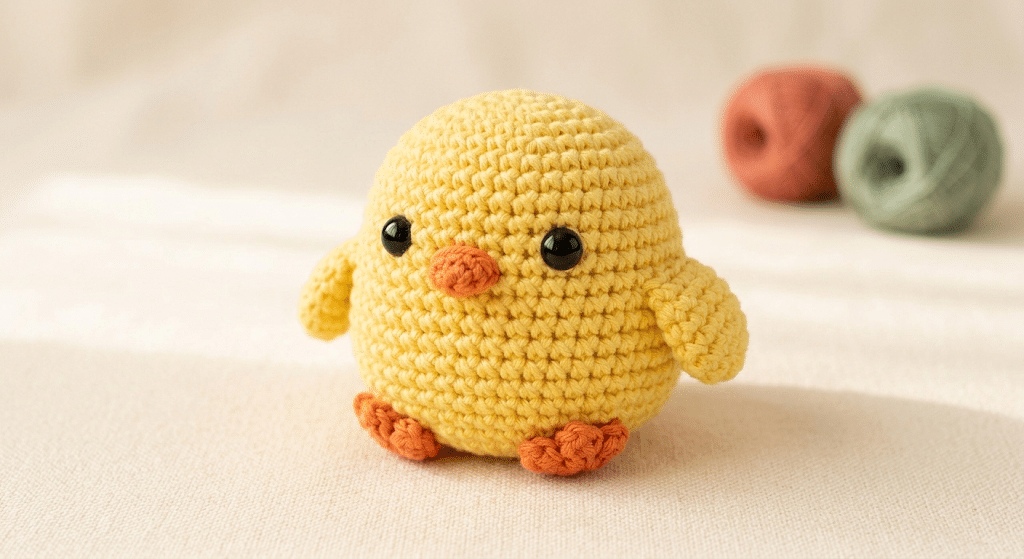
Add two tiny orange feet beneath the body.
You can crochet small chains or simple loops, then sew them securely to the bottom. Keep them short so they don’t overwhelm the body.
Finally, weave in every loose end and check all your seams.
Give your chick a gentle squeeze. If the body feels firm but soft, you have achieved a lovely amigurumi texture.
Now step back and admire your little bird. It has officially hatched!
Tips for Making Your Crochet Chick Look Professional
Small amigurumi projects often look simple, but a few finishing choices can make a huge difference.
You don’t need advanced crochet skills to create a polished result. Focus on consistent tension, neat finishing, and careful placement.
Keep your stitches tight and even
Loose stitches can allow stuffing to show through. This becomes especially noticeable with brightly colored amigurumi.
Try to maintain steady tension throughout the body. If your stitches become tighter or looser halfway through, the shape may change.
You can also test a small section before starting the full chick.
Use stitch markers consistently
Working in continuous rounds can make it easy to lose your place.
A stitch marker helps you identify the beginning of each round. Move it upward as you complete each round.
This tiny habit saves time and prevents many counting mistakes.
If you’re new to reading crochet patterns, remember that abbreviations are simply shorthand. The Craft Yarn Council explains that terms such as inc and dec describe common shaping actions used throughout crochet patterns.
Shape the stuffing carefully
Don’t push one large piece of stuffing into the body.
Instead, separate the fiberfill into small pieces and add them gradually. This lets you control the shape much more easily.
Pay special attention to the bottom corners. Even stuffing creates a smooth, rounded silhouette.
Position the face before committing
This is one of my favorite amigurumi tricks.
Place the eyes, beak, and wings temporarily before sewing or securing everything. Take a quick look from the front and side.
Sometimes moving an eye by only one stitch completely changes the expression.
Make a few different chicks
Once you finish your first chick, making another one becomes much easier.
Try different colors, facial expressions, wing positions, or tiny accessories. You could create a whole collection of spring chicks for a shelf or basket.
Trust me on this one: the second chick often feels twice as easy because your hands already understand the shape.
Easy Ways to Customize Your Amigurumi Chick
Your finished chick doesn’t have to look exactly like anyone else’s. That’s one of the joys of handmade crochet.
A few small changes can create completely different characters while using the same basic construction.
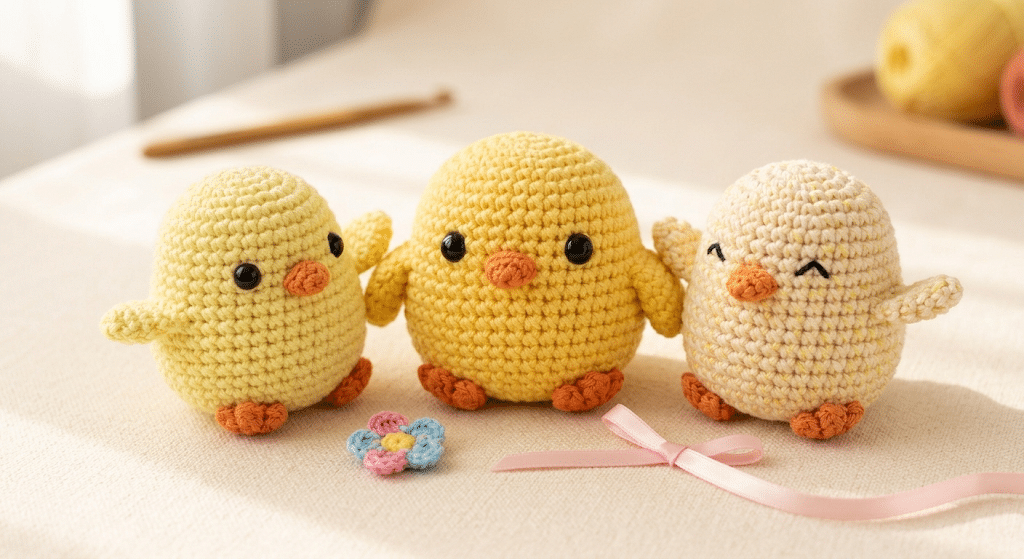
Try different yellow shades
Bright sunflower yellow gives your chick a traditional spring appearance.
For a softer look, try pale lemon, buttery yellow, or cream. Pastel shades work particularly well for baby-room decorations.
You can even use two shades of yellow for subtle contrast between the body and wings.
Create a fluffy chick
If you want your bird to look extra cuddly, choose a plush yarn.
A fluffy texture can make the chick resemble a tiny baby bird. Just remember that textured yarn can hide stitches, so it may feel easier once you’re comfortable with basic amigurumi.
Lion Brand Comfy Cotton yarn can also give you a softer, lightweight look when you prefer a less plush finish.
Give your chick a personality
Small details create big personality.
Try embroidered eyelashes for a sweet character. Add tiny blush marks beneath the eyes for a kawaii effect.
You can also change the eye size. Smaller eyes can create a more minimalist expression, while larger eyes create that classic cute amigurumi look.
Add seasonal accessories
Your chick can become part of a larger handmade display.
Try a tiny crochet flower, a miniature bow, or a small spring scarf. For Easter, you could place the chick inside a crochet basket surrounded by colorful eggs.
For a baby shower gift, use gentle pastel colors and add a tiny embroidered heart.
The possibilities are almost endless once you have the basic body shape mastered.
How to Finish and Care for Your Crochet Chick
Finishing details deserve just as much attention as the crocheting itself.
A neatly finished amigurumi feels sturdier, looks cleaner, and holds its shape better over time.
Hide your yarn ends securely
After sewing each part into place, weave your yarn tail through several stitches.
Avoid simply cutting the yarn close to the surface. The tail may loosen later.
Instead, weave it through the stuffing area, pull gently, trim the excess, and allow the yarn end to disappear inside the body.
Check every attachment
Before displaying or gifting your chick, gently test the wings, feet, and beak.
If anything feels loose, reinforce the stitching.
For children’s toys, pay particular attention to facial features and small decorative pieces. Embroidered details can offer a safer alternative to detachable components for very young children.
Keep the chick clean
Dust your finished chick gently with a soft cloth.
If the yarn label allows washing, follow its care instructions. Different fibers can react differently to water, heat, and agitation.
Avoid high heat unless the yarn manufacturer specifically recommends it.
Store your amigurumi carefully
Keep your chick away from direct sunlight for long periods if you want to preserve its color.
When storing seasonal decorations, place them somewhere dry and avoid crushing them under heavy objects.
A little care can help your handmade chick stay cute for many seasons.
Fun Ideas for Your Finished Crochet Chick
Once your chick is complete, you’ll probably start imagining places to use it.
This small project works for far more than Easter decorations.
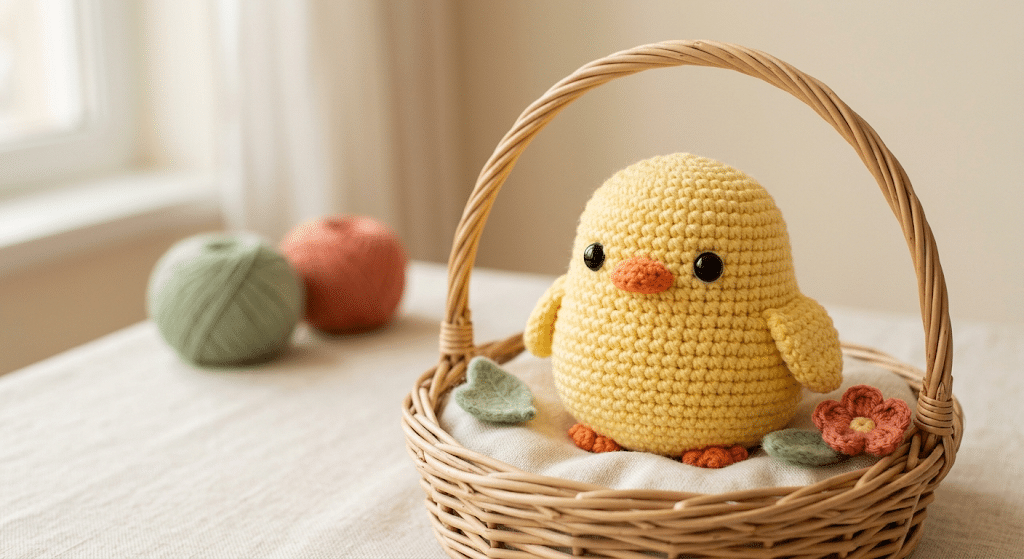
Handmade Easter basket gift
Place one chick inside an Easter basket alongside chocolate, handmade eggs, or other small gifts.
The recipient gets something they can keep long after the holiday ends.
Spring home decoration
Create three or five chicks and arrange them together on a shelf.
Mix different yellow shades for a handmade spring display. Add crochet flowers or small fabric leaves around them.
Baby shower or nursery gift
Choose soft cream, pale yellow, or pastel colors for a nursery-inspired chick.
Avoid overly complicated accessories and keep the design simple. A soft handmade bird can make a sweet decorative gift.
Keychain or bag charm
If you make a smaller version, your chick can become a cute bag accessory.
Use a secure attachment designed for the intended use, and remember that small pieces require extra care around young children.
Handmade market ideas
You can also make several chicks for craft fairs or handmade gift collections.
If you sell finished items made from this pattern, create your own presentation and product photography. A small basket filled with colorful chicks can make an eye-catching seasonal display.
For crochet abbreviations and standard terminology, the Craft Yarn Council remains a useful reference when adapting or writing crochet instructions.
Common Crochet Chick Problems and Easy Fixes
Even simple amigurumi can produce little surprises.
Don’t worry if your first attempt looks slightly different from the sample. Most shaping problems have an easy solution.
Why does my chick look too oval?
You may have worked too many increases in one area or skipped a decrease.
Check your stitch counts at the end of each round. Consistent increases create a more balanced circular shape.
Why can I see the stuffing?
Your stitches may be too loose for your yarn and hook combination.
Try a smaller hook or slightly firmer tension. You can also reduce the amount of stuffing.
A tightly packed body isn’t automatically better. The goal is a firm shape without stretching the crochet fabric.
Why does my chick lean sideways?
The facial pieces or wings may sit at slightly different heights.
Before sewing anything permanently, place all pieces first and check the balance from the front.
Small adjustments can make a surprising difference.
Why does the body have gaps?
Check your decreases.
If your decreases leave noticeable holes, make sure you insert your hook through the correct stitches and keep your tension even.
Stuffing can also push through if you fill the body too aggressively.
Why doesn’t my chick look kawaii?
The face may simply need adjusting.
Try moving the eyes slightly closer together or changing the beak position. Kawaii proportions often rely on a larger-looking head and simple facial features.
Don’t be afraid to remove and reposition pieces. Crochet is wonderfully forgiving.
Frequently Asked Questions About Crochet Chick Pattern
How long does it take to crochet a chick?
A small amigurumi chick can often be completed in a few hours, depending on your crochet speed and experience. Beginners may need extra time for counting, shaping, and sewing the pieces together. Once you become comfortable with continuous rounds, increases, and decreases, the project becomes much quicker.
What yarn is best for a crochet chick pattern?
Smooth DK or worsted-weight yarn works well for beginners because you can clearly see each stitch. Cotton blends can create a neat finish, while plush yarn creates a softer chick. Choose a yarn that gives you firm stitches without large gaps where stuffing can show.
Is this crochet chick pattern good for beginners?
Yes. A chick is a friendly beginner amigurumi project because the body uses basic shaping techniques. You’ll practice single crochet, increases, decreases, stuffing, and simple sewing. If you can work in rounds and understand basic crochet abbreviations, you can confidently give this project a try.
What size safety eyes should I use for a crochet chick?
For a small chick, 6mm safety eyes usually create a delicate face, while 9mm eyes give a more noticeable kawaii expression. The best size depends on your finished body and yarn thickness. Always check the proportions before permanently attaching the eyes.
Can I sell amigurumi made from this pattern?
You can generally sell finished handmade items you personally crochet, but you should not sell, redistribute, or claim the written pattern as your own. If you sell finished chicks, create your own product photos and descriptions. Also check any specific terms attached to the pattern before commercial use.
Final Thoughts on This Crochet Chick Pattern
There’s something incredibly satisfying about watching a simple ball of yellow yarn turn into a tiny little bird.
With just a few basic crochet techniques, you can create a cheerful chick with a round body, tiny wings, a sweet beak, and plenty of personality. This crochet chick pattern also gives you plenty of room to experiment with colors, expressions, and seasonal decorations.
Don’t worry if your first chick isn’t perfectly symmetrical. Handmade charm comes from those little details that make your creation uniquely yours.
And once you finish one, you may find yourself wanting to make an entire little flock!
Save this pin to your crochet board on Pinterest so you can find this pattern anytime!
Looking for more free crochet animal patterns? Visit Yarned Animals for new amigurumi patterns, kawaii plushies and beginner crochet tutorials added every week at yarnedanimals.com