
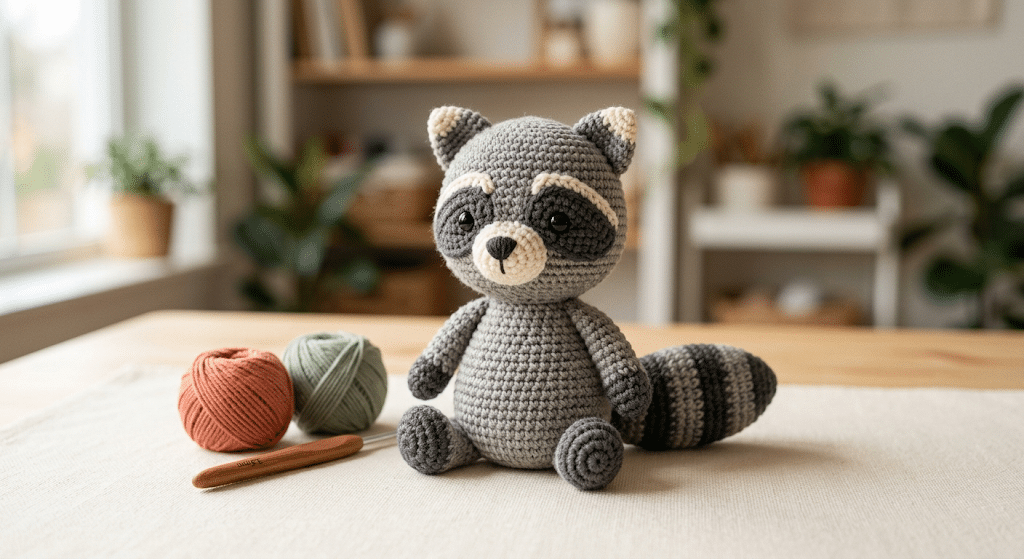
There is something irresistibly cute about a tiny raccoon with round cheeks, a little striped tail, and a mischievous expression. If you love making handmade animals, a crochet raccoon pattern gives you the perfect project for creating a cuddly woodland friend.
This beginner-friendly tutorial walks you through the process from choosing your yarn to adding the final details. You will learn how to shape a soft raccoon, create its recognizable mask, attach the ears, and finish those adorable little paws.
You do not need advanced crochet skills to enjoy this project. With a few basic stitches, simple shaping, and some patience, you can make a sweet amigurumi raccoon for yourself or someone special. Grab your hook, gather your favorite yarn, and let’s make this little forest friend together!
Table of Contents
What Makes This Crochet Raccoon Pattern So Adorable?
Raccoons have such a fun personality, which makes them wonderful subjects for amigurumi. Their dark eye mask, rounded ears, striped tail, and tiny paws create plenty of opportunities for cute details.
This crochet raccoon pattern uses simple shapes that beginners can handle comfortably. You will create the body, head, ears, legs, arms, and tail separately before joining everything together.
The finished raccoon makes a lovely shelf decoration, nursery companion, handmade gift, or woodland-themed plushie. You can also change the colors to create your own unique character.
Choose a Cute Raccoon Color Palette
Traditional raccoons usually feature gray, black, and cream shades. For a soft handmade look, try combining light gray yarn with charcoal details and a cream muzzle.
You can also make a kawaii version using warm beige, brown, and dark chocolate tones. A slightly unusual palette can make your finished amigurumi feel completely original.
Paintbox Simply DK yarn works beautifully when you want a lightweight, neat crochet fabric. For a softer plush finish, Bernat Blanket yarn creates a wonderfully squishy result.
Pick the Right Finished Size
Your hook size and yarn thickness will affect the final size of your raccoon. A DK-weight yarn generally creates a smaller, lightweight plushie, while bulky chenille yarn creates a larger cuddly animal.
Remember that amigurumi usually works best with a tighter crochet tension. You want the stuffing to stay securely inside without large gaps between stitches.
If your stitches look loose, try a smaller hook rather than pulling every stitch extremely tight.
Give Your Raccoon Its Own Personality
The face creates most of the character in an amigurumi animal. Small changes in eye placement can make your raccoon look sleepy, curious, surprised, or extra mischievous.
Try positioning the safety eyes slightly closer together for a baby-like expression. For a playful look, place them a little farther apart and add a tiny embroidered smile.
You can also experiment with blush details, a cream-colored muzzle, or tiny embroidered eyebrows. These small changes can make your finished raccoon feel truly handmade.
Crochet Raccoon Pattern Materials and Preparation
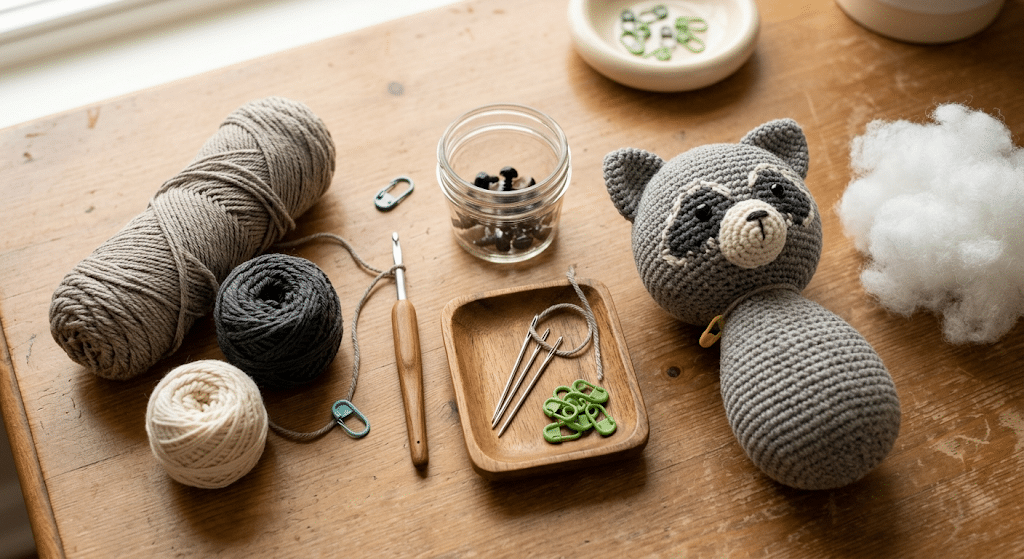
Before starting your crochet raccoon pattern, organize everything beside you. A prepared workspace makes the project much more relaxing, especially when you are learning amigurumi for the first time.
You will need yarn in your main raccoon color, a darker shade for the mask and tail, and a small amount of cream or beige for the muzzle.
You will also need a crochet hook that works well with your chosen yarn, stuffing, safety eyes, a yarn needle, and stitch markers.
Gather Your Crochet Hook and Yarn
Choose your hook according to your yarn label and the tightness of your stitches. For amigurumi, the fabric should feel firm rather than loose.
A Clover Amour crochet hook is a comfortable choice when you expect a longer crochet session. Its ergonomic handle makes it easier to keep crocheting without constantly adjusting your grip.
Keep your main yarn, contrast yarn, and small detail colors within easy reach. This saves you from stopping halfway through the project to search for supplies.
Prepare the Safety Eyes and Stuffing
Safety eyes give your raccoon its signature expression. For a medium-sized amigurumi, 9mm safety eyes often create a cute balanced look.
Use larger eyes for a more exaggerated kawaii appearance. Smaller eyes create a slightly more realistic woodland style.
You will also need Poly-fil Premium fiberfill for the body and head. Add stuffing gradually instead of filling the entire piece at once.
Learn the Basic Stitches First
This project works best when you feel comfortable with a few basic crochet techniques. You should know how to make a magic ring, single crochet, increases, and decreases.
You will also work in continuous rounds. A stitch marker helps you identify the beginning of each round.
If you are new to amigurumi, practice a small ball first. This helps you understand how increases create curves and decreases create shaping.
For a helpful crochet reference, you can explore the official Clover crochet resources for additional tool and technique information.
How to Crochet the Raccoon Body Step by Step
Now that your materials are ready, here is the fun part! The body forms the soft center of your woodland friend, so take your time with the shaping.
You will work in rounds and gradually build the body from the bottom upward. The exact number of stitches can vary depending on the size you want, but the construction stays simple.
The most important thing here is consistency. Keep your tension even, mark your rounds, and check the shape as you work.
Step 1: Create the Body Base
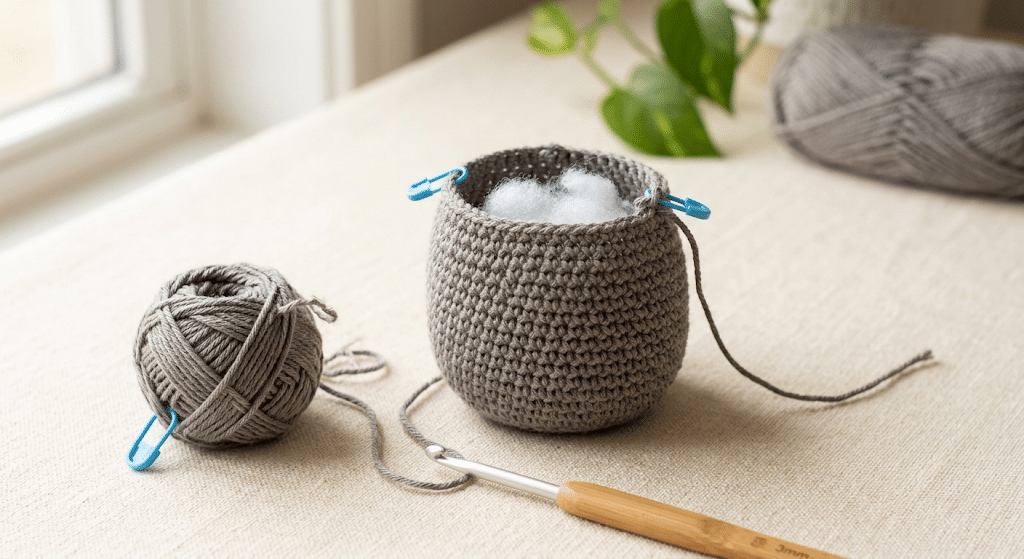
Begin with a magic ring using your main raccoon color. Work single crochet stitches into the ring and increase gradually to create a rounded base.
Continue working in the round until the base reaches the width you want. Keep your stitches snug so the finished body remains firm.
As the sides begin to rise, stop increasing for several rounds. This creates the main cylindrical shape of the raccoon.
Step 2: Shape the Raccoon Body
Continue crocheting around the body while keeping your tension consistent. The body should gradually become taller without becoming too narrow.
Start adding small amounts of stuffing as the body grows. Add it little by little and push it gently into the corners.
Avoid packing the stuffing too tightly. Overstuffing can stretch your stitches and change the shape of your amigurumi.
Step 3: Close the Body Neatly
Once your body reaches the desired height, begin decreasing gradually. This pulls the opening together and creates a rounded top.
Add the last amount of stuffing before closing the opening completely. Make sure the body feels firm but still soft enough to cuddle.
Fasten off and weave the yarn tail securely through the remaining stitches. Leave a useful yarn tail if you plan to sew the body to another piece.
How to Crochet the Raccoon Head and Face
The face is where your raccoon really starts coming alive. This section focuses on creating a rounded head and adding the unmistakable dark mask.
A good face does not require complicated embroidery. Careful placement of a few simple details can create an expressive character.
Before attaching anything permanently, hold the pieces against the head and experiment with positioning.
Step 4: Crochet the Rounded Head
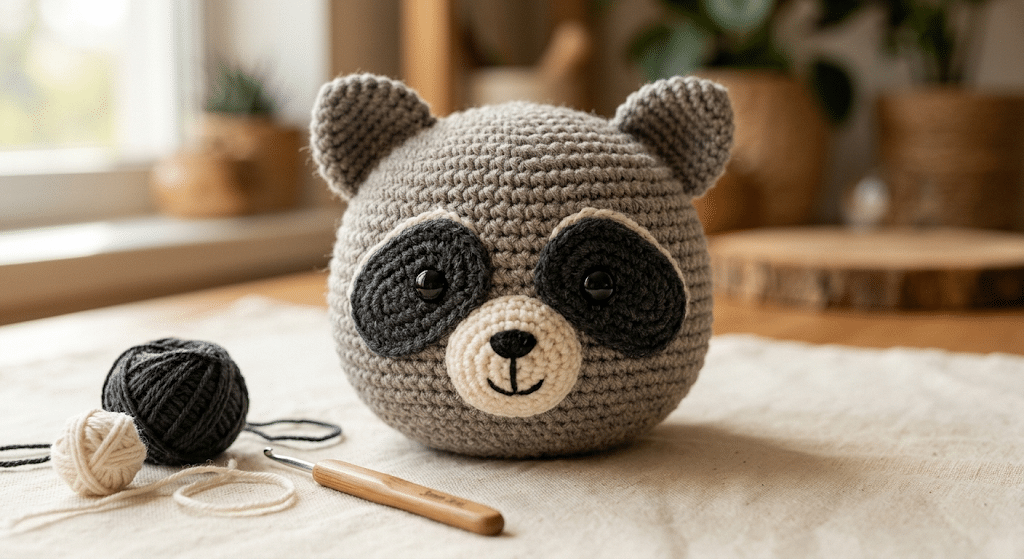
Start the head with your main color and create a magic ring. Increase gradually until you reach the widest part of the head.
Continue working several rounds without increases to create a rounded shape. Then begin decreasing toward the top.
Add stuffing as you shape the head. Use your fingers to distribute it evenly around the inside.
The head should look slightly larger than the body. This proportion gives your raccoon that adorable amigurumi appearance.
Step 5: Add the Raccoon Eye Mask
The dark eye mask is one of the most recognizable raccoon features. You can crochet a separate mask piece or create the appearance with carefully placed dark yarn.
For a simple beginner approach, embroider or crochet two dark patches around the eye area. Keep both sides as symmetrical as possible.
Place the safety eyes after checking the mask position. Always test the face before securing the pieces permanently.
A cream or light-gray muzzle underneath the mask adds another layer of contrast.
Step 6: Create the Cute Raccoon Expression
Insert the safety eyes at an even height. Step back and look at the face from several angles before locking in the final placement.
Add a tiny embroidered nose using black yarn. You can also add a small curved mouth underneath.
For an extra kawaii expression, add subtle blush using embroidery or a small amount of fabric-safe color. Keep the details simple so the raccoon still looks like a handmade plushie.
How to Make the Raccoon Ears, Arms, and Legs
Next up, you will create the smaller pieces that give your raccoon its woodland-animal silhouette. These parts use simple shapes and repeat familiar crochet techniques.
Small pieces can sometimes feel fiddly, so do not rush them. Count your stitches carefully and use a marker whenever you need one.
Step 7: Crochet the Pointed Ears
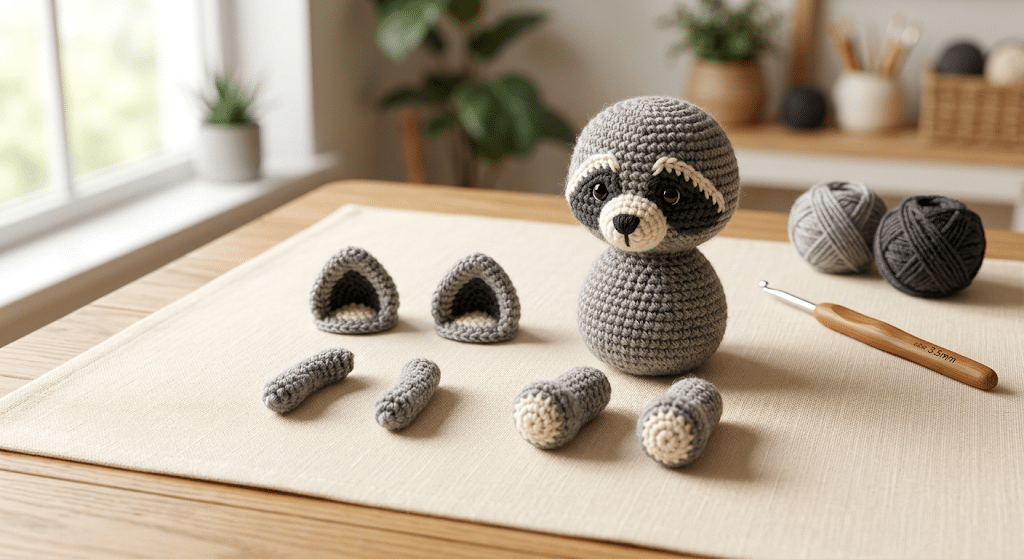
Create two small rounded triangular ears using your main color. Begin with a small foundation and increase toward the widest section.
Add a darker inner-ear detail if you want extra contrast. You can sew this detail onto each ear before attaching them to the head.
Position both ears near the top of the head. Pin them temporarily and check that they sit at the same height.
Sew them securely using a yarn needle. Take several small stitches around the base so the ears remain upright.
Step 8: Make the Tiny Arms and Legs
The arms and legs should stay relatively simple. Crochet small tubes or rounded pieces, then add a little stuffing.
You can use your darker yarn for tiny paw details. A few embroidered lines can suggest individual toes without making the project complicated.
Attach the legs near the lower portion of the body. Position them evenly so your raccoon can sit comfortably.
Attach the arms slightly below the head. You can angle them forward for a cuddly pose or outward for a playful look.
How to Crochet the Raccoon Tail
The tail is one of the most fun parts of this project. Those alternating dark and light sections instantly make your amigurumi recognizable.
You can make the tail straight, slightly curved, or curled upward. A curved tail gives your raccoon a playful woodland personality.
Step 9: Build the Striped Tail
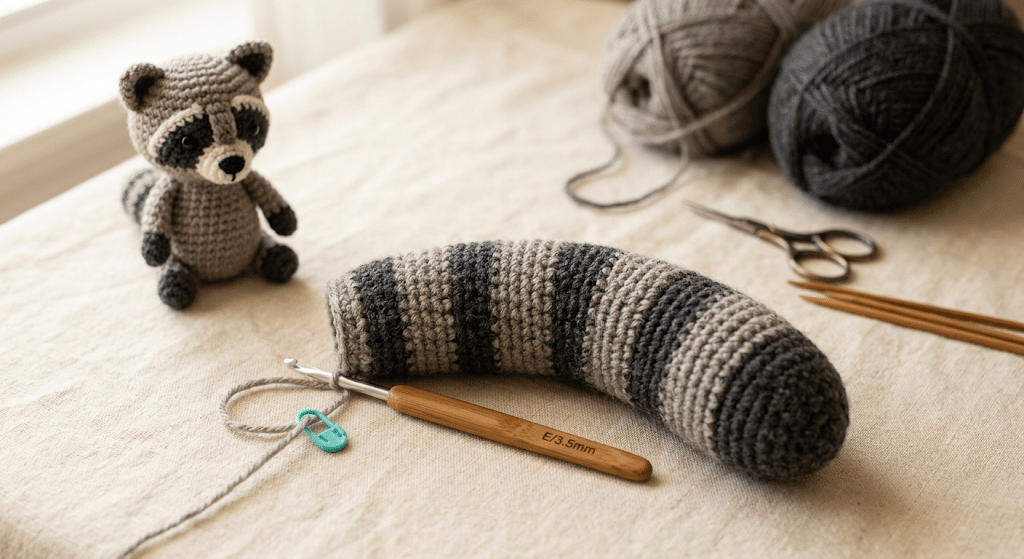
Start crocheting the tail with your main gray shade. Work several rounds before changing to your darker color.
Alternate the colors to create recognizable raccoon tail stripes. Keep each stripe roughly the same width for a classic appearance.
You do not need perfect stripes. Handmade variations can actually make your finished raccoon look more charming.
Add a small amount of stuffing as you work. The tail should remain flexible enough to bend slightly without becoming floppy.
Step 10: Attach and Pose the Finished Tail
Place the tail at the back of the body, slightly above the bottom edge. Pin it in place before sewing.
Try several positions before choosing your favorite. A curved tail beside the body creates a cute sitting pose.
Sew through the tail base and body several times. Secure the yarn carefully and hide the remaining tail inside the plushie.
Give your raccoon a gentle squeeze and check every attachment. If the ears, limbs, or tail feel loose, reinforce them before displaying or gifting your creation.
Easy Finishing Tips for a Professional-Looking Amigurumi
Your crochet work may already look adorable, but a few finishing touches can make a big difference. The goal is not perfection.
Instead, focus on clean joins, secure attachments, even stuffing, and balanced facial features.
These details help your handmade raccoon look polished while still keeping that cozy handmade charm.
Check the Shape Before Sewing
Lay every piece beside the body before attaching it. This lets you compare the size and placement of the arms, legs, ears, and tail.
If one ear looks higher, adjust it before sewing. The same trick works for the eyes and muzzle.
Taking an extra minute here can save you from having to undo several rows later.
Keep the Stuffing Even
Uneven stuffing can create lumps or dents. Add small amounts at a time and gently push the fiberfill toward empty areas.
Do not force large pieces of stuffing through a tiny opening. Smaller pieces distribute much more evenly.
When the body feels firm, stop adding. Soft and rounded usually looks better than extremely packed.
Hide Every Yarn End
Use a yarn needle to weave your yarn tails through several stitches. Pull gently and trim the excess.
For extra security, weave the tail through different directions before cutting it. This keeps the end from working loose during normal handling.
A neat finish also makes your raccoon much more gift-ready.
Cute Ways to Customize Your Crochet Raccoon
Once you finish the basic pattern, you can have fun creating your own variations. This is where amigurumi becomes especially enjoyable.
You can make a whole family of raccoons by changing the yarn colors, eye sizes, and expressions.
Make a Kawaii Woodland Raccoon
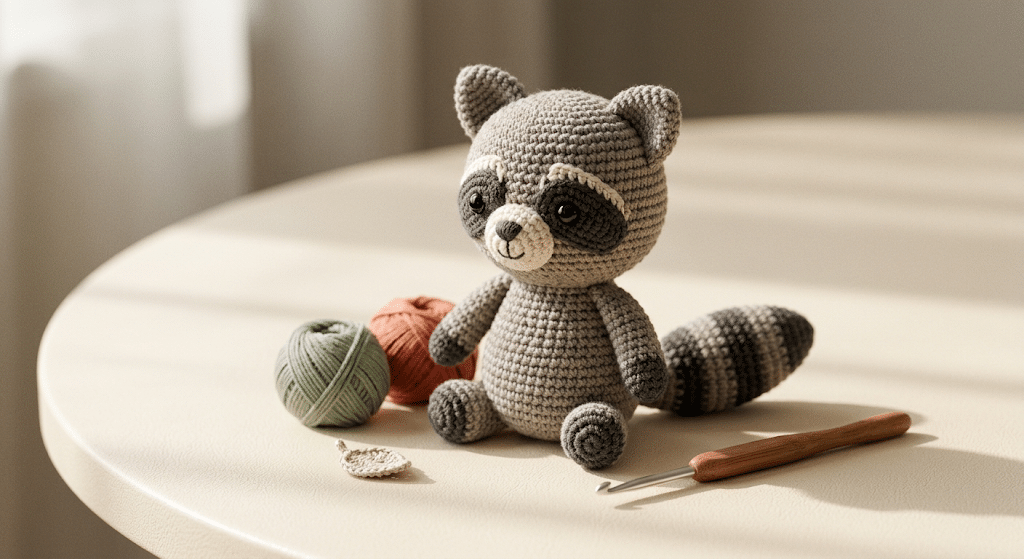
Use a warm gray body with a cream muzzle and oversized safety eyes. Add tiny blush cheeks for an extra sweet expression.
A slightly oversized head and short limbs can make the raccoon look even more kawaii.
This style works beautifully for nursery decorations, children’s gifts, and woodland-themed collections.
Create a Mini Raccoon
Use thinner yarn and a smaller hook to create a miniature version. A tiny raccoon can become a cute bag charm or desk companion.
Keep the facial details simple because very small pieces become harder to attach securely.
For miniature projects, make sure every safety feature suits the intended recipient and age group.
Make a Woodland Gift Set
Your finished raccoon can become part of a larger handmade woodland collection. Pair it with other crochet animals such as a fox, squirrel, owl, or bear.
A handmade animal collection makes a thoughtful baby shower gift or birthday present. You can also create different animals using the same yarn palette.
For more crochet inspiration, explore Yarnspirations’ crochet resources for additional pattern ideas and yarn inspiration.
Common Crochet Raccoon Pattern Mistakes to Avoid
Even experienced crocheters occasionally make small mistakes with amigurumi. The good news is that most problems have simple solutions.
If your raccoon looks slightly different from the picture in your imagination, do not panic. Small changes often come from yarn weight, hook size, tension, or stuffing.
Your Crochet Fabric Has Visible Holes
Large holes usually mean your hook is too large for your yarn or your tension is too loose.
Try going down one hook size. You want compact stitches that hold the stuffing securely.
Do not pull your yarn extremely tight, though. Your hands should remain comfortable throughout the project.
The Head Looks Too Small
Your head may look too small if you use a thinner yarn than planned. You can either enlarge the head or use a thicker yarn for the next version.
The easiest solution is often adjusting your proportions rather than trying to force the existing piece into shape.
Remember that handmade projects do not need to match perfectly.
The Face Looks Uneven
Facial placement can change the entire expression. If one eye sits slightly higher, the raccoon may look surprised or sleepy.
Before securing the eyes, place them temporarily and photograph the face from the front. This gives you a surprisingly helpful reference.
Take your time here because the face creates the personality of your amigurumi.
Frequently Asked Questions About Crochet Raccoon Pattern
How long does it take to crochet a raccoon?
A beginner may need several hours to complete a crochet raccoon, depending on yarn weight, hook size, and crochet experience. Small raccoons can take less time, while larger plush versions require more rounds and stuffing. Give yourself plenty of time for sewing the individual pieces and adding facial details.
What yarn is best for a raccoon amigurumi?
Soft acrylic, cotton-blend, and chenille yarn can all work well for raccoon amigurumi. Choose yarn that creates tight stitches and holds its shape. Bernat Blanket yarn gives a particularly soft plush texture, while DK-weight yarn produces more defined stitches and smaller details.
Is this crochet raccoon pattern good for beginners?
Yes, this project can work well for beginners who understand basic single crochet, increases, decreases, and working in rounds. The individual pieces use simple shapes, making them easier to practice separately. Start slowly and use stitch markers to keep track of your rounds.
What size safety eyes should I use for a crochet raccoon?
For a medium-sized raccoon, 9mm safety eyes often create a balanced kawaii appearance. Smaller eyes can give the animal a more subtle expression, while larger eyes create a cartoon-like look. Always choose safety eyes appropriate for the finished project and intended recipient.
Can I sell raccoons made from this pattern?
If you create your own finished amigurumi from a pattern, you can generally sell your handmade item, but you should always check the specific pattern designer’s terms. Do not copy, redistribute, or sell the written pattern itself unless you have permission. Listing the finished item as handmade is usually the better approach.
How do I make my crochet raccoon look fluffier?
Choose a plush or chenille yarn and keep your stitches tight enough to prevent stuffing from showing. You can also gently shape the finished pieces with your hands after stuffing. Avoid brushing or pulling yarn aggressively, especially when working with delicate chenille fibers.
Final Thoughts on Your Crochet Raccoon Pattern
Making a tiny woodland animal from a simple strand of yarn feels surprisingly rewarding. With each round, your raccoon gains more shape, personality, and charm.
This crochet raccoon pattern gives you a simple foundation for creating a cuddly handmade friend. You can keep the classic gray-and-black look or experiment with colors, expressions, and different tail positions.
Most importantly, enjoy the process. Your first raccoon does not need to be perfect to be special, and every little handmade detail tells the story of the time you spent creating it.
Once those final stitches are secured, you will have something you can proudly display, cuddle, or give to someone you love.
Save this pin to your crochet board on Pinterest so you can find this pattern anytime!
Looking for more free crochet animal patterns? Visit Yarned Animals for new amigurumi patterns, kawaii plushies and beginner crochet tutorials added every week at yarnedanimals.com