
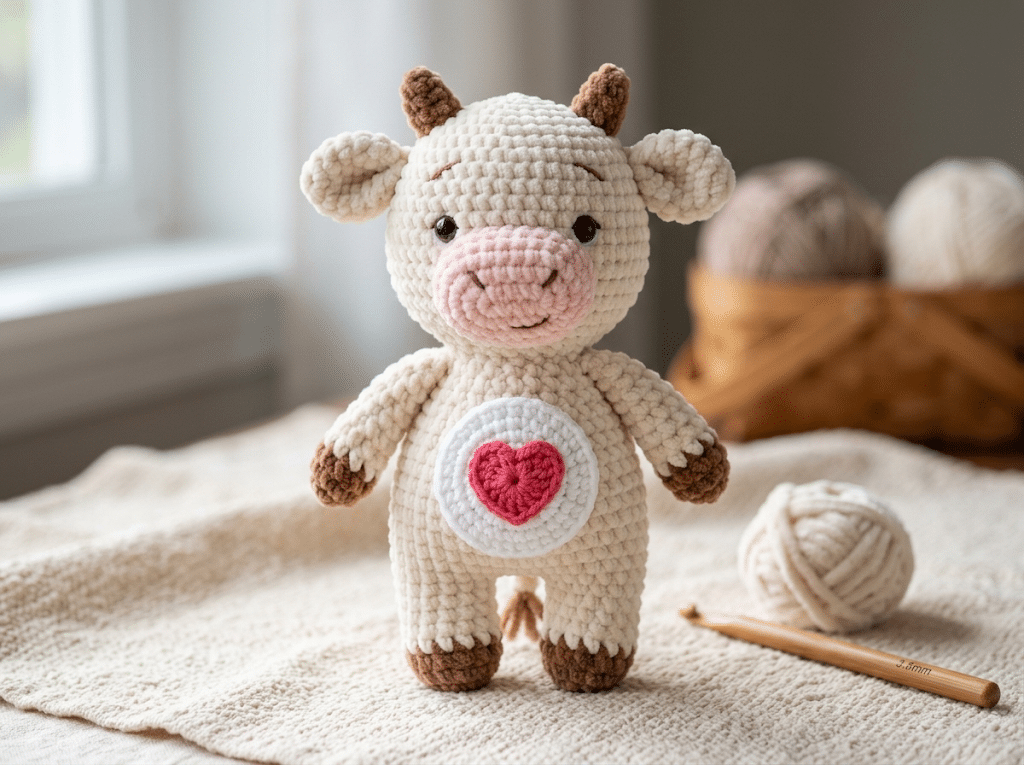
There is something extra special about a tiny handmade cow with a sweet little heart on its belly. This crochet cow pattern gives you a soft, cuddly amigurumi friend with a gentle face, cute little horns, tiny hooves, and a customizable heart belly badge. It makes a lovely handmade gift, nursery decoration, or adorable addition to your plushie collection.
The finished cow can measure around 4–7 inches depending on your yarn weight and hook size. You will use familiar amigurumi techniques such as the magic ring, single crochet, increases, decreases, continuous rounds, and simple sewing.
You can also personalize the heart with felt, embroidery, colors, or your own decorative ideas. Before you pick your favorite colors, let’s gather everything you need and get ready to crochet.
Table of Contents
What Makes This Crochet Cow Pattern So Adorable?
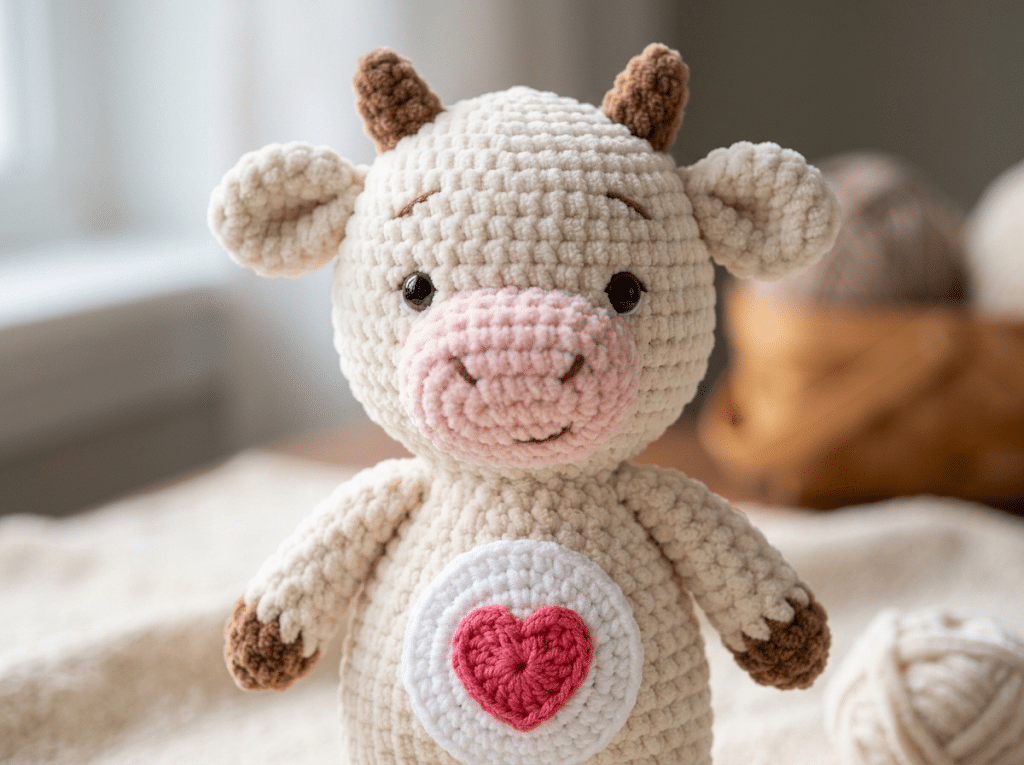
This crochet cow has a simple rounded shape that gives it an especially cuddly appearance. The design includes a separate head, body, legs, arms, ears, horns, snout, and tail. A white belly circle adds a sweet finishing detail, while the heart decoration gives your finished cow its own personality.
The original pattern uses basic amigurumi construction and recommends working in continuous spirals unless a section says otherwise. Stitch markers help you keep track of every round, which makes the shaping much easier to follow.
One of my favorite details is the heart belly badge. You do not have to make every cow identical. You can choose a classic heart, add stripes or dots, or create a completely different little decoration.
Why beginners can enjoy this amigurumi cow
You do not need complicated crochet stitches for the main body pieces. The important techniques are magic ring, single crochet, increase, invisible decrease, chain, slip stitch, and back loop only.
If you already know how to make a basic amigurumi ball, many parts will feel familiar. The head and belly badge use simple increases and decreases to create their rounded shapes.
The joining of the legs is the part that deserves a little extra attention. Take your time here and count your stitches carefully.
The heart badge makes every cow different
The belly badge uses a crocheted white circle with a decorative heart placed in the center. You can make the heart from felt, embroidery, or fabric paint.
This gives you plenty of freedom.
Try pink and red for a Valentine cow, pastel colors for a nursery cow, or rainbow decorations for a cheerful kawaii version.
A soft yarn choice gives a cuddly finish
For a plush texture, the source pattern recommends super bulky chenille or velvet yarn. Worsted weight yarn also works, producing a smaller finished cow.
For this kind of soft amigurumi, I love Bernat Blanket yarn because the chenille texture gives your finished cow an irresistibly squishy feel.
Crochet Cow Pattern Materials and Abbreviations
Now that you know what makes this little cow special, it is time to prepare your supplies. Having everything beside you before you begin can make your crochet session much more relaxing.
The source pattern uses different colors for the main body, accents, snout, and belly badge. The exact amount depends on your yarn choice and finished size.
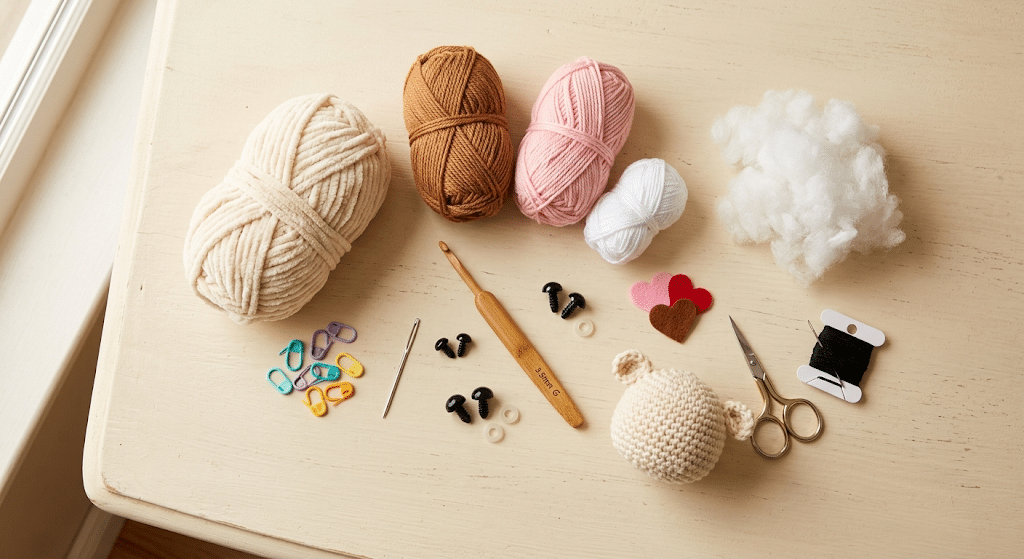
Yarn and crochet hook
For the larger version, the source uses super bulky size 6 chenille or velvet yarn with a 5 mm hook. For a smaller worsted-weight version, it uses a 3.5 mm hook.
Choose:
- Main body color
- Accent color for hooves, horns, and ears
- Light pink or tan for the snout
- White yarn for the belly badge
You can create a traditional white-and-brown cow, a pastel cow, or a completely kawaii color combination.
Helpful tools for amigurumi
You will also need safety eyes, stuffing, a yarn needle, stitch markers, scissors, black embroidery thread, felt, and fabric glue.
A comfortable hook can make a big difference during longer crochet sessions. I especially like the Clover Amour crochet hook because its soft grip feels comfortable while working lots of single crochet.
Keep a stitch marker nearby from the very first round. It will help you identify the beginning of each continuous round.
Crochet abbreviations to remember
Here are the main abbreviations used in the pattern:
- MR — magic ring
- sc — single crochet
- inc — increase
- dec — invisible decrease
- ch — chain
- sl st — slip stitch
- BLO — back loop only
- st/sts — stitch/stitches
Numbers in parentheses show the total stitch count after a round. Brackets show repeated instructions.
If you are new to amigurumi, keep this list beside you. It will make the pattern much easier to read.
How to Crochet the Cow Head and Face
Here is the fun part: watching the cow’s face take shape. The head begins with a small magic ring and gradually grows through regular increases.
The original head uses 6 single crochet stitches in the first round. The following rounds increase evenly until the head reaches 30 stitches. Several rounds then maintain the same stitch count before the decreases begin.
Crochet the rounded cow head
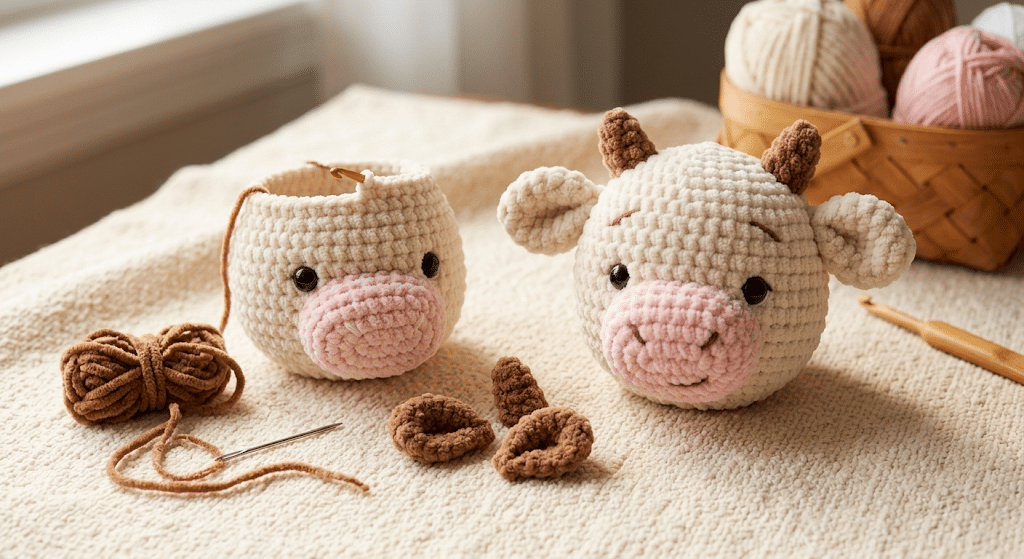
Start the head in your main color.
Work:
- Round 1: 6 sc into a magic ring
- Round 2: increase around
- Round 3: repeat sc 1, increase
- Round 4: repeat sc 2, increase
- Round 5: repeat sc 3, increase
- Rounds 6–11: sc around
- Round 12: repeat sc 3, decrease
- Round 13: repeat sc 2, decrease
- Round 14: repeat sc 1, decrease
- Round 15: decrease around
The source places the safety eyes between rounds 8 and 9, with roughly 5–6 stitches between them.
Stuff the head firmly before completing the final decreases.
Give your cow a sweet little snout
The snout starts with a chain and grows into a small oval shape.
After crocheting the snout, stuff it lightly and sew it onto the center of the face. The source places it between the eyes around rounds 9–12.
Use black embroidery thread to add two tiny nostrils.
A small curved smile underneath the snout gives your cow an especially gentle expression.
Add ears and tiny horns
Make two ears in your accent color. Each ear begins with a magic ring, grows through increases, stays at an even stitch count for two rounds, and then decreases.
Do not stuff the ears. Flatten the openings and pinch the lower section slightly before sewing them onto the head.
The horns are even quicker. Make two small pieces using the accent color, stuff them only very lightly, and leave long yarn tails for sewing.
Place the horns between the ears with a small gap between them.
Crochet Cow Body, Legs, Arms, and Tail
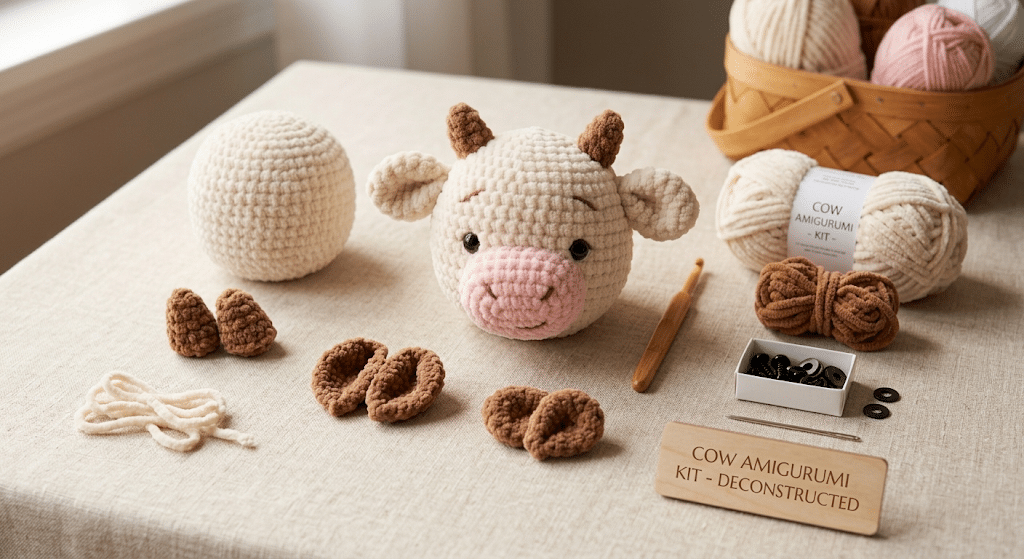
Ready to move on? The body is where your little cow starts looking like a complete plushie.
The legs begin separately, then the second leg connects to the first with a short chain. This construction creates the foundation for the rounded body.
Take your time with the joining round because this is one place where careful stitch counting really helps.
Make the tiny cow legs
Make two legs, beginning with the accent color for the hooves.
Start with a magic ring containing 6 sc. Increase to 12 stitches, then work a back-loop-only round. The BLO round creates a ridge that defines the hoof.
Change to your main body color.
Work three more rounds of single crochet.
Fasten off the first leg. Keep the second leg attached to your yarn because you will use it to begin joining the body.
Join the legs and build the body
From the second leg, chain 2.
Join to the first leg and crochet around it. Then work across the chain space, crochet around the second leg, and finish across the other side of the chain.
The joining round creates 30 stitches in total. Place your stitch marker at the beginning of the new round.
Continue with several rounds of single crochet.
Then decrease gradually:
- Work several rounds at 30 stitches.
- Decrease to 24 stitches.
- Work one round at 24.
- Decrease to 18 stitches.
- Decrease to 12 stitches.
- Finish with decreases to close the body.
Stuff the legs and body firmly as you go.
Add the arms and cute tassel tail
The arms begin in the accent color, just like the hooves. After two increase rounds, switch to the main body color.
Work three rounds evenly, then decrease to 8 stitches.
The arms should receive only light stuffing in the lower half. Keep the upper portion soft and flatten the opening before sewing.
For the tail, chain 8 and slip stitch back along the chain.
You can add a tiny tassel using several short strands of your accent color. Loop them through the tail end, secure them, and trim them neatly.
Create the Heart Belly Badge
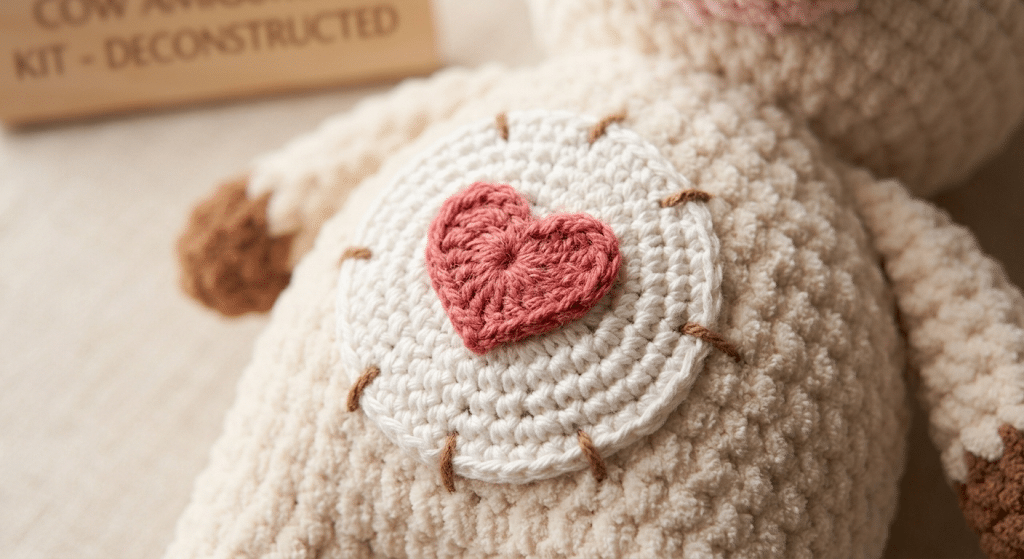
Before we get into assembly, let’s make the little feature that gives this cow so much personality.
The belly badge starts with a white crochet circle. It grows from 6 stitches in the magic ring to 30 stitches through regular increases.
Once your circle is finished, you can choose how to decorate it.
Make a felt heart applique
Felt is one of the easiest choices for beginners.
Cut a heart approximately 1.5–2 inches tall. You can use one solid color or layer smaller decorative pieces on top.
Try:
- Stripes
- Polka dots
- Tiny swirls
- Zigzags
- Small contrasting shapes
Attach your decorations with fabric glue and allow them to dry completely. Then secure the finished heart to the crocheted white circle.
Try embroidery instead
If you enjoy embroidery, sew the white circle onto the belly first.
Then stitch the outline of your heart with embroidery floss. Fill it with satin stitch and add small decorative details using backstitch or French knots.
This method gives your cow a handmade, textured appearance.
Use fabric paint for a quick decoration
Fabric paint gives you another simple option.
Sew the white circle onto the belly and draw your heart design directly onto it. Let the paint dry fully before handling your finished cow.
This is especially fun when making several cows with different personalities.
Assemble Your Adorable Crochet Cow
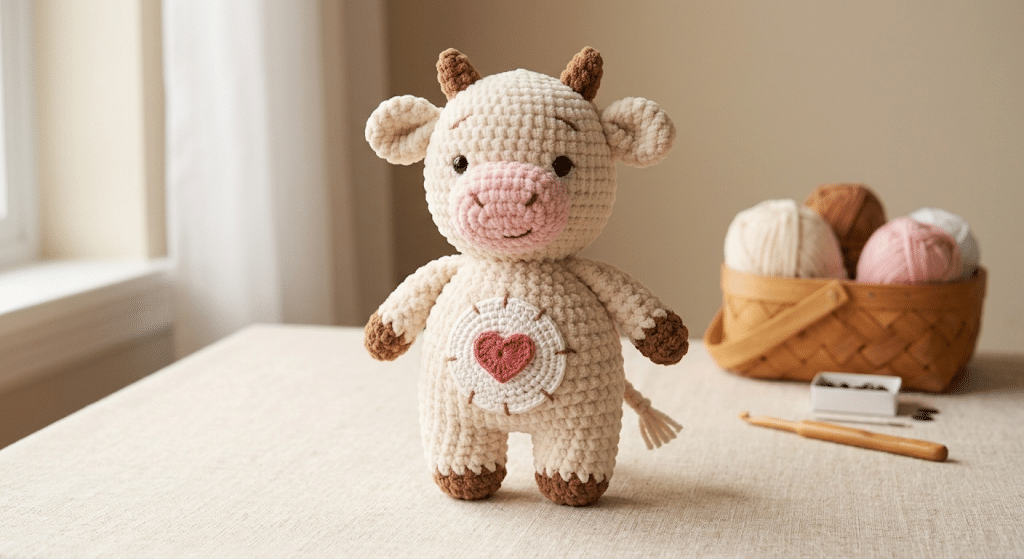
Now comes the moment when all those separate pieces become one little cow.
Before sewing anything permanently, arrange every piece around the body. Check the position of the eyes, snout, ears, horns, arms, tail, and belly badge.
Trust me on this one: taking a minute to check placement can save you from having to undo sewing later.
Attach the head securely
Position the head on top of the body and make sure it sits straight.
Use the long yarn tail to sew around the neck with a whip stitch. Add a little more stuffing through the neck opening if the head needs extra support before closing it completely.
The head should feel secure without pulling the stitches too tightly.
Sew on the facial features
Center the snout between the eyes.
Sew around its full edge, then add the small nostrils and smile with black embroidery thread.
Next, attach the ears to the sides of the head. Slightly cup them while sewing to give them more dimension.
Place the horns between the ears and sew them securely.
Attach the body pieces
Sew the arms to the sides of the body just below the neck.
Keep both arms at the same height for a balanced appearance. Attach the tail to the center back around the upper-middle body rounds.
Finally, center the heart belly badge on the tummy and sew around its entire edge.
Finish by trimming loose yarn ends and gently shaping the plush.
Helpful Tips for Better Amigurumi Results
Before you start your next cow, a few small habits can make your crochet much easier.
The original pattern emphasizes consistent tension, correct hook sizing, strategic stuffing, stitch markers, and checking your gauge.
Keep your stitches tight
Amigurumi needs firm fabric because loose stitches can allow stuffing to show through.
If you notice visible gaps, try a slightly smaller hook.
Your goal is a smooth surface that holds the stuffing neatly inside.
Stuff as you crochet
Do not wait until the final round to add all your stuffing.
Add small amounts as the head and body grow. Firm stuffing works well for the head and body, while the arms need less stuffing.
Add enough to keep the shape firm without stretching your stitches.
Check your stitch count often
A missing increase can change the entire shape of an amigurumi piece.
Count after every round, especially after increase and decrease rounds.
Your stitch marker should move upward with every completed round.
Pay attention to eye placement
The position of the safety eyes changes your cow’s expression.
Higher eyes can create a sweeter, more innocent appearance. Lower placement can make the face look more mature.
For a kawaii look, take a moment to experiment with the placement before permanently securing everything.
Easy Ways to Customize Your Crochet Cow Pattern
Once you finish your first cow, you may want to make another one immediately.
The basic shape works beautifully with different colors and decorative ideas. The source pattern suggests smaller and larger versions, pastel colors, seasonal themes, realistic colors, spots, flower crowns, bows, and different belly badge designs.
Make a tiny or oversized cow
For a smaller cow, use sport or DK yarn with a smaller hook.
For a larger version, use super bulky yarn and a 6 mm hook. The source also suggests adding one or two additional increase rounds when scaling up the head and body.
Remember that changing yarn weight also changes your finished size.
Create a pastel kawaii cow
Pastel pink, mint, lavender, peach, and soft purple can turn this cow into a sweet kawaii plushie.
You can also keep the body cream and use pastel colors only for the horns, hooves, ears, and heart.
A tiny flower crown or bow between the horns can make the finished cow feel extra special.
Make seasonal cow designs
Try red and green for Christmas.
Use pink and red for Valentine’s Day.
Pastel rainbow colors work beautifully for Easter, while orange and black create a fun Halloween version.
You can also replace the heart badge with a star, flower, rainbow, initials, or a name.
That simple badge gives you endless opportunities to make every cow unique.
Frequently Asked Questions About Crochet Cow Pattern
How long does it take to crochet a cow amigurumi?
The time depends on your crochet experience, yarn weight, and how quickly you sew the pieces together. A beginner may need several crochet sessions because the cow includes separate body parts and a decorative belly badge. Experienced amigurumi makers can usually work through the pieces more quickly.
What yarn is best for a crochet cow pattern?
The source pattern recommends super bulky chenille or velvet yarn for a soft, cuddly cow. Worsted weight yarn also works and creates a smaller finished size. Choose a yarn that lets you maintain tight stitches so the stuffing does not show through the fabric.
Is this crochet cow pattern good for beginners?
It is a good choice if you already know basic amigurumi techniques such as the magic ring, single crochet, increases, and decreases. The leg joining section and sewing require extra attention, but the main shapes use familiar stitches. Beginners should count each round and use a stitch marker.
What size safety eyes should I use for the cow?
The source pattern recommends 9mm or 12mm black safety eyes. For the larger super bulky version, 9mm or 12mm eyes can work depending on the expression you want. Test the placement before closing the head so you can adjust the face if needed.
Can I make this cow in different colors?
Yes. The pattern works beautifully with many color combinations. You can make a traditional cow, pastel cow, holiday cow, or realistic brown-and-white cow. You can also add contrasting spots, change the belly heart, or add a small bow or flower crown.
Can I sell a cow I crochet from this pattern?
The supplied source discusses making the finished cows for craft fairs and online sales, but it does not provide a detailed licensing policy. If you plan to sell finished pieces, check the specific designer’s current terms before listing them. Do not assume that permission to sell finished items includes permission to redistribute or sell the written pattern.
Finish Your Sweet Crochet Cow With a Heart
There is something incredibly satisfying about watching a handful of yarn turn into a tiny cow with a happy face and a heart on its belly. This crochet cow pattern gives you plenty of room to practice basic amigurumi skills while still leaving space for your own creativity.
You can make the cow small or large, choose classic or pastel colors, and decorate the belly badge in a way that feels completely yours. Most importantly, take your time and enjoy each little step.
Once you finish that final stitch and hold your handmade cow in your hands, you will have something much more special than a store-bought plushie. You will have made a little friend yourself.
Save this pin to your crochet board on Pinterest so you can find this pattern anytime!
Looking for more free crochet animal patterns? Visit Yarned Animals for new amigurumi patterns, kawaii plushies and beginner crochet tutorials added every week at yarnedanimals.com