
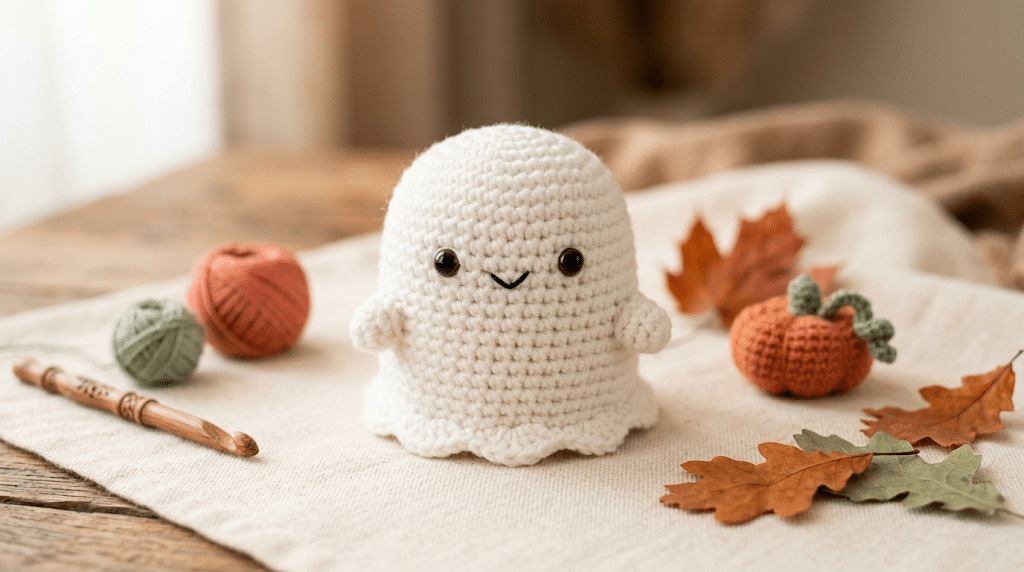
There is something extra magical about a tiny ghost made from soft yarn. Add a sweet little face, a wavy bottom, and a tiny Halloween touch, and suddenly spooky season feels absolutely adorable.
This crochet ghost pattern (kawaii Halloween style) is designed for beginners who want a quick amigurumi project with plenty of personality. You will learn how to crochet the rounded ghost body, create the cute face, shape the wavy bottom, add stuffing, and finish your little Halloween friend.
The finished ghost makes a lovely shelf decoration, handmade gift, party favor, or seasonal plushie. You can even make several ghosts in different colors for a whole spooky-cute collection.
So grab your hook, choose your favorite yarn, and let’s make a ghost that is much more cute than scary!
Table of Contents
Why This Crochet Ghost Pattern Is So Cute
The best Halloween crafts do not always need complicated details. Sometimes, a simple shape and an expressive face create all the charm you need.
This crochet ghost pattern (kawaii Halloween style) uses a rounded body with a slightly wavy base. That shape gives your ghost the classic floating appearance while keeping the construction beginner-friendly.
The face does most of the emotional work. Two small safety eyes and a tiny embroidered mouth can turn a basic white ghost into a cheerful little character.
The kawaii shape beginners can handle
You will mainly work with single crochet, increases, and decreases. These stitches create the firm fabric needed for a stuffed amigurumi toy.
You will work the body in continuous rounds. That means you do not need to turn your project after every round.
If crochet abbreviations feel confusing, keep a small reference nearby. The Craft Yarn Council provides a useful guide to common crochet terms and abbreviations.
Why the wavy bottom matters
A straight bottom can make a crochet ghost look more like a tiny ball. A softly uneven edge gives it that floating Halloween appearance.
You do not need dramatic points. Small rises and dips around the bottom edge are enough to create movement.
Beginner tip: Keep your tension consistent while shaping the bottom. Even tension helps the ghost keep its rounded silhouette.
A perfect little seasonal project
This project works especially well when you want something you can finish without committing to a large crochet project.
You can make one ghost for your desk or create a small group for a Halloween display. Try different facial expressions to give every ghost its own personality.
For a softer plush finish, Bernat Blanket yarn can create a wonderfully cuddly texture. Just remember that plush yarn can make individual stitches harder to see.
Now that you know why this little ghost is so lovable, let’s gather everything you need.
Crochet Ghost Pattern (Kawaii Halloween Style): Materials and Basics
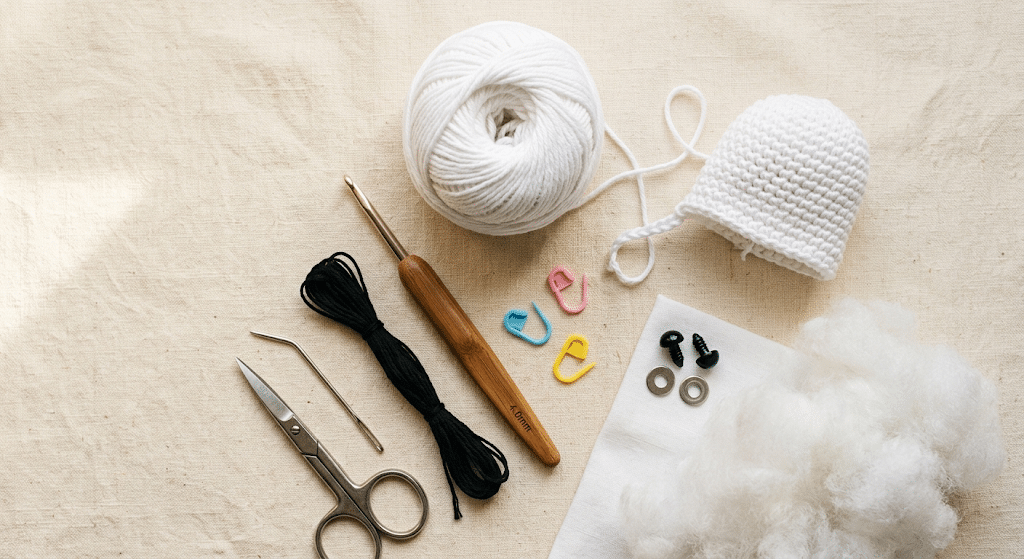
Before you begin, prepare your materials in one place. Having everything beside you makes the actual crocheting much more relaxing.
For this project, choose a yarn that gives you clear stitches and a firm shape. Smooth yarn makes it easier to see increases and decreases, especially if you are still learning amigurumi.
A cotton or cotton-blend yarn works beautifully for a classic ghost. Acrylic yarn can also work well if you prefer a softer feel.
Yarn and hook choices
You will need white yarn for the main ghost body. You can also use a small amount of black yarn for the mouth.
Choose a crochet hook that creates tight stitches with your yarn. Amigurumi normally needs a smaller hook than you might use for a scarf.
The goal is simple: your stitches should be tight enough that stuffing cannot easily show through.
For a more traditional amigurumi texture, Lion Brand recommends yarns with good stitch definition and minimal stretch.
Basic supplies
Gather these supplies before starting:
- White yarn
- Black yarn for embroidery
- Crochet hook suited to your yarn
- 9mm safety eyes
- Poly-fil Premium fiberfill
- Stitch marker
- Yarn needle
- Scissors
For your hook, I especially like a Clover Amour crochet hook when teaching beginner projects. The comfortable grip makes it easier to focus on your stitches instead of your hand position.
Crochet abbreviations
This pattern uses standard U.S. crochet terminology.
- MR = magic ring
- sc = single crochet
- inc = increase
- dec = decrease
- sl st = slip stitch
- st = stitch
- rnd = round
- FO = fasten off
The Craft Yarn Council lists standard abbreviations such as sc, inc, dec, sl st, and rnd in its crochet terminology guide.
If you are brand new to amigurumi, do not worry about memorizing everything. Keep the list beside your work and check each abbreviation as you go.
How to Crochet the Ghost Body in 10 Easy Steps
Now comes the fun part!
This crochet ghost pattern (kawaii Halloween style) starts with a simple rounded amigurumi body. You will build the shape gradually, add stuffing as you go, and finish with a cute wavy edge.
Take your time with the first few rounds. Once you get into the rhythm, the body becomes much easier.
Step 1: Start the magic ring
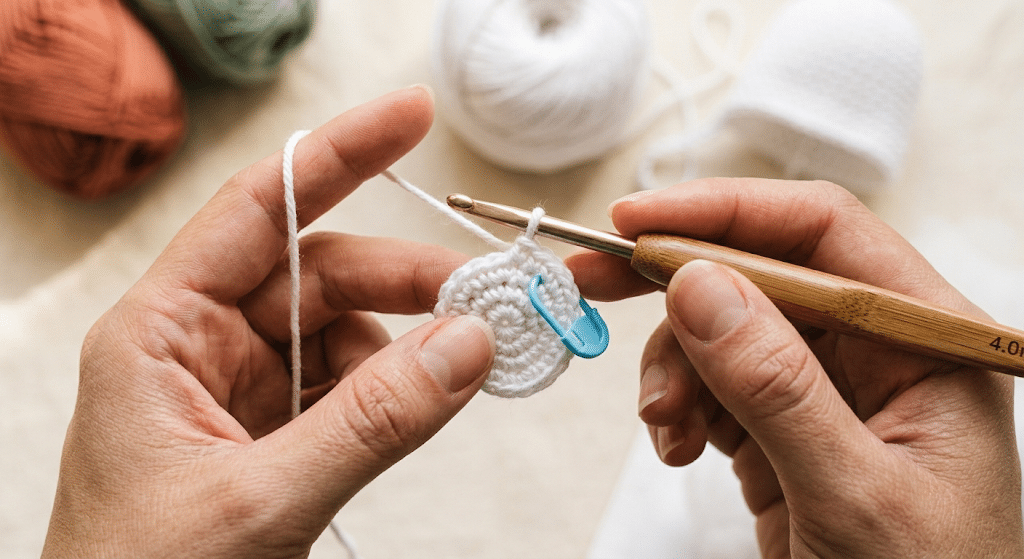
Begin with white yarn and create a magic ring.
Work 6 single crochet stitches into the ring. Pull the yarn tail gently to close the center.
Place your stitch marker in the first stitch of the round.
Do not worry if your magic ring looks slightly loose at first. You can tighten it once your stitches are complete.
Step 2: Build the first increases
Work an increase in each stitch around.
You should now have 12 stitches.
Keep your stitches snug but not overly tight. Very tight tension can make your hook difficult to insert into the next stitch.
Step 3: Continue widening the head
Work one single crochet in the first stitch, followed by an increase in the next stitch.
Repeat this sequence around the round.
Your ghost should begin forming a small circular shape.
The circle will eventually become the widest part of the ghost’s head and body.
Step 4: Create the rounded body
Continue increasing evenly around the next few rounds.
You want the shape to become wider without becoming completely flat.
Check your work from the side occasionally. A cute ghost should have a soft, rounded silhouette rather than a flat disk.
If your stitches feel difficult to count, move your stitch marker after every round.
Step 5: Crochet the main body
Once you reach the desired width, work several rounds of single crochet without increases.
This section creates the height of your ghost.
Keep your tension consistent and check that the body remains symmetrical.
At this stage, your project should start looking like a tiny white capsule or rounded bell.
Step 6: Add the safety eyes
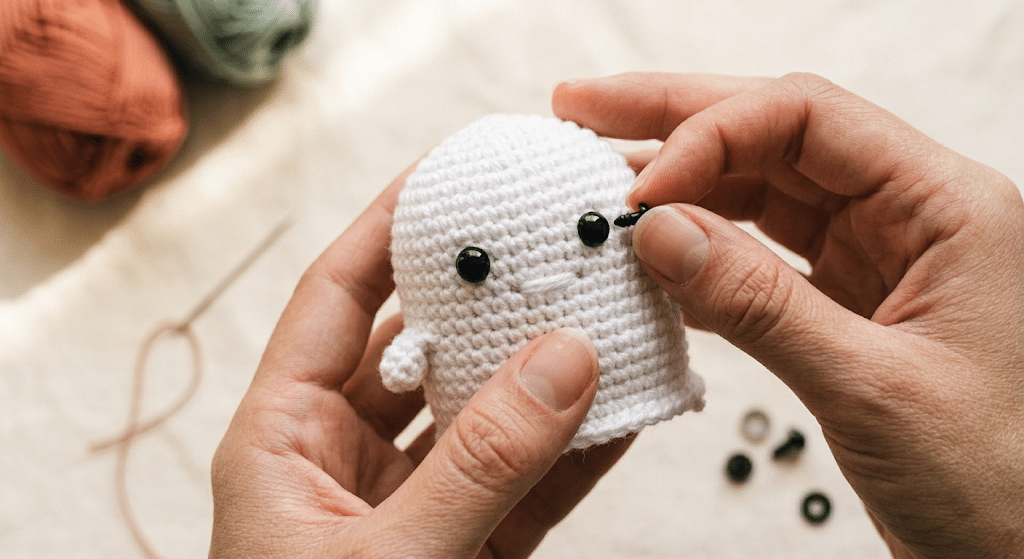
Place the safety eyes before closing the body.
For a kawaii expression, position them slightly below the widest part of the head.
Leave enough space between them for a tiny embroidered mouth.
Try holding the eyes in place before pushing them through. This lets you adjust the expression until your ghost looks exactly right.
Step 7: Start decreasing
Now begin shaping the lower part of the body.
Work single crochet stitches followed by decreases at regular intervals.
The body will slowly become narrower.
Do not rush this section. Even decreases help create a smooth rounded shape.
If you notice a small gap between stitches, check your tension before adding more stuffing.
Step 8: Stuff your ghost
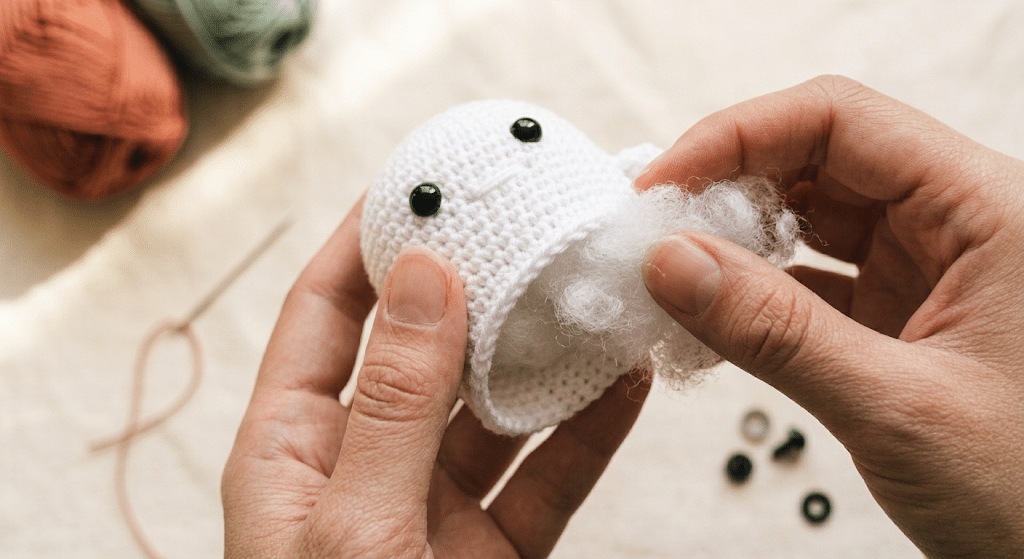
Add Poly-fil Premium fiberfill through the opening.
Start with small amounts rather than one large handful.
Push the stuffing gently toward the head and sides. You want a plump shape without stretching the crochet fabric.
Important tip: Stuff firmly enough to hold the shape, but stop before the stitches become stretched.
Add a little more stuffing as you continue the final rounds.
Step 9: Create the cute ghostly bottom
For the final section, shape the opening into a soft wavy edge.
You can create this effect by varying the height of the final stitches around the opening.
Keep the waves gentle. The goal is a floating ghost shape rather than a complicated ruffle.
Once you are happy with the edge, fasten off and weave the yarn tail securely through the remaining stitches.
Step 10: Finish the kawaii face
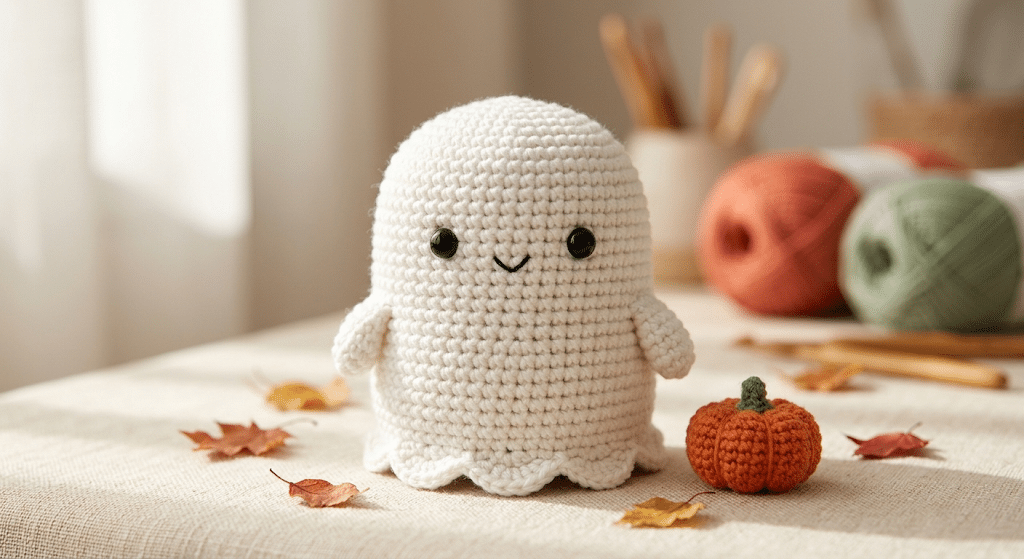
Use black yarn and a yarn needle to embroider a tiny mouth.
A simple curved smile works beautifully.
You can also add tiny cheek details using a small amount of pink or peach yarn if you want an extra kawaii touch.
Give your ghost one final fluff and gently shape the body with your hands.
And there it is — your tiny Halloween ghost!
How to Make Your Ghost Look Extra Kawaii
The basic body gives you the classic ghost shape, but the details create the personality.
A few tiny changes can make your amigurumi look completely different.
Give your ghost a sleepy expression
For a sleepy ghost, place the eyes slightly lower and embroider small curved eyelids.
This works especially well for bedroom or cozy autumn decorations.
You can also make the mouth tiny and curved downward for a sleepy pout.
Try different kawaii faces
Do not feel limited to one expression.
Try:
- Happy smiling ghost
- Surprised ghost
- Sleepy ghost
- Blushing ghost
- Tiny open-mouth ghost
- Wink ghost
You can make several ghosts from the same pattern and give every one a different face.
That is one of my favorite things about amigurumi. Small details can create completely different personalities.
Add a Halloween accessory
A tiny accessory can make your ghost even more festive.
Try adding a miniature crochet pumpkin, a tiny witch hat, or a little bow.
You could also use orange yarn for a small decorative accent.
Keep accessories secure if your ghost will be handled by young children. Safety eyes and small decorative pieces can present choking hazards.
Troubleshooting Your Crochet Ghost Pattern
Even easy amigurumi can have moments that make you stop and wonder, “What happened here?”
That is completely normal.
Crochet is a skill you build through practice. If your first ghost looks slightly different from the sample, that does not mean you failed.
Why can I see the stuffing?
Visible stuffing usually means your stitches are too loose.
Try using a smaller hook or tightening your tension slightly.
You can also add stuffing in smaller portions. This prevents you from pushing too much fiberfill against the stitches.
Why does my ghost look lumpy?
Uneven increases or decreases can create bumps.
Count your stitches at the end of each round. A missing increase can change the entire shape.
Stitch markers are your best friend here.
If you are new to reading patterns, remember that crochet abbreviations are designed to make patterns shorter and easier to follow once you understand them.
Why is my ghost too flat?
You may have stopped increasing too early or used very loose stuffing.
Check the shape before closing the body.
A little extra fiberfill can help your ghost become fuller, but do not overstuff.
Why does the face look uneven?
Safety eyes can look different when they are only a stitch apart.
Before locking the backs into place, look at the ghost from several angles.
Take your time with the face. It is usually the detail that gives your amigurumi its personality.
Fun Ways to Customize Your Halloween Ghost
Once you finish your first ghost, you may find yourself wanting to make another.
Luckily, this design gives you plenty of room to experiment.
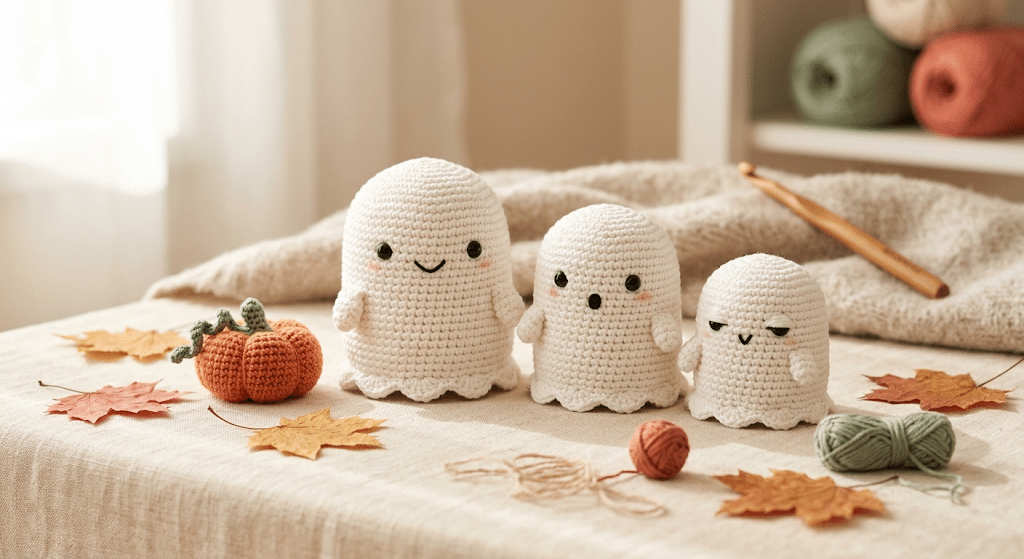
Make a ghost family
Create three or four ghosts with different expressions.
Use the same white yarn but change their faces.
One can look happy, another sleepy, another surprised, and another slightly mischievous.
Place them together on a shelf for a simple Halloween display.
Change the yarn texture
Smooth yarn creates a classic amigurumi appearance.
A plush yarn creates a softer, squishier ghost.
A fuzzy yarn can give the ghost a slightly mysterious Halloween appearance.
Remember that textured yarn can hide individual stitches. If you are a beginner, smooth yarn usually makes learning easier.
Experiment with ghost colors
Your ghost does not have to stay pure white.
Try:
- Cream for a vintage ghost
- Pale pink for a kawaii ghost
- Light gray for a spooky ghost
- Lavender for a magical ghost
- Pale green for a playful Halloween character
If you change yarn weight, your finished ghost will also change size.
A thicker yarn creates a larger ghost, while thinner yarn creates a miniature version.
Before you get started, remember that different fibers can behave differently even when they share a similar weight. The Craft Yarn Council also recommends checking gauge and fiber differences when substituting yarns.
How to Use Your Finished Crochet Ghost
Your finished ghost can become much more than a seasonal toy.
There are lots of cute ways to display or gift it.
Make a Halloween shelf display
Place your ghost beside pumpkins, candles, fall leaves, or other handmade decorations.
A small group looks especially charming on a bookshelf.
You can also place one beside your crochet supplies for a little seasonal studio decoration.
Turn it into a handmade gift
A crochet ghost makes a sweet little Halloween gift.
Add it to a Halloween basket with candy, cozy socks, or another handmade item.
You could also make matching ghosts for friends.
Handmade gifts feel special because someone can see the time and care behind every stitch.
Create Halloween party favors
Make several miniature versions and use them as table decorations.
You can place one at each table setting for a Halloween gathering.
For a smaller party favor, simply reduce the number of body rounds and use a thinner yarn.
Make a seasonal crochet collection
If you love amigurumi, this ghost can become the beginning of a whole Halloween collection.
Imagine a shelf filled with ghosts, pumpkins, bats, black cats, spiders, and little monsters.
Use the same facial style across each project so your collection feels coordinated.
Tips for Making a Ghost That Looks Professional
Small finishing details can make a surprisingly big difference.
You do not need advanced crochet skills to create a polished amigurumi. You simply need to slow down during the final steps.
Keep your stitches consistent
Try to maintain the same tension throughout the body.
Consistent stitches make the surface smoother and help the shape look balanced.
If you notice your tension changing, pause for a moment and relax your hands.
Hide your yarn ends carefully
Weave yarn tails securely into the inside of the project.
Avoid leaving long ends visible around the face or bottom.
A clean finish makes your ghost look much more polished.
Shape the stuffing before closing
Use your fingers to gently push stuffing toward any empty areas.
Check the head, sides, and bottom.
Your ghost should feel evenly filled without becoming hard.
Take your time with the face
The face is the focal point.
Place the eyes temporarily before securing them permanently.
Look at your ghost from the front, side, and slightly above.
Sometimes moving an eye by just one stitch can make the expression much cuter.
Frequently Asked Questions About Crochet Ghost Pattern (Kawaii Halloween Style)
How long does it take to crochet a ghost?
A beginner may need a few hours for their first ghost, depending on crochet speed and experience. Once you understand the increases, decreases, stuffing, and finishing steps, your next ghost can work up much faster.
What yarn is best for a crochet ghost?
Smooth cotton or cotton-blend yarn works especially well for a crochet ghost because it provides clear stitch definition. Acrylic yarn also works nicely. Plush yarn creates a soft finish but can make individual stitches harder to see.
Is this crochet ghost pattern good for beginners?
Yes. The design focuses on basic amigurumi techniques, including single crochet, increases, decreases, stuffing, and simple embroidery. If you can work single crochet in the round, you can comfortably practice this project.
What size safety eyes should I use?
For a medium-sized ghost, 9mm safety eyes create a cute kawaii proportion. Smaller ghosts may look better with 6mm eyes, while larger ghosts can handle 12mm eyes. Always consider the finished size before choosing your eyes.
Can I sell amigurumi made from this pattern?
You can generally sell finished handmade items when the designer permits it, but you should always check the specific pattern’s usage terms. Do not sell, copy, or redistribute the written pattern itself unless you have permission.
Can I make this ghost without safety eyes?
Yes. Embroidered eyes make a lovely alternative.
This option works especially well if you want a completely yarn-based decoration. It can also be a better choice when making toys for very young children, since loose small parts can pose a choking hazard.
Conclusion: Your Adorable Halloween Ghost Is Ready
There is something incredibly satisfying about watching a small ball of yarn become a character with a personality.
With this crochet ghost pattern (kawaii Halloween style), you learned how to build a rounded amigurumi body, create a soft wavy bottom, add stuffing, position the eyes, and finish a sweet Halloween face.
The best part is that your ghost does not need to be perfect. Every stitch represents something you made with your own hands, and that makes the finished piece special.
Make one for yourself, create a little ghost family, or surprise someone with a handmade Halloween gift. Once you finish the first one, you may already be planning your next spooky character.
Save this pin to your crochet board on Pinterest so you can find this pattern anytime!
Looking for more free crochet animal patterns? Visit Yarned Animals for new amigurumi patterns, kawaii plushies and beginner crochet tutorials added every week at yarnedanimals.com