
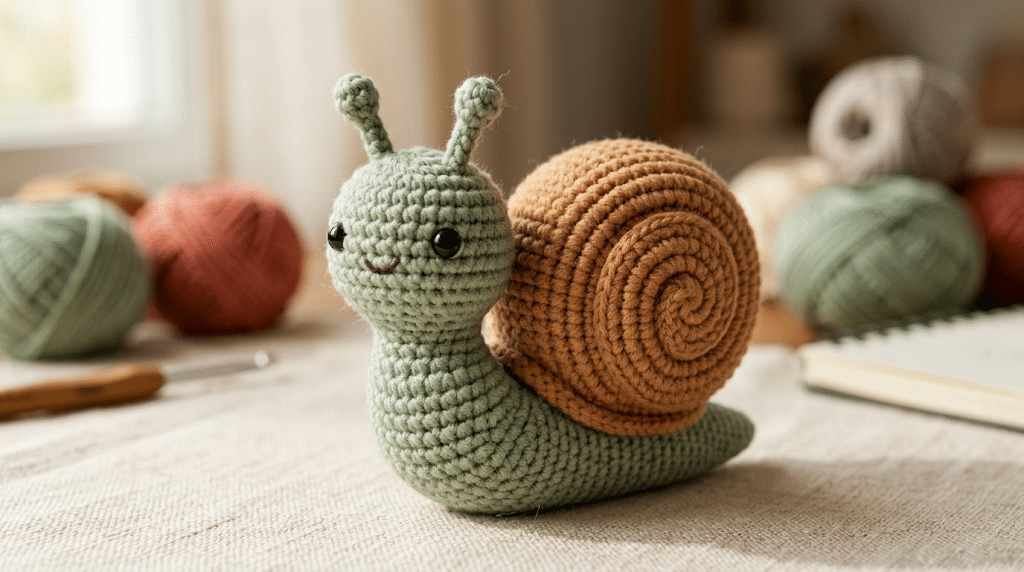
There is something wonderfully sweet about a tiny crochet snail slowly making its way across your craft table. With its round shell, little feelers, and soft squishy body, a crochet snail pattern makes a charming project for beginners and experienced amigurumi makers alike.
This project keeps the shapes simple, so you can focus on enjoying the process rather than worrying about complicated techniques. You’ll learn how to choose your yarn, shape the body and shell, add the tiny details, and give your finished snail plenty of personality.
If you love making handmade gifts or cute desk companions, this little amigurumi snail is such a fun project to keep in your crochet basket. Grab your hook, pick your favorite colors, and let’s get started.
Table of Contents
Why This Crochet Snail Pattern Is So Much Fun
Tiny amigurumi projects have a special kind of charm. They use small amounts of yarn, work up fairly quickly, and give you something adorable to hold when you finish. A snail makes an especially lovely choice because its shell gives you an easy way to experiment with color and texture.
This crochet snail pattern also works beautifully as a beginner project. You’ll practice familiar amigurumi skills such as working in rounds, keeping your stitches tight, shaping simple pieces, and sewing parts together.
The finished snail can become a cute shelf decoration, handmade gift, nursery accessory, or little crochet companion. You can even make several snails in different colors for a tiny garden-inspired collection.
Choose a Cute Color Combination
Start with two or three colors that make you smile. A soft green body with a caramel shell creates a classic garden look, while pink, lavender, cream, or peach can give your snail a kawaii style.
For a softer handmade finish, Bernat Blanket yarn creates a plush chenille texture that feels especially cuddly in small amigurumi projects.
Keep Your Stitches Tight
Amigurumi looks best when the stuffing stays neatly inside the crocheted fabric. Use a smaller hook than you might normally choose for the same yarn.
Tip: If you can easily see stuffing through your stitches, try a smaller hook or tighten your tension slightly.
Make Your Snail Your Own
The basic design gives you plenty of room for creativity. Try a darker shell, embroidered cheeks, tiny eyelashes, or a colorful spiral.
You can also change the proportions. A larger shell gives your snail a playful cartoon appearance, while a smaller shell creates a more delicate little creature.
Crochet Snail Pattern Materials and Preparation
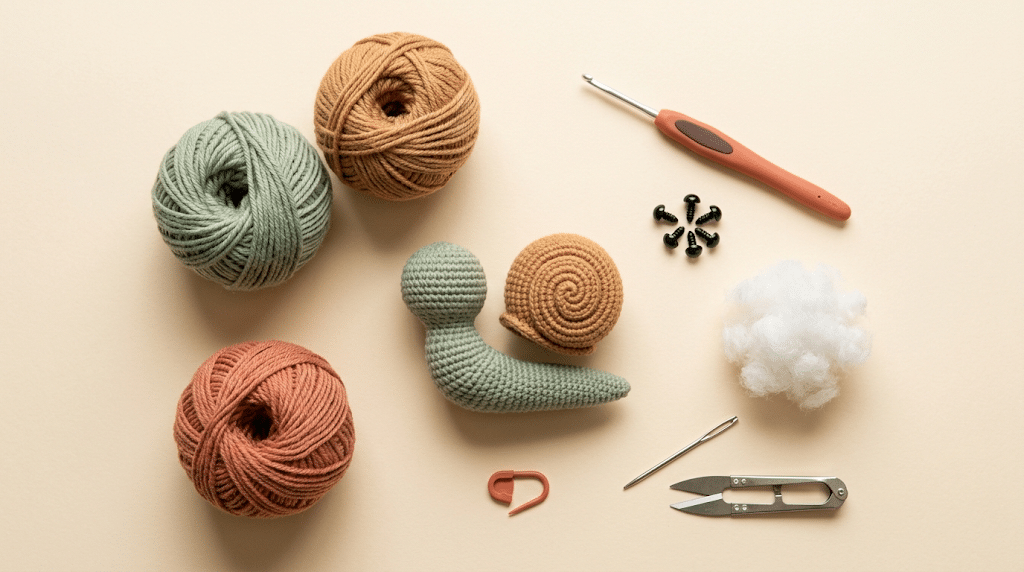
Before you begin, gather everything you need and create a comfortable workspace. Having your tools nearby makes the project much more relaxing, especially when you reach the sewing and finishing stages.
For this project, choose a smooth yarn that lets you clearly see your stitches. Cotton or acrylic yarn works nicely for a structured amigurumi shape, while chenille creates a softer plush result.
Yarn and Crochet Hook
Choose one main color for the snail’s body and another for the shell. A small accent color can work beautifully for the eyes, cheeks, or shell details.
Paintbox Simply DK yarn works well when you want clear stitches and a neat shape. Its lighter weight also makes it easier to see where each stitch belongs.
A Clover Amour crochet hook is another comfortable choice for amigurumi. The soft handle makes repeated rounds easier on your hand during longer crochet sessions.
Stuffing and Safety Eyes
You’ll need a small amount of Poly-fil Premium fiberfill to give the body and shell their rounded shapes.
Choose safety eyes that match the size of your finished snail. 6mm safety eyes create a tiny kawaii expression on a small project, while larger designs may suit 9mm or 12mm eyes.
Helpful Crochet Tools
Keep a few simple tools nearby:
- Stitch markers
- Yarn needle set
- Scissors
- Crochet hook
- Main-color yarn
- Shell-color yarn
- Fiberfill
- Safety eyes
A stitch marker can save you from losing your place during continuous rounds. Your yarn needle will also make sewing the pieces together much easier.
How to Make This Crochet Snail Pattern in 10 Easy Steps
Now that your materials are ready, here is the fun part. You’ll build your snail from a few simple shapes and then bring everything together at the end.
You don’t need advanced crochet experience. Take your time, check your stitches often, and remember that handmade pieces do not need to look perfectly identical.
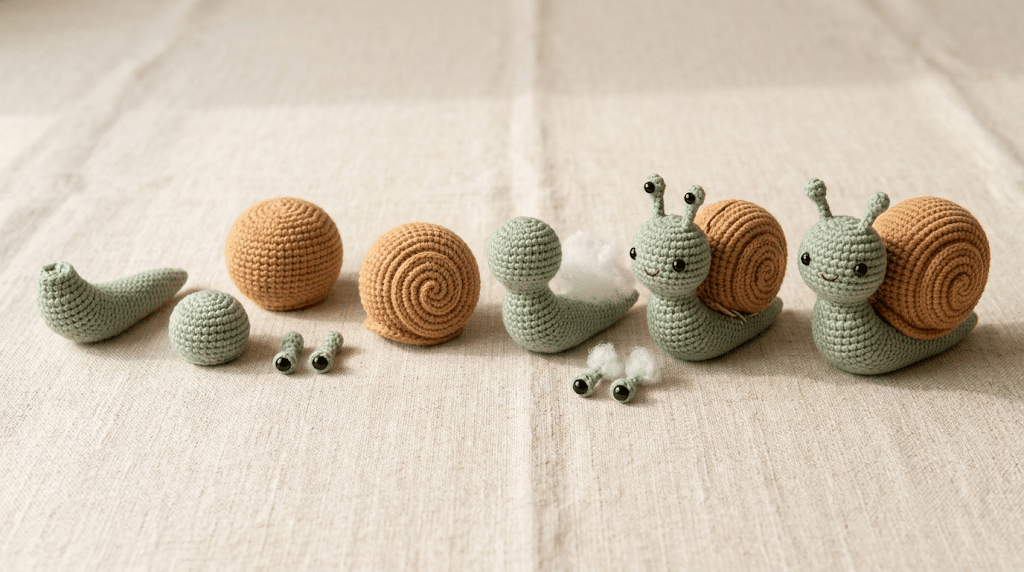
Step 1: Crochet the Snail Body
Begin with the main body color. Work in continuous rounds to create a small rounded shape.
Keep your stitches snug as you build the body. The lower section should remain slightly wider, giving your snail a stable base.
As the body becomes taller, gradually shape the upper portion so it transitions naturally toward the head.
Step 2: Shape the Head
Continue working the head from the body or create it as a separate piece, depending on your preferred construction.
The head should have a soft rounded shape rather than a sharp point. Add a little stuffing as you work so you can control the shape.
Beginner tip: Add stuffing gradually instead of filling everything at once. Small amounts help you create a smoother shape.
Step 3: Add the Eye Stalks
A snail becomes instantly recognizable once you add its little eye stalks.
Create two narrow crocheted pieces and attach them to the top of the head. Keep them similar in height, but don’t worry if they are not perfectly identical.
For a playful expression, angle the stalks slightly outward.
Step 4: Crochet the Shell
Next up comes the most recognizable part of your amigurumi snail: the shell.
Use your shell color and crochet a rounded circular piece. Build the shape gradually so it develops a slightly domed appearance.
The shell should feel substantial without becoming too heavy for the body.
Step 5: Create the Shell Spiral
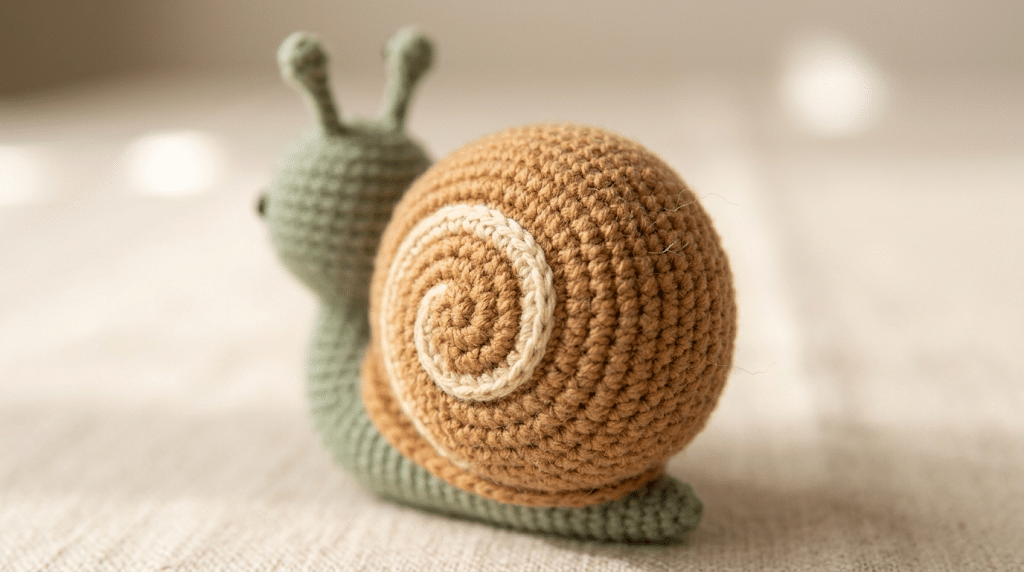
Here is where your snail really starts to show personality.
Use a contrasting yarn to create a simple spiral across the shell. You can crochet a narrow spiral separately and sew it on, or embroider the design directly.
Keep the spiral slightly raised if you want a more dimensional handmade look.
Step 6: Add the Stuffing
Before closing your pieces completely, add fiberfill little by little.
Push the stuffing gently into the corners with the blunt end of your crochet hook or another safe tool. Avoid packing it too tightly.
The goal is a firm but squishy finish. Your snail should hold its shape without feeling hard.
Step 7: Attach the Safety Eyes
Place the eyes evenly on the head.
Before locking them into place, step back and look at your snail from the front. Moving an eye slightly can completely change the expression.
Tip: For a very cute kawaii look, position the eyes a little lower and closer together.
Step 8: Sew the Shell to the Body
Place the shell against the snail’s back and use your yarn needle to stitch it securely into position.
Work slowly around the edges. Small, even stitches will help the shell sit naturally against the body.
Check the attachment from several angles before finishing the yarn ends.
Step 9: Add the Finishing Details
Now you can give your snail its personality.
Consider adding tiny embroidered cheeks, a little smile, eyelashes, or a contrasting shell border. These small details can make your handmade snail feel completely unique.
You can also add a tiny flower or heart accent if you are making the snail as a gift.
Step 10: Finish and Give Your Snail a Personality
We are almost there!
Weave in every loose end securely and gently reshape the body, head, and shell with your fingers.
Give your finished snail a little squeeze and check that all attachments feel secure. Then place it somewhere you can enjoy seeing your handmade creation.
Tips for Making a Cute Amigurumi Snail
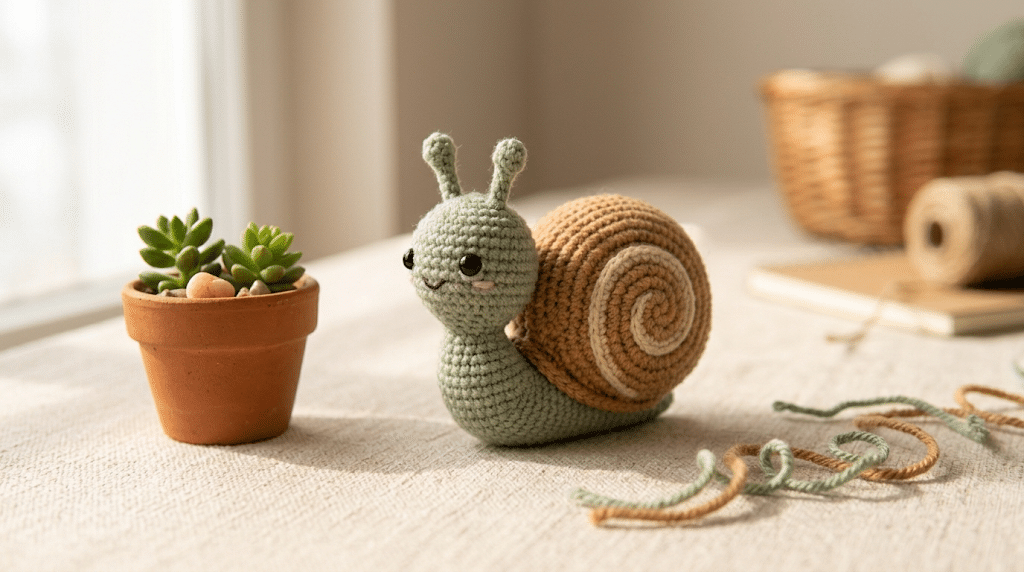
Once you understand the basic construction, you can make your snail look completely different simply by changing colors, proportions, and facial details.
The best part about amigurumi is that small changes can create a huge difference. A slightly bigger shell can make the snail look cartoonish, while tiny eyes create a softer expression.
Create a Kawaii Expression
Facial placement matters more than you might expect.
Place the eyes close together for a sweet expression. Add tiny embroidered cheeks underneath them for extra personality.
A small curved smile can also make your snail look cheerful without adding much extra work.
Experiment With Shell Colors
Your shell does not need to stay brown or tan.
Try pastel pink, sage green, cream, mustard, lavender, or terracotta. You can even make the spiral a contrasting shade.
For a gift, consider choosing colors based on the recipient’s favorite colors.
Keep the Shell Secure
The shell should sit comfortably against the body without wobbling.
Sew around several points rather than attaching it with only a few stitches. This creates a stronger connection and helps the shell stay in position.
If you plan to give the snail to a child, pay extra attention to every small attachment and follow the safety guidance for your chosen materials.
Common Mistakes When Crocheting a Snail
Even simple amigurumi can have a few tricky moments. The good news is that most problems have easy fixes.
If your first snail looks slightly different from the picture in your head, don’t worry. Handmade crochet naturally has character, and your next version will feel easier.
The Body Looks Too Loose
Loose stitches can make the stuffing visible.
Try using a smaller hook or slightly tighter tension. Your fabric should feel dense enough to hold the stuffing securely.
The Shell Looks Flat
A flat shell can happen when you do not add enough stuffing or when the shape lacks enough height.
Add fiberfill gradually and gently shape the shell with your fingers. If needed, add a little extra stuffing toward the center.
The Face Looks Uneven
Safety eyes can be surprisingly expressive.
Before securing them permanently, place both eyes and view your snail from straight ahead. Adjust them until the face looks balanced.
Remember that tiny differences can actually make handmade amigurumi look more charming.
Fun Ways to Use Your Crochet Snail
Your finished snail can become much more than a simple crochet decoration.
Because this project is small and lightweight, you can use it for several creative purposes. It also makes a sweet handmade gift when you want something personal without spending weeks on a large project.
Make a Handmade Gift
A tiny snail makes a lovely birthday gift, teacher gift, stocking stuffer, or surprise for a crochet-loving friend.
Place it inside a small gift box or pair it with a handwritten note. Handmade gifts feel extra special because the recipient knows you spent time creating them.
Decorate a Desk or Shelf
Place your snail beside a plant, books, or your crochet supplies.
A small group of snails can create an adorable miniature garden display. Make each one with a different shell color for a playful collection.
Turn It Into Seasonal Decor
Change the colors to match different seasons.
Use warm orange and brown shades for autumn, soft green for spring, or pastel colors for Easter-inspired decor. You can even create tiny themed shells for holidays.
Crochet Snail Pattern Ideas for Gifts and Collections
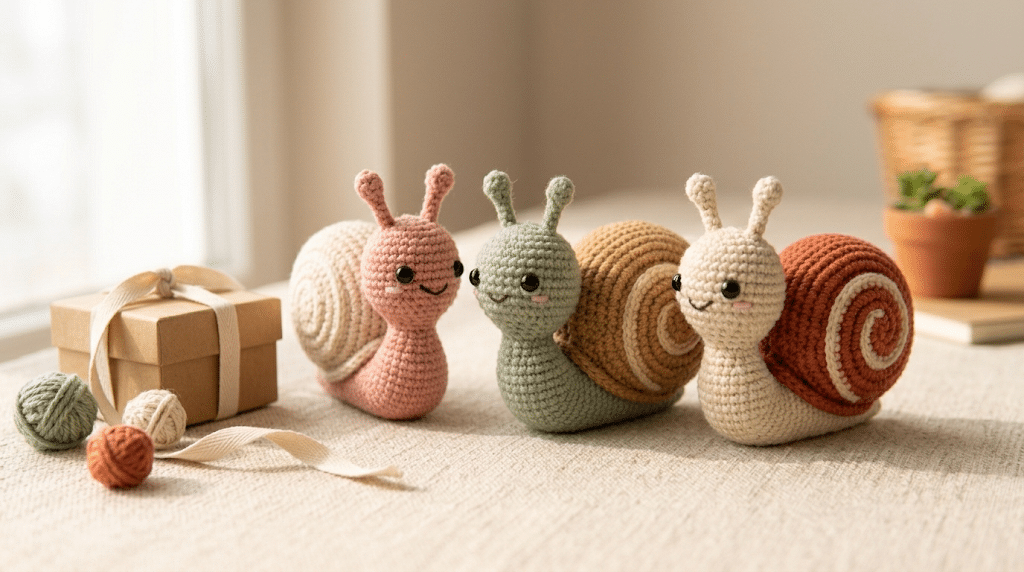
Ready to move on? Once you make your first snail, you may find yourself wanting to create an entire little family.
This is one of the best things about small amigurumi. You can reuse the same basic construction while changing the personality of every finished piece.
Make a Family of Snails
Create one large snail, one medium snail, and several tiny snails.
Give each one a different shell color and facial expression. A simple size variation can make your collection look surprisingly adorable.
Create Matching Garden Animals
Your snail can become part of a larger handmade garden theme.
Pair it with crochet frogs, mushrooms, butterflies, bees, or ladybugs. These projects look especially cute together on a shelf or nursery display.
Give Each Snail a Personality
Think beyond color.
One snail could have sleepy eyes, another could have rosy cheeks, and another could have a cheerful embroidered smile. Small details give each handmade animal its own character.
Frequently Asked Questions About Crochet Snail Pattern
How long does it take to crochet a snail?
A small amigurumi snail usually takes a few hours, depending on your crochet speed and experience. Beginners may need extra time for shaping, stuffing, sewing, and finishing. Once you become comfortable with continuous rounds, you can often make the basic shapes much faster.
What yarn is best for a crochet snail?
A smooth DK or worsted-weight yarn works well for a structured snail. Cotton blends can make stitches easy to see, while chenille yarn creates a soft plush finish. Choose yarn that feels comfortable in your hands and produces a tight enough fabric to hold stuffing securely.
Is this crochet snail pattern good for beginners?
Yes. A snail makes a friendly beginner amigurumi project because the main shapes are simple. You can practice crocheting in rounds, increasing, decreasing, stuffing, and sewing pieces together without needing complicated techniques.
What size safety eyes should I use for a crochet snail?
The best eye size depends on the finished size of your snail. For a small amigurumi, 6mm eyes can create a sweet kawaii expression. A larger snail may suit 9mm or 12mm eyes. Always check the placement before securing the eyes.
Can I sell snails made from this pattern?
You can generally sell finished handmade items you crochet from your own work, but always check the specific pattern designer’s terms if you use a published pattern. Do not sell or redistribute the written pattern itself unless the designer gives permission.
Conclusion
Making a tiny snail from yarn is such a satisfying crochet project. You get to practice simple amigurumi techniques while creating something full of personality.
With this crochet snail pattern, you can make a sweet little companion for your desk, a handmade gift for someone special, or the beginning of an entire collection of garden animals.
The finished snail does not need to look perfect. Those tiny handmade details are exactly what make each amigurumi feel special.
So grab your favorite yarn, pick a fun shell color, and enjoy watching your little snail come to life.
Save this pin to your crochet board on Pinterest so you can find this pattern anytime!
Looking for more free crochet animal patterns? Visit Yarned Animals for new amigurumi patterns, kawaii plushies and beginner crochet tutorials added every week at yarnedanimals.com