
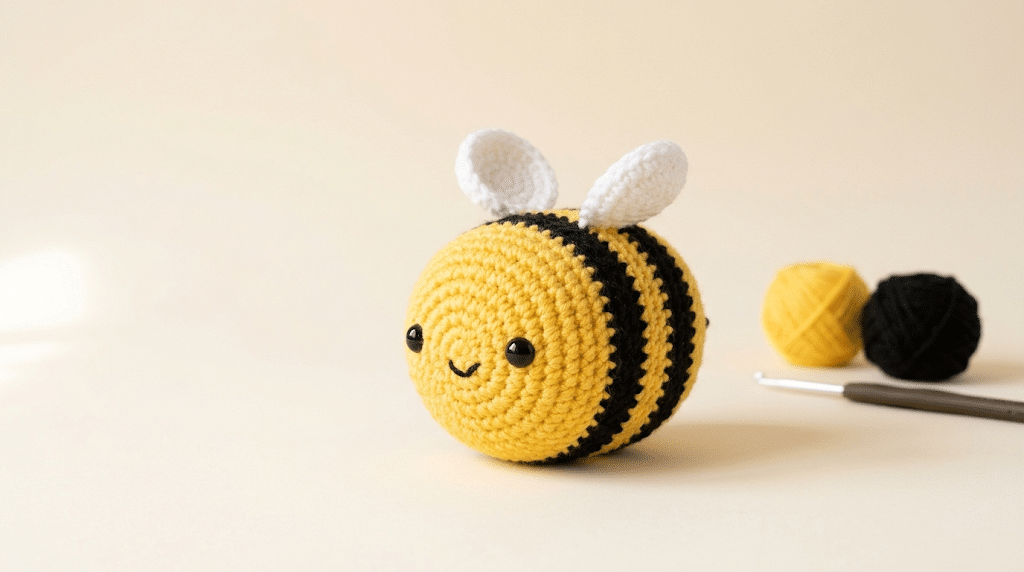
There’s something extra cheerful about a tiny yellow-and-black bee sitting in your hand, especially when you made it yourself. The round body, sweet little face, and fluffy wings make a bee one of those projects that feels cute from the very first round.
This crochet bee pattern free tutorial gives you a simple beginner-friendly way to make your own adorable amigurumi bee. You’ll learn how to crochet the striped body, shape the wings, add the face, stuff your bee neatly, and finish everything with a polished handmade look.
You can make one for your shelf, add a keychain later, or create a tiny buzzing collection for handmade gifts. The pattern uses basic amigurumi techniques, so grab your yarn and let’s get started.
Table of Contents
Why This Crochet Bee Pattern Free Tutorial Is So Beginner-Friendly
A first amigurumi project can feel intimidating when you see tiny stitches, color changes, and stuffed shapes all at once. The good news is that a bee breaks those skills into small, manageable pieces.
The body uses simple rounds of single crochet, increases, and decreases. The familiar yellow-and-black stripes also give you an easy way to practice changing colors without needing complicated stitch patterns.
This design keeps the shape rounded and playful. You don’t need advanced shaping techniques or complicated textures to create something that looks adorable.
A great first amigurumi project
This crochet bee pattern free tutorial works especially well if you already know basic single crochet. You’ll also practice working in continuous rounds, which appears in many stuffed animal patterns.
If crochet abbreviations feel confusing, keep a small reference beside you. The Craft Yarn Council provides a useful crochet abbreviation guide covering common terms such as sc, inc, dec, ch, and sl st.
The most important thing is not speed. Work slowly and count your stitches regularly. A steady rhythm will make your bee look much more even.
What makes a crochet bee so cute
The secret is the contrast.
Bright yellow yarn creates the cheerful body, while black stripes give your little bee its classic look. White wings add a soft finishing detail, and small safety eyes instantly give the face personality.
You can also change the expression. Place the eyes slightly closer together for a babyish look, or position them a little farther apart for a more playful character.
The finished bee makes a sweet handmade gift because it feels personal without requiring weeks of crochet.
Choosing your yarn
For a classic bee, Paintbox Simply DK yarn works beautifully for a firm, colorful amigurumi fabric.
If you prefer a super-soft plush finish, Bernat Blanket yarn can create a much squishier bee. Keep in mind that thicker yarn will make your finished animal larger.
The key is maintaining a tight fabric. You should not see stuffing through the stitches.
Crochet Bee Pattern Free: Materials, Stitches, and Setup
Before you begin, gather everything you need and keep your workspace comfortable. A tidy setup makes color changes and small finishing details much easier.
For this project, you’ll create the body first, then make the wings and finish the face. You’ll work mostly in continuous rounds, so a stitch marker becomes your best friend.
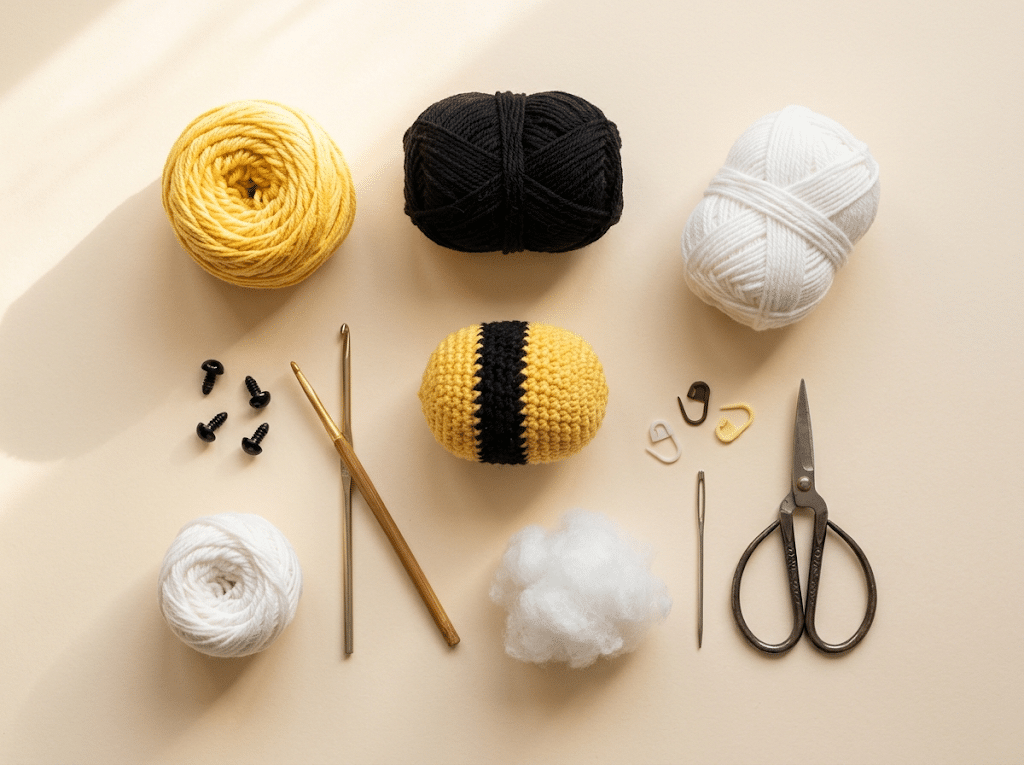
Materials for your bee
You’ll need:
- Paintbox Simply DK yarn in yellow
- Paintbox Simply DK yarn in black
- Paintbox Simply DK yarn in white
- Clover Amour crochet hook
- Poly-fil Premium fiberfill
- 9mm safety eyes
- Stitch markers
- Yarn needle set
- Scissors
Before you start, grab your Clover Amour crochet hook if you have one. I especially like its comfortable grip when I’m working several small amigurumi pieces in one sitting.
For a child under three, avoid loose safety eyes. Embroidered eyes offer a safer alternative for very young children.
Crochet abbreviations you’ll use
This pattern uses U.S. crochet terminology.
- MR: magic ring
- sc: single crochet
- inc: increase
- dec: decrease
- sl st: slip stitch
- ch: chain
- st: stitch
- FO: fasten off
- rnd: round
The Craft Yarn Council lists standard U.S. crochet abbreviations and explains common pattern terms.
If you’re new to reading patterns, don’t worry about memorizing everything. Keep this list nearby and check each abbreviation as you work.
Understanding the finished shape
Your bee will have a rounded, slightly oval body with a friendly face and two white wings.
The exact size depends on your yarn, hook, tension, and stuffing. A tighter stitch produces a firmer amigurumi, while thicker yarn creates a larger plush bee.
Gauge does not need to be perfect for this project. Your main goal is a tight, even fabric.
How to Crochet the Bee Body in 10 Easy Steps
Now that your supplies are ready, here is the fun part. The bee body comes together through simple increases, straight rounds, color changes, and decreases.
Take your time during the first few rounds. Once the shape starts forming, you’ll find the rhythm much easier.
Step 1: Start the yellow magic ring
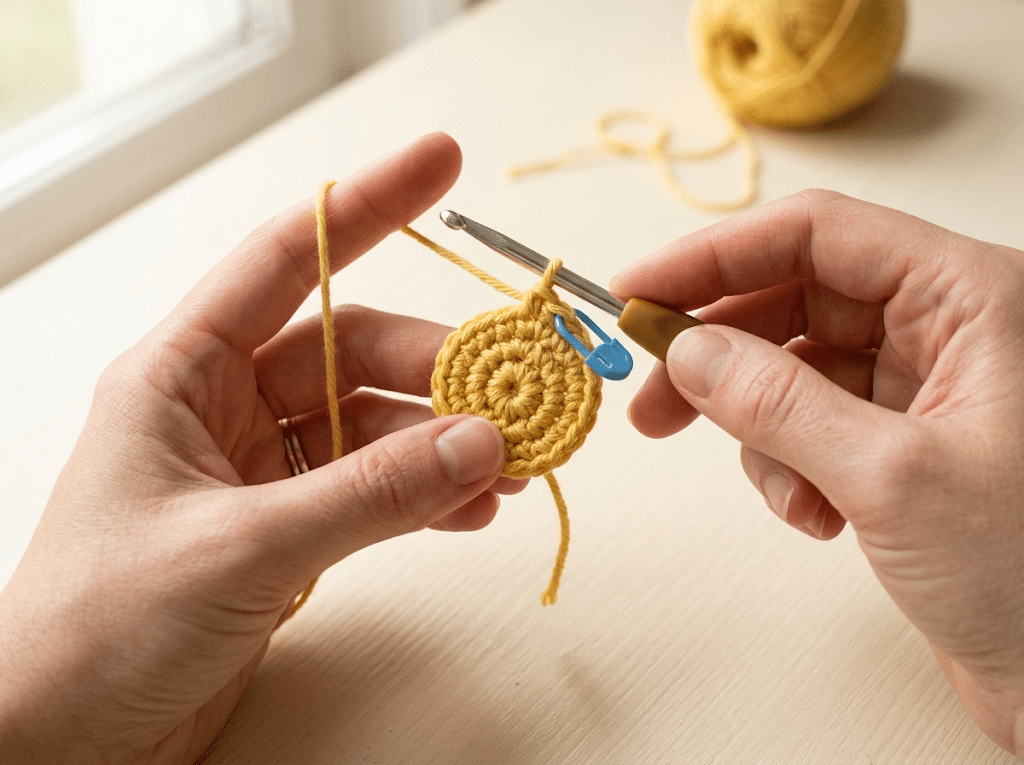
Begin with your yellow yarn.
Make a magic ring and crochet 6 single crochet stitches into the ring. Pull the yarn tail gently to close the center.
Place your stitch marker into the first stitch of the round.
For Round 2, work an increase into every stitch around. You’ll finish with 12 stitches.
For Round 3, repeat 1 sc, 1 inc around. You’ll have 18 stitches.
Keep your stitches snug but not overly tight. You need enough flexibility to insert your hook comfortably.
Step 2: Build the rounded bee body
Continue crocheting in yellow.
Work one single crochet into every stitch around for the next few rounds. This creates the middle section of your bee.
Keep checking the shape as you work. The body should begin looking like a small rounded capsule rather than a flat circle.
If your stitches look uneven, don’t panic. Stuffing and finishing will smooth out many tiny imperfections.
Tip: Move your stitch marker at the beginning of every round.
That small habit prevents one of the most common beginner mistakes: accidentally adding or losing stitches.
Step 3: Add the first black stripe
Now it’s time to bring your bee to life.
Switch from yellow yarn to black yarn at the end of the previous round. Work one round of single crochet in black.
Try to keep the color change neat. When completing the final yellow stitch, pull the black yarn through for the final loop.
This creates a cleaner transition between the two colors.
You can leave the yellow yarn attached inside the project if you plan to pick it up again soon. Avoid carrying it too tightly because it can pull the body inward.
Step 4: Continue the yellow and black stripes
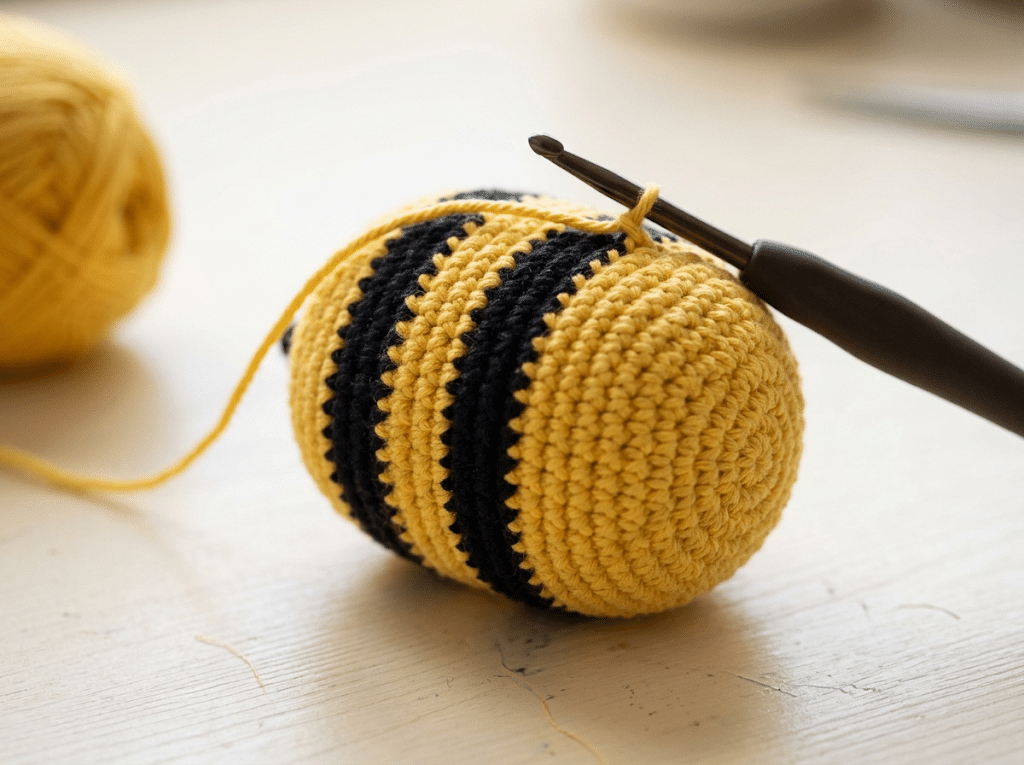
Switch back to yellow and work one complete round.
Then switch to black for another round.
Continue alternating colors until your bee has several cheerful stripes.
The exact number of stripes can vary depending on the look you prefer. More stripes create a classic bumblebee appearance, while fewer stripes give your bee a chunkier, simpler look.
Keep your tension consistent during every color change.
If one stripe looks noticeably tighter than another, gently loosen your stitches before continuing.
Step 5: Add the safety eyes
Before closing the body, pause and add the face.
Place the two 9mm safety eyes on the front of your bee. Position them evenly and check the expression before pushing the backs into place.
This is the perfect moment to experiment.
Move the eyes slightly closer together for a cute baby-bee expression. A slightly wider placement creates a more alert look.
If you are making the bee for a very young child, embroider the eyes instead of using safety eyes.
Step 6: Start stuffing your bee
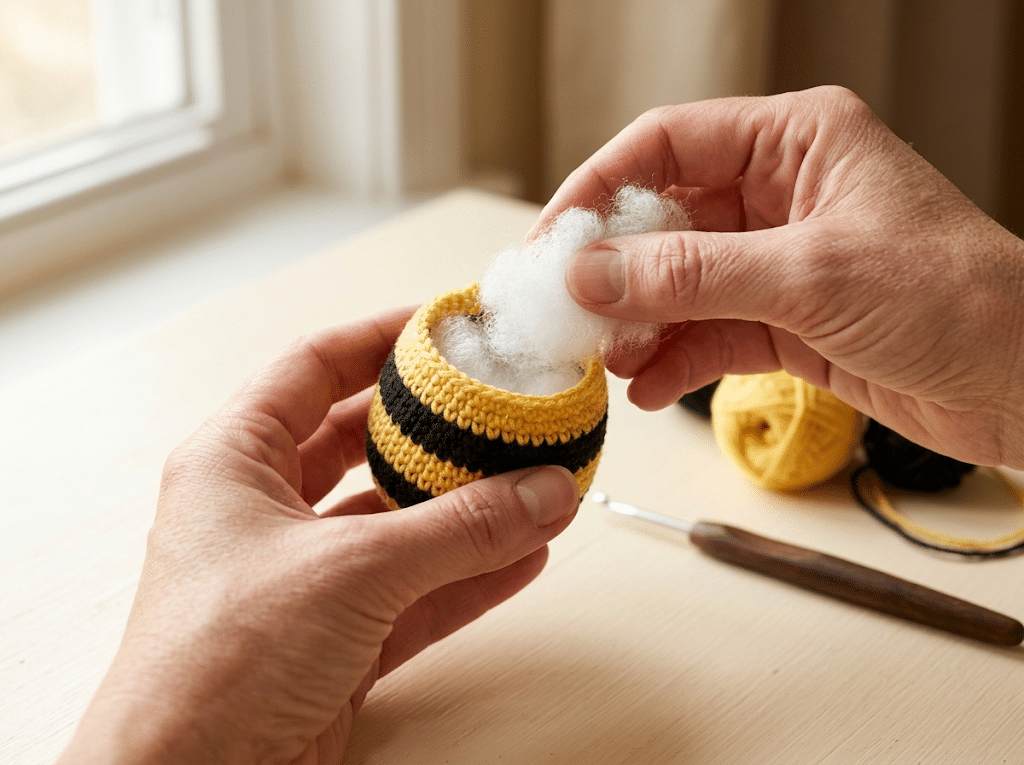
As the body begins to narrow, start adding Poly-fil Premium fiberfill.
Add small amounts at a time instead of pushing one large piece inside.
Use the back of your yarn needle or another blunt tool to gently distribute the stuffing.
Firm stuffing creates a better amigurumi shape.
However, don’t overfill the bee. Too much stuffing can stretch the stitches and make the body look lumpy.
Rotate the bee while stuffing so the filling spreads evenly around the entire shape.
Step 7: Shape the final rounds
Continue crocheting the body while working your decreases.
A simple decrease pattern will gradually close the opening.
As the hole becomes smaller, add tiny amounts of stuffing wherever you notice soft spots. This is your last opportunity to adjust the shape.
Your bee should feel plump but still have a little softness when gently squeezed.
When only a small opening remains, finish the final decreases and fasten off.
Leave a longer yarn tail for closing the opening neatly.
Step 8: Close and shape the body
Thread your yarn tail onto your yarn needle.
Work the needle through the remaining front loops around the opening. Pull gently until the hole closes.
Secure the yarn and weave the remaining tail inside the body.
Take a moment to inspect your bee from every angle.
If one side looks flatter, gently massage the stuffing into place. Amigurumi often becomes much cuter after this small shaping step.
Step 9: Crochet the tiny white wings
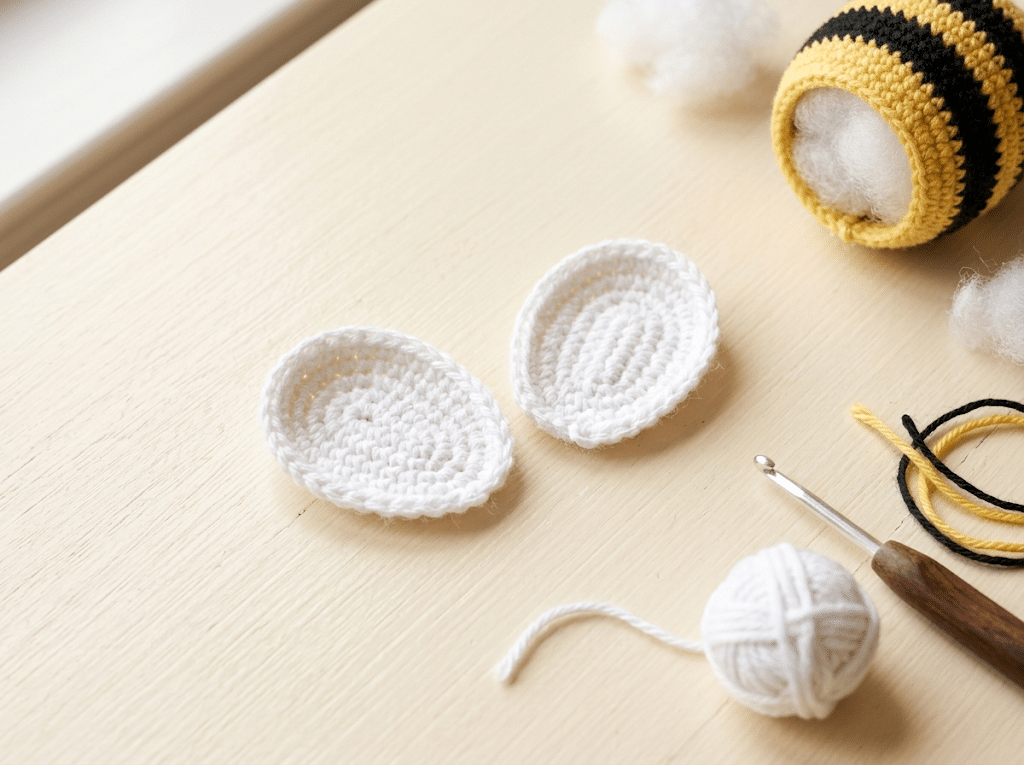
Now your bee needs wings.
Using white yarn, make a small magic ring.
Work several stitches into the ring, then continue around to create a small oval wing shape. Fasten off while leaving a yarn tail for sewing.
Repeat for the second wing.
You want the wings to remain lightweight. Do not stuff them.
Flatten each wing gently between your fingers before attaching it.
For a softer look, you can make the wings slightly larger. For a tiny bee, keep them compact and rounded.
Step 10: Attach the wings and finish the face
Place the two wings near the top-back portion of the bee.
Sew them securely with the yarn tails.
Try to position them at slightly different angles rather than perfectly flat. This gives your bee a more playful, dimensional appearance.
Next, add a tiny embroidered smile using black yarn.
You can also add small blush marks with pink yarn if you want extra kawaii detail.
Finally, weave in every remaining yarn end.
Give your finished bee a gentle squeeze and check that all sewn pieces feel secure.
That’s it — your little bee is ready to buzz!
Easy Ways to Make Your Crochet Bee Even Cuter
Once you finish your first bee, it’s hard not to imagine a whole little swarm. Thankfully, you can change the personality without changing the basic pattern.
Small adjustments to the colors, wings, eyes, and accessories can make every bee look different.
Try different bee color combinations
Traditional yellow and black will always look adorable, but you can have fun with the palette.
Try:
- Mustard yellow with charcoal
- Golden yellow with dark brown
- Cream with warm brown
- Pastel yellow with soft gray
- Orange with black
You can even make a tiny fantasy bee using pastel rainbow stripes.
If you’re making several bees as gifts, giving each one a different color combination makes the collection feel extra special.
Make a chunky plush bee
Want an extra squishy bee?
Switch to Bernat Blanket yarn and use a hook size appropriate for your yarn and tension.
The larger yarn creates a completely different result. Your bee becomes more like a soft plush toy than a tiny amigurumi decoration.
Remember that thicker yarn usually needs a larger hook. You still want the stitches tight enough to keep the stuffing contained.
This version can be especially cute as a nursery decoration or oversized shelf plush.
Turn your bee into a gift
A finished bee makes a lovely handmade present for a crochet lover, teacher, coworker, or friend.
You can place several small bees inside a gift basket with flowers, honey-themed treats, or a handmade card.
For older children and adults, you can also turn a finished bee into a bag charm or keychain by attaching a suitable keychain finding securely.
If you plan to sell finished bees at craft markets, always make sure your own written pattern terms allow commercial sales of finished items.
Crochet Bee Pattern Free Tips for Cleaner Amigurumi
A cute amigurumi doesn’t require perfect stitches. It does benefit from consistent tension and careful finishing.
These small techniques can make a surprisingly big difference.
Keep your tension tight
Loose stitches create visible gaps.
Those gaps allow stuffing to peek through and can make your bee look less polished.
If you notice holes between your stitches, try going down one hook size. The best hook is the one that gives you a dense fabric without making your hands uncomfortable.
Count after every increase round
Beginners often lose track of stitches when working continuous rounds.
Place a stitch marker in the first stitch and count your stitches whenever you finish an increase or decrease round.
If your count looks wrong, fix it immediately.
Finding a mistake early is much easier than discovering it ten rounds later.
Change colors neatly
The stripes are one of the most recognizable features of a crochet bee.
For clean color changes, switch colors during the final step of the stitch before the new color begins.
Keep both yarns relaxed rather than pulling tightly.
You can also gently smooth the stripe with your fingers after completing the round.
Stuff gradually
Adding stuffing little by little gives you more control.
Push the filling toward the edges first, then fill the center.
Check your bee from the front, side, and top as you go.
This helps you create a balanced oval shape rather than a lumpy ball.
Fun Ideas for Your Finished Crochet Bee
Your finished bee can become much more than a shelf decoration.
Once you have the basic shape finished, you can use it in several creative ways.
Make a mini bee collection
Create bees in different sizes using different yarn weights.
A tiny cotton bee can become a desk decoration, while a chunky yarn bee can become a soft plush.
Arrange several together in a little crochet garden.
Add flowers, leaves, or tiny crocheted honey pots for a complete display.
Create a handmade gift
A small amigurumi bee makes a thoughtful addition to a handmade gift box.
Pair it with a crochet flower, a handmade bookmark, or a simple card.
The recipient doesn’t need to be an experienced crocheter to appreciate it.
Handmade gifts feel special because someone spent time creating them.
Use the bee as seasonal decor
Bees work beautifully for spring and summer decorating.
Place a few around potted plants, a craft shelf, or a sunny window.
You can also make a small swarm for a birthday party, garden-themed celebration, or baby shower.
The bright colors instantly add a cheerful handmade touch.
Crochet Bee Pattern Free Troubleshooting Guide
Even simple amigurumi can produce a few confusing moments. If your bee doesn’t look exactly like the sample in your head, don’t unravel everything immediately.
Most problems have an easy fix.
Why does my bee have holes?
Your tension may be too loose, or your hook may be too large for your yarn.
Try using a smaller hook and keep your single crochet stitches snug.
Also check your stuffing. Overstuffing can stretch the fabric and create larger gaps.
Why is my bee leaning?
A leaning bee often comes from accidentally adding or losing stitches.
Check your stitch count at the end of each round.
If the stitch count changes unexpectedly, go back to the last round where your count was correct.
Using a stitch marker makes this much easier.
Why do my stripes look uneven?
Uneven tension can make one color band appear wider than another.
Try maintaining the same stitch height throughout each round.
Also make sure your color changes happen consistently at the same point.
A neat color change can make the entire bee look more professional.
Why do my wings look floppy?
Small crochet wings naturally have some movement.
If you want firmer wings, use slightly tighter stitches or a smaller hook.
You can also sew the wings down more securely at two points instead of one.
Avoid adding heavy stuffing because it can distort the wing shape.
How to Read the Pattern Without Feeling Overwhelmed
Pattern abbreviations can look strange at first, especially when you see something like “sc, inc” repeated several times.
The trick is to read each instruction as a tiny action.
For example, “sc, inc” simply means one single crochet followed by one increase.
The Craft Yarn Council’s pattern guide explains that crochet patterns use abbreviations to make instructions shorter and easier to follow.
Read one round at a time
Don’t look at the entire pattern and try to memorize it.
Read the current round.
Complete it.
Count your stitches.
Then move to the next round.
This simple routine makes even unfamiliar patterns feel manageable.
Use a stitch marker
Your stitch marker tells you where each continuous round begins.
Move it into the first stitch after every completed round.
If you forget to move it, your rounds can become difficult to track.
This tiny tool saves a surprising amount of frustration.
Give yourself permission to restart
Sometimes the fastest solution is to undo a few stitches.
That doesn’t mean you failed.
Every crocheter makes mistakes.
Restarting one round now can save you from fixing a crooked body later.
The goal is not to crochet without mistakes. The goal is to learn how to spot and fix them.
Why Crochet Bees Make Such Lovely Handmade Gifts
Bees have a cheerful look that works for many occasions.
Their bright stripes feel playful, while their tiny wings and round bodies make them instantly recognizable.
There’s also something meaningful about creating a bee-inspired project. Bees play an important role in pollination and ecosystems, making them more than just a cute crochet subject.
The U.S. Department of Agriculture notes that animal pollinators support many flowering plants and food crops.
That makes a handmade bee a sweet little reminder of nature, gardens, and the flowers around us.
A thoughtful gift for crochet lovers
A handmade bee can show someone that you thought about them.
You can choose their favorite colors, add a tiny smile, or make the bee extra chunky and cuddly.
That personal touch is difficult to recreate with a mass-produced gift.
A fun project for beginners
This project also gives you several useful skills you can reuse.
You practice:
- Working in continuous rounds
- Increasing stitches
- Decreasing stitches
- Changing colors
- Stuffing amigurumi
- Sewing small pieces
- Embroidering simple facial details
Once you master these techniques, you’ll recognize them in many other crochet animal patterns.
Frequently Asked Questions About Crochet Bee Pattern Free
How long does it take to crochet a bee?
A beginner may need a couple of hours for a first bee, especially while learning color changes and amigurumi shaping. Once you become comfortable with the pattern, you can work much faster. The body is relatively simple, while the wings and finishing details add a little extra time.
What yarn is best for a crochet bee?
Paintbox Simply DK yarn works well for a classic amigurumi bee because it gives you clear stitches and defined stripes. You can also use Bernat Blanket yarn when you want a larger, softer plush bee. Choose a hook that creates a firm fabric without visible stuffing.
Is this crochet bee pattern good for beginners?
Yes. This project uses beginner-friendly amigurumi techniques, including single crochet, increases, decreases, color changes, stuffing, and basic sewing. If you can already make a single crochet stitch and work in rounds, you can learn the remaining techniques as you go.
What size safety eyes should I use for a crochet bee?
For this design, 9mm safety eyes create a cute balanced face with DK-weight yarn. The best size can change with your yarn and finished bee size. Always secure safety eyes properly and avoid them for toys intended for children under three unless you replace them with securely embroidered eyes.
Can I sell bees made from this pattern?
You can generally sell finished handmade items when the pattern designer’s terms allow it. If you publish or sell your own pattern, keep the written instructions and photographs original. For any specific pattern, check its designer’s copyright and commercial-use terms before selling finished pieces.
Can I turn my crochet bee into a keychain?
Yes. A small bee works especially well as a bag charm or keychain. Choose a compact yarn and make sure any attachment hardware gets sewn or secured firmly. For a child’s toy, avoid small detachable hardware and safety eyes that could create choking hazards.
Final Thoughts on This Crochet Bee Pattern Free Tutorial
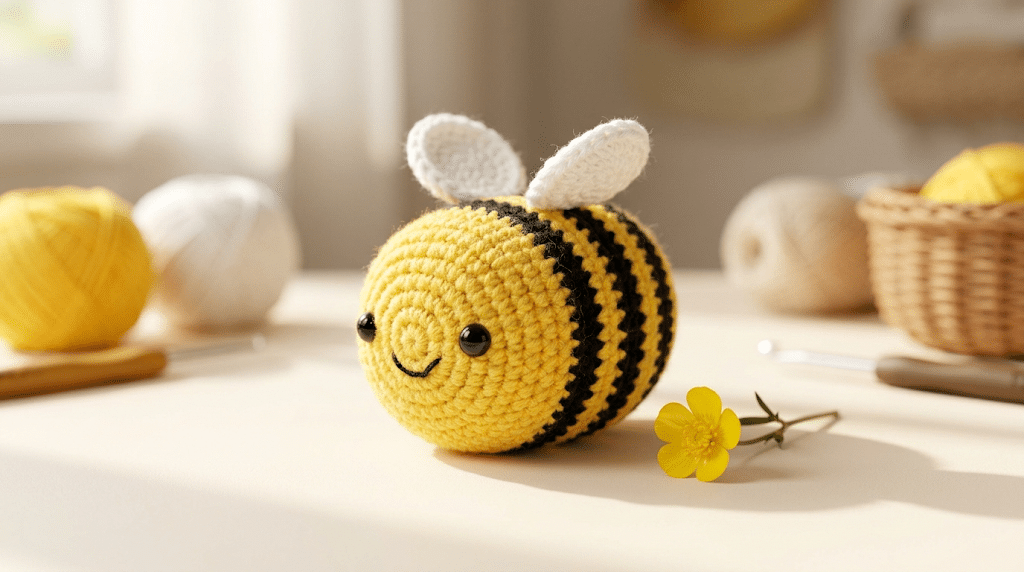
There’s something wonderfully satisfying about watching a few simple rounds turn into a tiny buzzing character. With bright stripes, a sweet face, and little white wings, your finished bee has plenty of personality.
This crochet bee pattern free project also gives you valuable amigurumi skills you can carry into your next animal. Take your time, keep your stitches consistent, and don’t worry if your first attempt isn’t perfectly symmetrical.
The best part comes when you hold the finished bee and realize you made it yourself. Whether you keep it on your craft shelf or give it to someone special, that little handmade moment is worth every stitch.
Save this pin to your crochet board on Pinterest so you can find this pattern anytime!
Looking for more free crochet animal patterns? Visit Yarned Animals for new amigurumi patterns, kawaii plushies and beginner crochet tutorials added every week at yarnedanimals.com