
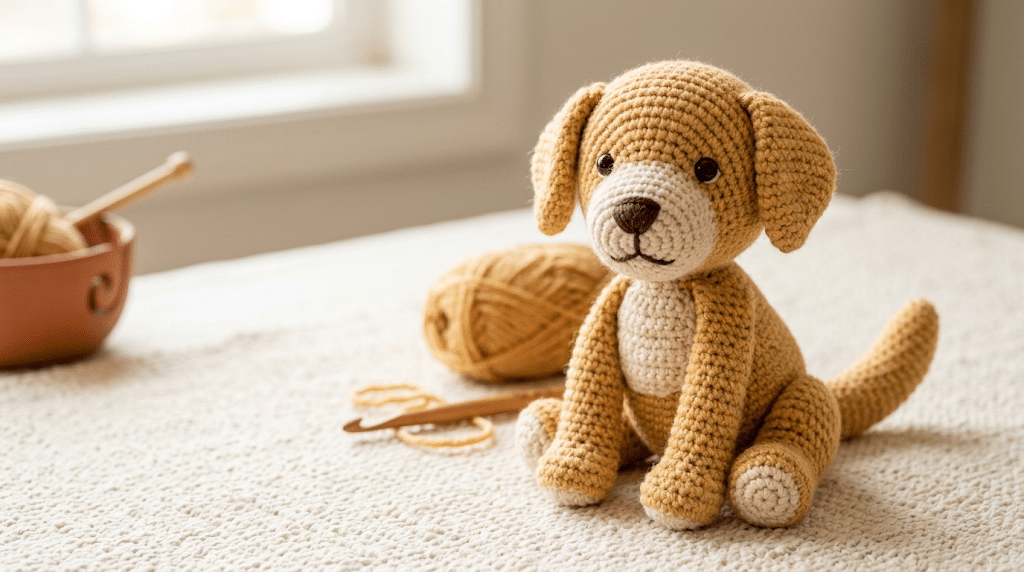
There is something special about a handmade dog that captures the personality of a beloved pet. A tiny golden face, floppy ears, soft paws, and a sweet little smile can turn a few balls of yarn into a keepsake filled with memories.
This crochet golden retriever pattern is designed with that pet-portrait feeling in mind. You can create a cuddly golden-inspired amigurumi for yourself, make a thoughtful birthday gift, or crochet a miniature version of a friend’s favorite companion.
You will learn how to shape the body, create the floppy ears, build an expressive face, add golden coloring, and assemble everything neatly. You will also find beginner-friendly tips for stuffing, embroidery, shaping, and gift presentation.
For a soft, plush finish, Bernat Blanket yarn is one of my favorite choices for cozy amigurumi because it gives small animals a wonderfully squishy texture.
Now grab your hook and let’s turn that golden-dog inspiration into something adorable.
Table of Contents
Why This Crochet Golden Retriever Pattern Makes Such a Special Gift
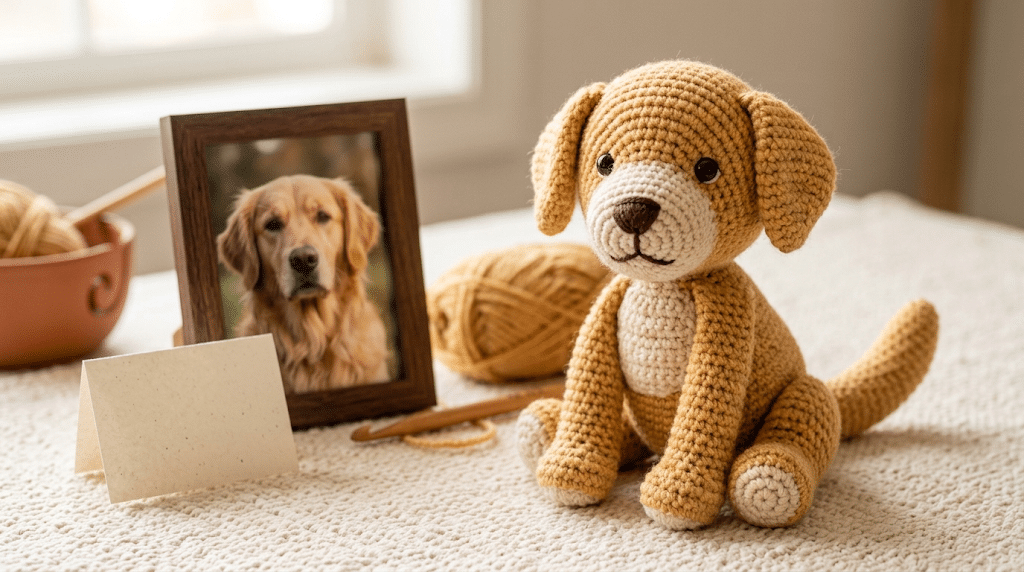
A handmade dog has a charm that a store-bought plush simply cannot match. You choose the colors, facial expression, ear shape, and tiny details that make your finished pup feel personal.
Golden Retrievers work especially well as crochet inspiration because their most recognizable features translate beautifully into amigurumi. Their warm golden coat, floppy ears, friendly expression, and sturdy body create a naturally cute silhouette.
Turn a favorite pet into a keepsake
The best part of a golden retriever amigurumi is how easily you can personalize it. Think about the dog you want to celebrate before you start crocheting.
Does the real dog have darker ears? Add a deeper golden shade around the sides of the head. Does your friend’s dog have a cream-colored chest? Add a small lighter patch.
You can even embroider a tiny collar in the owner’s favorite color.
The goal isn’t perfect breed-show accuracy. The goal is capturing the personality that makes the dog special.
Why the classic golden colors work
Traditional Golden Retrievers have a recognizable golden coat that ranges from lighter cream shades to richer golden tones. The American Kennel Club describes the breed as friendly, affectionate, adaptable, and known for its glossy golden coat.
For crochet, you can exaggerate those features slightly.
A warm honey color creates a cheerful puppy look, while cream and caramel shades create a softer portrait-style finish.
Make it a thoughtful handmade present
This project works beautifully as a handmade dog gift because you can tailor it to the recipient.
Add a small embroidered initial to the collar. Make the ears slightly darker. Choose a favorite blanket color for a tiny accessory.
For someone who has recently lost a beloved pet, a carefully made crochet dog can also become a sentimental keepsake.
Give yourself permission to make it imperfect. Handmade details are part of what makes the finished piece meaningful.
Crochet Golden Retriever Pattern Materials and Preparation
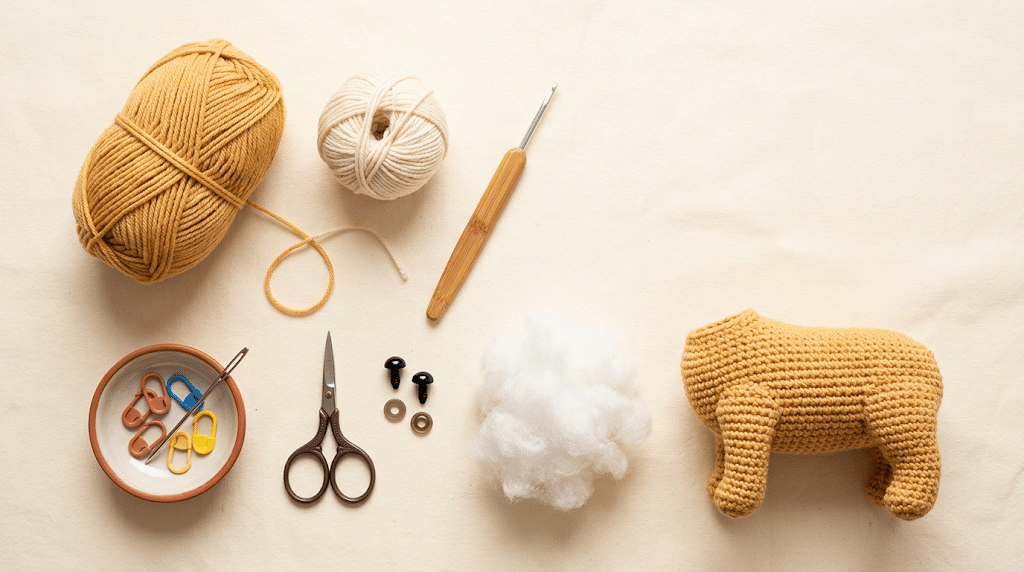
Before you begin your crochet golden retriever pattern, gather everything in one place. Having your supplies ready keeps the project relaxing instead of turning it into a hunt around your craft room.
For this design, you will mainly work with basic amigurumi techniques. You should feel comfortable with single crochet, increases, decreases, working in rounds, stuffing, and sewing pieces together.
If abbreviations ever feel confusing, the Craft Yarn Council provides a helpful guide to common crochet terms and instructions.
Choose your golden retriever yarn
Pick a warm golden, honey, caramel, or light tan yarn for the main body.
Paintbox Simply DK yarn works nicely when you want a traditional yarn texture with clearly visible stitches. A slightly darker shade can create beautiful contrast for the ears and muzzle.
For a plushier puppy, choose a soft bulky yarn and adjust your hook accordingly.
The Craft Yarn Council’s yarn-weight guide can help you understand how yarn categories relate to recommended hook sizes.
Prepare your crochet tools
You can keep your basic tool setup simple:
- Crochet hook suited to your yarn
- Main golden yarn
- Small amount of darker yarn for details
- Safety eyes
- Fiberfill stuffing
- Stitch markers
- Yarn needle
- Scissors
For comfortable stitching during a longer project, I like using a Clover Amour crochet hook because the soft handle makes repeated stitches easier on your fingers.
Understand your amigurumi tension
Tight stitches matter when you make stuffed animals.
If your stitches become too loose, the stuffing can peek through the fabric. Use a smaller hook if necessary, while still making sure your stitches feel comfortable.
Your goal is a firm fabric with no obvious gaps.
Don’t worry if your first few rounds look slightly uneven. Once you add stuffing and shape the pieces, the character will start appearing.
How to Crochet the Golden Retriever Body Step by Step
Now that your materials are ready, here is the fun part.
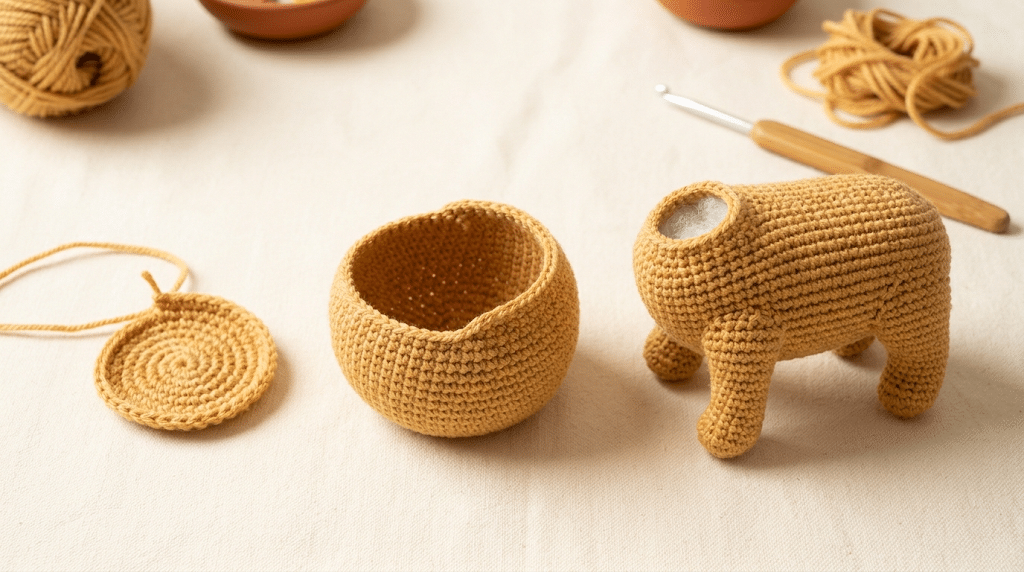
The body forms the foundation of your crochet dog amigurumi. A rounded body gives the finished puppy that soft, cuddly appearance while keeping the construction approachable for beginners.
You will work primarily in continuous rounds. Use a stitch marker to identify the beginning of each round.
Step 1: Start with the body base
Begin your body with a small magic ring or adjustable loop.
Work several single crochet stitches into the center, then gradually increase around the next rounds. These increases create the rounded base instead of a flat circle.
Keep your tension consistent.
As the body grows, you should notice the shape beginning to curve upward.
Don’t stuff the body yet. Keeping it empty gives you more room to shape the lower section neatly.
Step 2: Build the rounded puppy body
Continue working single crochet rounds while gradually reducing the frequency of increases.
This creates a smooth transition from the wider belly toward the shoulders.
Pause occasionally and gently squeeze your crochet fabric.
You want a rounded, slightly chunky shape rather than a tall tube.
If you want a sitting golden retriever, make the lower body slightly fuller. A standing-style version can have a longer body shape.
Step 3: Shape and stuff the body
Once the body reaches the desired size, begin adding small amounts of Poly-fil Premium fiberfill.
Add stuffing gradually rather than pushing in one large handful.
Firm stuffing creates a polished amigurumi shape, but avoid overfilling the piece. Too much pressure can stretch the stitches and distort the body.
Use your fingers to distribute the stuffing toward the edges.
Keep checking the silhouette from the front and side.
A well-stuffed body should feel firm while still having a soft, cuddly quality.
Create the Face, Muzzle, and Floppy Golden Retriever Ears
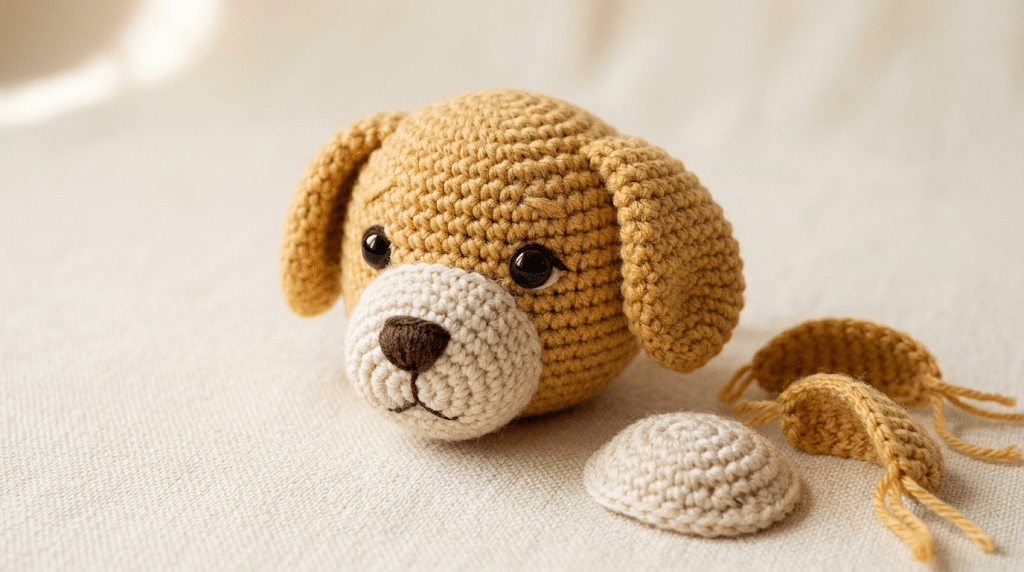
The face is where your little dog really comes alive.
A few carefully placed details can transform a basic crocheted shape into an expressive puppy. Take your time with this section because small placement changes can dramatically affect the personality.
Step 4: Shape the puppy head
Create a rounded head using the same basic amigurumi construction as the body.
Begin with increases to create a circular base. Continue with even rounds to build height.
Then use gradual decreases to bring the shape inward.
Keep the head slightly wider than the neck area.
A rounded head gives your puppy a softer kawaii appearance.
Before closing the final opening, add fiberfill and shape the head with your fingers.
Don’t make the head perfectly symmetrical. Tiny handmade variations often give amigurumi their sweetest expressions.
Step 5: Add the muzzle
The muzzle creates the characteristic dog-like face.
Crochet a small rounded muzzle using cream, light tan, or a slightly lighter golden yarn.
Sew it onto the lower front portion of the head.
Keep the muzzle centered, but don’t place it too high.
You want enough space above it for the eyes and enough room below it for the nose.
For a more realistic golden retriever crochet look, make the muzzle slightly elongated rather than perfectly circular.
Step 6: Add the eyes and nose
Place the eyes on either side of the muzzle.
Step back and look at the face before permanently securing everything.
Eye placement changes the entire expression.
Move the eyes slightly closer together for a baby-puppy appearance. Place them farther apart for a softer, more relaxed expression.
Add a small dark nose at the center of the muzzle.
You can embroider the nose with black yarn or use an appropriate safety nose if your design calls for one.
For projects intended for young children, remember that small components can create choking hazards. Keep safety in mind when choosing how you finish your amigurumi.
Give Your Crochet Dog Its Golden Retriever Personality
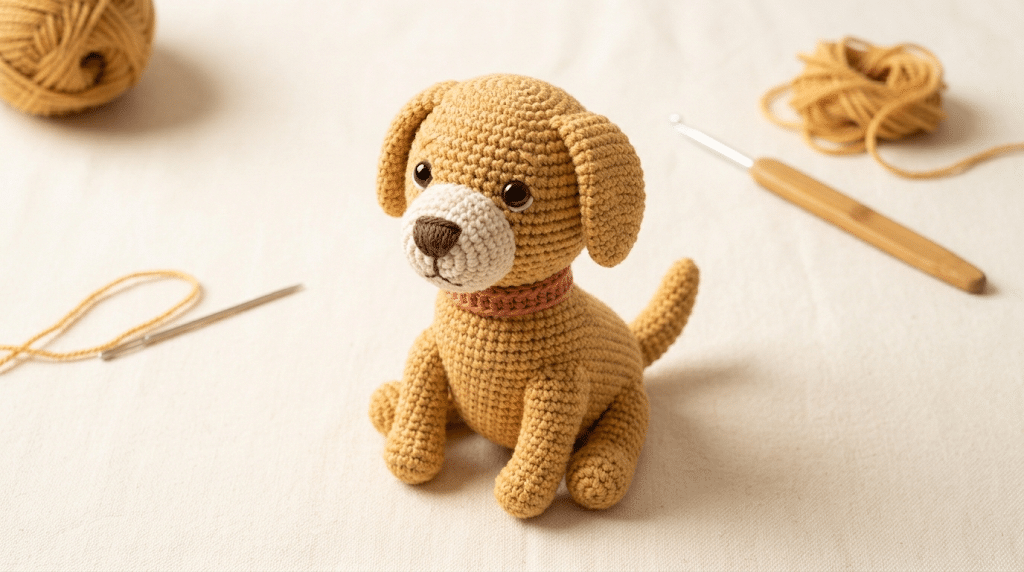
The basic body creates the dog shape, but the finishing details create the personality.
This is also where you can turn a generic golden puppy into a pet portrait crochet inspired by someone special.
Step 7: Crochet the floppy ears
Golden Retriever ears are one of the easiest features to recognize.
Create two soft ear pieces using golden or slightly darker yarn.
Each ear should have a rounded top and enough length to hang beside the head.
Sew the ears onto both sides of the head.
Try positioning them slightly forward rather than perfectly flat against the head.
A tiny angle can make your puppy look much more expressive.
For a portrait-style gift, study a photo of the dog you are recreating. Match the general ear length and color rather than trying to reproduce every strand of fur.
Step 8: Add four little legs
Crochet four short legs using the same golden yarn.
Keep the front legs slightly narrower if you want a delicate puppy appearance.
The back legs can look a little fuller to create a seated silhouette.
Stuff each leg lightly.
Sew the legs securely to the body while checking that the puppy sits evenly.
If one leg looks slightly higher than another, don’t panic.
Remove it and reposition it before sewing permanently.
Symmetry becomes much easier when you check the whole animal before securing each piece.
Step 9: Add the tail
The tail gives your finished dog another opportunity for personalization.
Crochet a small tapered tail and attach it to the back of the body.
For a playful puppy, angle the tail slightly upward.
For a relaxed dog, let it curve gently downward.
You can also add a little extra fluff around the end using yarn fibers if your chosen yarn allows it.
Think about the real dog you’re recreating.
Does its tail curl? Is it fluffy? Does it usually sit high when excited?
Those tiny observations can make a crochet dog portrait feel much more personal.
Finishing Touches That Make Your Amigurumi Look Professional
Ready to move on?
The final details can make the difference between a cute handmade toy and a polished keepsake.
Take a few minutes to inspect every seam before calling your project finished.
Shape the face before trimming ends
Use your fingers to gently adjust the muzzle, cheeks, ears, and head.
Look at the puppy from several angles.
The face should look balanced when viewed from the front.
If something feels slightly off, fix it now rather than after trimming every yarn tail.
Five extra minutes of shaping can save a lot of frustration later.
Hide yarn ends carefully
Use your yarn needle to weave loose ends securely into the interior of the piece.
Avoid leaving long ends near the surface.
When you finish sewing an ear, leg, or tail, weave the yarn through several stitches before trimming.
This helps keep your handmade dog looking neat and durable.
Add a tiny collar
A collar is a wonderful finishing touch for a pet portrait.
Use a narrow strip of yarn in the recipient’s favorite color.
You could choose red, blue, green, pink, or even a neutral shade.
For a truly personal gift, add a tiny embroidered initial to the collar.
You don’t need complicated embellishments.
One thoughtful detail often says more than ten decorative extras.
Make the expression unique
Your golden puppy doesn’t have to look exactly like every other amigurumi.
Try subtle changes.
A slightly tilted head can create a curious expression. Lower ears can make the puppy look sleepy. A tiny embroidered smile can make it look cheerful.
That’s the magic of handmade crochet.
Two people can follow the same basic construction and create completely different personalities.
How to Turn Your Crochet Golden Retriever Into a Pet Portrait Gift
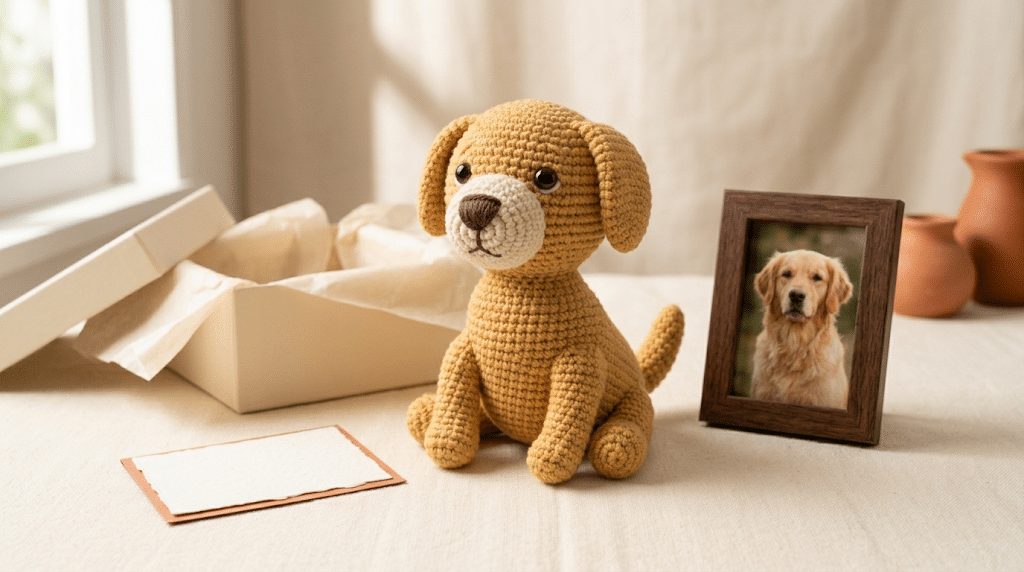
A handmade crochet golden retriever pattern becomes even more meaningful when you design it around a real dog.
This is perfect for birthdays, adoption anniversaries, Christmas gifts, memorial keepsakes, or simply surprising a loyal dog lover.
Match the coat colors
Golden Retrievers can have different shades of golden coloring.
Study a clear photo of the dog before selecting your yarn.
Choose a light cream for a pale-coated dog. Pick honey or caramel for a richer golden coat.
You can also combine two shades.
Use the darker shade around the ears while keeping the body lighter.
Match recognizable features
Don’t try to copy everything.
Instead, identify three or four features that immediately make the dog recognizable.
Maybe the dog has:
- Extra-floppy ears
- A darker muzzle
- A white chest
- A distinctive collar
- A particularly fluffy tail
- A favorite sitting pose
Focus on those details.
A few recognizable features create a stronger portrait than dozens of tiny decorations.
Add a meaningful presentation
If you’re giving your puppy as a gift, presentation matters.
Place it inside a small gift box with tissue paper.
You could also attach a handwritten note describing why you chose the dog’s colors and features.
For a memorial gift, include the dog’s name on the card.
For a birthday gift, add the dog’s adoption date or a favorite phrase.
The crochet piece becomes more than decoration.
It becomes a little reminder of a relationship.
Beginner Tips for a Better Golden Retriever Amigurumi
Even experienced crocheters occasionally struggle with stuffed animals.
Amigurumi requires slightly different habits than flat crochet because shaping, tension, stuffing, and assembly all work together.
Here are a few ways to make your project easier.
Keep your stitches tight
Loose stitches can create visible holes once you add stuffing.
If you can easily see the fiberfill through the fabric, try using a smaller hook.
Don’t force your hands, though.
Comfort still matters during long crochet sessions.
Stuff gradually
Adding stuffing too quickly can create lumps.
Instead, add small pieces and push them toward the edges.
Rotate the piece as you work.
This helps maintain an even shape.
Use stitch markers
A stitch marker helps you track the start of each continuous round.
This small habit can prevent major shaping mistakes.
Place the marker into the first stitch of each round and move it upward as you crochet.
Check the face before sewing
This tip is worth repeating.
Place the eyes, muzzle, and ears temporarily before securing them.
Take a photo with your phone.
Sometimes you won’t notice an uneven placement while holding the piece close, but a photograph makes the proportions much easier to see.
Don’t chase perfect symmetry
Handmade means handmade.
A tiny difference between the ears can make your puppy look more natural.
If your first attempt isn’t perfect, don’t unravel everything immediately.
Look at the finished animal as a whole.
You may discover that the little imperfection gives it more character.
Common Problems When Making a Crochet Golden Retriever
Before you get frustrated, remember that almost every amigurumi problem has a simple solution.
The body looks too narrow
Your tension may be tighter than expected.
Try loosening your stitches slightly or moving to a larger hook.
Also check that you haven’t accidentally skipped increases.
The Craft Yarn Council notes that yarn categories provide general guidance rather than guaranteeing that different yarns behave identically, so your chosen yarn can affect the final fabric.
The stuffing shows through
This usually means your stitches are too loose.
Use a smaller hook or adjust your tension.
You can also add stuffing more gradually.
Avoid packing the body extremely tightly because that can stretch the stitches.
The head looks too big
A large head can create a cute puppy look, but you may want a more realistic pet portrait.
Reduce the head size slightly or increase the body proportions.
Remember that amigurumi often exaggerates animal features for a kawaii effect.
The face looks angry
Don’t worry!
This usually comes from eye placement.
Move the eyes slightly lower or farther apart.
You can also soften the expression by adjusting the muzzle.
Take a photograph before committing to the final placement.
Frequently Asked Questions About Crochet Golden Retriever Pattern
How long does it take to crochet a golden retriever?
A small golden retriever amigurumi can take several hours, depending on your experience, yarn thickness, and finishing details. Beginners may need extra time for shaping and sewing. If you’re making a personalized pet portrait, plan additional time for matching colors, positioning the features, and adding a collar or other special details.
What yarn is best for a crochet golden retriever?
A smooth golden or honey-colored yarn works well for a classic amigurumi appearance. DK or worsted-style yarn gives you clear stitches and defined shaping, while plush yarn creates a softer puppy texture. Choose a yarn that lets you maintain firm stitches without making the project uncomfortable to crochet.
Is this crochet golden retriever pattern good for beginners?
Yes, especially if you already know basic single crochet, increases, decreases, stuffing, and sewing. The individual pieces are manageable, and you can take your time assembling them. Beginners should focus on consistent tension rather than speed. The face may require a little patience because small placement changes affect the finished expression.
What size safety eyes should I use for golden retriever amigurumi?
The best eye size depends on the finished size of your dog. For a medium amigurumi, 9mm safety eyes can create a balanced puppy expression. Smaller designs may suit 6mm eyes, while larger pieces can handle 12mm eyes. Always check the proportions before permanently attaching the eyes.
Can I make a crochet golden retriever as a pet memorial gift?
Absolutely. A handmade dog can become a deeply personal memorial keepsake. Match the yarn colors to a favorite photograph and recreate recognizable features such as the ears, muzzle, collar, or chest markings. Adding the dog’s name to a small handmade tag can make the gift even more meaningful.
Can I sell amigurumi I make from this pattern?
If you create your own finished crocheted piece, you can generally sell your handmade item, but you should always check the specific terms attached to the pattern you are using. Don’t copy, redistribute, or sell the written pattern itself. If you’re selling finished pieces, consider adding your own handmade branding and product photography.
Final Thoughts on This Crochet Golden Retriever Pattern
A tiny crocheted golden puppy can hold a surprisingly big amount of meaning.
With a rounded body, floppy ears, sweet face, and warm golden colors, you can create a keepsake that feels personal from the very first stitch.
The real magic comes when you customize it for someone you love. Match the coat, recreate a favorite collar, add a tiny name detail, or simply choose colors that remind you of a special dog.
Whether you’re making your first amigurumi or adding another animal to your collection, this crochet golden retriever pattern gives you plenty of room to make the project your own.
And when you finally stitch on those little ears and see the face looking back at you, you’ll have that wonderful handmade feeling: I made this.
That feeling never gets old.
Save this pin to your crochet board on Pinterest so you can find this pattern anytime!
Looking for more free crochet animal patterns? Visit Yarned Animals for new amigurumi patterns, kawaii plushies and beginner crochet tutorials added every week at yarnedanimals.com