
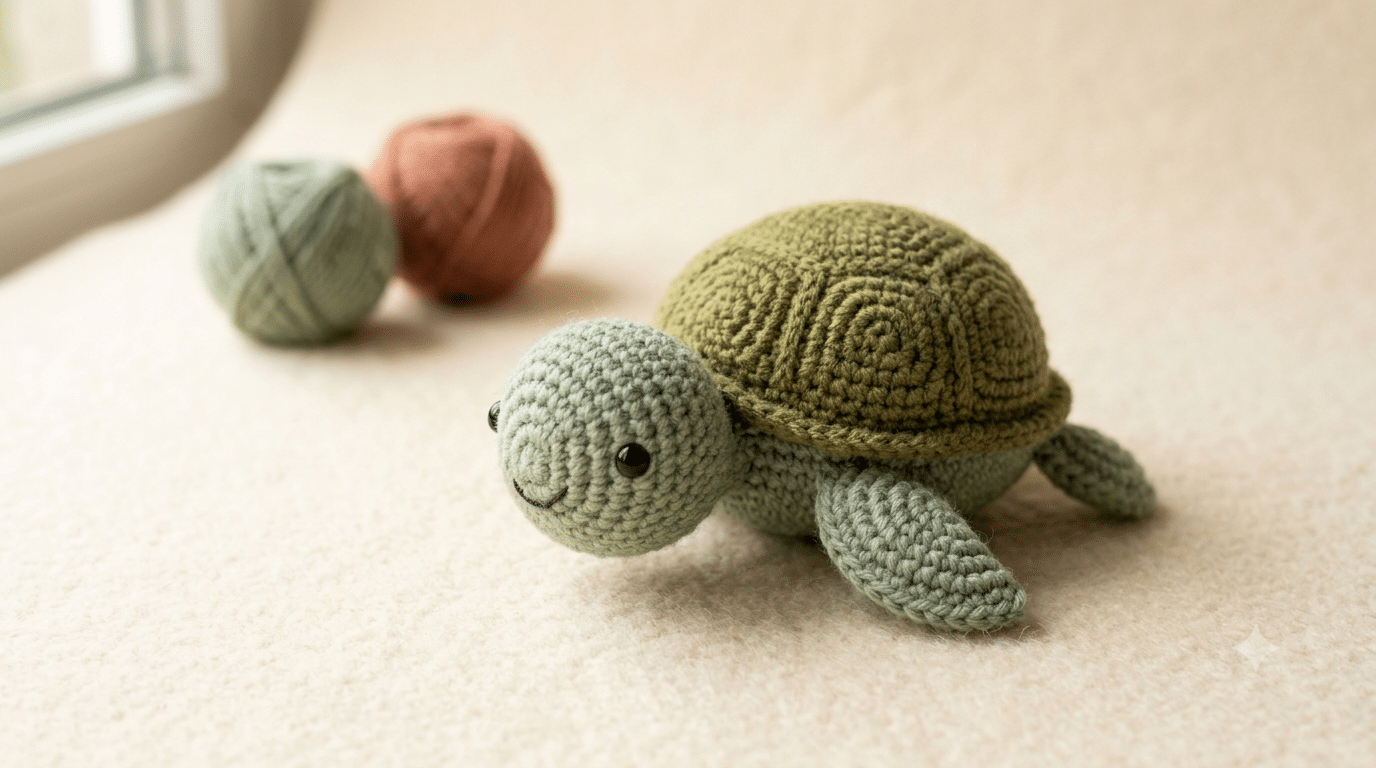
There is something wonderfully calming about watching a tiny sea turtle take shape from a simple ball of yarn. One little stitch becomes a flipper, another becomes a rounded shell, and suddenly you have an adorable ocean friend in your hands.
This crochet sea turtle pattern gives you a simple way to create a cute amigurumi turtle with a rounded body, textured shell, tiny flippers, and a sweet face. You will learn how to shape each part, join the pieces neatly, add stuffing, and create those charming finishing details.
For an extra-soft turtle, Bernat Blanket yarn can create a cuddly chenille finish that feels lovely in your hands.
The pattern uses beginner-friendly crochet techniques, so grab your hook and let’s bring this little ocean friend to life.
Table of Contents
Why This Crochet Sea Turtle Pattern Is So Adorable
A handmade sea turtle makes a lovely project because you can keep the design simple while adding plenty of personality. The rounded body gives your finished turtle that classic kawaii look.
This crochet sea turtle pattern also works beautifully as a first ocean-themed amigurumi project. You only need a handful of familiar stitches and some basic shaping skills.
A cute project for beginners
Sea turtles might look detailed in pictures, but their basic shape stays surprisingly simple. You create the body with a rounded amigurumi form, then add the shell, head, and flippers.
You will mainly use single crochet, increases, and decreases. These stitches create the firm fabric that helps stuffed animals keep their shape.
If you are still learning single crochet, the Craft Yarn Council has a helpful visual guide that walks through the stitch step by step.
A perfect handmade gift
A finished amigurumi sea turtle makes a sweet birthday gift, baby-room decoration, desk companion, or nursery accent.
You can also make several turtles in different colors. Try sage green, ocean blue, sandy beige, or soft mint for a cute collection.
Easy to personalize
The shell gives you plenty of room for creativity. You can embroider simple lines, add contrasting colors, or keep the shell completely smooth.
You can even change the expression. Tiny embroidered eyelashes create a sweet look, while simple black eyes give your turtle a classic kawaii style.
Now that you know why this project is so fun, let’s gather your materials and prepare your workspace.
Materials and Simple Crochet Skills You Need
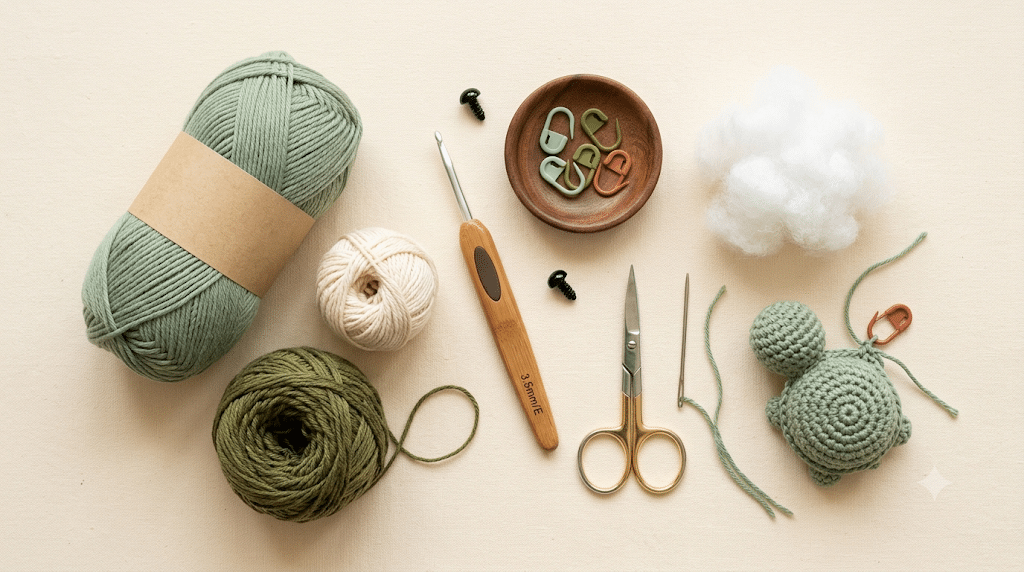
You do not need a huge collection of crochet supplies for this project. A small basket beside your chair can hold almost everything you need.
Choose a yarn that creates a firm fabric without making your stitches difficult to see. DK-weight yarn works especially well for a medium-sized turtle.
Choose your yarn carefully
For the main body, use a soft green or olive shade. Choose a lighter green or cream shade for the underside if you want extra contrast.
Paintbox Simply DK yarn works nicely when you want clear stitches and a lightweight finished turtle.
For the shell, you can use the same green family or choose a deeper shade. A dark forest green shell looks especially cute against a lighter body.
Pick a comfortable hook
A hook around 3 mm to 3.5 mm works well with DK yarn for a tight amigurumi fabric.
Your stitches should feel firm. You should not see large gaps between stitches after stuffing.
If you tend to crochet tightly, try the larger hook. If your stitches look loose, try a slightly smaller hook.
Keep your finishing tools nearby
You will also want 6mm safety eyes, stuffing, scissors, a yarn needle, and stitch markers.
Stitch markers help you identify the start of each round. That small detail can save you from losing your place.
A yarn needle lets you close openings and hide loose yarn tails neatly.
Before starting, make sure you understand these common abbreviations:
- MR — magic ring
- ch — chain
- sc — single crochet
- inc — increase
- dec — decrease
- sl st — slip stitch
- st — stitch
- rnd — round
The Craft Yarn Council also provides standardized crochet symbols and basic pattern terminology if you want a quick reference while working.
Next up, you will build the turtle one simple piece at a time.
Crochet Sea Turtle Pattern: 10 Easy Steps
Here is the fun part. You will create the turtle from several small pieces and assemble everything at the end.
The pattern below creates a cute, rounded crochet turtle plushie with a recognizable shell and four flippers.
Step 1: Start the turtle body
Begin with your main body color and create a magic ring.
Work single crochet stitches into the ring. Continue crocheting in continuous rounds.
Increase gradually during the first few rounds. This creates a flat base that slowly becomes rounded.
Keep your stitches tight but comfortable. Avoid pulling the yarn so tightly that your hook becomes difficult to insert.
Place a stitch marker at the beginning of each round. Move it upward as you continue.
Step 2: Shape the rounded body
Continue working single crochet around the body.
Add increases until the piece reaches its widest point. The shape should look like a small rounded dome.
After reaching the widest point, work several even rounds. This gives the turtle enough depth for stuffing.
Do not overstuff at this stage. You want a soft, rounded shape rather than a hard ball.
Step 3: Add the turtle head
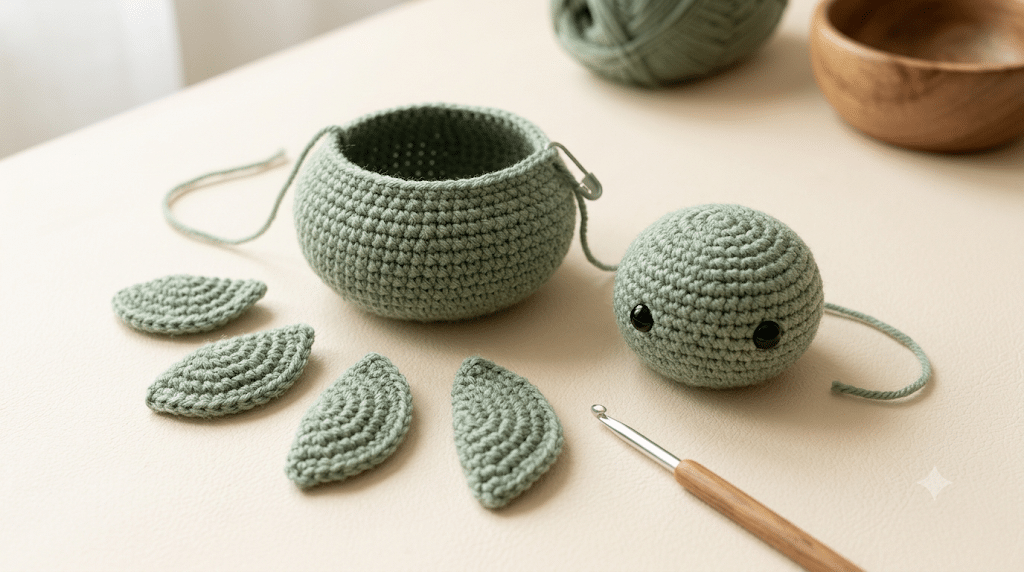
Create the head separately using your main body color.
Start with a magic ring and build a small rounded shape with single crochet.
Increase during the early rounds. Then work several even rounds before beginning the decreases.
Place the safety eyes while the head remains easy to handle. Position them evenly on both sides.
Add a tiny embroidered mouth if you want extra personality.
Step 4: Crochet the four flippers
Make four matching flippers using your body color.
Each flipper starts with a small chain or magic ring. Work single crochet around the foundation to create a flat, slightly tapered shape.
Keep the flippers flexible. You do not need to stuff them heavily.
Two front flippers can sit slightly longer than the back flippers. This creates a natural sea turtle silhouette.
If you prefer a very simple design, make all four flippers the same size.
Step 5: Create the crochet turtle shell
The shell gives your crochet sea turtle pattern its most recognizable feature.
Start with a magic ring in your shell color. Work increases around the ring until you create a wide circular piece.
Continue with a few even rounds. Then begin decreasing slowly to create a shallow dome.
You can stuff the shell lightly before closing it. Keep the stuffing evenly distributed.
The shell should sit above the body rather than completely flattening against it.
Step 6: Add shell texture
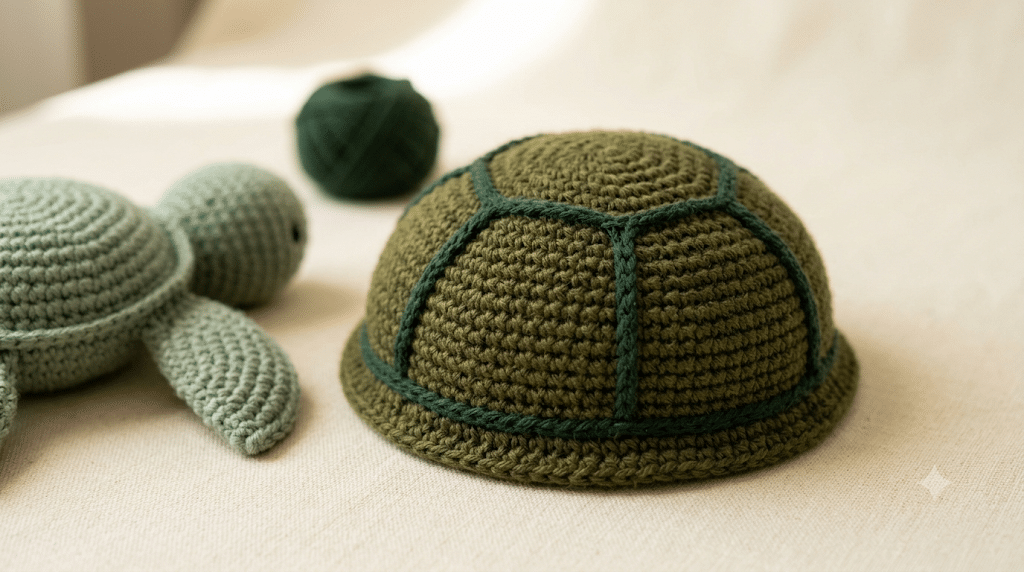
Now give your crochet turtle shell some personality.
You can embroider curved lines across the shell using a contrasting yarn. Keep the lines simple and slightly rounded.
Another option uses surface crochet. This creates raised lines without changing the main shell shape.
For a beginner-friendly finish, embroidery remains the easiest choice.
Try a darker green on a light shell. Try cream on olive green for a softer ocean-inspired appearance.
Step 7: Stuff every piece gently
Before closing your pieces, add small amounts of fiberfill.
Start with the head and body. Add stuffing gradually instead of pushing a large amount inside at once.
Use your fingers or the blunt end of a crochet hook to distribute the filling.
Poly-fil Premium fiberfill works well when you want a soft but supportive finish.
Do not pack the body too tightly. A slightly squishy stuffed crochet turtle looks more charming and cuddly.
Step 8: Attach the head and flippers
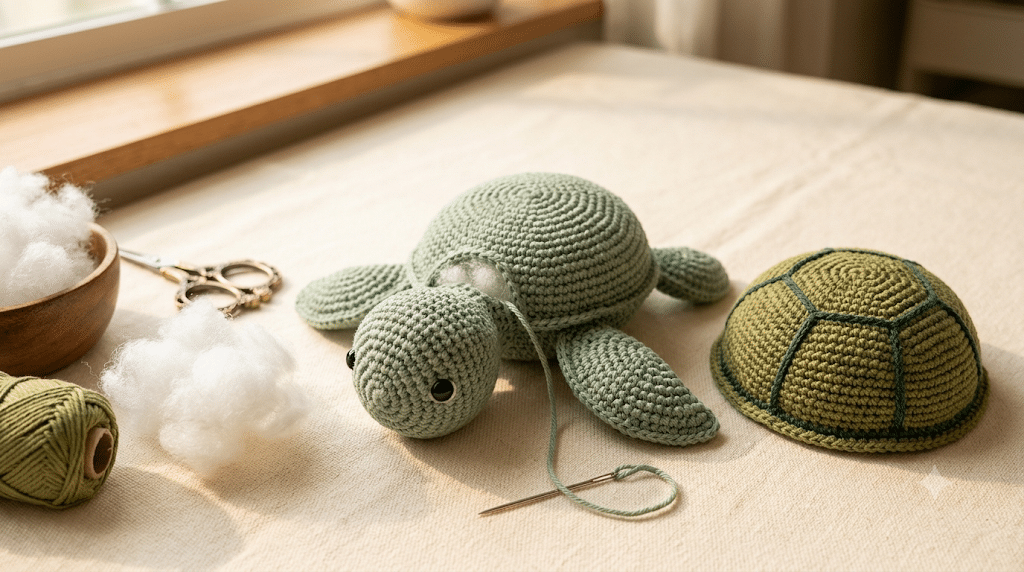
Position the head at the front of the body.
Use your yarn needle to sew it securely in place. Work through several stitches so the head does not wobble.
Next, attach the front flippers near the lower sides of the body. Place the back flippers slightly farther toward the rear.
Take a moment to look at your turtle from different angles.
Small changes in placement can completely change the personality of your sea turtle amigurumi.
Step 9: Attach the shell
Place the shell directly over the upper body.
Sew around the shell edge with matching yarn. Take small stitches so the joining points stay discreet.
Leave the lower portion slightly less tightly attached if you want the shell to look more dimensional.
You can also add a small amount of stuffing underneath the shell before finishing the seam.
This creates a plump, rounded silhouette that photographs beautifully.
Step 10: Add the final details
Finally, check your turtle from every angle.
Make sure the eyes sit evenly. Check that all flippers point in the direction you want.
Weave every loose yarn tail securely into the inside of the piece.
For a final touch, add tiny embroidered cheeks, a little smile, or a few shell details.
And just like that, your adorable ocean friend is finished!
How to Make Your Sea Turtle Look More Professional
A few finishing choices can make a handmade turtle look dramatically more polished.
The biggest secret involves consistency. Your stitches, stuffing, and assembly all affect the final shape.
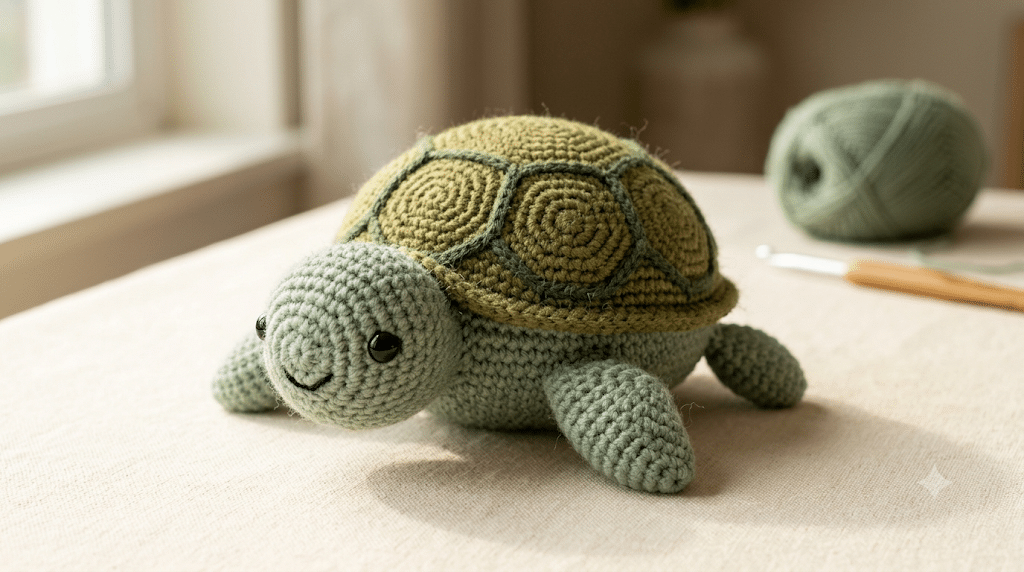
Keep your amigurumi stitches tight
Loose stitches can create visible gaps after stuffing.
Aim for a dense fabric that keeps the fiberfill inside. If you notice large spaces, try using a smaller hook.
The Craft Yarn Council notes that hook and yarn combinations vary, so treat recommended sizes as guidelines rather than strict rules.
Stuff gradually instead of forcefully
Too little stuffing creates a floppy turtle. Too much creates a lumpy shape.
Add fiberfill in small pieces. Rotate the body as you work so the filling spreads evenly.
Pay special attention to the sides. Uneven stuffing can make your turtle lean.
Check placement before sewing
Never rush the final assembly.
Use removable stitch markers or small pins to test where each piece should sit. Step back and look at the turtle from the front and side.
This works especially well for the flippers.
A small adjustment can make your crochet animal pattern look much more balanced.
Cute Color Ideas for Your Crochet Turtle
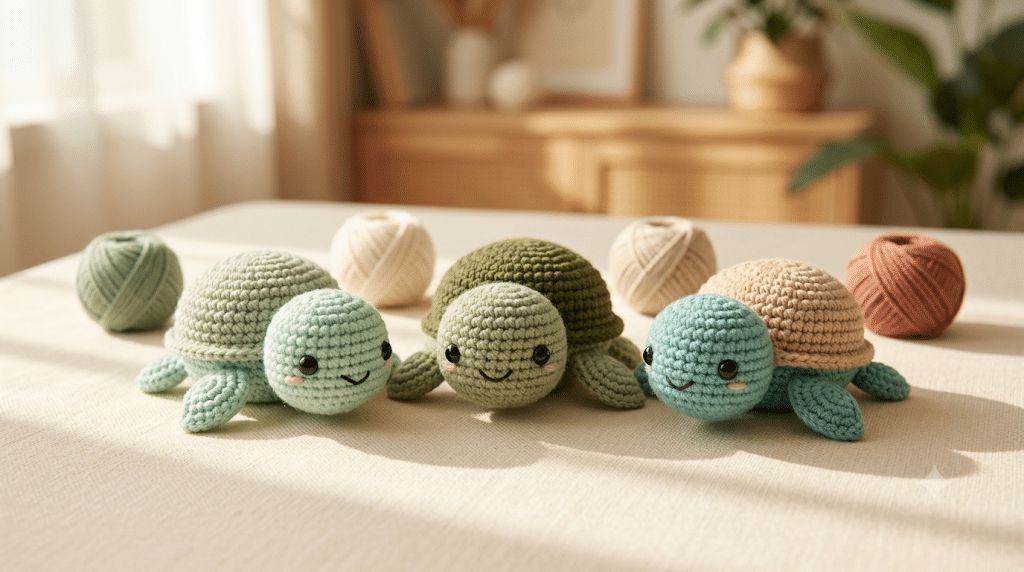
Color can completely change the personality of your finished turtle.
Traditional greens create a realistic ocean-inspired look. Softer shades create a kawaii plushie that feels perfect for gifts.
Classic ocean green
Try a medium green body with a darker green shell.
Add tiny black eyes and a simple embroidered smile. This combination gives you a timeless sea turtle appearance.
Soft pastel turtle
Use mint green for the body and pale sage for the shell.
This palette looks adorable in nurseries and makes a lovely handmade baby gift.
Keep the details minimal. Pastel colors already create plenty of visual softness.
Tropical turtle
Try warm turquoise, coral, and sandy cream.
Use turquoise for the body and coral accents for the shell lines. The result feels bright and playful.
This version works beautifully as part of a collection of underwater crochet animals.
Woodland-inspired turtle
You can even move away from traditional ocean colors.
Try moss green, warm beige, and muted brown. These colors create a cozy handmade look that fits beautifully with autumn decor.
Now that your turtle has the right colors, let’s make sure your shaping stays neat.
Beginner Tips for Better Amigurumi Shaping
Small stuffed animals can feel tricky at first. The good news is that most problems have simple solutions.
If your turtle does not look perfect immediately, do not unravel everything.
Count your stitches often
Counting prevents many amigurumi problems.
If you accidentally skip a stitch, your shape may become smaller on one side. Adding an extra stitch can make the opposite side expand.
The Craft Yarn Council recommends counting stitches regularly because missed stitches often cause crochet pieces to narrow.
Use a stitch marker
A stitch marker shows you exactly where each round begins.
This becomes especially helpful when working continuous rounds.
Move the marker after completing each round. That simple habit keeps your shaping much easier to follow.
Watch your decreases
Invisible decreases create a smoother finish.
When you decrease, make sure you do not pull the yarn too tightly. A tight decrease can create noticeable bumps.
Practice the decrease on a small scrap piece first if you feel unsure.
Do not panic about tiny imperfections
Handmade items should look handmade.
A slightly uneven stitch or tiny difference between two flippers does not ruin your project.
Those little details give your turtle its own personality.
If you are learning how crochet patterns use abbreviations, repeats, brackets, and stitch instructions, the Craft Yarn Council offers a useful pattern-reading guide.
Fun Ways to Use Your Finished Crochet Sea Turtle
Once your turtle is finished, you may discover that you want to make several more.
This project works beautifully for gifts, decorations, collections, and handmade keepsakes.
Make a turtle family
Create three or four turtles using different shades.
Make one large turtle, two medium turtles, and one tiny turtle. Arrange them together for an adorable family scene.
You can give each turtle a slightly different facial expression.
Create an ocean-themed nursery
Pair your turtle with crocheted whales, fish, jellyfish, and starfish.
Use soft blues, greens, creams, and sandy colors throughout the collection.
This creates a peaceful handmade ocean theme without overwhelming the room.
Turn it into a thoughtful gift
A handmade amigurumi sea turtle makes a memorable present because you created it yourself.
Add a small handwritten card with the recipient’s name.
For a beach-loving friend, you could also make the turtle in their favorite colors.
Make seasonal decorations
Tiny turtles work well as shelf decorations during summer.
You can also make miniature versions for a nautical-themed Christmas tree.
A small turtle with a ribbon can become a cute handmade ornament.
The possibilities go far beyond one finished plushie.
Common Crochet Sea Turtle Mistakes and Easy Fixes
Even experienced crocheters occasionally make mistakes.
The trick is learning how to spot them early.
The body looks too lumpy
This usually comes from uneven increases or uneven stuffing.
Check your stitch placement first. Then gently redistribute the fiberfill.
If the stitches look consistent, the stuffing probably needs adjustment.
The shell looks flat
Add a little more stuffing underneath the shell.
You can also work a few additional shaping rounds before starting the decreases.
The shell should have enough height to sit proudly above the body.
The head tilts sideways
Check your attachment points.
Remove a few stitches if necessary and reposition the head.
Use temporary markers before sewing it permanently.
The flippers look uneven
Lay all four flippers next to each other before attaching them.
Compare their lengths and widths.
If one looks noticeably different, remake it before assembly. This small step saves frustration later.
The safety eyes look misplaced
Always check eye placement before securing the head.
Hold the eyes against the crocheted fabric and view the face from several angles.
For younger children, avoid loose safety components and consider securely embroidered eyes instead.
Frequently Asked Questions About Crochet Sea Turtle Pattern
How long does it take to crochet a sea turtle?
A beginner may need several hours for a small sea turtle, especially when learning amigurumi shaping. An experienced crocheter may finish much faster. Your yarn thickness, hook size, turtle size, and finishing details all affect the total time. Give yourself extra time for stuffing and sewing the pieces together neatly.
What yarn is best for a crochet sea turtle?
DK-weight yarn works especially well for a small sea turtle because it creates clear stitches without making the project bulky. Cotton blends give you defined stitches, while chenille yarn creates a softer plush finish. Choose a yarn that lets you see your stitches clearly while maintaining a firm amigurumi fabric.
Is this crochet sea turtle pattern good for beginners?
Yes. This project uses beginner-friendly amigurumi techniques such as single crochet, increases, decreases, stuffing, and simple sewing. The separate body, head, shell, and flippers also make the project easier to understand. If you can make basic single crochet rounds, you can gradually learn the shaping used here.
What size safety eyes should I use for a sea turtle?
For a small or medium turtle, 6mm safety eyes usually create a sweet proportion. Larger turtles can use 9mm eyes for a more noticeable kawaii expression. Always check the proportions before securing the eyes. For toys intended for very young children, embroidered eyes provide a safer alternative.
Can I sell amigurumi made from this pattern?
You can generally sell finished handmade items you personally crochet from an original pattern, but you should not sell, redistribute, or copy the written pattern itself. Check the specific pattern’s copyright terms before selling finished pieces. When sharing your finished turtle online, crediting the original pattern creator is also a thoughtful practice.
How do I make a crochet turtle shell stand out?
Use a contrasting shell color and add simple embroidered lines across the surface. You can also create raised details with surface crochet. Light stuffing underneath the shell gives it extra dimension. Keep the texture simple so the rounded shell remains the main visual feature.
More Helpful Crochet Resources for Beginners
If this is one of your first amigurumi projects, a few reliable references can make the process easier.
The Craft Yarn Council provides beginner-friendly guides for single crochet, pattern abbreviations, crochet symbols, and pattern reading.
You can also use its crochet chart symbol guide when you begin exploring more advanced patterns.
These resources are especially useful when a pattern abbreviation looks unfamiliar. Keep them bookmarked while you practice.
Once your basic stitches feel comfortable, you will find that many amigurumi patterns become much easier to read.
Final Thoughts on This Crochet Sea Turtle Pattern
Creating a little turtle from yarn feels surprisingly rewarding. You start with simple stitches, then watch a recognizable sea creature appear in your hands.
This crochet sea turtle pattern gives you plenty of room to experiment with colors, shell details, facial expressions, and different sizes.
The first turtle may not look exactly like the picture in your imagination. That is completely okay.
Each project teaches you something new about tension, shaping, stuffing, and assembly. Before long, you may have a whole little ocean family sitting beside your crochet basket.
Save your finished turtle as a handmade keepsake or give it to someone who loves the sea.
Save this pin to your crochet board on Pinterest so you can find this pattern anytime!
Looking for more free crochet animal patterns? Visit Yarned Animals for new amigurumi patterns, kawaii plushies and beginner crochet tutorials added every week at yarnedanimals.com