
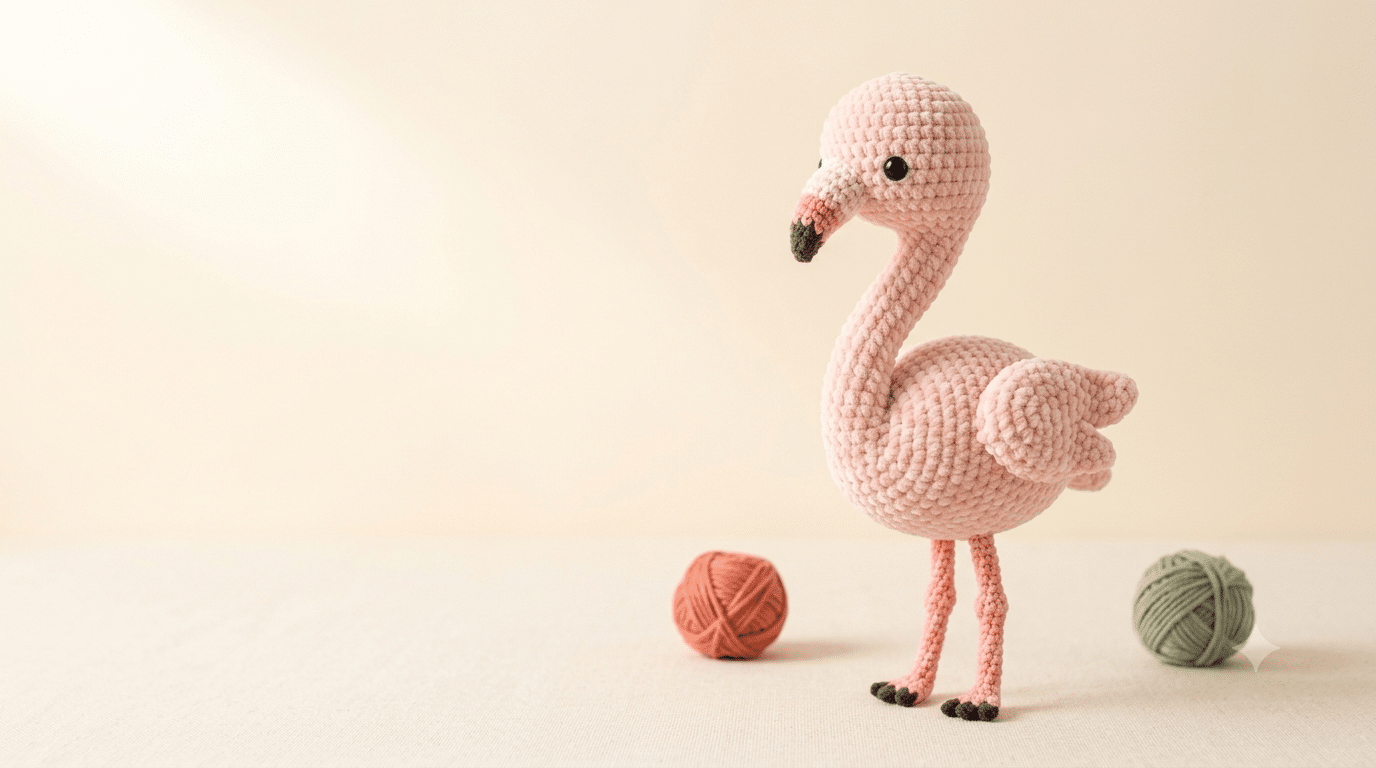
There is something extra cheerful about a tiny pink flamingo made from soft yarn. With its long neck, skinny legs, sweet little face, and playful shape, a flamingo amigurumi can turn an ordinary crochet afternoon into something wonderfully cute.
This crochet flamingo pattern free tutorial gives you a simple way to create your own adorable pink bird, even if you are still gaining confidence with amigurumi. You will learn how to shape the body, build the curved neck, add the beak, create the legs, and finish your flamingo with charming details.
The finished flamingo makes a lovely handmade gift, nursery decoration, shelf buddy, or kawaii crochet collection piece. Grab your yarn and hook, because the pinkest little project is ready to begin!
Table of Contents
Why This Crochet Flamingo Pattern Free Tutorial Is So Cute
Flamingos have such a recognizable shape that they translate beautifully into amigurumi. Their rounded body gives you a satisfying crochet base, while the long neck and little legs add personality without requiring complicated shaping.
This crochet flamingo pattern free project also gives you plenty of room to make the design your own. You can choose a soft pastel pink for a gentle nursery look or a brighter pink for a playful tropical style.
If you enjoy creating handmade animals, flamingos make a fun change from the usual bears, bunnies, and cats. They also look adorable sitting beside other crochet birds or tropical animals.
A beginner-friendly amigurumi project
You do not need advanced crochet skills to enjoy this flamingo. Basic amigurumi techniques such as single crochet, increasing, decreasing, working in the round, and sewing pieces together will carry you through most of the project.
If you already know how to make a simple stuffed ball, you have a great starting point. Take your time with the shaping, and remember that small imperfections often make handmade toys feel even more special.
What makes the flamingo shape unique
The body should feel rounded and slightly plump. The neck creates the signature flamingo silhouette, so gentle shaping works better than making it perfectly straight.
The head can stay small and rounded, while the beak adds a little contrast. Tiny safety eyes give your flamingo a sweet expression without adding complicated embroidery.
For a particularly soft finish, Bernat Blanket yarn can create a wonderfully cuddly texture. I especially love it when you want your flamingo to feel more like a plush toy than a decorative amigurumi.
Perfect for gifts and tropical decor
A handmade flamingo makes a cheerful birthday gift, baby-room accent, desk companion, or summer decoration. You can even make several flamingos in different shades of pink for a colorful display.
Try adding one to a tropical-themed gift basket with handmade flowers, a small crochet pineapple, or other colorful accessories. Your recipient will have something unique that clearly came from your own hands.
Crochet Flamingo Pattern Free Materials and Simple Preparation
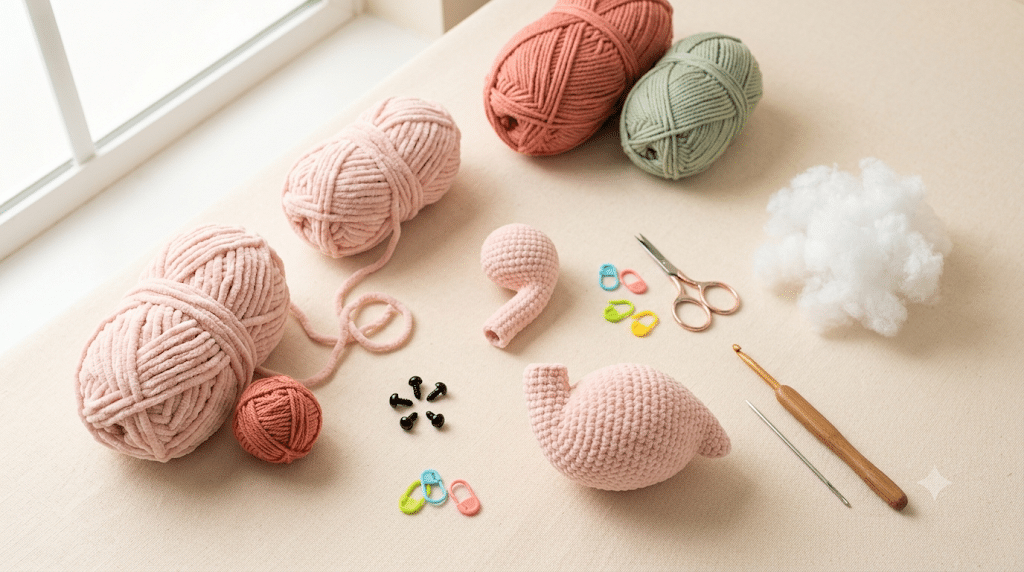
Before you begin this crochet flamingo pattern free, gather everything you need and prepare your workspace. Having your supplies nearby makes the project feel much easier once you start shaping the smaller pieces.
Choose a yarn that gives your stitches enough structure to hold the flamingo’s shape. Cotton blends work especially well for traditional amigurumi, while chenille yarn creates a softer plush appearance.
You will also need stuffing, a suitable crochet hook, safety eyes, a yarn needle, and stitch markers. Keep your tools organized so you can focus on the fun part: creating your flamingo.
Choose the right pink yarn
Pink gives you the classic flamingo appearance, but you do not have to use only one shade. A dusty rose creates a soft vintage look, while coral pink feels bright and tropical.
Paintbox Simply DK yarn works nicely when you want clear stitch definition. Its lighter weight can also make smaller details easier to see while you crochet.
Keep your tension fairly consistent throughout the project. Uneven tension can make the stuffed pieces look lumpy or cause small gaps to appear between stitches.
Prepare your crochet hook and stuffing
Choose a hook slightly smaller than the yarn label’s recommended size if needed. A tighter fabric helps prevent stuffing from showing through your stitches.
For stuffing, Poly-fil Premium fiberfill gives the body and head a soft, springy shape. Add stuffing gradually instead of filling everything at once.
A small amount at a time lets you control the shape much more easily. You want the body firm enough to hold its form without stretching the stitches.
Keep your small pieces organized
The flamingo includes several smaller components, including the legs, neck, wings, and beak. Losing one tiny piece can quickly turn a relaxing crochet session into a treasure hunt.
Keep completed pieces in a small container or project bag. Stitch markers also help you keep track of rounds when working on the body or head.
Write down which pieces you have finished as you work. This simple habit makes assembling your amigurumi much less stressful.
How to Make This Crochet Flamingo Pattern Free in 10 Easy Steps
Now that your materials are ready, here is the fun part. The flamingo comes together by creating a few simple crocheted shapes and then joining them carefully.
You can work through these steps at your own pace. If you are new to amigurumi, pause after each section and check your shape before continuing.
Step 1: Crochet the rounded flamingo body
Start with the main body using pink yarn. Work in the round to create a compact, rounded shape that becomes slightly wider through the middle.
Use increases gradually to create the curve. Once the body reaches the size you want, begin decreasing toward the lower section.
Add stuffing as the body develops. Keep checking the firmness because the final shape should look plump rather than overly stretched.
Step 2: Shape the flamingo head
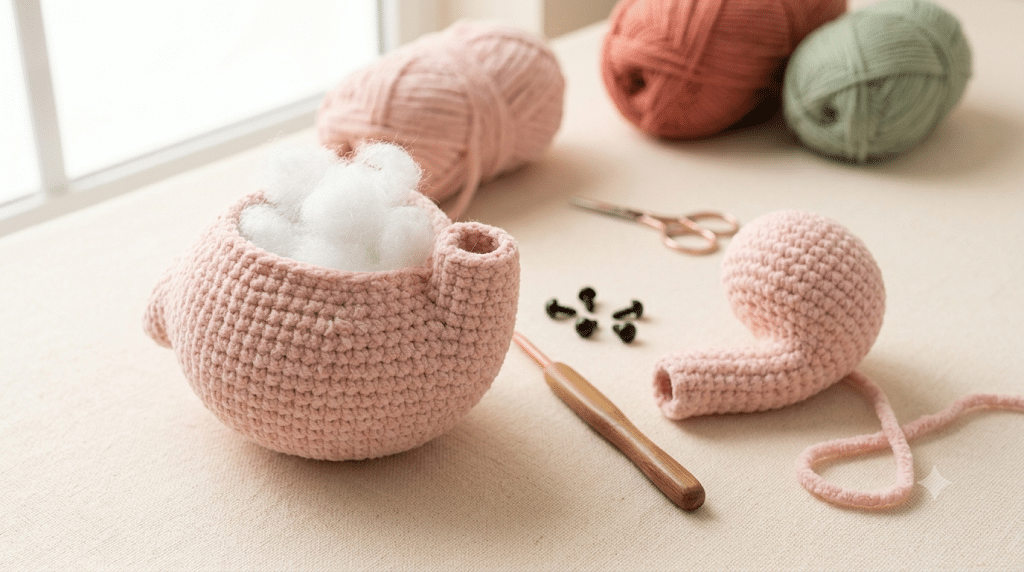
The head uses another rounded crocheted piece. Keep the shape slightly smaller than the body so your finished bird looks balanced.
Work the head in pink yarn and add stuffing before closing it. Shape it gently with your fingers while the piece remains slightly flexible.
Do not overstuff the head. A softer shape usually creates a much sweeter kawaii appearance.
Step 3: Build the long curved neck
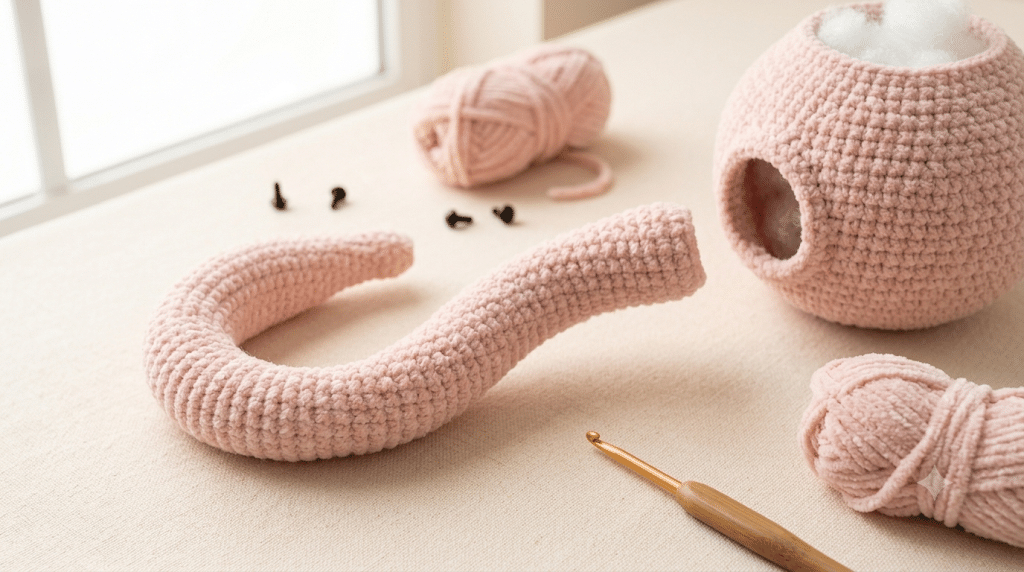
The neck creates the flamingo’s most recognizable feature. Crochet a narrow tube that remains flexible enough to curve naturally.
Stuff the neck little by little as you work. Too much stuffing can make it difficult to create the graceful curve.
Once finished, gently bend the neck into a soft S-shape. Secure it carefully when attaching it to the body so it stays upright.
Step 4: Create the little beak
The beak adds a tiny pop of contrast to your flamingo’s face. You can use black, dark gray, or a combination of pink and black depending on your preferred look.
Crochet the beak as a small tapered piece. Keep it compact because a huge beak can overwhelm the delicate head.
Sew it securely onto the front of the head. Check its position from several angles before making your final stitches.
Step 5: Add the wings
Crochet two small wing shapes using the same pink yarn. You can keep them simple and rounded rather than adding complicated feather details.
Place one wing on each side of the body. Pin them temporarily before sewing so you can check that they sit at equal heights.
For a playful pose, angle the wings slightly outward. For a classic standing flamingo, keep them closer against the body.
Step 6: Make the long flamingo legs
The legs should remain noticeably thinner than the body and neck. Use a firm stitch tension so they hold their shape.
You can create the legs using pink yarn and add darker feet for contrast. Keep the finished legs similar in length so your flamingo stands evenly.
If the flamingo feels unstable, adjust the leg placement before sewing everything permanently. Small positioning changes can make a big difference.
Step 7: Attach the eyes and facial details
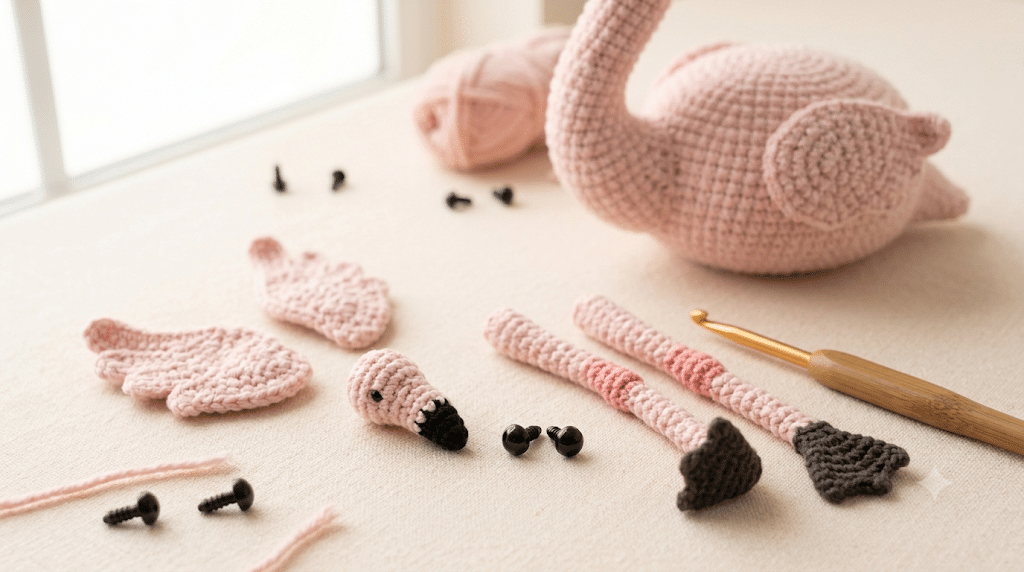
Add the safety eyes before closing the head if your chosen construction makes that easier. Position them evenly on either side of the face.
For a smaller flamingo, 6mm safety eyes can create a delicate expression. A larger design may look better with slightly larger eyes.
Always check that the eyes sit securely. If you plan to make the flamingo for a young child, follow the safety guidance for the materials you use.
Step 8: Assemble the neck and head
Now connect the head to the curved neck. Take a moment to check the angle before sewing.
The head should sit naturally at the top of the neck without leaning too far forward. Use several secure stitches around the connection point.
This is where your flamingo really starts to look like a flamingo. Give the neck a gentle curve and adjust the head until the expression feels right.
Step 9: Sew on the wings and legs
Attach the wings first, then position the legs underneath the body. Use the same pink yarn when possible so the joining stitches blend into the fabric.
Sew each piece securely with a yarn needle. Take small stitches around the edges instead of pulling one long stitch across the piece.
Turn the flamingo over and check the underside. The legs should sit evenly enough for your bird to stand without tipping.
Step 10: Add the final kawaii touches
Your flamingo is almost finished! Give the body a gentle squeeze and reshape any areas that look uneven.
You can add tiny embroidered details, soft blush, or a subtle stitch detail around the eyes. Keep these additions simple so the flamingo retains its clean kawaii appearance.
Finally, weave in every loose end and trim the yarn neatly. Stand your flamingo upright and admire your work.
Easy Tips for a Better Flamingo Amigurumi
Before you get too far into your project, a few small techniques can make the finished flamingo look much more polished. Amigurumi often depends more on consistent tension and careful assembly than complicated stitches.
The biggest secret is patience. When something looks slightly wrong, avoid immediately pulling everything apart.
Instead, look at the piece from several directions. Sometimes moving one wing or changing the neck angle solves the problem instantly.
Keep your amigurumi stitches tight
Tight stitches help keep stuffing inside the crocheted fabric. They also give your flamingo a smoother and more professional appearance.
If you notice visible gaps, try using a smaller hook. Your tension may also need a little adjustment.
Do not pull your yarn so tightly that your hand becomes uncomfortable. Comfortable crochet usually produces better results than forcing every stitch.
Shape stuffed pieces gradually
Stuffing affects the final appearance more than many beginners expect. Adding too much at once can create bumps and distort the stitch pattern.
Add a small amount, shape the piece, then add more if needed. This approach works especially well for the rounded body and delicate neck.
When you finish stuffing, check the silhouette before closing the opening. Your hands can gently massage the fiberfill into a smoother shape.
Make the neck stand securely
The long neck needs enough structure to remain upright. If it feels floppy, add a little more stuffing or reinforce the inside with firm stitching.
Avoid forcing the neck into an extreme curve. A soft curve usually looks more natural and keeps the flamingo balanced.
You can also sew the neck to the body at several points. This helps prevent unwanted movement after assembly.
Choose safety eyes carefully
Safety eyes create that classic amigurumi expression with very little effort. Their size can change the entire personality of your flamingo.
Small eyes give a sweet, delicate look. Larger eyes create a more exaggerated kawaii appearance.
Place both eyes before permanently sewing other facial pieces. This lets you experiment with the expression until you love it.
How to Customize Your Crochet Flamingo Pattern Free
One of the best things about amigurumi is how easily you can personalize a basic design. Once you understand the main shapes, you can create flamingos that match different seasons, rooms, or gift themes.
This crochet flamingo pattern free design works beautifully as a starting point. Change the colors, proportions, accessories, or facial expression to create something completely your own.
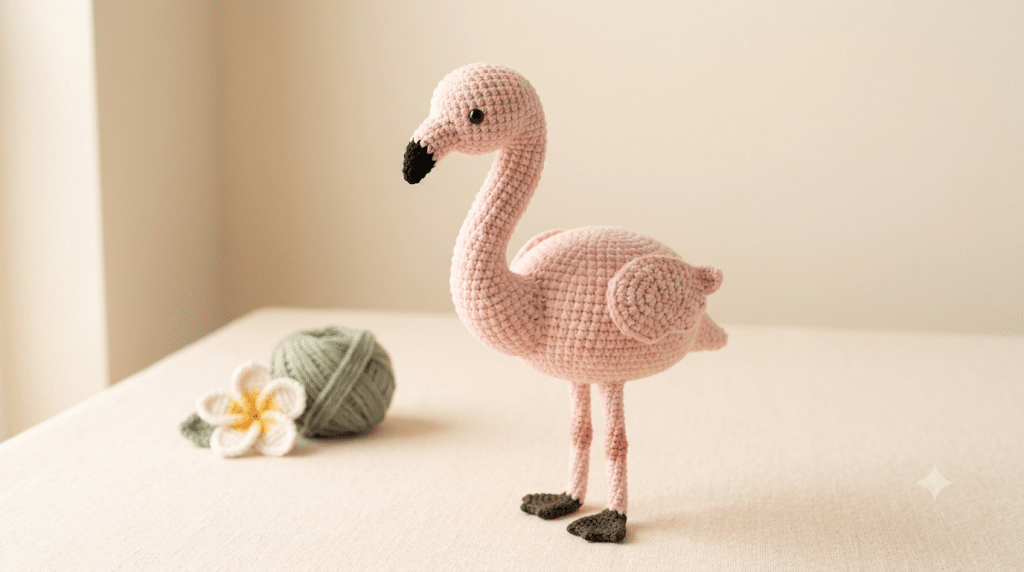
Try different flamingo color combinations
Classic pink always works, but you can experiment with soft peach, coral, blush, or even pale lavender.
A white flamingo could create a dreamy nursery look. A hot pink version would feel playful and energetic.
You can also use two pink shades. Try a lighter body with a darker wing or darker neck detail.
Create a standing or sitting flamingo
A standing flamingo has a tall, elegant silhouette. A sitting flamingo feels softer and more like a cuddly plush toy.
If you want a standing design, spend extra time balancing the legs. If you prefer a sitting version, make the body slightly wider and position the legs forward.
Both styles can look adorable. Choose the pose that matches your crochet collection.
Add a tiny tropical accessory
A little accessory can turn your flamingo into a themed gift. Try a miniature flower, tiny bow, or small crochet leaf.
For a summer display, pair the flamingo with handmade tropical flowers. For a baby gift, choose soft pastel accessories instead.
Remember to keep accessories secure, especially if your finished piece will go to a young child.
Troubleshooting Common Flamingo Crochet Problems
Even simple amigurumi can create confusing moments. Maybe your neck bends too much, the body looks lopsided, or your flamingo refuses to stand.
That does not mean you failed. Crochet pieces often need small adjustments during assembly.
Next up, let’s fix the most common problems before they become frustrating.
Why does my flamingo look uneven?
Uneven shaping usually comes from inconsistent tension or uneven stuffing. First, check whether your stitches look similar around the piece.
Then gently reshape the stuffing. You may find that one side simply needs a little less fiberfill.
If the issue comes from the crocheted shape itself, slow down around increases and decreases. Consistent stitch placement helps create a smoother silhouette.
Why won’t my flamingo stand?
The legs may sit too close together, too far apart, or at slightly different angles. Before sewing them permanently, place them against the body and test the balance.
The feet also need enough width to support the body. If necessary, make the feet slightly larger.
A tiny adjustment can completely change the stability of your finished flamingo.
Why is my neck floppy?
A floppy neck usually needs more internal support. Check whether you have added enough stuffing as you crocheted.
You can also reinforce the neck-to-body connection with additional sewing. Make several secure stitches around the joining area.
For a particularly tall flamingo, a firmer crochet fabric can also help. Avoid making the neck excessively long if you want an easy beginner project.
How can I make the flamingo look cuter?
Expression and proportions make a huge difference. Slightly larger eyes, a rounded head, and a gently curved neck can create a charming kawaii look.
Try positioning the eyes a little lower on the face. Then place the beak between them and slightly below.
Take a photo of your flamingo from the front. Sometimes a picture makes tiny proportion issues much easier to notice.
How to Use Your Finished Flamingo
Your finished flamingo can become much more than a crochet project. Because the design feels cheerful and tropical, it works beautifully in many handmade settings.
A small flamingo makes an adorable desk companion. A larger one can become a nursery decoration or cozy shelf plush.
You can also make several flamingos in different sizes and shades. A little flock displayed together looks especially sweet.
Make a handmade flamingo gift
Pair your flamingo with a handmade card for a thoughtful birthday present. You can also create a tropical-themed gift basket with other crocheted pieces.
For a baby shower, choose soft pink and cream colors. For a teenager or young adult, brighter pinks can create a fun kawaii aesthetic.
The handmade element makes the gift feel personal. Your recipient gets something that carries the time and care you put into every stitch.
Create a tropical crochet collection
A flamingo looks wonderful alongside other crochet animals. Build a small tropical collection with a parrot, turtle, pineapple, or tropical flower.
Use coordinating colors throughout the collection. Soft pink, cream, coral, green, and warm yellow create a cheerful palette.
This can also become a fun series of projects if you enjoy making themed amigurumi.
Turn your flamingo into seasonal decor
Flamingos are perfect for summer decorating. Place one on a shelf beside tropical plants, handmade flowers, or colorful crochet pieces.
You can also create a small seasonal display with several flamingos. Vary their poses so the group feels playful instead of perfectly uniform.
If you enjoy changing your home decor throughout the year, this little project gives you an easy handmade summer accent.
Frequently Asked Questions About Crochet Flamingo Pattern Free
How long does it take to crochet a flamingo?
A beginner may need several hours to complete a crochet flamingo, especially when learning amigurumi shaping and assembly. An experienced crocheter may finish much faster. Your yarn weight, flamingo size, neck length, and sewing speed can all change the total time.
What yarn is best for a flamingo amigurumi?
Cotton or cotton-blend yarn works well when you want clear stitches and a structured finish. Chenille yarn creates a softer plush appearance. Choose a yarn that feels comfortable in your hands and gives you enough stitch definition to control the small pieces.
Is this flamingo crochet pattern good for beginners?
Yes, especially if you already know basic crochet stitches. The project mainly involves working in rounds, shaping with increases and decreases, stuffing pieces, and sewing them together. The long neck and small parts require patience, but you can complete them gradually.
What size safety eyes should I use for flamingo amigurumi?
The ideal eye size depends on your finished flamingo’s proportions. Smaller designs often look cute with 6mm safety eyes, while medium amigurumi can use 9mm eyes. Always position the eyes before final assembly so you can adjust the expression.
Can I sell flamingos I make from this pattern?
You can generally sell finished handmade items when the pattern creator allows finished-product sales. Do not sell, copy, or redistribute the written pattern itself. If you sell your finished flamingos, adding your own handmade photos and product descriptions can help customers understand that each piece is individually crafted.
Can I make this flamingo in colors other than pink?
Absolutely. Pink creates the classic flamingo appearance, but you can experiment with peach, coral, white, lavender, or multiple pink shades. Color changes are one of the easiest ways to personalize amigurumi while keeping the same basic shape.
Final Thoughts on This Crochet Flamingo Pattern Free
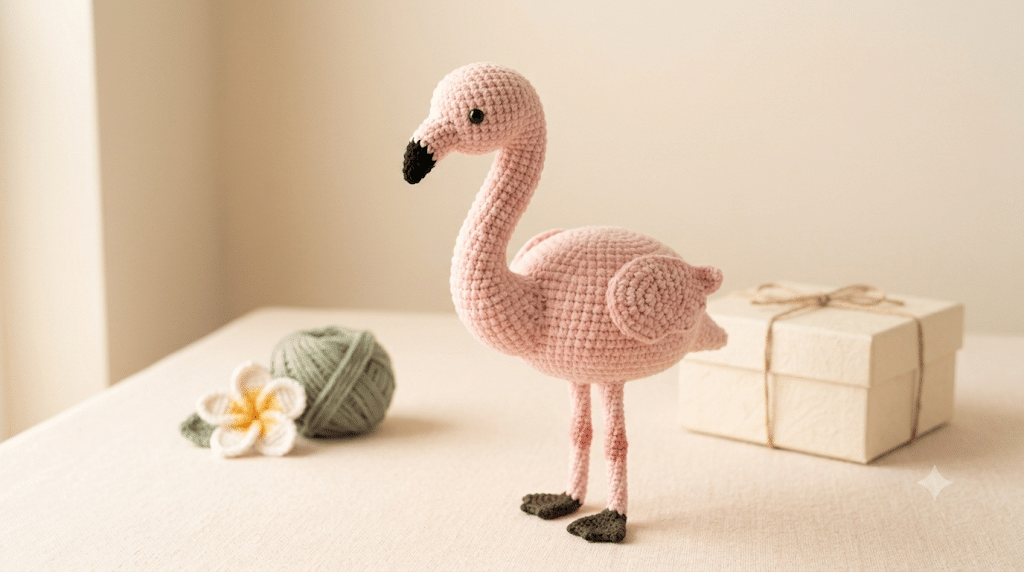
Creating a tiny flamingo from a ball of yarn is such a satisfying crochet experience. You start with simple shapes, then watch a recognizable little bird appear as you connect each piece.
With this crochet flamingo pattern free tutorial, you now have a beginner-friendly project that you can customize with your favorite colors, expressions, and accessories. Most importantly, you can make something completely handmade and wonderfully personal.
Imagine finishing those final stitches, setting your flamingo upright, and realizing that you created the whole thing yourself. That little feeling of accomplishment is exactly why amigurumi is so much fun.
If you are making yours as a gift, I hope the recipient smiles just as much when they see it.
Save this pin to your crochet board on Pinterest so you can find this pattern anytime!
Looking for more free crochet animal patterns? Visit Yarned Animals for new amigurumi patterns, kawaii plushies and beginner crochet tutorials added every week at yarnedanimals.com