
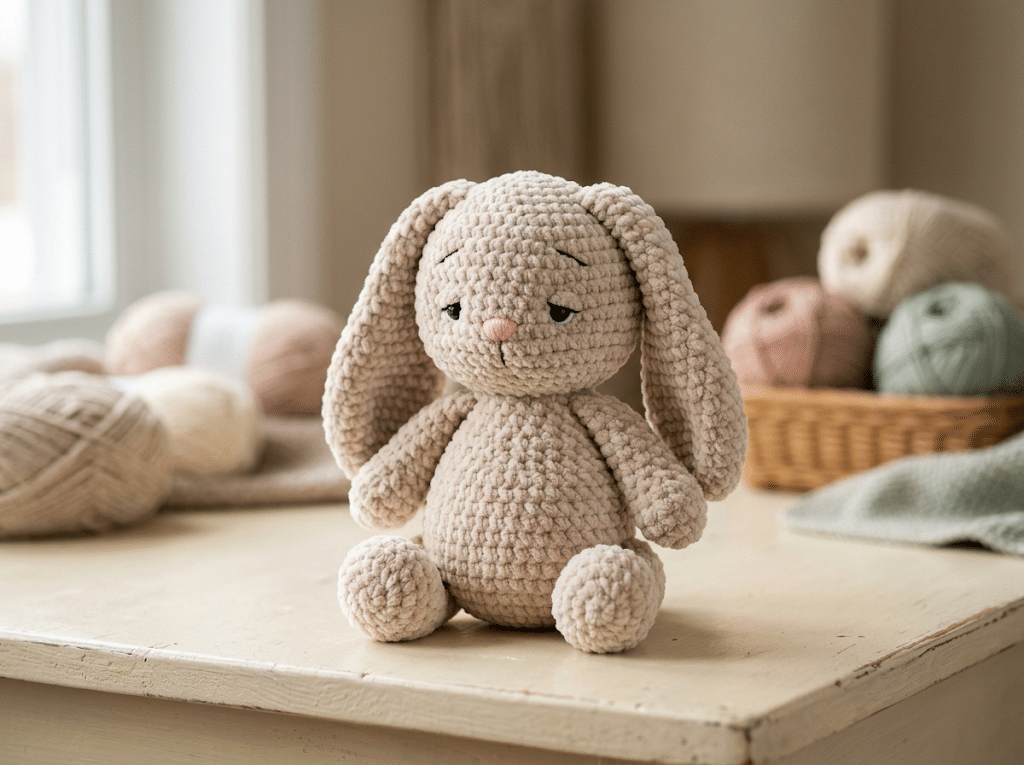
There is something extra special about a soft little bunny made with your own hands. From its floppy ears to its sleepy eyes and squishy body, this crochet bunny pattern gives you a sweet amigurumi friend that feels perfect for gifting, decorating, or simply keeping close.
This bunny measures about 8 inches when made with the suggested bulky plush yarn and 4mm hook. The body and head are worked as one continuous piece, while the arms, legs, and ears are made separately.
You will also learn how to attach the legs and arms directly while crocheting, create a tiny puff-stitch tail, shape the face, and finish the ears neatly.
If you have already tried a few basic amigurumi projects, this is a lovely next project. Grab your favorite yarn, settle into a cozy spot, and let’s start with everything you need.
Table of Contents
Why This Crochet Bunny Pattern Is So Cuddly
The charm of this bunny comes from its simple shape and soft texture. Plush yarn creates a rounded, huggable body that feels wonderful in your hands.
The finished bunny has a calm expression rather than a wide cartoon smile. Its half-closed sleepy eyes give it a gentle look that works beautifully for nursery decor, handmade gifts, or a cozy shelf display.
A Soft Plush Amigurumi Shape
The body and head flow together as one continuous piece. You do not fasten off between the body and head, which helps create a smooth silhouette.
The legs join during Round 7, while the arms join during Round 15. That means you do not need to sew those limbs onto the finished body afterward.
This construction can feel unusual at first, especially if you normally crochet separate pieces and sew everything together.
Take your time when you reach the joining rounds. Slow crochet is much easier than trying to fix a misplaced limb later.
A Sweet Little Puff-Stitch Tail
One of my favorite details is the tiny tail. It forms directly during the body round with five double crochets worked into one stitch.
The tops are closed together to create a small puff shape. It gives the bunny a cute rounded tail without requiring another separate piece.
A Beginner-Friendly Skill Level
This project uses familiar amigurumi techniques such as single crochet, increases, decreases, a magic ring, stuffing, and sewing.
You will also practice joining crocheted pieces into the body and shaping facial details.
If plush yarn makes your stitches difficult to see, do not worry. Work slowly and use a stitch marker to help keep track of your rounds.
Crochet Bunny Pattern Materials You’ll Need
Before starting your crochet bunny pattern, gather everything in one place. Having your tools nearby makes the project feel much smoother once you reach the joining rounds.
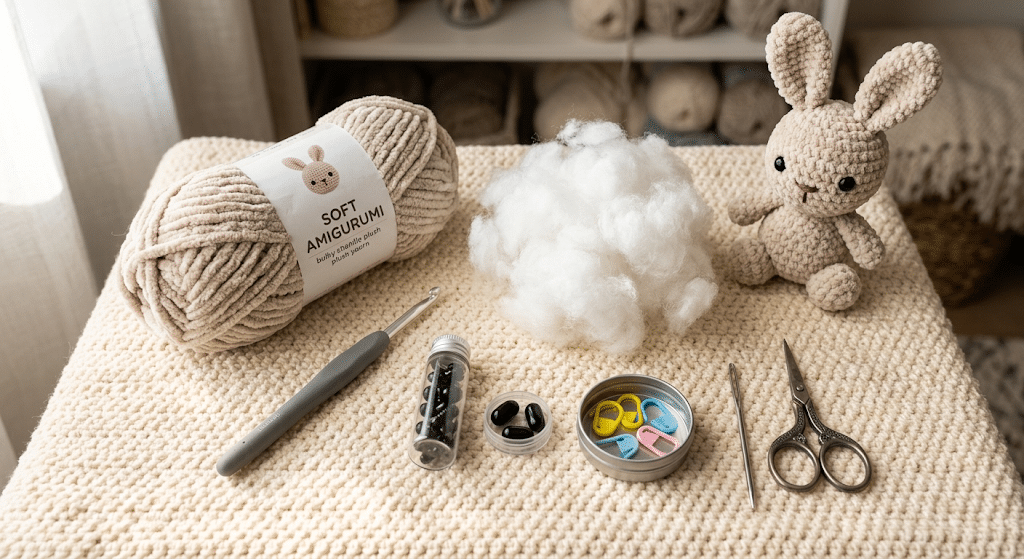
The original pattern calls for bulky-weight plush or velvet yarn made from 100% polyester. About 120 meters or 100 grams of oatmeal or light beige yarn creates the soft neutral bunny shown in the reference.
Choose Your Plush Yarn
A plush yarn works beautifully because it creates the soft, velvety surface that makes this bunny so huggable.
For a similar cozy texture, you can use Bernat Blanket yarn.
Keep your tension fairly snug when working with plush yarn. Loose stitches can allow the stuffing to show through.
If you change yarn, remember that yarn thickness can affect the final size and firmness of your bunny.
Pick a Comfortable Crochet Hook
The reference pattern uses a 4mm crochet hook with bulky plush yarn.
For long crochet sessions, I like a comfortable ergonomic hook such as a Clover Amour crochet hook.
You can also browse the official Clover crochet website if you want to compare their ergonomic hook styles.
The hook should create tight enough stitches to keep the stuffing inside while still allowing you to crochet comfortably.
Gather the Small Finishing Supplies
You will also need safety eyes, a safety nose, polyester fiberfill, stitch markers, a yarn needle, scissors, and black and white sewing thread.
The reference uses 10mm safety eyes and an 11mm oval safety nose. It also uses black thread for eyelashes, eyebrows, and the mouth, plus white thread for eye highlights.
For stuffing, Poly-fil Premium fiberfill is a convenient option.
Set aside enough stuffing for the legs, body, and head before you begin.
Crochet Bunny Pattern Stitches and Notes
Now that your supplies are ready, take a few minutes to understand the pattern language. This will make the actual rounds much easier to follow.
The pattern uses US crochet terminology and works most pieces in continuous spiral rounds. You do not join or turn at the end of each round unless the instructions specifically tell you to do so.
Learn the Main Abbreviations
Here are the stitches used throughout the pattern:
- sc — single crochet
- inc — increase
- dec — decrease
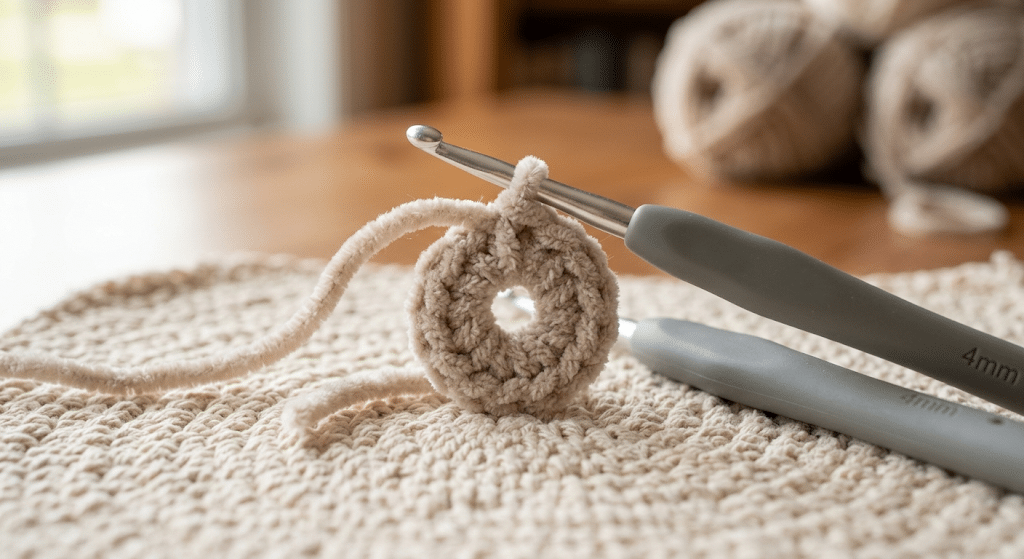
- MR — magic ring
- sl st — slip stitch
- dc — double crochet
- rnd — round
- st — stitch
The pattern uses invisible decreases for a smoother amigurumi surface.
If these abbreviations are new to you, keep this list beside your crochet hook.
Watch Your Stitch Counts
Each round includes a stitch count at the end. Those numbers help you check your work before moving forward.
For example, Round 1 of the body begins with six single crochets in a magic ring. Round 2 increases each stitch to reach 12 stitches.
If your count does not match, stop and find the mistake before continuing.
Fixing one missed increase now is much easier than correcting several rounds later.
Keep the Body and Head Connected
The body and head are crocheted as one continuous piece.
After Round 16, you continue directly into the head rather than fastening off. This creates the rounded transition between the body and face.
Use a stitch marker to identify the beginning of each spiral round.
This tiny habit can save you plenty of frustration when working with fluffy yarn.
Crochet Bunny Pattern – Arms and Legs
Here is the fun part: you can begin creating the bunny’s little limbs.
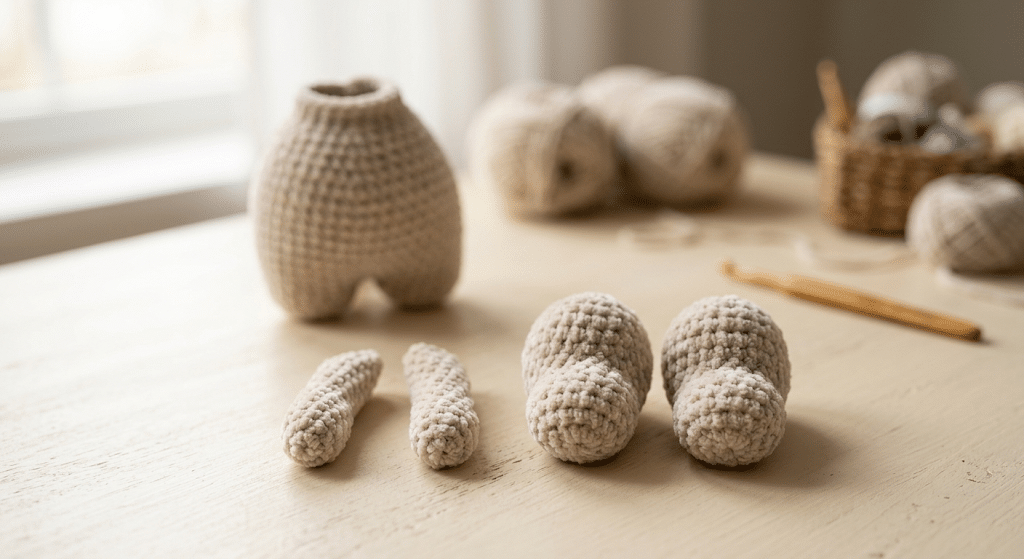
The arms and legs are crocheted separately first. You will then have them ready when the body reaches the joining rounds.
Make the Two Arms
Make two identical arms.
Round 1: Make 6 sc in a magic ring. (6)
Round 2: Increase in every stitch around. (12)
Rounds 3–4: Sc in each stitch around. (12)
Round 5: Decrease four times in a row, then sc in the next 4 stitches. (8)
Rounds 6–9: Sc in each stitch around. (8)
Fasten off with a slip stitch and leave a long yarn tail.
Weave the end inside the arm. Stuff each arm lightly through Round 5, leaving the upper section flat and unstuffed.
That flat upper area makes attachment easier later.
Make the Two Legs
Make two identical legs.
Round 1: Make 6 sc in a magic ring. (6)
Round 2: Increase in every stitch around. (12)
Round 3: Repeat sc, inc six times. (18)
Rounds 4–5: Sc in each stitch around. (18)
Round 6: Sc in the next 4 stitches, repeat sc, dec three times, then sc in the next 5 stitches. (15)
Round 7: Sc in the next 4 stitches, decrease three times, then sc in the next 5 stitches. (12)
Rounds 8–10: Sc in each stitch around. (12)
Round 11: Repeat sc in the next 4 stitches, dec twice. (10)
Fasten off with a slip stitch and leave a long tail.
Stuff each leg firmly with fiberfill through Round 7.
Get Ready for the Body Join
Before starting the body, make sure both legs are finished.
The legs attach directly during Round 7 of the body. The arms attach during Round 15.
Keep both pieces nearby so you do not need to stop midway through a round.
This is one of those moments where preparation makes the crochet feel much easier.
How to Crochet the Body and Head
Next up, you will create the main shape of your bunny.
This is the longest section of the project because the body and head grow continuously from the same piece.
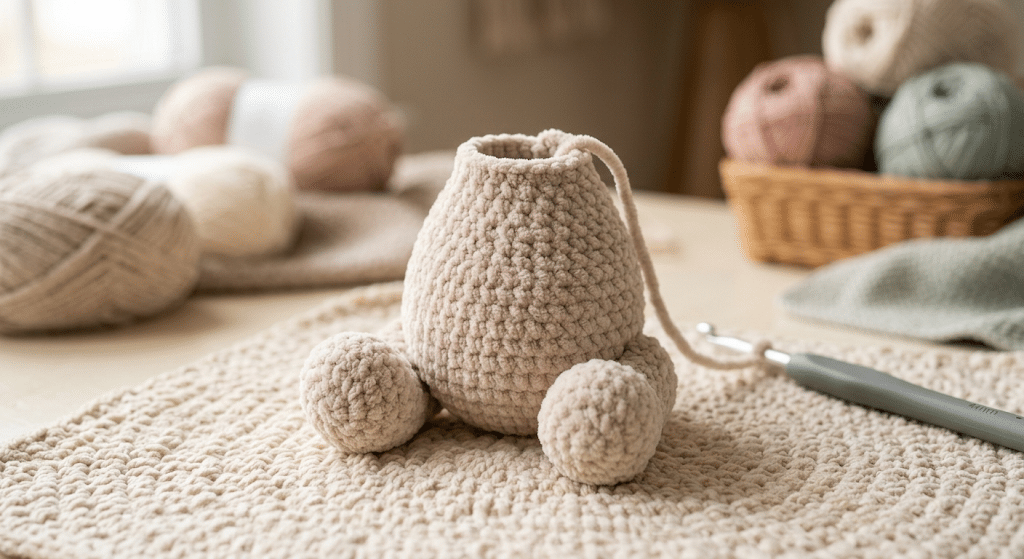
Build the Body
Round 1: 6 sc in a magic ring. (6)
Round 2: Inc in each stitch around. (12)
Round 3: Repeat sc, inc six times. (18)
Round 4: Repeat 2 sc, inc six times. (24)
Round 5: Repeat 3 sc, inc six times. (30)
Round 6: Repeat 4 sc, inc six times. (36)
Round 7: Sc in the next 5 stitches, work through one leg to join it, then sc in the next 13 stitches. Sc in the next 5 stitches, work through the second leg to join it, then sc in the next 6 stitches.
Create the tail by working five dc into the same stitch and closing their tops together into a puff stitch. Finish with sc in the next 6 stitches. (36)
Take your time on this round. It attaches both legs and creates the tail during the same pass.
Round 8: Sc in each stitch around. (36)
Round 9: Sc in the next 8 stitches, dec, sc in the next 3 stitches, dec, sc in the next 13 stitches, dec, sc in the next 6 stitches. (33)
Round 10: Sc in the next 7 stitches, dec, sc in the next 3 stitches, dec, sc in the next 12 stitches, dec, sc in the next 5 stitches. (30)
Round 11: Repeat sc in the next 3 stitches, dec six times. (24)
Round 12: Sc in each stitch around. (24)
Round 13: Repeat sc in the next 2 stitches, dec six times. (18)
Round 14: Sc in each stitch around. (18)
Attach the Arms
Round 15 attaches both arms directly to the body.
Round 15: Sc in the next 4 stitches, work through one arm to join it, sc in the next 5 stitches, sc through the second arm to join it, then sc in the next 5 stitches. (18)
Check the arms from the front before continuing.
You want them to sit at roughly the same height on both sides.
Round 16: Repeat sc, dec six times. (12)
Do not fasten off.
Continue directly into the head.
Shape the Bunny Head and Add the Face
Ready to move on? The body is now complete, and the next rounds transform your project into an adorable bunny.
The head expands first and then gradually decreases toward the top.
Expand the Head
Round 17: Increase in each stitch around. (24)
Round 18: Repeat sc in the next 3 stitches, inc six times. (30)
Round 19: Repeat sc in the next 4 stitches, inc six times. (36)
Round 20: Repeat sc in the next 11 stitches, inc three times. (39)
Rounds 21–23: Sc in each stitch around. (39)
At this point, your bunny should have a rounded head shape.
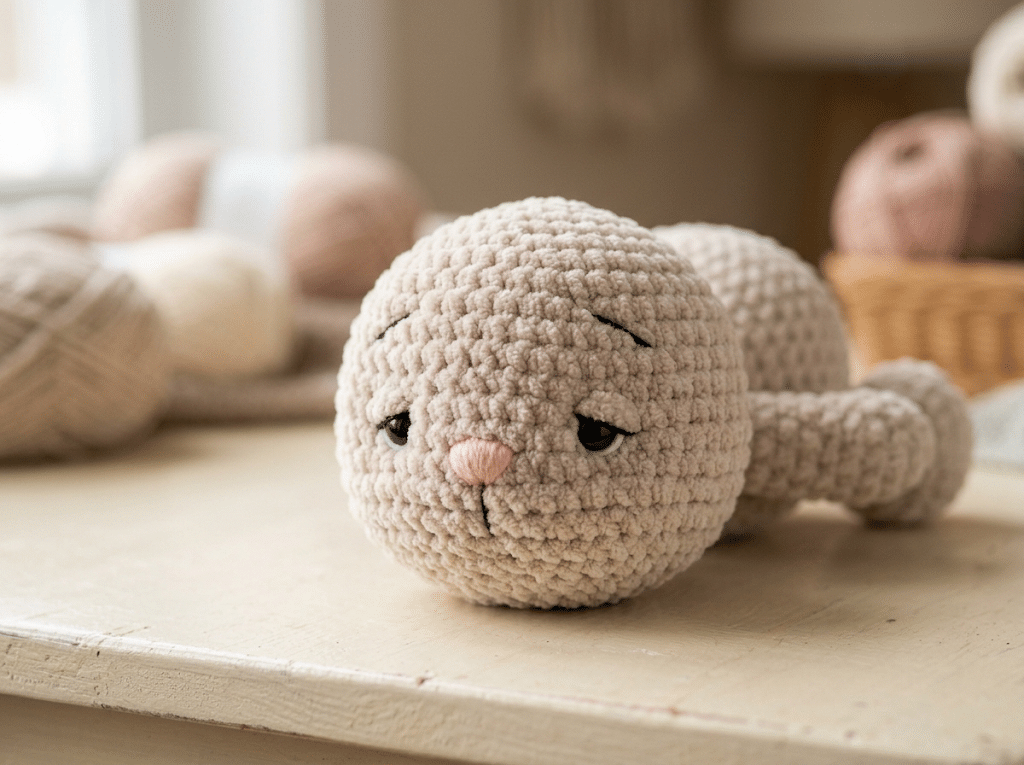
Position the Nose and Eyes
Insert the safety nose between Rounds 23 and 24, centered on the face.
Then work Round 24: sc in the next 7 stitches, repeat sc, dec six times, then sc in the next 14 stitches. (33)
Keep the decreases centered between the arms. If needed, slightly adjust the starting point of the round so the shaping lines up.
Insert the safety eyes between Rounds 24 and 25.
Space them six stitches apart and center them above the legs.
Close the Head
Rounds 25–26: Sc in each stitch around. (33)
Round 27: Repeat sc in the next 9 stitches, dec three times. (30)
Round 28: Repeat sc in the next 3 stitches, dec six times. (24)
Round 29: Repeat sc in the next 2 stitches, dec six times. (18)
Round 30: Repeat sc, dec six times. (12)
Round 31: Decrease six times around. (6)
Fasten off and leave a yarn tail.
Use your yarn needle to cinch the remaining stitches closed, then weave the end inside the head.
Make the Adorable Bunny Ears
The ears bring the whole personality together.
They are worked as two matching pieces, folded flat, and then sewn onto the head.
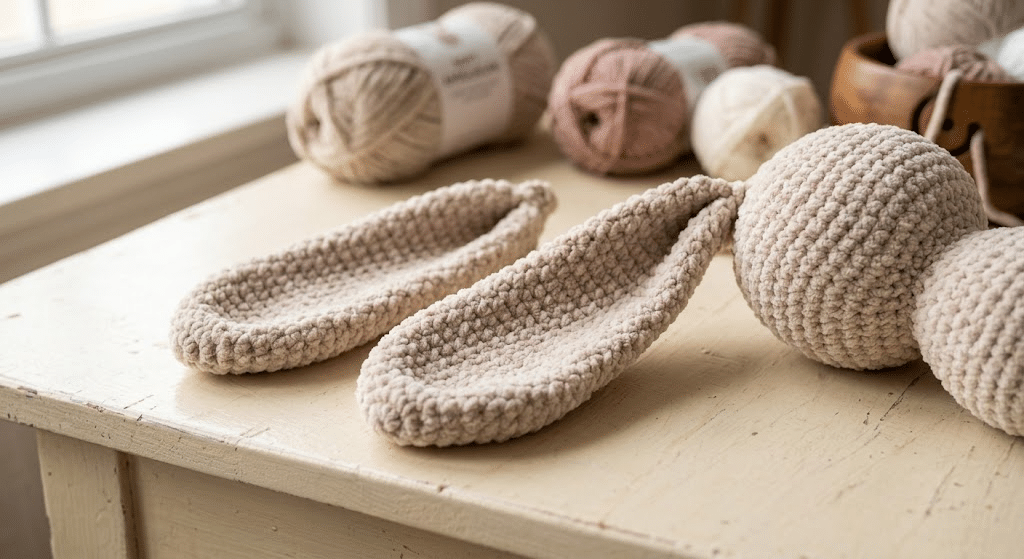
Crochet Two Ears
Make two ears.
Round 1: 6 sc in a magic ring. (6)
Round 2: Repeat sc, inc three times. (9)
Round 3: Repeat sc in the next 2 stitches, inc three times. (12)
Round 4: Repeat sc in the next 3 stitches, inc three times. (15)
Rounds 5–9: Sc in each stitch around. (15)
Round 10: Repeat sc in the next 3 stitches, dec three times. (12)
Fold the ear flat.
Work six sc through both layers together to close the bottom edge. Fold the ear in half once more, then work one slip stitch to finish closing it.
Leave a long tail for sewing. Make the second ear the same way.
Sew the Ears in Place
Position the ears about two rounds back from the center top of the head.
Use the long yarn tails to whipstitch each ear securely into place.
Look at the bunny from the front before tightening the stitches.
Small changes in ear angle can completely change the expression.
For a sleepy, gentle look, keep the ears balanced and slightly folded rather than pulling them dramatically outward.
Give Your Bunny Its Sweet Facial Details
Your bunny is already recognizable, but the embroidered details create its finished expression.
This stage is slower than crocheting, so give yourself permission to take your time.
Sculpt the Eyes and Nose
The reference uses needle sculpting around the eyes.
Bring your needle through the head so the thread passes just beneath each eye. Pull gently and evenly until you create a subtle indentation, then secure the thread with a double knot.
Repeat the same basic process around the nose.
Bring the needle beneath the nose and back through the head. Pull gently to shape the area, secure the thread, trim the excess, and bury the ends inside the head.
Embroider the Expression
Use black thread to embroider the eyelashes, eyebrows, and mouth.
Use white thread to add the eye highlights.
Keep your stitches small and make one facial feature at a time.
The expression does not need to be perfectly symmetrical.
A tiny handmade difference can make your bunny feel even more special.
Finish Every Loose End
Before calling your project finished, check the body, head, arms, legs, and ears.
Weave in any remaining loose yarn ends throughout the bunny.
Give the bunny a gentle squeeze.
If you find a loose section, tuck the end securely inside before trimming it.
Helpful Tips for a Perfect Crochet Bunny
Trust me on this one: plush yarn rewards patience.
Its fuzzy surface can hide individual stitches, so your hands need to rely on consistent tension and careful counting.
Keep Your Tension Snug
Tight, even stitches help prevent stuffing from peeking through the plush yarn.
This matters most around the body and head, where the stuffing creates pressure from inside.
Do not pull your yarn so tightly that your hook becomes difficult to move.
Aim for firm stitches that still feel comfortable to crochet.
Use Invisible Decreases
For a cleaner amigurumi surface, work your invisible decreases through the front loops of the two stitches being joined.
This creates a smoother appearance than a standard decrease, especially with plush yarn.
If you notice a small ridge, check whether you accidentally used a regular decrease.
Stuff Slowly and Evenly
Add stuffing gradually rather than filling the entire piece at once.
The finished bunny should feel dense and huggable without stretching the stitches or becoming misshapen.
Add small amounts around the curves.
Use your fingers to distribute the stuffing before adding more.
Check Symmetry Before Sewing
When attaching or shaping the limbs, compare both sides before securing everything.
The source specifically recommends watching symmetry around the arms and legs because those pieces join directly during the body rounds.
This quick check can make a big difference to how your finished bunny sits.
How to Customize Your Amigurumi Bunny
Once you finish your first crochet bunny pattern, you may want to make another one with your own color palette.
That is one of the best parts of handmade amigurumi.
Try a Different Bunny Color
The reference uses an oatmeal or light beige plush yarn.
You can imagine the same design in cream, soft brown, dusty pink, gray, or another gentle shade.
Just remember that changing yarn thickness can affect your finished size and stuffing density.
Change the Facial Expression
The sleepy eyes create a calm personality.
You can make your bunny feel slightly different by changing the eyebrow placement or embroidery details.
Keep the changes small at first.
A tiny adjustment can make your bunny look curious, shy, sleepy, or cheerful.
Make a Handmade Gift
This bunny makes a lovely handmade present because it has a soft shape and a gentle expression.
You could make one for a baby shower, birthday, nursery shelf, or a friend who loves cute handmade decorations.
Always follow appropriate safety guidance when giving crocheted toys to babies or young children, especially around small detachable parts.
Frequently Asked Questions About Crochet Bunny Pattern
How long does it take to crochet this bunny?
The exact time depends on your crochet speed, plush yarn experience, and how comfortable you are with amigurumi. The project includes separate arms, legs, and ears plus a continuous body and head. Facial sculpting and embroidery can also add extra time. Beginners may want to work slowly and take breaks instead of trying to finish everything in one sitting.
What yarn is best for this crochet bunny pattern?
The reference pattern uses bulky-weight plush or velvet yarn made from 100% polyester, with about 120 meters or 100 grams needed. A plush yarn gives the bunny its soft, huggable texture. If you change yarn, choose a similar thickness to help maintain the intended proportions.
Is this crochet bunny pattern good for beginners?
This project suits crocheters who already know basic amigurumi techniques. You will use a magic ring, single crochet, increases, decreases, continuous rounds, stuffing, and sewing. The leg and arm joins add another skill to practice. If you are completely new to amigurumi, work slowly and check your stitch counts after every round.
What size safety eyes does the bunny use?
The reference pattern specifies 10mm safety eyes and an 11mm oval safety nose. The eyes are inserted between Rounds 24 and 25, with six stitches between them. Always secure safety components carefully and consider age-appropriate safety guidance when making toys for young children.
Can I use a different yarn for the bunny?
Yes, but changing yarn can change the final size and feel of your bunny. The reference notes that gauge is not critical, although it can affect the finished size. It also recommends checking that a replacement plush or chenille yarn has a similar gauge so the proportions and stuffing firmness stay close to the original design.
How do I keep the bunny’s body symmetrical?
Use the stitch counts at the end of every round and check the position of the limbs as you work. The legs join during Round 7 and the arms join during Round 15. Before finishing those rounds, look at the bunny from the front and make sure both sides line up.
Finish Your Sweet Handmade Bunny
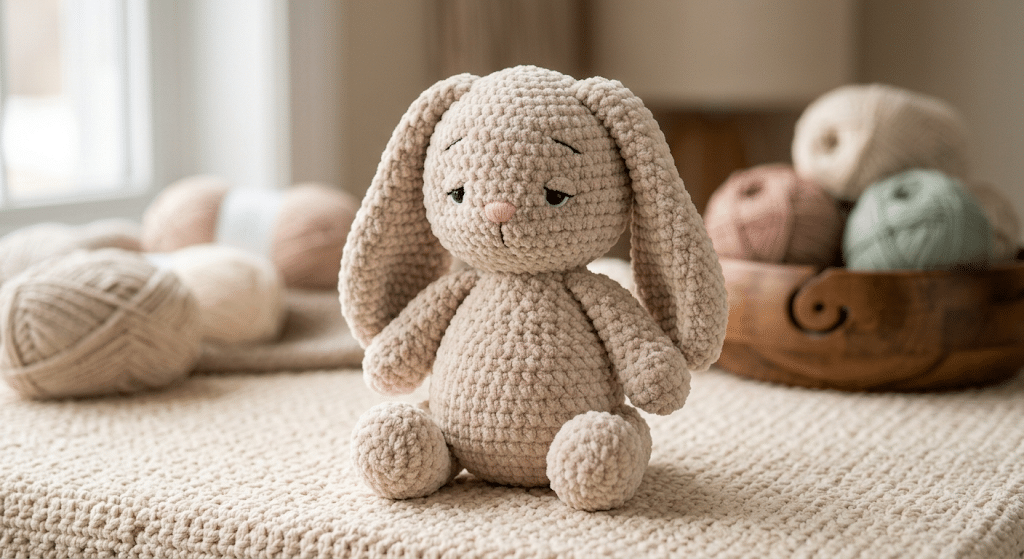
You made it!
From the first magic ring to the final embroidered detail, this crochet bunny pattern gives you plenty of satisfying little milestones to celebrate.
You practiced continuous rounds, shaped a rounded body and head, joined the limbs directly into the crochet, created a tiny puff tail, and finished the face with delicate embroidery.
The result is a soft little bunny with a sleepy expression and a wonderfully cuddly shape.
Whether you keep yours on a shelf, add it to a handmade gift basket, or make a whole bunny family in different colors, you can feel proud of every stitch.
Handmade projects do not need to look factory-perfect. Those tiny differences are part of what makes your bunny yours.
Save this pin to your crochet board on Pinterest so you can find this pattern anytime!
Looking for more free crochet animal patterns? Visit Yarned Animals for new amigurumi patterns, kawaii plushies and beginner crochet tutorials added every week at yarnedanimals.com