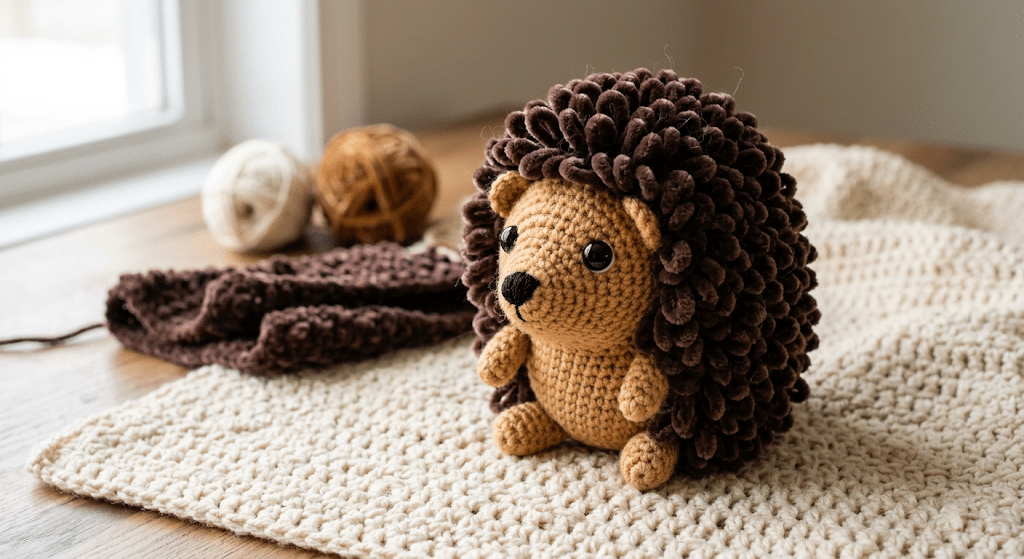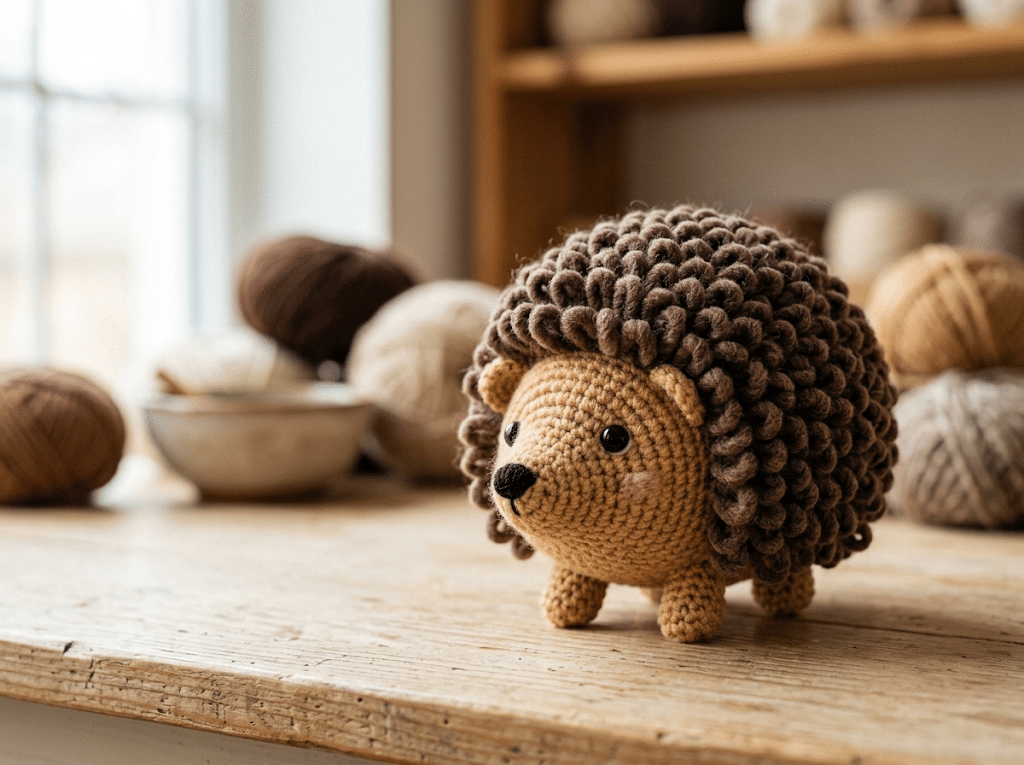
Picture a tiny hedgehog with a sweet little face and a back covered in soft, curly loops. That fluffy texture makes this loop stitch hedgehog amigurumi pattern especially fun to crochet when you want something different from a classic smooth amigurumi.
This project creates a small hedgehog measuring roughly 12–13 cm (4.75–5 inches) when finished. You’ll crochet a Face piece, a textured Quills piece, four tiny legs, and then join everything together into one cuddly little creature.
The shaping stays fairly simple, while the loop stitch gives you a chance to learn a new technique. The pattern uses US crochet terminology and joined rounds, so you can keep track of every round as you work.
If loop stitch feels new, don’t worry. The texture may look complicated at first, but the basic idea becomes much easier after a few repeats.
For a comfortable crochet session, a smooth ergonomic hook can make repeated stitches easier on your hands.
Now grab your yarn, hook, and stitch marker, and let’s turn those little loops into an adorable hedgehog.
Table of Contents
What Makes This Loop Stitch Hedgehog Amigurumi Pattern So Special?
There’s something wonderfully satisfying about watching a flat crochet piece transform into a tiny animal. This hedgehog takes that feeling one step further with its fluffy loop-stitch quills.
The design uses two main oval-shaped pieces. The Face creates the soft front, while the Quills piece creates the textured back. Once you join them, the two shapes form the body of your hedgehog.
The finished size stays small enough for a shelf, desk, bag, or handmade gift box. Its flat-backed construction also gives it a slightly different shape from round stuffed animals.
Why the loop stitch creates such cute quills
The loop stitch is the star of this project. Instead of creating a smooth fabric, it produces long loops that create a furry, fringed effect.
You’ll use loop stitches throughout the Quills piece. This gives the hedgehog its recognizable spiky back without needing complicated separate spikes.
The most important trick is consistency. Try keeping each loop approximately the same length throughout the piece.
Wrapping the yarn around two fingers or a ruler can help you create more even loops. The source specifically recommends this approach when working the quills.
A beginner-friendly project with one new technique
This pattern works especially well if you already know basic crochet stitches and want to try something new.
You’ll use chain, single crochet, half double crochet, increases, slip stitches, magic ring terminology, and loop stitch. The Face also uses half-double-crochet increases for shaping.
The loop stitch adds the main learning curve, but the actual body construction remains straightforward.
The finished hedgehog stays wonderfully compact
The source gives an approximate finished measurement of 12–13 cm (4.75–5 inches). Gauge does not need to be exact, but keeping your tension even helps you maintain the intended shape.
That makes this little hedgehog a lovely handmade project when you want something cute without committing to a huge amigurumi.
Next up, let’s gather everything before you begin.
Materials and Stitches for Your Hedgehog
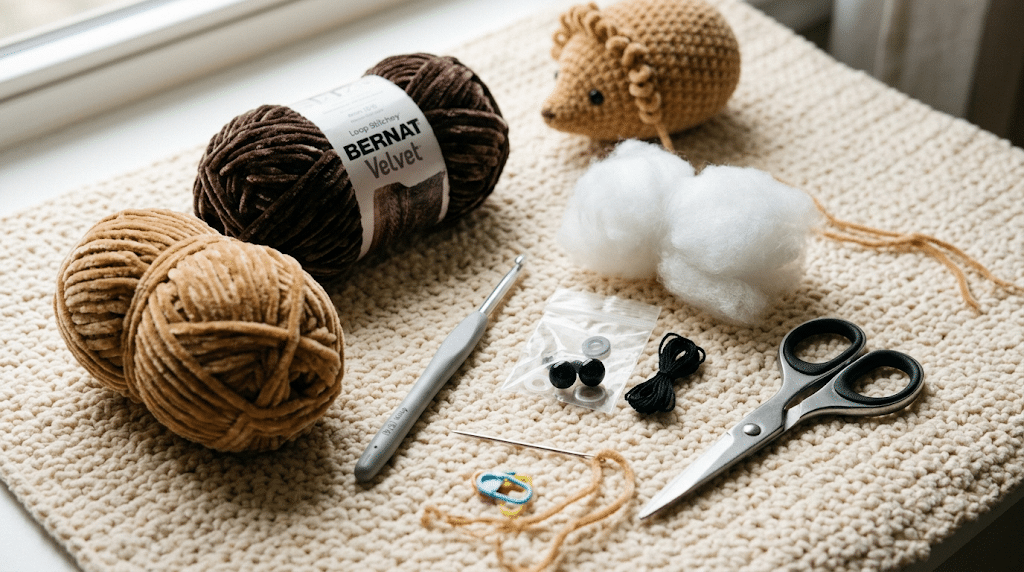
Before you start crocheting, set everything beside you. Having your materials ready makes the project feel much calmer, especially when you’re learning loop stitch for the first time.
The original pattern calls for light worsted or DK-weight plush yarn in two colors. One color forms the Face, while the second creates the textured Quills.
You’ll also need a 4 mm crochet hook, polyester fiberfill, 10 mm safety eyes, black cotton-blend embroidery thread, a tapestry or yarn needle, scissors, and an optional stitch marker.
Choose two plush yarn colors
Pick one soft color for the face and another color for the quills.
Velvet-style or plush yarn works especially well for the soft appearance described in the source. The original pattern mentions Himalaya Dolphin Baby or a similar plush yarn as an example.
You can choose classic natural hedgehog colors, or make your project more playful with soft pink, cream, brown, gray, or another cozy combination.
The important thing is creating enough contrast between the Face and Quills pieces so the facial area stands out.
Keep your basic crochet tools nearby
Your main tools include a 4 mm crochet hook, scissors, a yarn needle, and a stitch marker.
The stitch marker is optional, but it can make round tracking easier. This matters because the pattern uses joined rounds rather than one continuous spiral.
For stuffing, use polyester fiberfill and add it gradually during assembly.
Learn these abbreviations before you begin
The pattern uses US crochet terminology. Here are the important abbreviations:
- ch — Chain
- hdc — Half double crochet
- inc — Increase
- inc-hdc — Half-double-crochet increase
- lp st — Loop stitch
- inc-lp st — Loop-stitch increase
- MR — Magic ring
- sc — Single crochet
- sl st — Slip stitch
An increase normally means working two single crochets into the same stitch unless another stitch type appears in the abbreviation.
For example, inc-hdc means two half double crochets worked into the same stitch.
Ready to move on? The pattern notes below will make the actual crocheting much easier.
Before You Start This Loop Stitch Hedgehog Pattern
A few small details make a big difference with this project. The most important one is remembering that the Face and Quills pieces use joined rounds.
That means you close each round with a slip stitch instead of simply continuing around in a spiral.
The pattern also gives the stitch count at the end of every round. Use those numbers as checkpoints rather than rushing through the stitches.
Keep your tension even
You don’t need perfect gauge for this project. The source says gauge isn’t critical, but even tension helps you reach the approximate finished size.
With plush yarn, very loose stitches can leave visible gaps. That becomes especially noticeable after you add stuffing.
Try to keep your stitches firm without making them uncomfortable to work.
Place the safety eyes at the correct point
The source places the 10 mm safety eyes between Round 3 and Round 4 of the Face, with three single crochets between them.
Insert the eyes before you finish stuffing the hedgehog. This gives you easier access to the inside of the piece.
Take a moment to check that both eyes sit at the same height before continuing.
Understand the Quills offset
There is one unusual instruction at the end of the Quills section.
After Round 6, you work 10 additional loop stitches to shift your position back toward the start of the round. These stitches do not count toward the round’s stitch count.
Do not cut the yarn after making this offset. You’ll use the remaining yarn when joining the Quills to the Face.
Trust me on this one: marking this instruction in your pattern notes can prevent confusion later.
Crochet Your Hedgehog Step by Step
Here is the fun part. You’re ready to start building the actual hedgehog.
The pattern divides the crochet work into three main components: the Face, the Quills, and four small Legs.
Take your time with the stitch counts. Plush yarn can sometimes make individual stitches harder to see, so checking each round before moving forward will save you from unnecessary unraveling.
Step 1: Crochet the Face
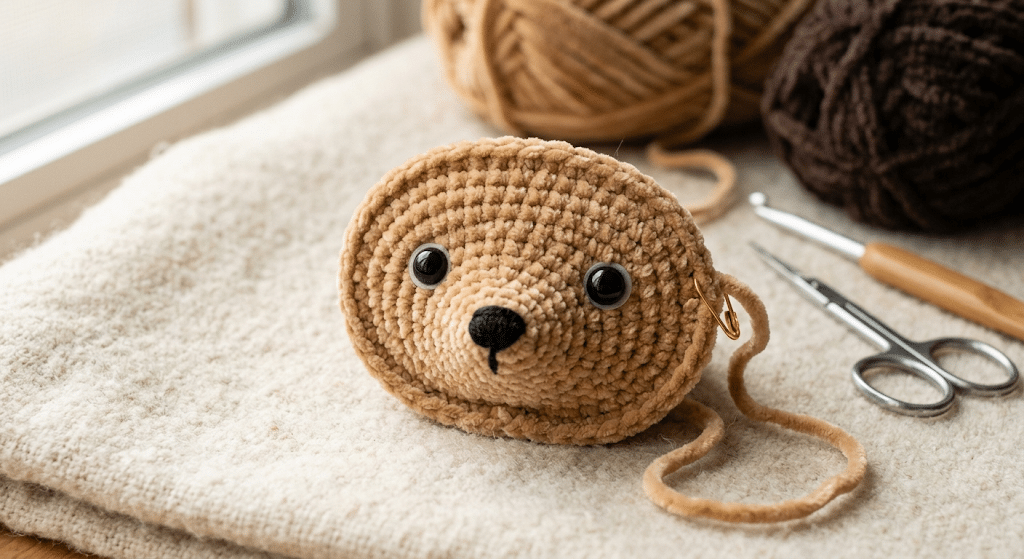
Begin with your face-colored yarn.
Round 1: Chain 6. Starting in the second chain from the hook, work 3 sc in the same stitch, then 3 sc, and repeat twice. You should have 12 stitches.
Round 2: Work the specified increases and single crochets, then slip stitch as instructed. Continue with the chain section described in the original pattern. The completed round has 21 stitches.
Round 3: Work 2 sc, then repeat the increase and 3 sc sequence three times, followed by 3 sc. You should have 24 stitches.
Move your stitch marker before starting the next round if that helps you track your position.
Round 4: Work the half-double-crochet increases, half double crochets, single crochets, and repeated increases exactly as written. The completed round has 32 stitches.
Round 5: Continue with the hdc increases and single-crochet increases shown in the pattern. Your final stitch count should be 39.
Round 6: Work the final increases and single crochets for the Face. You should finish with 42 stitches.
Work 2 additional slip stitches, then fasten off.
Step 2: Add the safety eyes
Insert your safety eyes between Rounds 3 and 4, leaving three single crochets between them.
Check their placement before moving forward. Once you are happy with the expression, continue with the Quills.
Step 3: Crochet the textured Quills
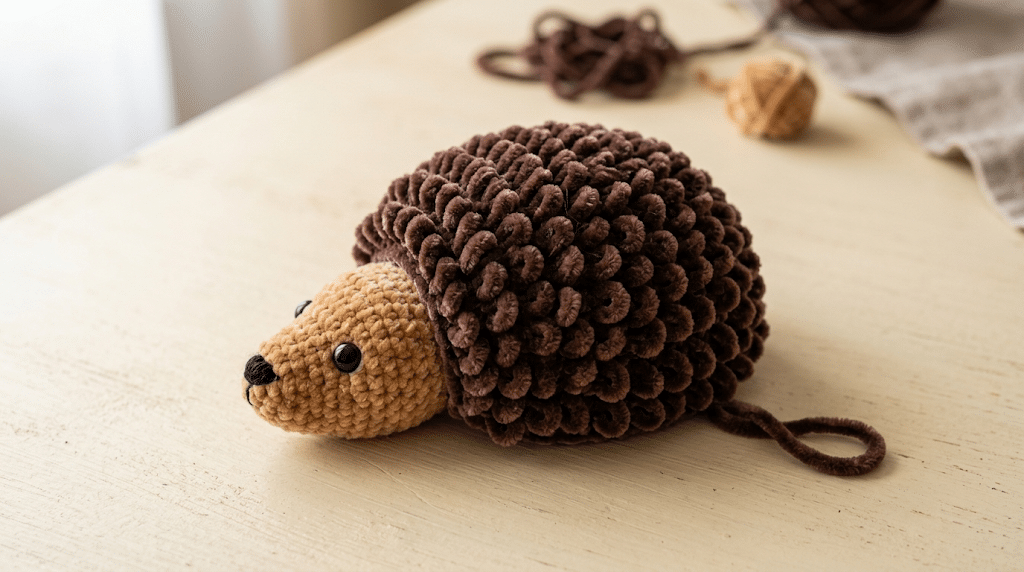
Now switch to your second yarn color.
This is where your hedgehog starts looking extra special.
The Quills piece uses loop stitch throughout, creating the furry texture around the back.
Round 1: Chain 6. Starting in the second chain from the hook, work 3 loop stitches in the same stitch, followed by 3 loop stitches. Repeat twice for 12 stitches.
Round 2: Repeat 3 loop-stitch increases and 3 loop stitches twice. You should have 18 stitches.
Round 3: Follow the repeated loop-stitch increases and single loop stitches as written. Finish with 24 stitches.
Step 4: Continue shaping the Quills
Round 4: Work the repeated sequence of 2 loop stitches and one loop-stitch increase. Finish with 30 stitches.
Round 5: Work the repeated loop-stitch increase and 3 loop stitches. Finish with 36 stitches.
Round 6: Work 4 loop stitches followed by a loop-stitch increase in the repeated sequence. Finish with 42 stitches.
The six rounds gradually expand the textured oval until it matches the Face piece.
Step 5: Make the position shift
After Round 6, work 10 additional loop stitches.
Remember that these stitches shift your position and do not count toward the 42-stitch total.
Do not cut the yarn. Keep it attached because you’ll immediately use it during assembly.
Step 6: Make all four legs
You’ll make four small legs.
Attach your yarn at the base of the Quills, just beneath the cheek. Work 3 single crochets directly into the Face fabric for Row 1.
For Row 2, chain 1, turn, and work 2 single crochets.
Fasten off and tie a knot using the tail left from attaching the yarn. Weave both ends into the toy.
Repeat the same process for the remaining three legs.
Step 7: Join the Face and Quills
Hold the Face and Quills pieces with their wrong sides together.
Keep the Quills yarn attached.
Work loop stitches through both layers around the entire edge. This creates the textured join between the two oval pieces.
If the pieces shift while you work, anchor them at several points before continuing.
Step 8: Add the stuffing gradually
Start adding fiberfill before you completely close the final section.
The source recommends stuffing the hedgehog firmly, while still adding the filling gradually. Press the stuffing toward the edges so the body keeps a smooth oval shape.
Avoid packing everything in at once. Too much stuffing can make the body lumpy or force the joining edge apart.
Step 9: Shape the adorable little face
Once the body is joined, use a threaded yarn needle to create a gentle face indent.
The needle-sculpting technique pulls the yarn through the head around the eyes and muzzle. Follow the simple gathering approach described in the source.
Pull gently and check your progress often. You want a soft indentation rather than a tightly cinched face.
Step 10: Finish the details
Embroider the nose and eyebrows with black cotton-blend thread.
Then attach all four legs and weave in every remaining yarn end.
Take a final look at the eyes, muzzle, legs, and quills. A few gentle adjustments can make the finished hedgehog look beautifully balanced.
Easy Tips for Perfect Loop Stitch Quills
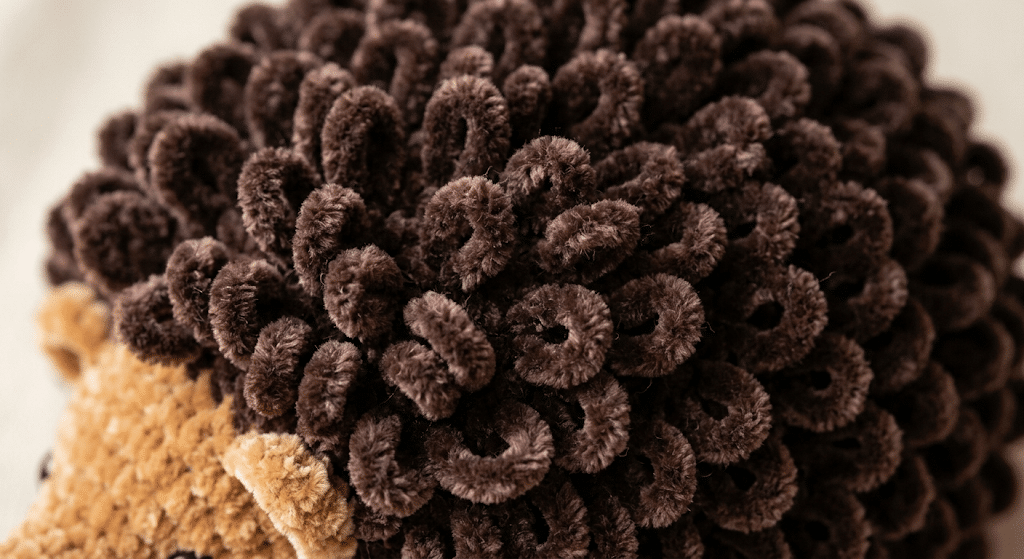
Loop stitch can feel a little awkward during your first few rounds. That’s completely normal.
The biggest secret is consistency. Once your hands find the rhythm, the texture becomes much more enjoyable.
Keep every loop approximately the same length
Uneven loops can make one section look much fluffier than another.
Try wrapping the yarn around two fingers or a ruler each time you make a loop. This gives you a simple physical guide for keeping the loops consistent.
You don’t need every loop to look mathematically identical. Just aim for a similar overall length.
Use slightly firmer tension
Plush and velvet yarns have plenty of stretch.
If your stitches become too loose, the stuffing may show through the fabric. The source recommends working increases and single crochets with slightly firmer tension than usual.
Keep your tension firm enough to close the fabric without making the hook difficult to insert.
Don’t overstuff the body
Wait until you’re close to finishing the join before adding the final amount of stuffing.
Add fiberfill gradually and press it into the edges first. This helps maintain the smooth oval shape.
If you overstuff too early, the two pieces may become harder to join neatly.
Pin the pieces if they move
Sometimes the Face and Quills pieces don’t naturally stay perfectly aligned.
If that happens, pin them together at the top, bottom, and sides before joining. Then work between those anchor points.
This simple trick can keep your edges lined up as you crochet around the body.
How to Assemble Your Finished Hedgehog
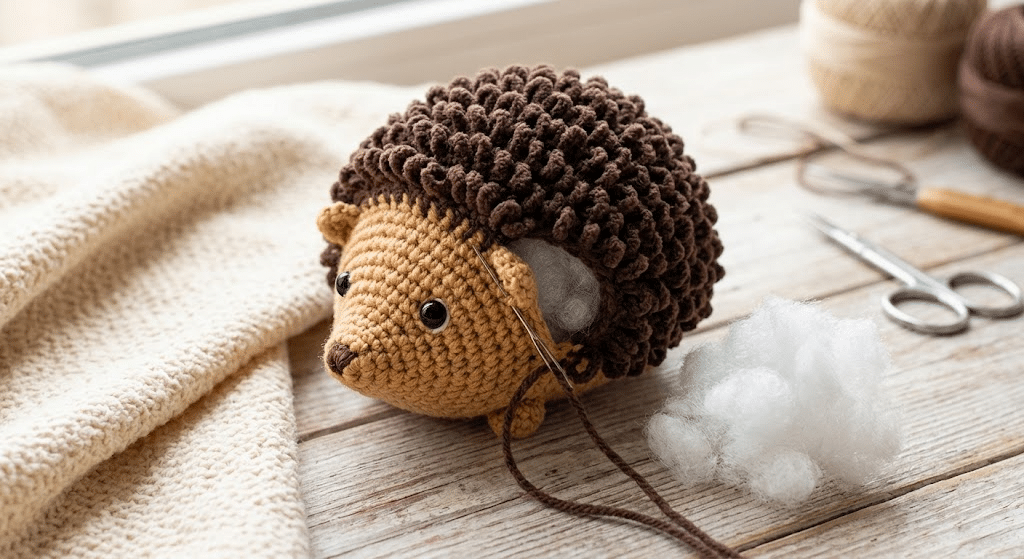
Assembly is where your little collection of crochet pieces finally becomes an animal.
The Face provides the smooth front, while the Quills create the textured back. Together, they give the finished hedgehog its distinctive appearance.
Take your time here because neat assembly makes a huge difference.
Check the Face before joining
Lay the Face over the Quills before you begin.
Make sure the eyes sit where you want them and that the top and bottom of both pieces align correctly.
This is also a good moment to check the legs and decide where you want each one positioned.
Join around the entire edge
Use the yarn already attached to the Quills.
Work loop stitches through both layers around the complete edge. Keep checking that you are catching both pieces evenly.
The join should hold the two ovals together without pulling one side tighter than the other.
Shape the muzzle gently
The face-sculpting stage adds a surprisingly large amount of character.
Thread your needle and pull gently through the head to create a slight indent around the eyes and muzzle.
Stop frequently to inspect the expression. A subtle indentation usually looks more natural than a deep pull.
Finish with embroidered details
The source uses black cotton-blend thread for the nose and eyebrows.
These tiny details help define the face and make the hedgehog feel much more expressive.
Finally, attach all four legs and weave in the remaining ends.
Before you put your hook away, gently fluff the loop stitches so the quills spread naturally around the back.
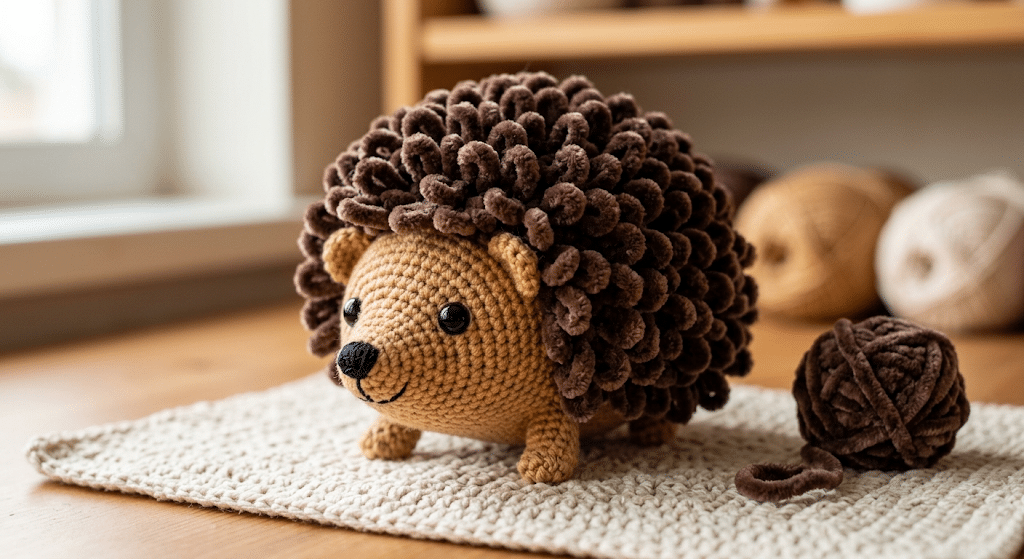
Frequently Asked Questions About Loop Stitch Hedgehog Amigurumi Pattern
What yarn works best for a loop stitch hedgehog?
The source recommends light worsted or DK-weight plush yarn, such as Himalaya Dolphin Baby or a similar velvet-style yarn. Use two colors, with one for the Face and another for the Quills. Plush yarn helps create the soft appearance and textured finish that suit this hedgehog design.
Is this loop stitch hedgehog amigurumi pattern good for beginners?
This pattern suits crocheters who already know basic stitches and want to try loop stitch. The shaping remains fairly simple, but the Quills introduce a new texture technique. If you have made a few basic amigurumi projects, this can be a nice next challenge.
What size crochet hook does the hedgehog pattern use?
The original pattern uses a 4 mm (US G/6) crochet hook. Gauge does not need to be exact, but keeping your tension even helps the finished hedgehog reach approximately 12–13 cm, or 4.75–5 inches.
What size safety eyes does this hedgehog use?
The pattern uses 10 mm safety eyes. They go between Rounds 3 and 4 of the Face, with three single crochets between them. Insert them before you finish stuffing the project so you can secure and position them easily.
How do you make loop stitch crochet look even?
Try wrapping the yarn around two fingers or a ruler each time you form a loop. Keeping the loops similar in length creates a more consistent furry texture. Also watch your tension because plush yarn stretches easily and loose stitches can create gaps.
How do you keep the hedgehog shape smooth?
Add stuffing gradually as you finish joining the Face and Quills. Press fiberfill toward the edges first, then fill the center. Avoid overstuffing because too much filling can make the body lumpy and make the joining edge harder to close neatly.
Time to Stitch Up Your Little Hedgehog
You’ve now turned two simple oval pieces, four tiny legs, and rows of curly loop stitches into a sweet handmade hedgehog.
The best part of this loop stitch hedgehog amigurumi pattern is seeing the texture appear as you work. Every loop adds personality, while the embroidered face gives your finished creation its own little expression.
If this is your first loop-stitch project, give yourself permission to take it slowly. Crochet confidence grows one stitch at a time, and this tiny hedgehog makes a wonderfully satisfying project to add to your handmade collection.
Once you finish, you’ll have a cute little piece to display, gift, or simply keep beside your crochet supplies as a reminder of what you created.
Save this pin to your crochet board on Pinterest so you can find this pattern anytime!
Looking for more free crochet animal patterns? Visit Yarned Animals for new amigurumi patterns, kawaii plushies and beginner crochet tutorials added every week at yarnedanimals.com