
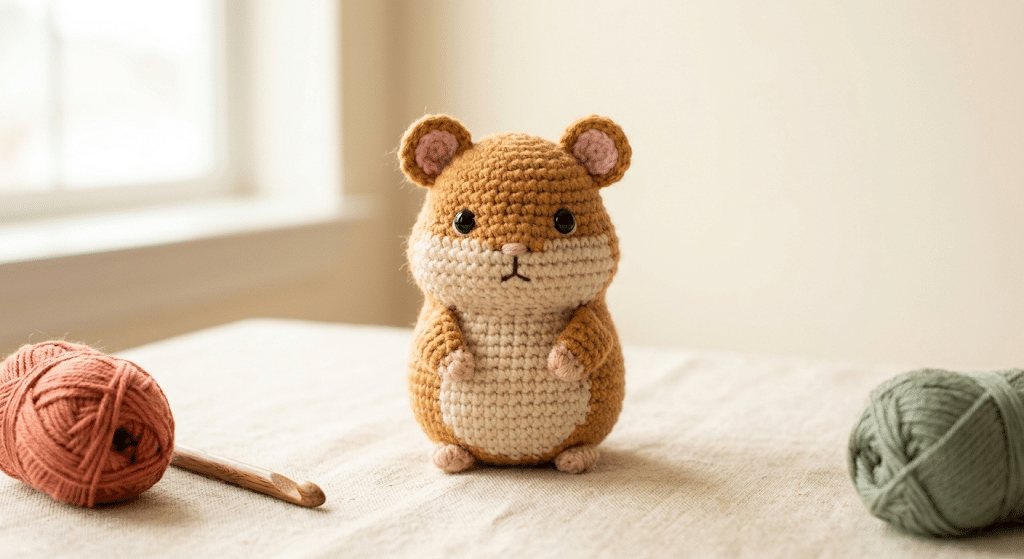
There is something irresistibly sweet about a tiny hamster with chubby cheeks, round ears, and a little button nose. Now imagine turning that cuteness into a soft handmade pocket pet you can hold in your palm.
This crochet hamster pattern gives you an easy, beginner-friendly way to create your own kawaii amigurumi hamster. You will learn how to shape the body, create those adorable cheeks, add tiny ears, and finish your pocket pet with simple embroidered details.
The finished hamster makes a sweet handmade gift, desk companion, nursery decoration, or cute addition to your amigurumi collection. You can also change the colors to create different hamster personalities.
Before grabbing your hook, let’s look at everything you need and how to make this little pocket pet step by step.
Table of Contents
Why This Crochet Hamster Pattern Is So Adorable
Tiny amigurumi animals have a special kind of charm. They are small enough to hold in one hand, but they still have plenty of personality.
This hamster design focuses on the features that make these little animals so cute. You get a rounded body, plump cheeks, tiny ears, little paws, and a sweet face.
The pattern keeps the shapes simple so beginners can concentrate on their stitches rather than complicated construction. Once you understand the basic pieces, you can customize your hamster with different colors and expressions.
A perfect beginner amigurumi project
If you are new to amigurumi, this project makes a lovely starting point. You mainly work with familiar crochet techniques and simple rounded shapes.
The body uses a compact construction that helps you practice working in the round. This also teaches you how increases and decreases change the shape of your crochet.
Do not worry about making every stitch perfect. Your hamster will develop its own personality as you work.
Why the pocket-pet size works so well
A small finished hamster feels satisfying because you can complete it without spending weeks on one project. The compact size also makes this pattern convenient for gifts.
You can place your finished hamster beside your computer, on a craft shelf, or inside a small gift box. It also works beautifully as a cute handmade companion for children who enjoy soft animal toys.
If you want an extra-soft finish, Bernat Blanket yarn creates a plush chenille texture that feels wonderfully squishy in your hands.
Easy to customize with colors
Hamsters come in many beautiful shades, so you have plenty of creative freedom.
Try cream with caramel patches for a classic look. Choose warm brown for a teddy-bear-inspired hamster, or use pale pink and white for an extra-kawaii version.
You can even make several hamsters with different personalities. Give one sleepy eyes, another rosy cheeks, and another a tiny embroidered smile.
Now that you know why this project is so fun, let’s gather your supplies and prepare your workspace.
Materials and Simple Preparation for Your Kawaii Hamster
Before starting your crochet hamster pattern, gather everything you need. Having your supplies nearby makes the project much more relaxing.
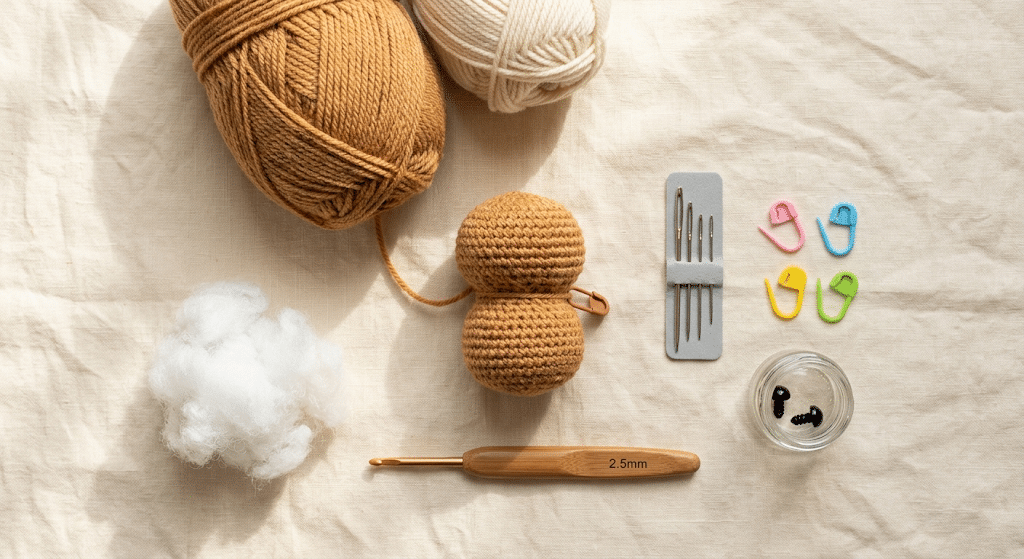
You do not need a huge collection of crochet tools. A few basic materials will take you from the first stitch to the finished pocket pet.
Choose your yarn carefully
For a classic amigurumi hamster, choose a yarn that creates a firm but soft fabric.
Paintbox Simply DK yarn works nicely when you want clearly defined stitches and a traditional amigurumi appearance. You can choose a main hamster color and a contrasting shade for the cheeks, belly, or ears.
Keep your stitches firm. Loose stitches can allow stuffing to show through the finished fabric.
Prepare your crochet hook
Use a crochet hook that works comfortably with your chosen yarn.
A Clover Amour crochet hook feels comfortable during longer crochet sessions because of its soft ergonomic grip. A comfortable hook can make a noticeable difference when you repeat small stitches around the body.
Your exact hook size may vary depending on your yarn and tension. For amigurumi, choose a size that creates a dense fabric without large gaps.
Gather the finishing supplies
You will also need stuffing, a yarn needle, stitch markers, and safety eyes.
Poly-fil Premium fiberfill works well for giving the hamster its rounded shape. Add the stuffing gradually instead of putting everything inside at once.
A yarn needle helps you sew the separate pieces securely. Stitch markers can also make it much easier to keep track of where each round begins.
Basic techniques to know
This project becomes much easier when you feel comfortable with a few common crochet techniques.
You should know how to make:
- A magic ring
- Single crochet
- Crochet increases
- Crochet decreases
- Slip stitches
- Basic sewing
- Weaving in yarn ends
If the magic ring feels difficult at first, do not let it stop you. Practice it separately with scrap yarn before starting your hamster.
Ready to move on? Here comes the fun part: creating your tiny hamster from simple crochet shapes.
Crochet Hamster Pattern: 10 Adorable Steps
The magic of this crochet hamster pattern comes from turning simple crochet pieces into one expressive little animal.
You will build the project gradually. Start with the main body, then create the smaller details before bringing everything together.
Step 1: Start the round hamster body
Begin with your magic ring and work your first rounds of single crochet.
Keep the stitches close together as you build the circular base. The beginning may look flat, but that is exactly what you want.
Continue increasing gradually so the shape becomes wider. Think of the body as a small ball that will eventually become slightly oval.
Tip: Place a stitch marker at the beginning of each round. This simple habit can save you from losing your place.
Step 2: Shape the chubby body
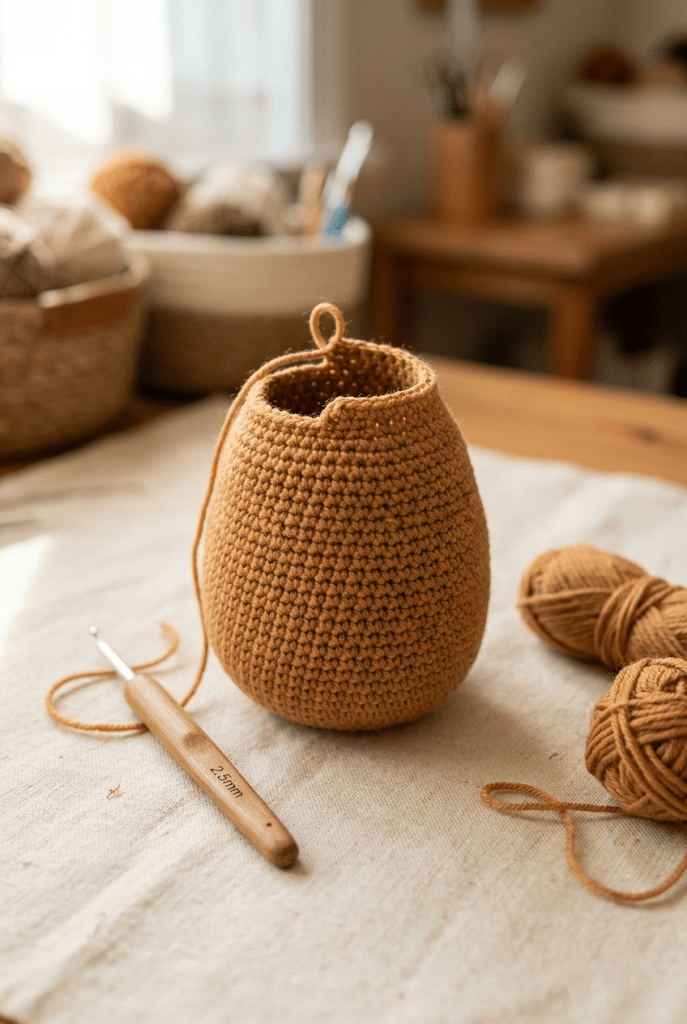
Once the body reaches its widest point, continue crocheting without adding as many increases.
This creates the rounded middle that gives your hamster its plump appearance.
Try holding the piece in your hand as you work. You should start seeing the body transform from a flat circle into a small three-dimensional shape.
If your hamster looks slightly uneven, gently shape it with your fingers. Small differences often disappear after stuffing.
Step 3: Add the hamster’s cute cheeks
Now it is time to emphasize the feature that makes your pocket pet instantly recognizable.
Create two small rounded cheek sections or use shaping within the head area to create a fuller appearance.
Keep the cheeks soft and rounded rather than sharply defined. Kawaii amigurumi usually looks best when the shapes feel gentle.
You can use a lighter yarn color here if you want a two-tone hamster.
Step 4: Stuff the body gradually
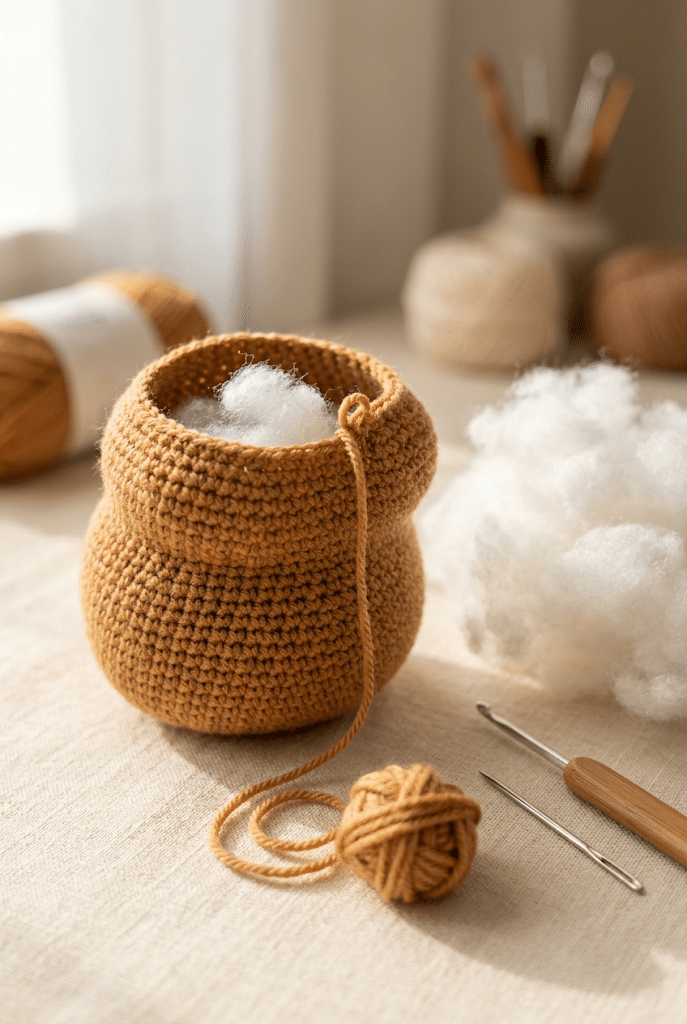
Start adding small amounts of fiberfill through the opening.
Push the stuffing gently toward the edges. Rotate the hamster as you work so the filling spreads evenly.
Avoid packing everything tightly at once. Too much stuffing can stretch your stitches and make the hamster look stiff.
A softly firm body gives the cutest result.
Continue filling until your hamster feels plump but still squeezable.
Step 5: Close and shape the body
Once you have enough stuffing inside, finish the final rounds and close the opening securely.
Use your yarn needle to weave the yarn through the remaining stitches. Pull gently until the opening closes.
Do not pull so tightly that the body develops a deep dent.
Now gently squeeze the body between your fingers. Shape the sides and belly until you like the silhouette.
Step 6: Crochet the tiny ears
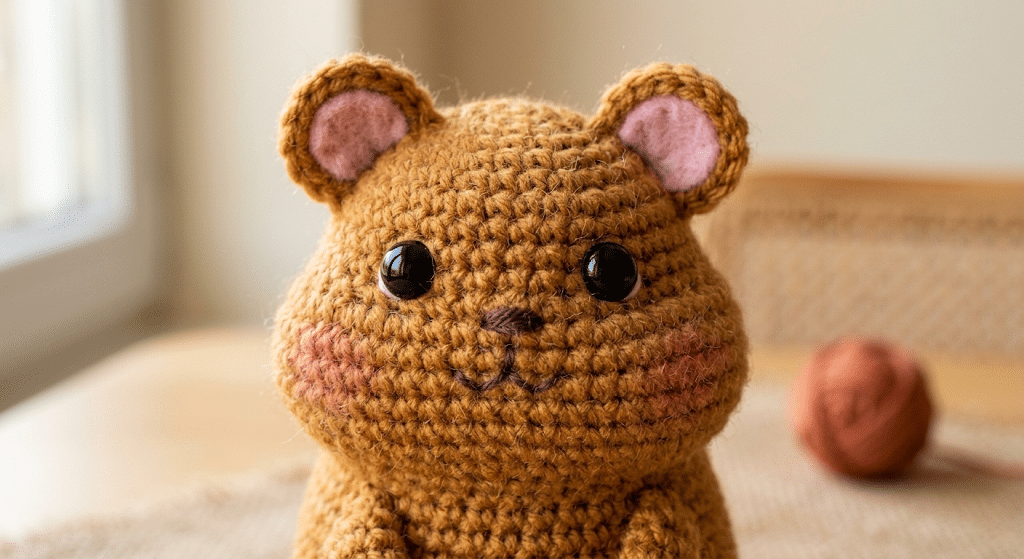
Next, create the hamster’s small rounded ears.
You can crochet each ear as a simple circular or slightly curved piece. The goal is a soft shape rather than a pointed animal ear.
For an extra-cute appearance, use a contrasting color on the inner portion of each ear.
Sew the ears near the top of the head, keeping them symmetrical.
Take your time with placement. Even a few millimeters can change your hamster’s expression.
Step 7: Create the little paws
Your hamster needs tiny paws to complete its pocket-pet look.
Crochet two small front paws using the same yarn as the body. Keep them compact and slightly rounded.
Sew the paws onto the front of the body. Position them close together for a cuddly pose.
You can also add tiny back feet if you want your hamster to look as though it is sitting.
This is where your handmade animal really starts to look alive.
Step 8: Add the safety eyes
Now give your hamster its expression.
Position the safety eyes evenly across the face. Check their placement before securing them permanently.
For many small amigurumi designs, 6mm safety eyes create a delicate kawaii expression without overwhelming the face.
If your hamster is larger, you may prefer a bigger eye size. Always choose a size that suits your finished proportions.
For toys intended for very young children, consider embroidered eyes instead of plastic safety eyes.
Step 9: Embroider the tiny nose and mouth
A little embroidered nose can completely transform your hamster.
Use a yarn needle and a small amount of dark yarn to create a simple triangular or rounded nose.
Add a tiny mouth underneath if you want a smiling expression.
You can also add small blush details using embroidery thread or carefully applied textile-safe details.
Less is often more with kawaii faces. A few tiny details can create a surprisingly expressive result.
Step 10: Assemble and give your hamster personality
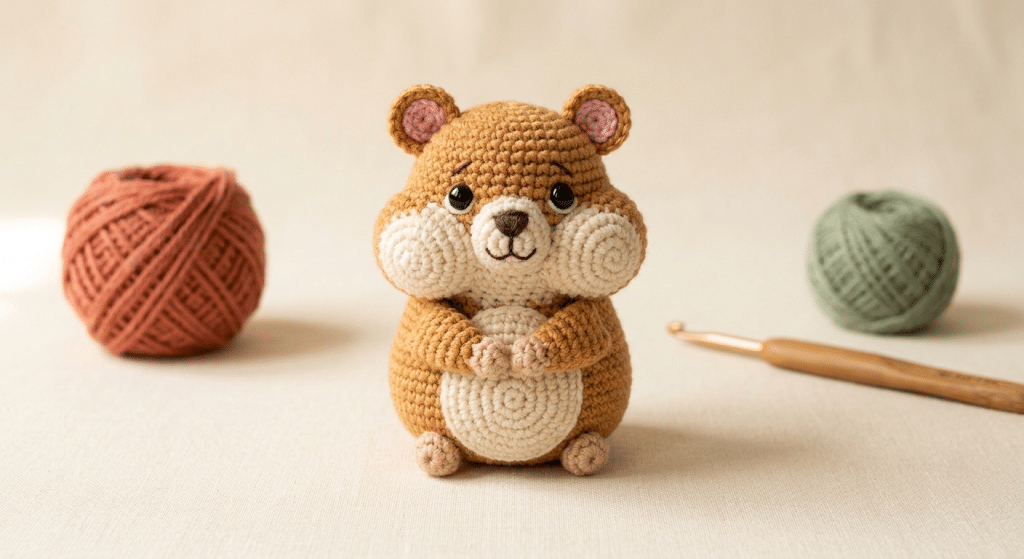
Finally, check every sewn piece and secure any loose ends.
Look at your hamster from the front, side, and back. Adjust the ears or paws if they do not sit exactly where you want them.
This final step is also your chance to add personality.
Try giving your hamster a tiny accessory, a different color combination, or a slightly sleepy expression. Your handmade pocket pet does not need to look identical to anyone else’s.
Here is the fun part: your hamster is completely yours.
Easy Ways to Make Your Crochet Hamster Look Extra Cute
Once you finish the basic shape, you can experiment with small changes that create completely different personalities.
That is one of the best things about amigurumi. A simple alteration to the ears, eyes, or colors can make the same pattern look like a brand-new character.
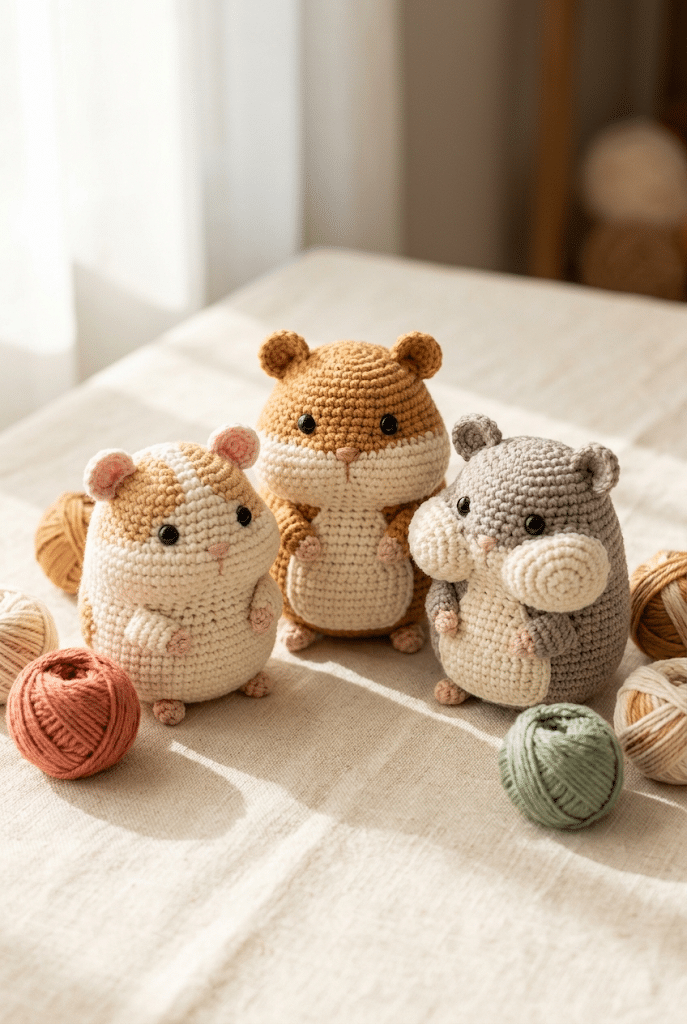
Try a soft two-color hamster
Use one shade for the body and another for the belly and cheeks.
Cream and caramel create a warm natural appearance. White and light gray create a soft wintery look.
You can also choose colors based on the person receiving the gift.
For a child, pastel colors can create a playful appearance. For an adult crochet lover, neutral shades can create a stylish desk companion.
Experiment with facial expressions
Your hamster’s eyes control much of its personality.
Place the eyes slightly closer together for an innocent expression. Position them a little lower for a sleepy look.
Add small embroidered eyebrows for extra personality if you want something more expressive.
You can also make several hamsters with different faces and display them together.
Make a tiny hamster family
Once you finish your first hamster, making another becomes much easier.
Create one larger hamster and several smaller companions. Use different yarn colors to make each one unique.
This idea works especially well for handmade gifts. You could make a small collection for a friend who loves miniature animals.
If you want more inspiration for crochet animals, Ravelry crochet patterns offers a large collection of crochet designs to browse.
Next up, let’s look at the little details that help your finished amigurumi look polished rather than rushed.
Helpful Amigurumi Tips for a Neater Finish
Small crochet projects can sometimes feel surprisingly tricky. The stitches are tiny, the pieces are small, and every detail becomes visible.
The good news is that a few simple habits can make your finished crochet hamster pattern look much cleaner.
Keep consistent tension
Consistent tension helps your body maintain a smooth shape.
Try not to suddenly tighten your stitches during decreases. Uneven tension can create little bumps or dents.
If your hands become tired, pause for a few minutes. Relaxing your grip often improves your stitches when you return.
Stuff in small amounts
Do not wait until the end to shape the stuffing.
Add a little fiberfill, shape the area with your fingers, and then add more.
Pay special attention to the cheeks. These areas should feel rounded without becoming overly firm.
Your fingers are excellent shaping tools. Use them throughout the stuffing process.
Secure every sewn piece
Small amigurumi pieces need secure attachment.
When sewing ears, paws, or other details, pass your needle through several nearby stitches. Make several secure passes before hiding the yarn tail.
Avoid leaving long loose ends inside the finished toy.
Check symmetry before sewing
Before permanently attaching the ears and eyes, place everything temporarily.
Step back and look at the hamster from a short distance.
This makes it easier to catch uneven placement before you commit to sewing.
For more general crochet inspiration and tutorials, The Crochet Guild of America is another useful external crochet resource.
Fun Gift Ideas for Your Finished Crochet Hamster
A handmade hamster can become much more than a cute decoration.
Because the finished piece is small, you can turn it into a thoughtful gift for birthdays, holidays, celebrations, or simple surprises.
Create a pocket-pet gift box
Place your finished hamster inside a small gift box with tissue paper.
Add a handwritten note introducing your new pocket pet. You could even give the hamster a name.
This makes the gift feel personal without requiring expensive packaging.
Make a cute desk companion
Small amigurumi animals look adorable beside a computer, notebook, or craft basket.
Your hamster can become a cheerful little companion during work or study sessions.
Try placing it beside a tiny plant or a stack of colorful notebooks for a cozy display.
Turn it into a seasonal character
You can also change the colors and accessories throughout the year.
Make a pastel hamster for spring. Create a warm autumn version with caramel and cream colors.
For Halloween, try a dark hamster with a tiny pumpkin-inspired accessory.
Christmas versions can use classic festive colors without changing the basic body.
Gift a handmade collection
If you enjoy making multiple animals, create a small collection of pocket pets.
Pair your hamster with other amigurumi animals from Yarned Animals. This creates a charming handmade gift set for someone who loves kawaii creatures.
Before you get started, choose a color palette that makes you smile. That tiny decision can make the whole project feel more personal.
Common Crochet Hamster Mistakes and Easy Fixes
Even experienced crocheters make mistakes. Small amigurumi projects simply make those mistakes easier to notice.
The goal is not perfection. The goal is learning what happened and knowing how to fix it.
Your body looks too narrow
If the body feels narrow, check your stitch tension and increases.
Very tight stitches can make your fabric smaller than expected.
You can also adjust your hook size if your chosen yarn creates a fabric that feels too firm.
Your hamster looks lumpy
Uneven stuffing often causes lumps.
Remove some stuffing and redistribute it rather than forcing more fiberfill into the body.
Shape the hamster with your fingers as you go.
The face looks uneven
Do not immediately sew the facial pieces into place.
First, position the eyes, nose, and ears loosely and look at the whole face.
Moving one feature slightly can make a surprisingly large difference.
The ears do not match
Place both ears side by side before attaching them.
Make sure they have similar shapes and sizes.
If one ear looks different, reshape it gently or crochet a replacement before finishing the assembly.
Your stitches are too loose
If you can clearly see stuffing through the fabric, your tension may be too loose.
Try using a smaller crochet hook with the same yarn.
Amigurumi usually needs a tighter fabric than flat crochet projects.
Frequently Asked Questions About Crochet Hamster Pattern
How long does it take to crochet a hamster?
A small hamster can often be completed within a few crochet sessions, depending on your experience, yarn, hook, and finishing speed. Beginners may need more time while learning amigurumi techniques. Give yourself plenty of time for sewing and shaping because those details make a big difference.
What yarn is best for hamster amigurumi?
A smooth DK-weight yarn works especially well for beginners because you can clearly see each stitch. Soft chenille yarn can create a plush hamster with an extra-cuddly texture. Choose yarn that produces a firm fabric with your hook and does not leave large gaps around the stuffing.
Is this crochet hamster pattern good for beginners?
Yes, the design works well for beginners who already know basic crochet stitches. The project gives you practice with crocheting in the round, increasing, decreasing, stuffing, and sewing small pieces together. Take your time with facial placement, since those details have a big effect on the final appearance.
What size safety eyes should I use for a hamster?
For a small kawaii hamster, 6mm safety eyes can create a sweet proportion without taking over the face. Larger hamsters may suit 9mm or 12mm eyes. Always compare the eye size with your finished head before attaching them, and consider embroidered eyes for toys intended for very young children.
Can I sell hamsters I make from this pattern?
If you create a hamster from your own crochet work, you may be able to sell the finished physical item, but you should always check the specific pattern designer’s terms. Do not sell, copy, or redistribute the written pattern itself unless you have permission.
Can I make different hamster colors?
If you create a hamster from your own crochet work, you may be able to sell the finished physical item, but you should always check the specific pattern designer’s terms. Do not sell, copy, or redistribute the written pattern itself unless you have permission.
Final Thoughts on This Crochet Hamster Pattern
Creating a tiny animal from a strand of yarn feels surprisingly magical. A few simple stitches slowly become a round body, tiny ears, chubby cheeks, and an expressive little face.
This crochet hamster pattern gives you plenty of room to make the project your own. Change the colors, experiment with expressions, or create an entire family of kawaii pocket pets.
Most importantly, enjoy the process. Your finished hamster does not need to look perfectly identical to a sample because handmade charm comes from those little personal touches.
If you are making this as a gift, imagine the smile when someone receives a tiny animal made especially for them. That feeling is one of the sweetest rewards of crochet.
Save this pin to your crochet board on Pinterest so you can find this pattern anytime!
Looking for more free crochet animal patterns? Visit Yarned Animals for new amigurumi patterns, kawaii plushies and beginner crochet tutorials added every week at yarnedanimals.com