
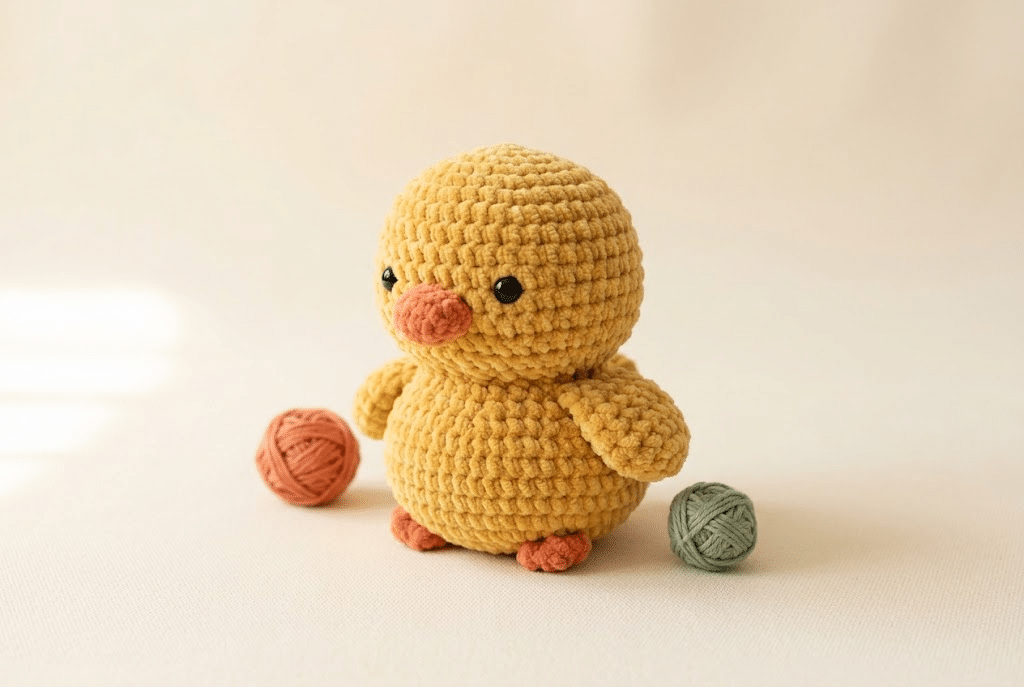
There’s something ridiculously cheerful about a tiny yellow duck made from yarn. Its round body, little orange beak, and sweet expression can turn an ordinary afternoon into a cozy crochet moment.
This crochet duck pattern free guide helps you create your own adorable amigurumi duck with simple shapes and beginner-friendly techniques. You’ll learn how to choose yarn, shape the body, create cute wings, add the beak, place the eyes, and give your duck a polished finish.
You can also customize your duck with different colors, facial expressions, and yarn textures. Make one for yourself, create a handmade gift, or crochet an entire little duck family.
Before you grab your hook, let’s look at everything that makes this project so fun and approachable.
Table of Contents
Why This Crochet Duck Pattern Free Is Perfect for Beginners
A cute duck may look complicated when you first see a finished amigurumi photo. The secret is that you build it from very simple shapes.
This crochet duck pattern free project focuses on the techniques you’ll use again and again in amigurumi. You’ll practice working in the round, increasing, decreasing, stuffing, and shaping.
You don’t need advanced crochet skills to enjoy this project. If you already know single crochet and feel comfortable making a magic ring, you have a great starting point.
Many beginner duck patterns use continuous rounds because this method creates smooth, rounded shapes without bulky seams.
A cheerful project for your first amigurumi
A duck makes an excellent first animal because its shape stays simple. You don’t need complicated limbs, elaborate textures, or difficult colorwork.
The body can start as a small circle and gradually become a rounded shape. Simple increases create width, while decreases bring the shape back together.
That process teaches you an important amigurumi skill: controlling the shape of your crochet with basic stitches.
Once you understand that idea, you can use the same technique for bears, chicks, penguins, cats, frogs, and many other animals.
Small enough for a relaxing weekend project
You can keep this duck fairly compact by choosing DK or worsted-weight yarn. A smaller duck works beautifully as a shelf decoration, desk companion, or handmade gift.
If you use plush yarn, you can create a larger and extra-squishy version. Chenille-style yarn can give the finished toy a soft texture that feels especially cuddly.
For that fluffy finish, Bernat Blanket yarn is one of the yarns I enjoy reaching for when I want an especially soft amigurumi texture.
Easy to customize
The classic yellow duck is adorable, but you don’t have to stop there.
Try pale yellow for a baby duckling, creamy white for a soft neutral version, or mustard yellow for a vintage-inspired duck. You can even make a little mallard-inspired duck using green, brown, cream, and orange.
The best part is that your personality can show through every little detail.
Crochet Duck Pattern Free Materials and Basic Techniques
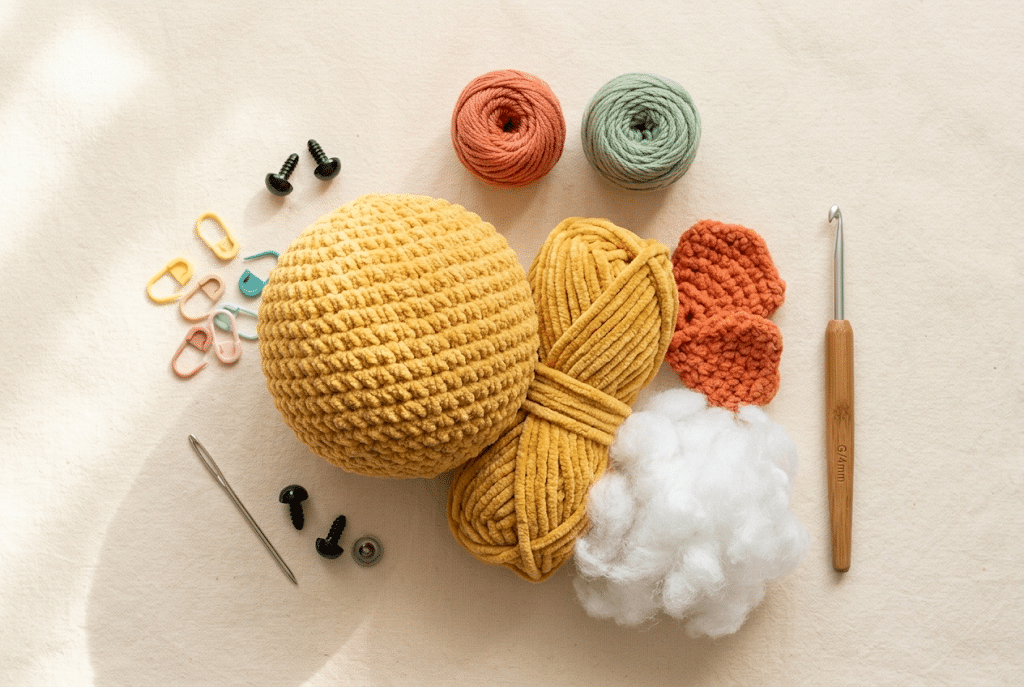
Before starting your crochet duck pattern free, gather everything you need in one small basket. Having your supplies nearby makes the project much more relaxing.
For a beginner project, you want yarn that lets you clearly see your stitches. Smooth yarn can make learning easier than very fuzzy fibers.
Choose your yarn carefully
Paintbox Simply DK yarn works nicely when you want clearly defined stitches and a lightweight finished duck.
You’ll generally want a main color for the body and a small amount of orange or another contrasting shade for the beak and feet.
You can also experiment with different yarn weights. A thinner yarn creates a smaller duck, while thicker yarn creates a larger plushie.
Remember that changing yarn weight also changes the size of your hook and the finished toy. Always crochet tightly enough that stuffing cannot easily show through the stitches.
Pick a comfortable crochet hook
A Clover Amour crochet hook is a lovely choice when you plan to spend a longer afternoon crocheting.
The comfortable grip can make repetitive amigurumi stitches feel easier, especially when you work several rounds of single crochet.
Your exact hook size depends on your yarn. For amigurumi, you usually want a hook smaller than you would use for a loose crochet fabric.
That tighter fabric helps keep your stuffing safely inside the body.
Prepare your stuffing and finishing tools
You’ll need soft stuffing, a yarn needle, scissors, stitch markers, and safety eyes.
Poly-fil Premium fiberfill works well for giving the duck a plump, rounded shape without making it unnecessarily heavy.
Keep your stuffing nearby rather than waiting until the final round. Adding small amounts as you shape the body gives you much better control.
You’ll also want to keep your stitch marker close. Continuous amigurumi rounds can be easy to lose track of, especially when you pause your project.
Know these beginner crochet stitches
You don’t need a huge stitch vocabulary for this project.
Focus on:
- Magic ring for starting circular pieces
- Single crochet for the main fabric
- Increase for adding width
- Decrease for shaping
- Slip stitch for neat finishing
- Chain stitch for small details when needed
If you’re still learning increases and decreases, don’t rush. Practice each technique on a tiny scrap piece first.
How to Crochet the Duck Body Step by Step
Now that your supplies are ready, here is the fun part: shaping your little duck.
The body forms the foundation of the entire project. Take your time here because a smooth body makes every later detail look better.
The general construction uses a rounded amigurumi shape. You begin small, expand toward the widest section, maintain the shape, and then decrease toward the opening.
Step 1: Start the magic ring
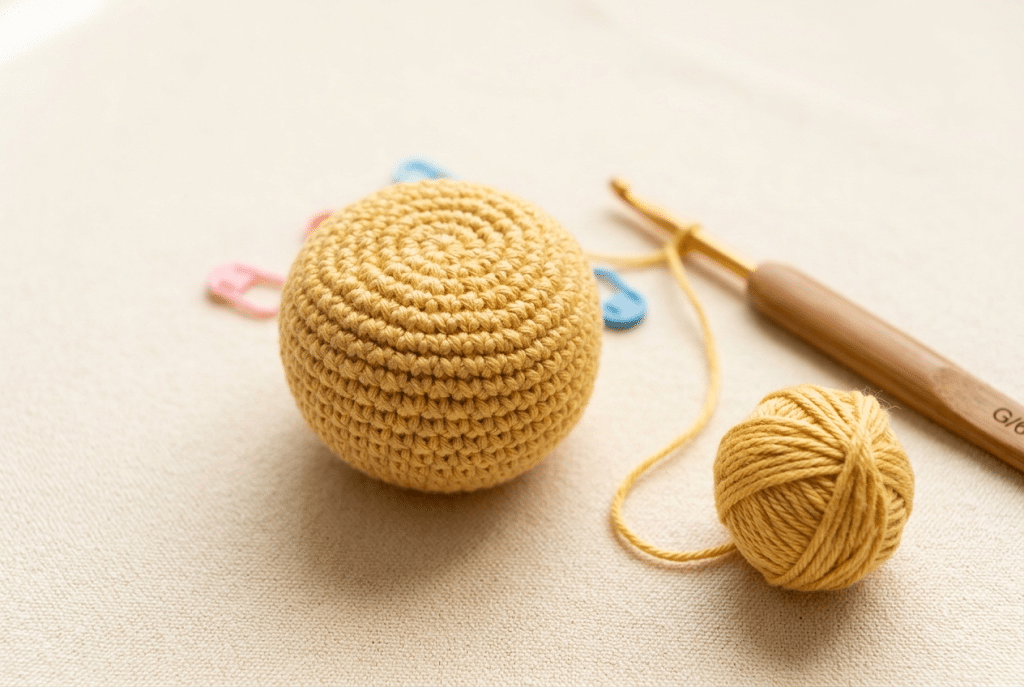
Begin with your main duck color.
Create a magic ring and work a small group of single crochet stitches into the center. Pull the ring closed so you have a neat starting circle.
If magic rings feel awkward, don’t worry. This technique becomes much easier after a few projects.
Keep your stitches snug, but don’t pull them so tightly that your hook struggles to enter them.
Step 2: Build the rounded base
Continue working single crochet rounds while adding increases at regular intervals.
These increases gradually expand the circle. Think of them as the tiny building blocks that create your duck’s chubby body.
Keep checking your work after each round. Your circle should remain relatively flat during the early expansion.
If it starts forming a bowl too quickly, check your stitch placement. If it becomes wavy, you may have added too many increases.
Step 3: Create the duck’s widest section
Once the base reaches the desired width, work several rounds without increasing.
This creates the rounded middle of your duck.
At this stage, the project may not look much like a duck yet. That’s completely normal.
The personality appears later when you add the head shape, beak, wings, and eyes.
Step 4: Begin shaping the upper body
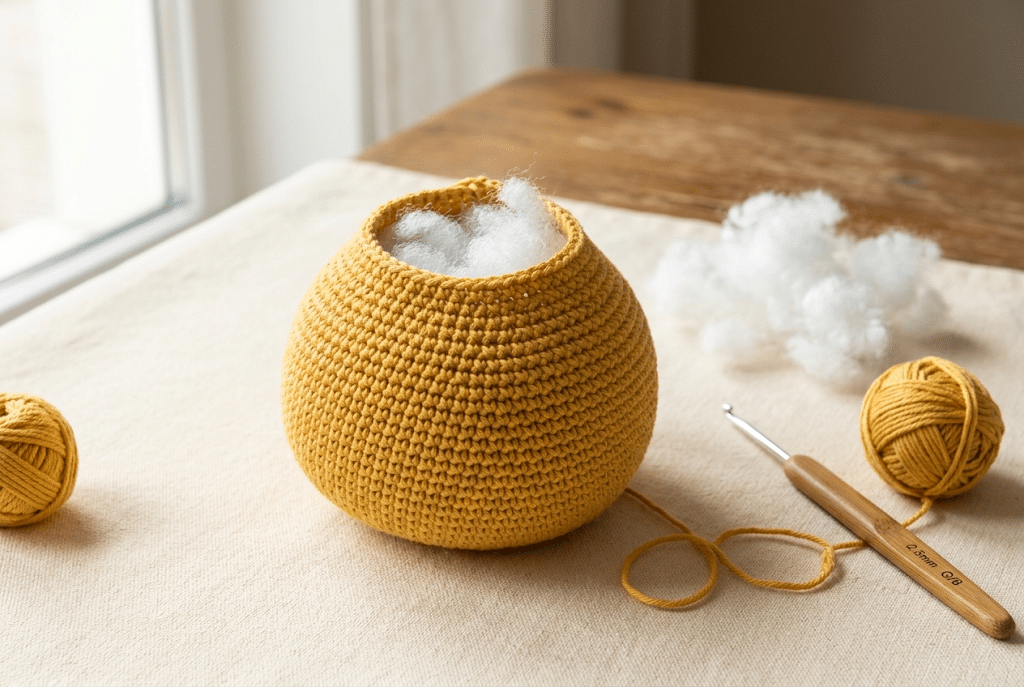
Start using decreases to bring the body inward.
Add stuffing gradually as the opening becomes smaller. Don’t wait until the final few stitches because you’ll have less room to distribute the stuffing evenly.
Use your fingers to push stuffing into the sides and lower portion of the body.
You want a firm but squeezable result. Too little stuffing makes the duck floppy, while too much can stretch your stitches.
How to Shape a Cute Duck Head, Beak, and Wings
The head and facial details are where your crochet duck really comes alive.
A simple round body can look cute on its own, but the beak and eyes create the recognizable duck expression.
This section also gives you plenty of room to experiment.
Step 5: Shape the head
Continue your amigurumi construction so the upper portion becomes slightly narrower than the body.
Keep the head rounded rather than making it too tall.
A cute duck usually looks best with a large rounded head and compact body. This gives it that classic kawaii proportion.
As you decrease toward the top, add small amounts of stuffing.
Pause occasionally and gently squeeze the body. If you notice a hollow area, add a little more fiberfill before closing the opening.
Step 6: Add the safety eyes
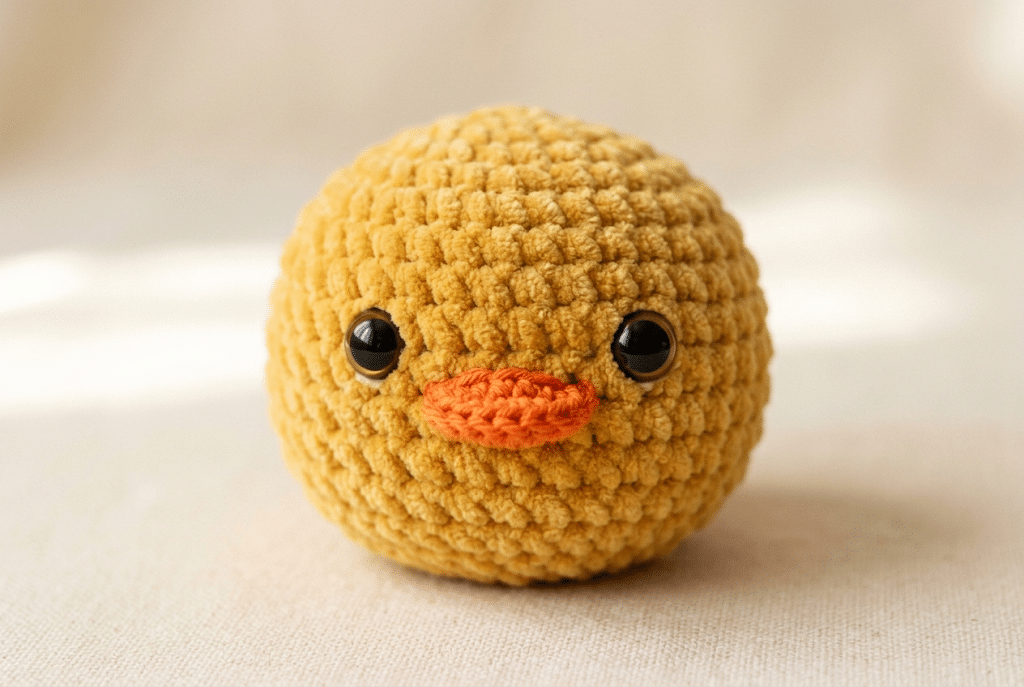
Place the eyes once the head has enough shape to judge the facial placement.
For a classic kawaii expression, position the eyes slightly above the center of the face and leave enough space between them for the beak.
6mm safety eyes can create a small, sweet expression on a smaller duck, while larger eyes can give a plushier project a more exaggerated kawaii look.
Before permanently securing them, hold them against the face and check the placement from several angles.
Tip: Take a quick photo of your duck from the front. Your phone camera can reveal uneven eye placement more easily than your eyes can while holding the toy.
Step 7: Crochet and attach the beak
Use orange yarn for the beak.
Keep the shape small and slightly rounded. You want the beak to complement the face rather than dominate it.
You can crochet a tiny flat oval or create a small dimensional shape using increases and decreases.
Attach the beak horizontally between the eyes.
Use a yarn needle to secure it firmly. Take your time with the first few stitches because the beak placement has a big effect on the finished expression.
A slightly higher beak can create a curious expression. A centered beak creates a classic duckling look.
Step 8: Create the wings
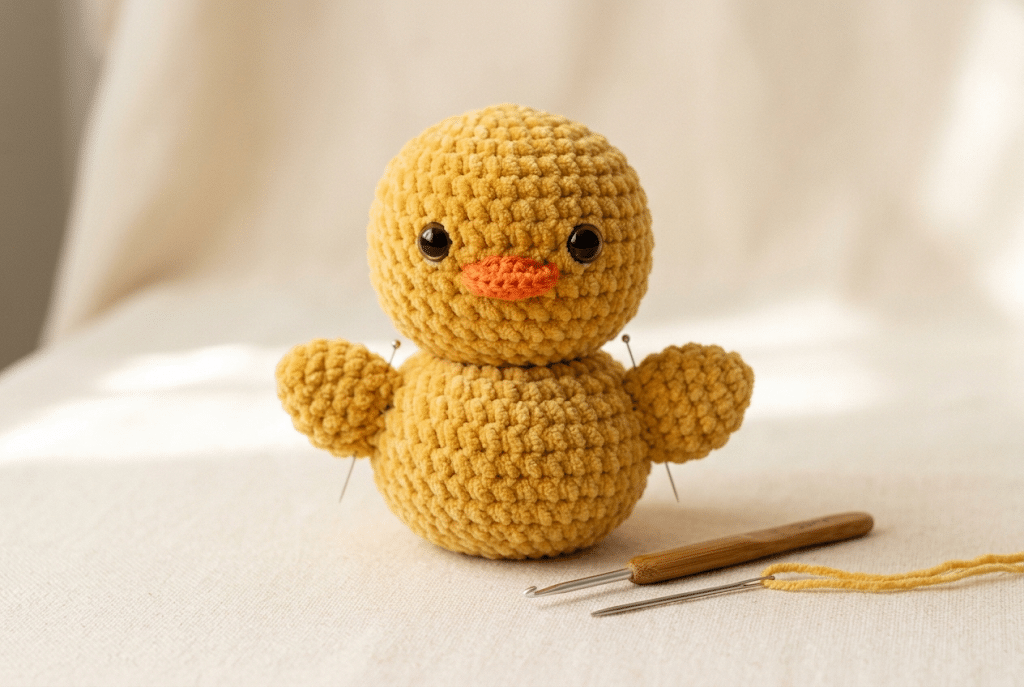
Next, make two small wings using your main body color.
The wings don’t need complicated shaping. A simple rounded or slightly pointed piece works beautifully.
Position one wing on each side of the body.
Pin them temporarily before sewing. This lets you step back and check whether both wings sit at the same height.
For an extra-cute pose, angle the wings slightly forward.
You can also leave them slightly loose so they have a tiny bit of movement.
Finishing Your Amigurumi Duck Like a Pro
Ready to move on? Your duck should now have its main shape and recognizable face.
The finishing stage makes the difference between a project that looks homemade and one that looks beautifully polished.
You don’t need complicated techniques. You simply need patience and careful placement.
Step 9: Finish the body neatly
Once the body feels evenly stuffed, continue your decreases until only a small opening remains.
Add one final small amount of stuffing if necessary.
Then close the opening securely and weave the yarn tail inside the body.
Pull gently rather than aggressively. You want a smooth finish without creating a noticeable dent.
Hide the remaining yarn end inside the stuffing.
Step 10: Check every detail
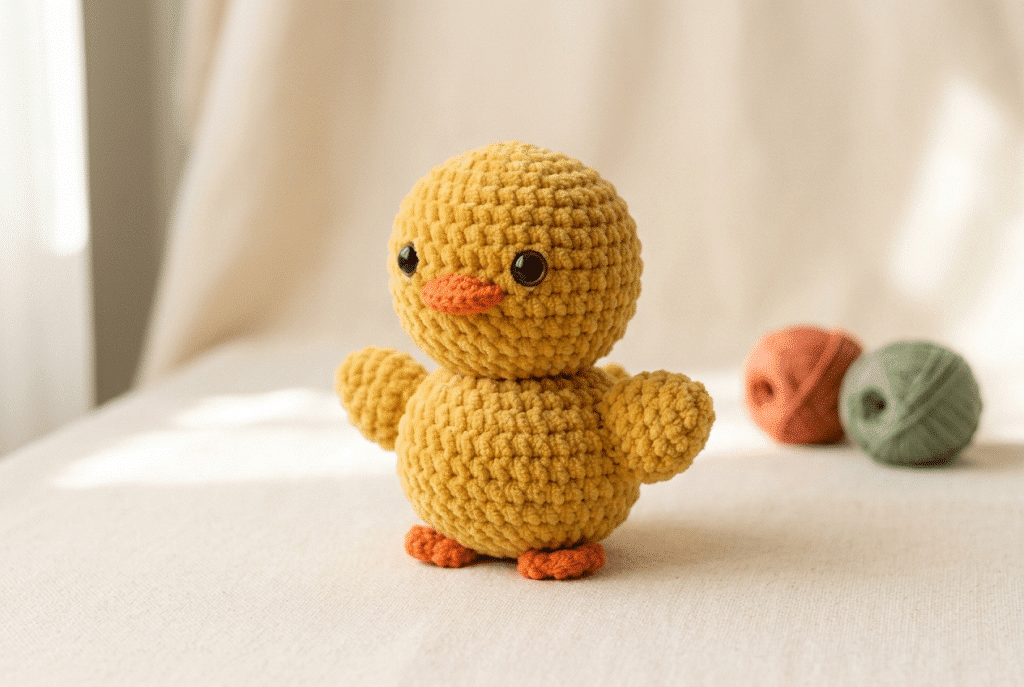
Place your finished duck on a flat surface and inspect it from the front.
Check the eye alignment, beak position, wing height, and overall balance.
If something looks slightly uneven, don’t panic.
Amigurumi often changes appearance dramatically once you gently shape it with your fingers.
You can also lightly adjust the wings before trimming any remaining yarn ends.
This final check takes only a few minutes but can make your handmade duck look much more professional.
Give your duck some personality
Here is where you can have fun.
Try adding tiny embroidered eyebrows for a surprised expression. You can also use a small amount of pink yarn to create subtle cheeks.
A little tuft of yarn on the head can turn a simple duck into a fluffy duckling.
You could even make several ducks with different expressions.
One can look sleepy, another curious, and another completely delighted.
Helpful Tips for a Soft and Adorable Crochet Duck
Before you get too excited and start making a whole flock, take a moment to learn a few tricks that make amigurumi easier.
Small adjustments can dramatically improve the finished shape.
Keep your tension consistent
Consistent tension helps create an even surface.
If your stitches suddenly become loose, stuffing may peek through the fabric.
If your stitches become extremely tight, your hands may become uncomfortable and the finished shape can become harder to manipulate.
Find a relaxed rhythm and take short breaks.
Stuff gradually instead of all at once
This tip can completely change your amigurumi results.
Adding stuffing little by little lets you shape the body from the inside.
Push small amounts into corners and gently rotate the toy as you work.
Avoid creating one large ball of stuffing. Small pieces distribute more evenly.
Use stitch markers every round
It’s easy to lose your starting point when crocheting in continuous rounds.
A stitch marker gives you a clear visual reminder.
Move it upward at the beginning of each round.
If you accidentally crochet one stitch too many, don’t immediately unravel everything. Count your stitches first and identify where the mistake happened.
Try different duck colors
Yellow is the obvious classic, but your imagination can take this project much further.
Soft cream creates an elegant neutral duck.
Golden yellow gives a traditional duckling appearance.
Pastel peach creates a sweet nursery-style toy.
For a more natural look, try combining brown, cream, green, and orange.
You could even create a rainbow duck collection using different pastel shades.
Cute Ways to Use Your Finished Crochet Duck
Your finished duck doesn’t have to sit quietly on a shelf.
A handmade amigurumi makes a thoughtful gift because you can choose the colors and personality specifically for the person receiving it.
Make a sweet handmade gift
A crochet duck makes a charming birthday present, Easter gift, baby-shower decoration, or small handmade surprise.
Pair it with a handwritten note for an extra personal touch.
For younger children, remember that safety eyes can pose a choking risk. Embroidered facial details provide a safer alternative for toys intended for very young children.
Create a tiny duck collection
Why stop at one?
Make several ducks in different sizes and colors.
You can create a parent duck with several smaller ducklings by changing your yarn weight and hook size.
This is also a fun way to use leftover yarn from other amigurumi projects.
Turn your duck into seasonal décor
Add a tiny floral accessory for spring.
Use warm autumn colors for a fall-inspired duck.
A miniature scarf can create a cozy winter character.
You can also place several ducks around a bookshelf, craft room, nursery, or desk.
The possibilities are surprisingly endless for such a small project.
Common Mistakes to Avoid With Your Crochet Duck
Before you finish your crochet duck pattern free, check these common beginner mistakes.
They’re easy to fix when you catch them early.
Making the fabric too loose
Loose stitches can expose the stuffing.
Try using a smaller hook if your fabric looks too open.
Your stitches should create a firm fabric while still allowing your hook to move comfortably.
Overstuffing the head
A very firm head may stretch the stitches and make the duck look less rounded.
Add stuffing slowly and stop when the shape feels full but flexible.
You want the finished duck to feel pleasantly squishy.
Placing the eyes too far apart
Eye placement changes the entire expression.
Eyes placed close together can create an especially cute kawaii appearance.
Wider placement can make the duck look more cartoon-like or surprised.
Always test the placement before permanently securing the eyes.
Making the beak too large
The beak should usually remain smaller than you initially expect.
A compact orange beak keeps the face balanced.
If your beak looks oversized, reduce its width or shorten its height.
Forgetting to count stitches
Even simple amigurumi depends on consistent stitch counts.
If the body suddenly looks lopsided, stop and count your stitches.
Fixing a small mistake early is much easier than discovering it several rounds later.
Easy Variations to Make Your Duck Extra Special
Once you understand the basic construction, you can turn one simple design into many different characters.
That’s one of my favorite things about amigurumi.
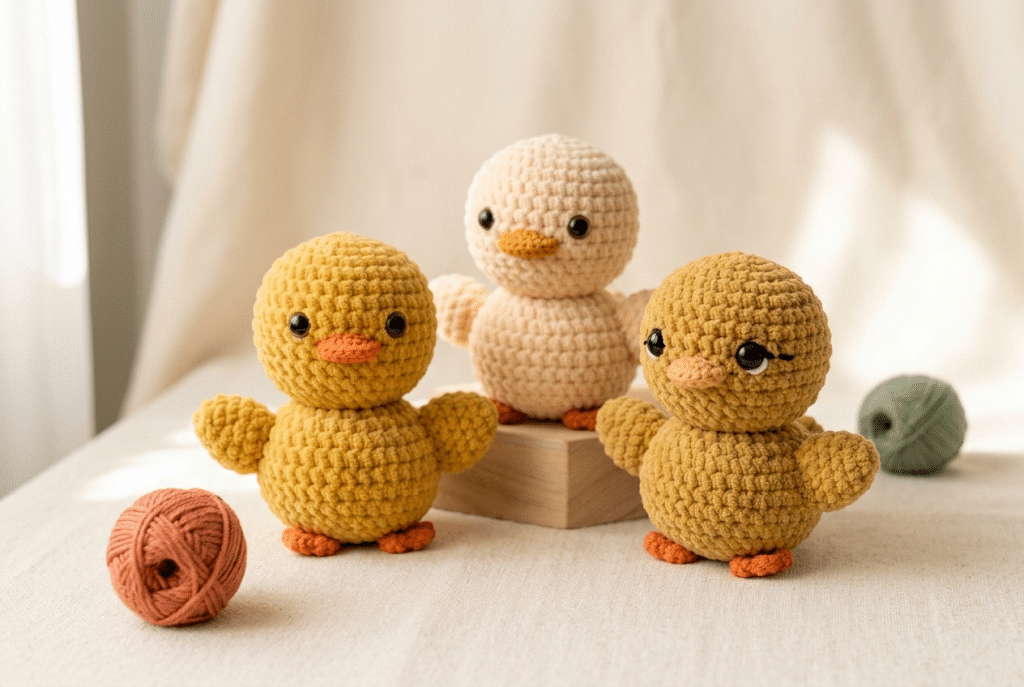
Make a tiny duckling
Use thinner yarn and a smaller hook.
This creates a miniature duck that can work beautifully as a bag charm or tiny decorative piece.
Keep the facial details proportionally small so the duck doesn’t look overwhelmed by its eyes or beak.
Make a fluffy plush duck
Switch to a soft plush yarn for a larger cuddly version.
The stitches can become harder to see with fuzzy yarn, so this variation works best once you feel comfortable counting your rounds by touch and using stitch markers.
Create a mallard-inspired duck
Move beyond bright yellow.
Use a darker green or brown shade for the head, a neutral body, and a warm orange beak.
This gives you a more realistic bird-inspired palette while keeping the cute amigurumi proportions.
Add tiny accessories
A miniature bow, scarf, flower, or hat can completely change the character.
Keep accessories removable if you plan to give the duck to a young child.
Small decorative parts can create safety concerns, so always consider the recipient’s age before adding them.
Frequently Asked Questions About Crochet Duck Pattern Free
How long does it take to crochet a duck?
A small amigurumi duck can take a few hours, depending on your experience, yarn weight, and construction style. Beginners may need longer while they learn the shaping and stuffing techniques. Once you become comfortable with continuous rounds, increases, and decreases, the same project can become much faster.
What yarn is best for a crochet duck?
Smooth DK or worsted-weight yarn works well for beginners because you can easily see your stitches. Plush or chenille yarn creates a softer, squishier duck but can make stitch counting harder. Choose a yarn that feels comfortable in your hands and matches the size you want.
Is this crochet duck pattern free and good for beginners?
Yes, this guide focuses on beginner-friendly amigurumi techniques. You’ll mainly work with basic stitches, shaping, stuffing, and simple finishing. If you can make a magic ring, single crochet, increase, and decrease, you have the essential skills needed to begin.
What size safety eyes should I use for a duck amigurumi?
The best size depends on your finished duck. Smaller ducks often suit 6mm safety eyes, while medium plush ducks can look adorable with larger eyes. Always compare the eyes with the finished head before attaching them. For toys intended for very young children, embroidered eyes provide a safer alternative.
Can I sell ducks I make from this tutorial?
You can generally sell your own finished handmade creations when you create them yourself, but always check the specific terms of any pattern you use. Do not copy, redistribute, or sell another designer’s written instructions or photographs. If you adapt a published pattern, follow its designer’s stated usage and selling policies.
Can I make this duck in different colors?
Absolutely. Changing colors is one of the easiest ways to personalize amigurumi. Try pastel yellow, cream, golden yellow, brown, or green combinations. You can also make several ducks using different yarn weights to create a cute family of different-sized ducklings.
Final Thoughts on This Crochet Duck Pattern Free
You now have everything you need to create a cheerful little duck with simple crochet techniques and plenty of room for creativity.
From the rounded body to the tiny orange beak, every part gives you another chance to practice your amigurumi skills. Once you finish your first duck, you may find yourself imagining an entire flock in different colors and sizes.
The best part is that your finished toy carries something store-bought toys never can: the time, creativity, and love you put into making it.
So grab your favorite yarn, make yourself comfortable, and enjoy the satisfying feeling of watching a few simple stitches become a tiny handmade friend.
If this crochet duck pattern free project becomes your new favorite, save it for your next cozy crochet afternoon.
Save this pin to your crochet board on Pinterest so you can find this pattern anytime!
Looking for more free crochet animal patterns? Visit Yarned Animals for new amigurumi patterns, kawaii plushies and beginner crochet tutorials added every week at yarnedanimals.com