
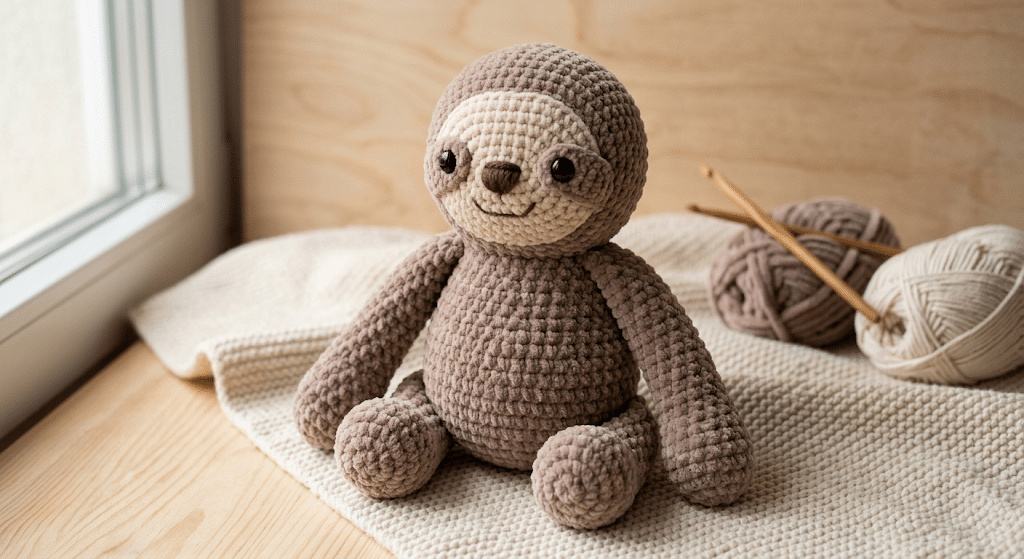
There is something wonderfully cozy about a sleepy little sloth curled up in your hands. With its tiny face, long arms, and gentle expression, a crocheted sloth makes an adorable companion for your shelf, desk, or gift basket.
This crochet sloth pattern gives you a simple way to create your own cuddly amigurumi friend. You will learn how to shape the body, add the face, create floppy arms, and finish your sloth with a sweet personality.
The design keeps the shapes beginner-friendly, so you can focus on enjoying each stitch instead of worrying about complicated techniques. If you love soft plushies, handmade gifts, and kawaii crochet animals, this project is especially fun.
Grab your yarn and hook, because your sleepy little sloth is ready to come to life!
Table of Contents
Why This Crochet Sloth Pattern Is So Adorable
Sloths have an effortless charm that works beautifully in amigurumi. Their rounded bodies, sleepy faces, and long little arms make them easy to recognize while giving you plenty of room to add personality.
This crochet sloth pattern uses simple shapes that come together like a tiny plush toy. You can keep your sloth classic with warm brown and beige yarn, or experiment with different shades for a more playful look.
A beginner-friendly amigurumi project
If you already know basic single crochet, you can tackle this project with confidence. Most of the shaping comes from familiar increases and decreases.
The pattern uses U.S. crochet terminology. If abbreviations ever feel confusing, the Craft Yarn Council has a helpful reference for common crochet terms and abbreviations.
You will also work mainly in the round. That means you can build the plush shape gradually without sewing together lots of separate flat pieces.
A cute handmade gift idea
A finished sloth makes a sweet birthday gift, baby-room decoration, desk companion, or handmade surprise for a crochet-loving friend.
You can also change the colors to match someone’s favorite palette. A cream belly, rosy cheeks, or tiny embroidered smile can make your version feel completely personal.
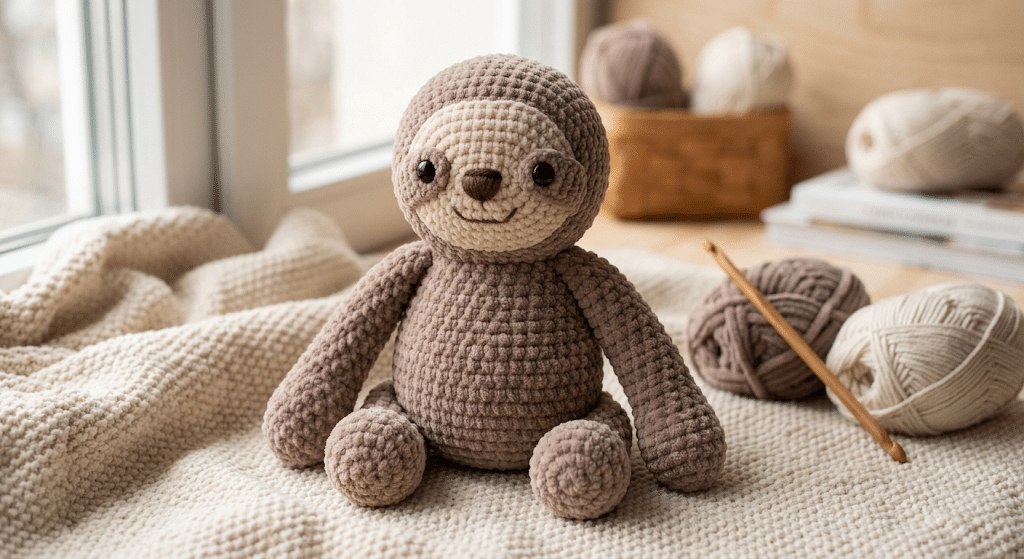
Soft yarn makes the difference
For a plush finish, I love reaching for Bernat Blanket yarn. Its super-bulky chenille texture creates a wonderfully soft result, and the yarn works up quickly. Yarnspirations lists Bernat Blanket as a #6 super-bulky polyester yarn.
Now that you know why this little project is so lovable, let’s get your supplies ready.
Crochet Sloth Pattern: Materials and Easy Preparation
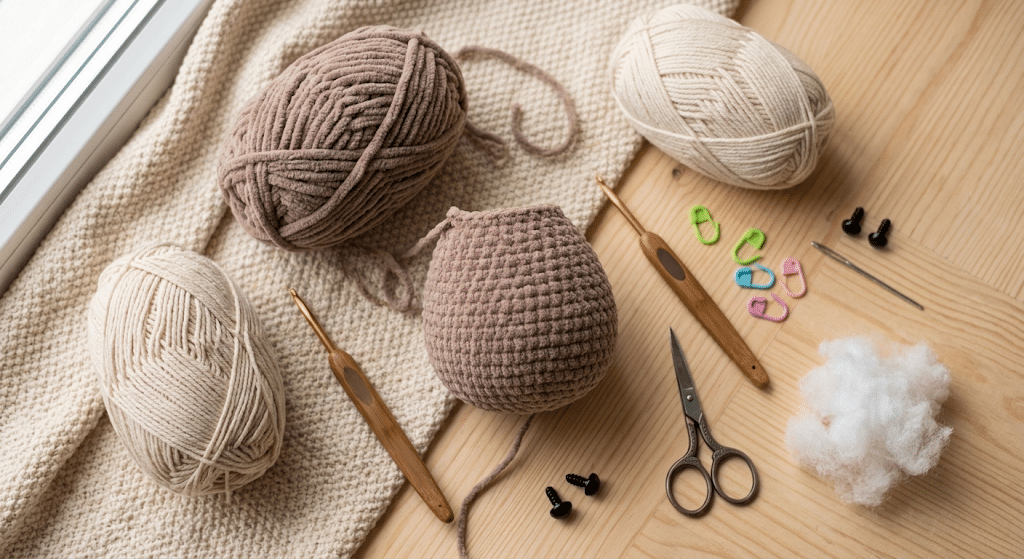
Before you begin, take a few minutes to organize your materials. A calm setup makes amigurumi much easier, especially when you are learning how to shape stuffed pieces.
You do not need a huge collection of supplies. A few basic crochet tools can take you from the first loop to the finished sloth.
Choose your yarn and colors
For the main body, choose a soft brown, taupe, caramel, or warm gray. These colors give your sloth a natural woodland feel.
Use a lighter shade for the face patch or muzzle area. Cream, beige, and oatmeal shades work beautifully against darker yarn.
For a kawaii look, add tiny black safety eyes and a small embroidered mouth. A touch of pink yarn can create sweet cheeks.
Pick the right crochet hook
Use a hook that creates firm stitches with your chosen yarn. Tight stitches matter because stuffing should not peek through the finished fabric.
If you crochet loosely, try going down one hook size. If your stitches feel extremely difficult to work, move up slightly.
For thicker yarn, a comfortable ergonomic hook can make a big difference. The Clover Amour line uses a soft-grip handle designed for comfortable crocheting.
Prepare your stuffing and tools
Keep Poly-fil Premium fiberfill, a yarn needle, stitch markers, scissors, and your safety eyes nearby.
A stitch marker helps you track the beginning of each round. This becomes especially useful when you work continuous rounds.
Before starting, make sure you understand the basic terms. The Craft Yarn Council lists sc for single crochet, inc for increase, and sc2tog for single crochet two stitches together.
Next up, let’s turn those supplies into your sleepy little sloth.
10 Easy Steps to Make Your Crochet Sloth
Here is the fun part. You will build your sloth from simple rounded pieces, then bring everything together at the end.
Keep your tension relaxed. Amigurumi can feel tighter than ordinary crochet because you want a firm fabric.
Step 1: Start the crochet sloth body
Begin with your main body color and create a small magic ring.
Work your first round of single crochet into the ring. Keep your stitches fairly tight, then continue working in continuous rounds.
Place a stitch marker at the beginning of each round. This tiny habit makes counting much easier.
Step 2: Shape the rounded body
Continue increasing gradually around the center. The body should begin forming a small dome.
After reaching the widest point, work several even rounds. These rounds create the plush middle of your sloth.
Keep checking the shape as you crochet. Your piece should look rounded rather than flat.
Step 3: Add the decreases
Now start decreasing to close the lower part of the body.
Work your decreases evenly around the round. Avoid pulling your stitches too tightly because the fabric needs enough flexibility for stuffing.
Before the opening becomes too small, begin adding small amounts of fiberfill.
Step 4: Stuff the body evenly
Add stuffing little by little rather than pushing a large handful inside at once.
Use your fingers or the blunt end of your yarn needle to gently move stuffing into the corners.
Aim for a firm but squeezable body. Too little stuffing can make your sloth floppy, while too much can stretch the stitches.
Step 5: Finish the head shape
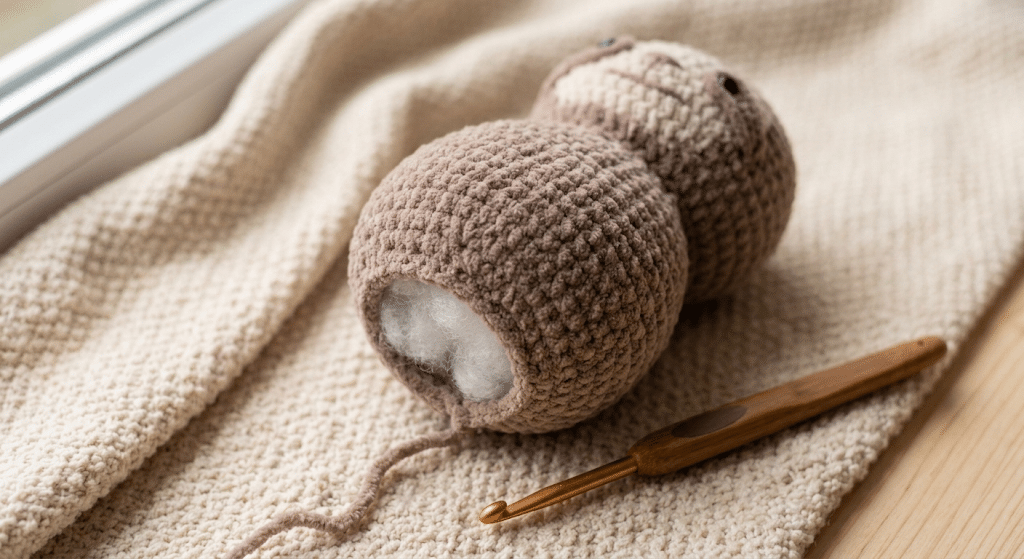
Continue closing the body until you have a rounded head and torso shape.
Add the final stuffing before completely closing the opening. Once the opening becomes tiny, it becomes harder to distribute the fiberfill evenly.
Fasten off securely and weave the yarn tail inside the body.
Step 6: Create the sloth face
Now your sleepy friend starts getting a personality.
Add the safety eyes to the front of the head. Leave enough space between them for a small muzzle or embroidered nose.
For a classic sloth look, use a lighter beige or cream patch around the eyes and nose. Keep the shape soft and slightly oval.
Step 7: Crochet the long arms
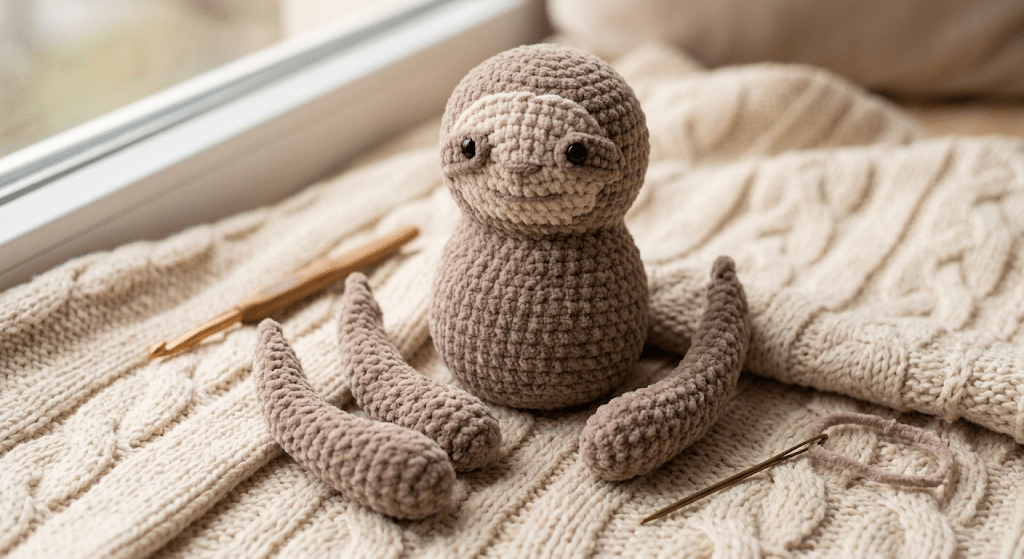
Create two narrow arms using your main yarn color.
Keep the arms slightly longer than you might expect. That extra length gives your sloth its signature relaxed appearance.
Stuff them lightly. You want the arms to remain flexible enough to hang naturally beside the body.
Step 8: Make the legs and little paws
Crochet two small legs using the same basic shaping technique.
Keep the legs short and rounded. Sloths look especially cute when their little feet sit slightly outward.
Add only a small amount of stuffing. This keeps the feet soft and prevents them from looking overly bulky.
Step 9: Attach the arms and legs
Arrange each piece before sewing anything permanently.
Pin or hold the arms against the body and check their position from the front. Then attach them securely with your yarn needle.
Repeat with the legs. Take your time here because placement can completely change your sloth’s expression and posture.
Step 10: Add the final kawaii details
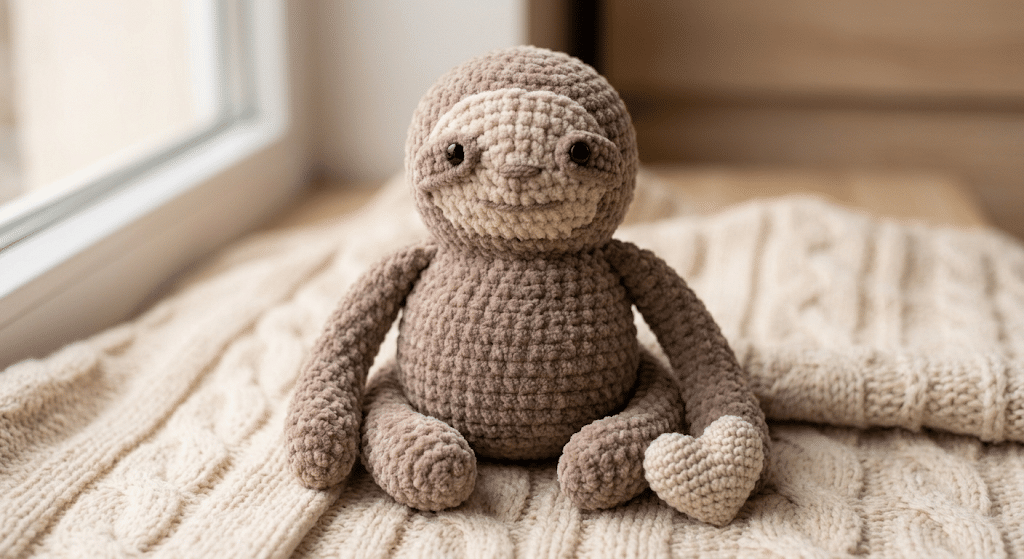
Finish your sloth with the tiny details that make it yours.
Embroidery can create a simple nose, smile, claws, or sleepy eyelids. You can also add small blush marks using embroidery yarn.
Give the finished sloth a gentle squeeze and check every attachment point. Make sure the eyes and sewn pieces feel secure before gifting your amigurumi.
Ready to move on? Let’s make your finished sloth look even more polished.
How to Make Your Crochet Sloth Look Extra Cute
The basic shape creates the sloth, but tiny finishing choices give it character.
Two sloths made from the same pattern can look completely different. One might look sleepy and gentle, while another could look playful and curious.
Give your sloth a sleepy expression
Place the eyes slightly lower on the face for a relaxed look.
You can also embroider tiny curved eyelids above the eyes. This creates an adorable sleepy expression without adding complicated stitches.
A small embroidered smile keeps the face soft and friendly.
Create a soft face patch
A contrasting face patch helps your sloth’s features stand out.
Try cream, beige, or light caramel yarn. Keep the patch rounded rather than perfectly symmetrical.
That handmade imperfection adds charm. Your sloth does not need to look factory-perfect to look adorable.
Make the arms extra cuddly
Long arms give your amigurumi the classic sloth silhouette.
You can position the arms hanging down, crossing over the belly, or wrapping around a small crocheted heart.
For a gift, the hugging pose looks especially sweet. You can even make a second tiny accessory and photograph the sloth holding it.
Add your own personality
Try a tiny bow, embroidered cheeks, a different eye size, or a contrasting belly.
You could also create a whole sloth family using different yarn colors.
One could be caramel, another gray, and another creamy beige. A small collection would look adorable sitting together on a shelf.
Before we get into that, let’s look at the most common beginner problems and how to avoid them.
Easy Fixes for Common Crochet Sloth Problems
Amigurumi sometimes looks strange before it looks cute. That is completely normal.
The body can look lumpy while you are crocheting it. The face can seem too large before the arms and legs are attached.
Do not judge your project too early.
Your stitches look too loose
Loose stitches create visible gaps between the loops.
Try using a smaller crochet hook or slightly firmer tension. The goal is a dense fabric that holds stuffing without large holes.
Avoid pulling every stitch extremely tight, though. Excessive tension can make your hands tired and make the hook difficult to insert.
Your body looks uneven
Check your stitch counts at the end of each round.
An accidental increase or missed decrease can change the shape quickly. This is why a stitch marker helps so much.
If your shape looks uneven, carefully count backward until you find the round where the problem started.
The stuffing shows through
This usually means your stitches are too loose or the body contains too much stuffing.
Remove a little fiberfill and gently reshape the piece.
Then check your hook size and tension. A slightly smaller hook often creates a better fabric for amigurumi.
The face does not look right
Do not sew the facial pieces immediately.
Place your eyes, muzzle, and nose temporarily. Take a quick photo from the front.
Photos can make placement problems easier to notice. Once everything looks balanced, secure the pieces permanently.
Your sloth feels too stiff
A plush animal should feel soft and huggable.
Use less stuffing in the arms and legs. Keep the body firm, but allow the smaller pieces to remain flexible.
Trust me on this one: soft stuffing and relaxed shaping create a much sweeter finished sloth.
Helpful Tips for a Better Sloth Amigurumi
Once your first sloth starts taking shape, a few small habits can make future projects easier.
The biggest secret is patience. Amigurumi rewards careful shaping more than complicated techniques.
Count at the end of every round
You do not need to count every stitch constantly.
Instead, pause at the end of each round and check your total. This simple habit can prevent major shaping mistakes.
Write down your round number if needed. A small notebook beside your crochet basket can save you from guessing later.
Keep your tension consistent
Try to maintain similar tension throughout the project.
If your first rounds are very tight and later rounds become loose, the body may develop uneven sections.
Take short breaks if your hands feel tired. Comfortable crochet usually produces more consistent stitches.
Secure safety eyes carefully
Safety eyes should sit firmly in the fabric.
Position them before closing the head completely. Once you add the locking backs, repositioning becomes much harder.
For a handmade toy, always follow the safety instructions that come with your specific eyes.
Use embroidery for tiny details
Embroidery gives you excellent control over small facial features.
It also lets you customize your sloth without changing the main crochet structure.
If you are making the project for a very young child, consider embroidered eyes instead of safety eyes.
Keep your finished pieces organized
Place completed arms, legs, and facial pieces in a small container.
This prevents tiny pieces from disappearing between crochet sessions.
It also makes assembly much less stressful when you return to the project later.
Now that your sloth is finished, let’s explore a few fun ways to use it.
Cute Ways to Use Your Finished Crochet Sloth
A handmade sloth can become much more than a simple crochet project.
Its small size makes it perfect for gifts, decorations, and little moments of everyday joy.
Make a thoughtful handmade gift
Give your finished sloth to someone who loves cute animals or handmade crafts.
Pair it with a handmade card for a birthday, graduation, friendship gift, or just-because surprise.
The handmade element makes the gift feel personal. You spent time creating something specifically with that person in mind.
Create a cozy desk companion
Place your sloth beside your computer, craft supplies, or reading chair.
Its sleepy expression adds a little personality to your workspace without taking up much room.
You can even create a small seasonal collection with different colors.
Turn it into a gift basket centerpiece
A crochet sloth works beautifully in a cozy gift basket.
Add a handmade card, a small notebook, soft socks, or other non-edible treats.
The sloth becomes the little character that brings the entire gift together.
Photograph your finished amigurumi
Good photos can make your crochet project look even more special.
Place your sloth near a window with soft natural light. Use a simple cream or neutral background.
Try a close-up of the face, a full-body photo, and one photo showing your hand holding the finished piece.
Make a matching sloth family
Once you understand the shaping, experiment with colors and expressions.
Create a sleepy sloth, a smiling sloth, and a tiny baby sloth.
You could even give each one a different personality through its eye placement and accessories.
Before you finish, let’s answer a few questions beginners often have.
Frequently Asked Questions About Crochet Sloth Pattern
How long does it take to crochet a sloth?
A small crochet sloth can take several hours, depending on your experience, yarn weight, and finishing details. Beginners may need more time while they learn the shaping and assembly. Thick chenille yarn can speed up the crochet portion, while embroidered faces and careful sewing add extra time.
What yarn is best for sloth amigurumi?
Soft acrylic, cotton, or chenille yarn can work well for a sloth amigurumi. Chenille creates an especially cuddly finish, while cotton makes stitches easier to see. Bernat Blanket is a super-bulky polyester option with a soft chenille-style texture.
Is this crochet sloth pattern good for beginners?
Yes, this style of sloth works well for beginners who know basic single crochet. You mainly practice working in the round, increasing, decreasing, stuffing, and sewing pieces together. If crochet abbreviations are new to you, keep a basic abbreviation guide nearby while you work.
What size safety eyes should I use for a sloth?
For a medium-sized sloth, 9mm safety eyes can create a balanced kawaii appearance. Smaller sloths may look better with 6mm eyes, while larger designs can handle 12mm eyes. Always choose eye size based on your finished head size and secure the eyes carefully.
Can I sell sloths I make from this pattern?
You can generally sell handmade items you personally crochet, but pattern designers may have their own rules about selling finished products. Always check the specific pattern’s terms before selling. If you publish photos or listings, credit the pattern source when its terms request or require attribution.
How do I make my sloth extra fluffy?
Choose a soft chenille-style yarn for a plush finish and avoid overstuffing the body. Bernat Blanket is one option because its bulky chenille texture creates a cozy surface. Keep your stitches firm enough to hold the stuffing while allowing the finished animal to remain soft.
Final Thoughts on This Crochet Sloth Pattern
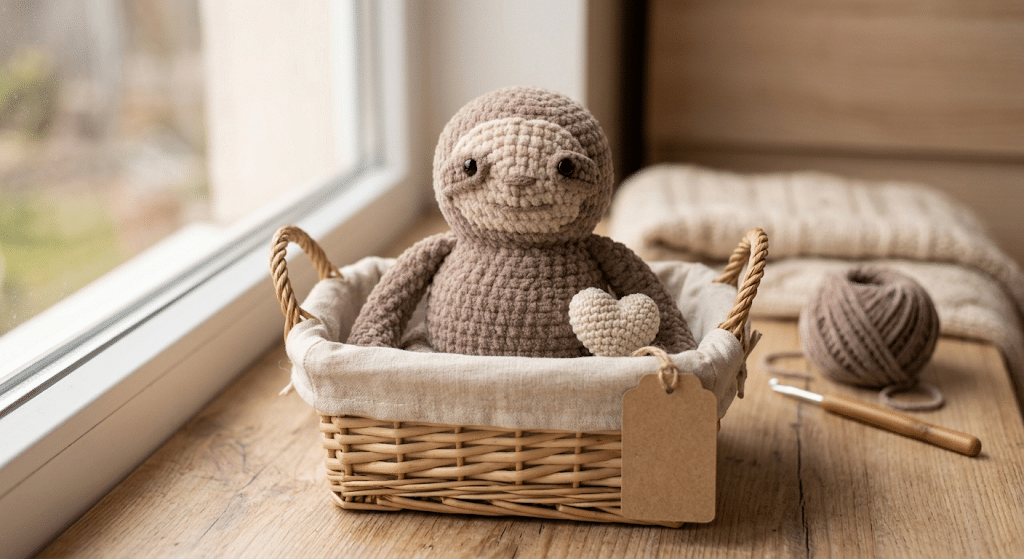
There is something special about finishing a handmade animal and realizing that every little stitch came from your own hands.
With this crochet sloth pattern, you learned how to build a rounded body, shape the face, create floppy limbs, and add those tiny details that bring a plushie to life.
Do not worry if your first sloth looks a little different from the example. That handmade personality is part of the magic.
Soon, you may find yourself making a whole sleepy sloth family for friends, gifts, and your own cozy crochet corner. Most importantly, enjoy the process and celebrate every finished stitch.
Save this pin to your crochet board on Pinterest so you can find this pattern anytime!
Looking for more free crochet animal patterns? Visit Yarned Animals for new amigurumi patterns, kawaii plushies and beginner crochet tutorials added every week at yarnedanimals.com