
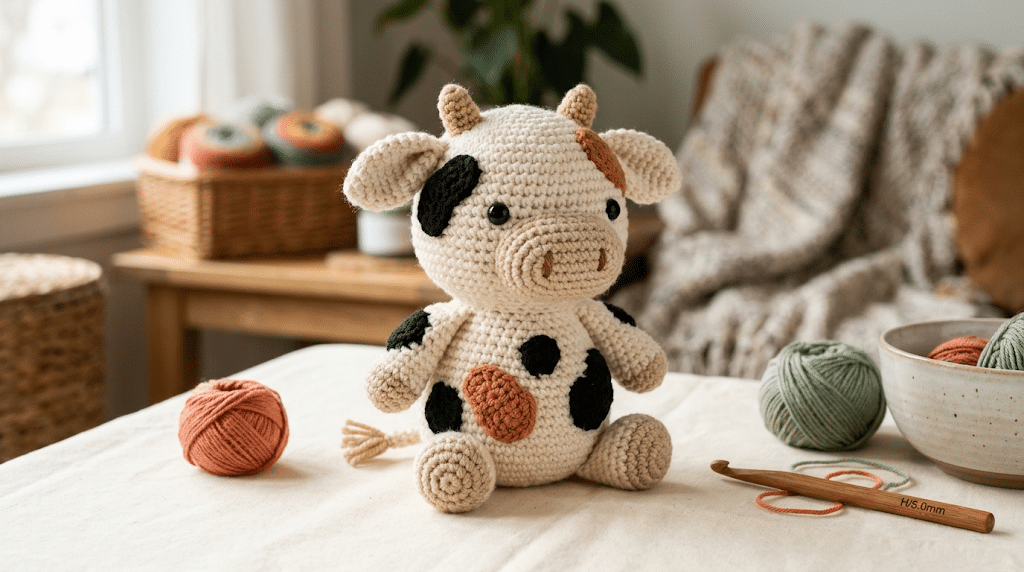
There’s something incredibly sweet about a tiny handmade cow sitting on a shelf, desk, or bedside table. With soft yarn, a round body, little ears, and a cute pair of horns, your finished amigurumi can feel like a tiny farm friend made just for you.
This crochet cow pattern free guide walks you through the process in simple, beginner-friendly steps. You’ll learn how to shape the body, create the muzzle, add adorable spots, crochet the ears and legs, and finish your cow with those signature little horns.
You don’t need complicated techniques to make something special. Grab your favorite yarn, settle into a cozy spot, and let’s turn a few simple stitches into an irresistibly cute crochet cow.
Table of Contents
Why This Crochet Cow Pattern Free Guide Is So Cute
A handmade cow makes such a fun crochet project because the design gives you plenty of room for personality. You can keep your cow classic with black-and-white spots, choose warm brown patches, or create a completely whimsical pastel version.
This crochet cow pattern free project also works beautifully as a beginner amigurumi because most of the shapes come from familiar crochet techniques. The body has a rounded shape, while the legs, ears, muzzle, and horns create the details that make the animal recognizable.
The best part is that you can make your cow as simple or detailed as you like. Beginners can stick with a few basic colors, while experienced crocheters can experiment with different spot patterns and facial expressions.
Pick a Color Palette You Love
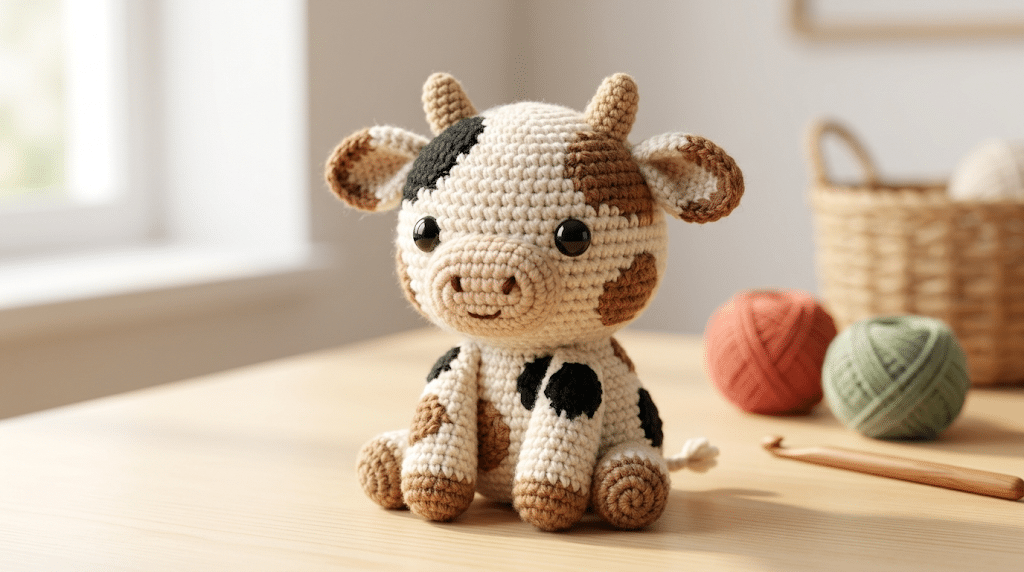
Traditional cow colors work beautifully for this project. Try cream with black spots, white with warm brown patches, or beige with chocolate-colored details.
For a softer kawaii look, pastel pink, sage green, butter yellow, and cream can create an adorable decorative cow.
The most important thing is contrast. Your spots should stand out clearly from the main body color so the finished amigurumi has that classic cow appearance.
Choose Soft Amigurumi Yarn
For a cuddly finish, Bernat Blanket yarn creates a plush texture that makes small animal projects especially huggable.
If you prefer a more defined stitch texture, Paintbox Simply DK yarn works nicely for smaller amigurumi. Lion Brand Comfy Cotton yarn can also give your cow a soft, slightly structured finish.
The yarn weight you choose affects the final size, so try to keep your yarn and hook combination consistent throughout the project.
For this project, I especially like using a Clover Amour crochet hook because the comfortable grip makes longer crochet sessions feel much easier.
Think About Your Cow’s Personality
Before you crochet the face, imagine what personality you want your cow to have.
Large safety eyes and a tiny muzzle create a classic kawaii look. Smaller eyes can make the cow appear calm and sleepy.
You can also slightly adjust the placement of the ears, horns, and eyes. Small changes can completely transform the expression.
Crochet Cow Pattern Free Materials and Simple Preparation
Before you begin your crochet cow pattern free, gather everything in one place. Having your supplies ready prevents interruptions and makes the project much more relaxing.
You don’t need a huge collection of tools. A few basic crochet supplies can take you from the first stitch to the final embroidered detail.
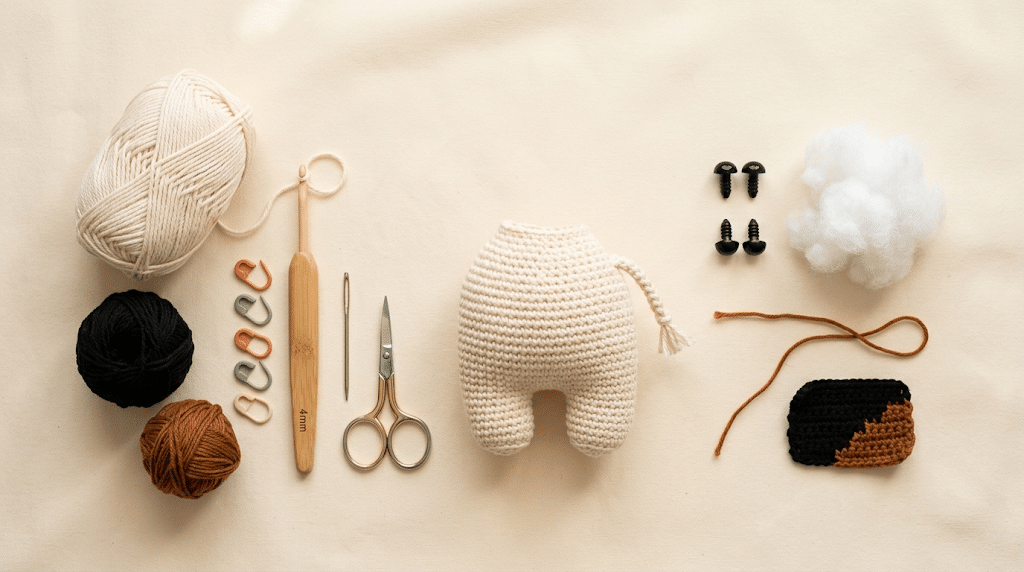
Yarn and Crochet Hook
Choose your main body color first. Cream, white, beige, or light gray all work beautifully.
Then choose one darker shade for the spots. Black creates the strongest contrast, while brown gives your cow a softer farmhouse appearance.
For smaller pieces, keep your tension even. Consistent tension helps the body and accessories maintain their intended proportions.
Safety Eyes and Stuffing
For a medium-sized amigurumi cow, 9mm safety eyes can create an especially cute expression.
You’ll also need soft stuffing to give your cow its rounded shape. Poly-fil Premium fiberfill works well because you can add it gradually as you crochet.
Avoid stuffing everything at once. Add small amounts as you work, then gently shape the body with your fingers.
Small Tools That Make Crocheting Easier
A stitch marker helps you keep track of the beginning of each round. This becomes especially useful when working continuously in amigurumi.
A yarn needle helps you sew the individual pieces together and hide your yarn tails neatly.
Keep your scissors nearby, too. A tidy workspace makes the whole project feel easier.
For an especially organized setup, keep your small pieces in a little bowl while you work. This prevents ears, legs, and horns from disappearing under your yarn.
How to Crochet the Cow Body Step by Step
Now that your supplies are ready, it’s time for the main part of the crochet cow pattern free project.
The body forms the foundation for everything else. Take your time here because even tension will help create a smooth, rounded shape.
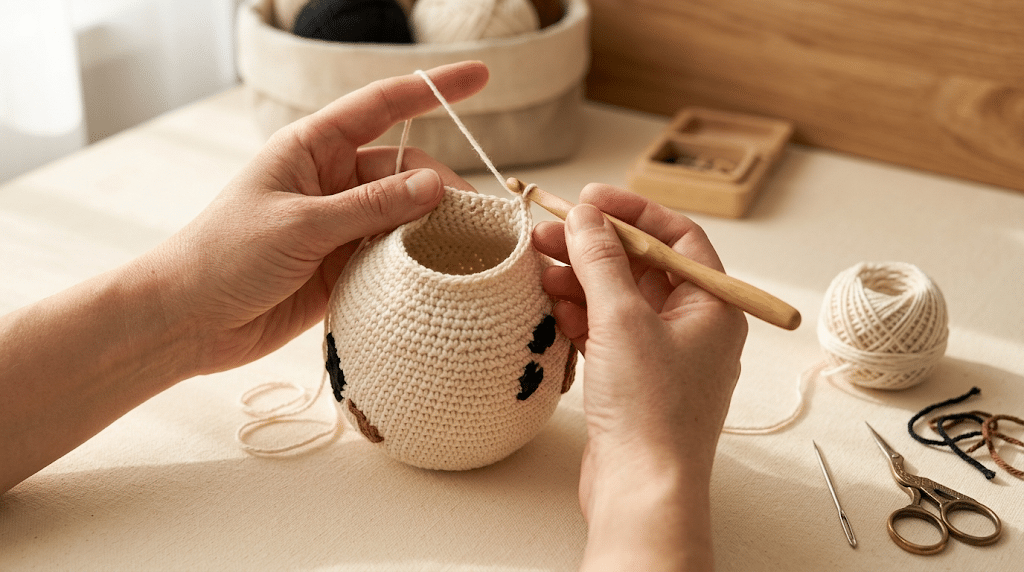
Step 1: Start the Rounded Body
Begin with a magic ring and work your stitches into the center.
Increase gradually to create a rounded base. Keep your stitches fairly snug so the stuffing won’t show through the fabric later.
As the body grows, continue working in continuous rounds. Place a stitch marker at the beginning of each round so you always know where your round starts.
The goal is a plump, rounded shape rather than a flat ball.
Step 2: Build the Cow’s Main Shape
Once you reach the widest part of the body, continue crocheting without adding more increases.
This creates the central section of your amigurumi cow. Check the shape occasionally by gently squeezing it between your fingers.
If the body looks too narrow, your tension may be tighter than expected. If it looks loose, try using a smaller hook next time.
Step 3: Add the Cow Spots
Here comes one of the most fun parts.
You can add spots while crocheting or attach small crocheted patches afterward. For beginners, adding separate spots can make the process easier because you don’t need to manage multiple yarn colors constantly.
Try creating a few uneven shapes rather than perfectly symmetrical circles. Random-looking patches often make handmade cows look more natural and charming.
Place one larger spot on the side of the body and a few smaller patches around the back.
Step 4: Shape and Close the Body
Start decreasing gradually toward the top.
Before completely closing the opening, add your fiberfill. Work slowly and add stuffing in small amounts.
The body should feel firm but still soft. Too much stuffing can stretch the stitches, while too little can leave the cow looking floppy.
Once the body has a nicely rounded shape, finish closing the opening and secure the yarn.
Make the Face Look Adorably Cow-Like
The face is where your little farm animal really comes alive.
A few small details can turn a simple crocheted shape into a recognizable cow with its own personality. Take your time with placement because facial features are surprisingly powerful.
Step 5: Crochet the Muzzle
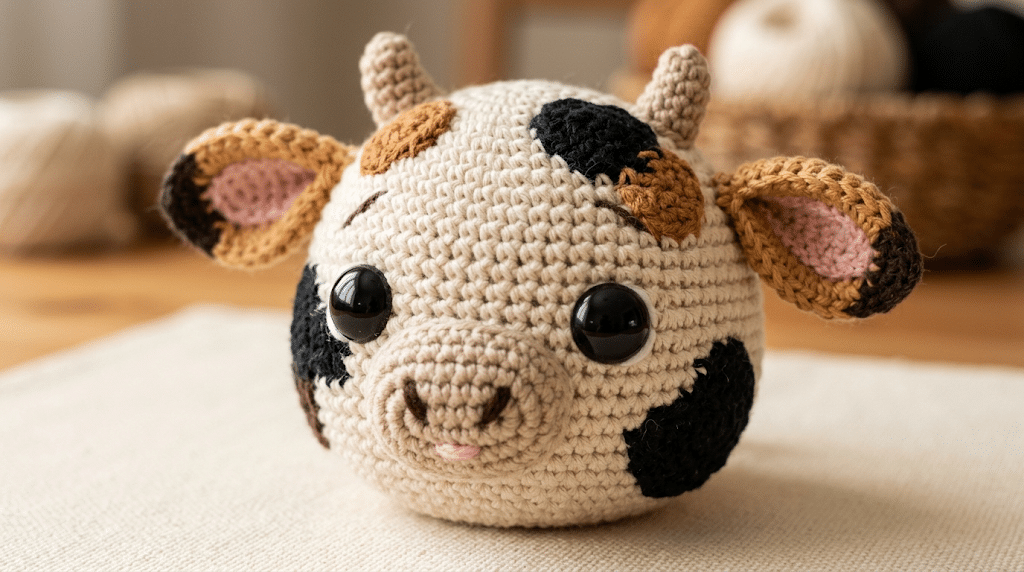
The muzzle should have a slightly lighter color than the head.
A soft pink, beige, or pale brown shade works beautifully. Crochet a small rounded piece and lightly stuff it before attaching it to the front of the face.
Keep the muzzle centered beneath the eyes.
You can embroider two tiny nostrils using dark yarn. A small curved mouth underneath can give your cow an extra kawaii expression.
Step 6: Add the Safety Eyes
Position the eyes above the muzzle.
For a classic kawaii appearance, leave enough space between the eyes so the face doesn’t look crowded.
Before securing the backs permanently, hold the eyes in position and look at the cow from several angles.
This little check can save you from having to reposition them later.
Step 7: Add the Ears and Horns
Cow ears usually have a soft, slightly curved shape.
Crochet two matching ear pieces and fold or shape them gently before sewing them onto the head. Position them slightly above and to the sides of the eyes.
Next, add two tiny horns.
Use a warm tan, brown, or cream color for the horns. Small pointed pieces work beautifully and instantly make the animal recognizable.
Sew each horn securely so they stay upright.
Crochet Cow Legs, Tail, and Cute Farm Details
Your cow already has a face and body, so now it’s time to add the little details that make the finished amigurumi feel complete.
These pieces are smaller than the body, which means you’ll want to pay attention to your tension.
Step 8: Crochet the Four Little Legs
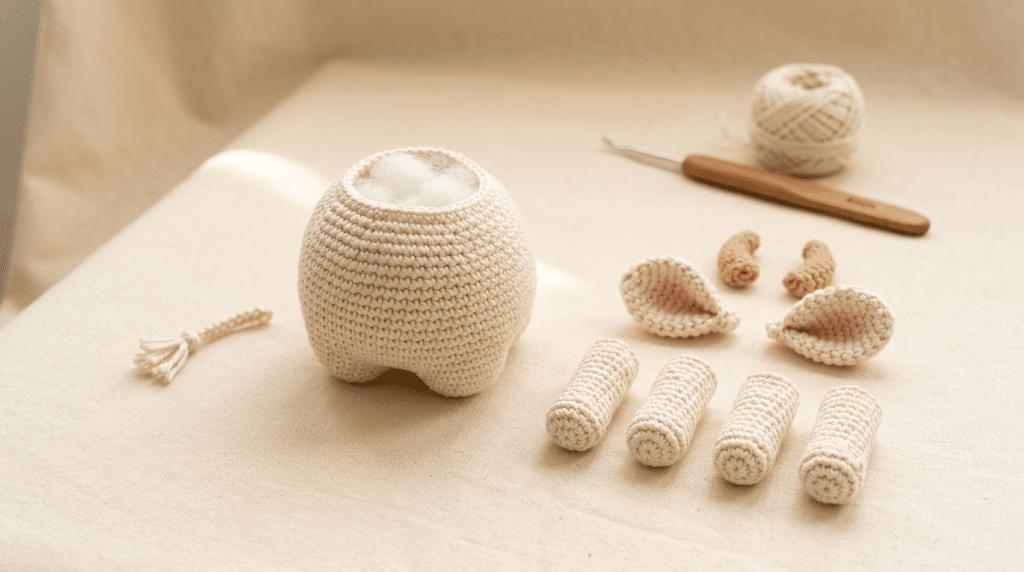
Create four matching legs using the same yarn color as the body.
Each leg should have enough stuffing to hold its shape without becoming completely rigid.
Attach the legs evenly around the lower body. Before sewing them permanently, place all four pieces against the body to check their positions.
This simple test helps keep your cow balanced.
If you want a sitting cow, position the legs slightly forward. If you want a standing cow, attach them more vertically underneath the body.
Step 9: Add the Tail
A little tail adds a surprising amount of personality.
Crochet a narrow tail and attach a small tuft at the end using darker yarn. You can make the tuft fluffy by separating the yarn strands gently with your fingers.
Sew the tail toward the back of the body.
A slightly raised tail can make the cow look playful, while a downward tail creates a calmer appearance.
Step 10: Finish With Final Details
Now inspect your cow from every side.
Check that the eyes sit evenly, the muzzle looks centered, and the ears have similar angles.
Hide every yarn tail carefully inside the body or beneath nearby stitches.
If your cow feels slightly uneven, don’t worry. Handmade amigurumi often has tiny differences that make each piece feel unique.
That handmade character is part of the charm.
Easy Tips for Better Crochet Cow Amigurumi
Once you’ve finished your first crochet cow pattern free project, a few simple techniques can make your next amigurumi even smoother.
The biggest improvement usually comes from controlling tension and shaping rather than learning complicated stitches.
Keep Your Stitches Tight
Amigurumi normally looks best with firm stitches.
Loose stitches can create visible gaps where the stuffing shows through. If that happens, try moving down a hook size or tightening your working yarn slightly.
Avoid pulling so tightly that your hook becomes difficult to insert.
Comfortable, controlled tension gives you the best balance.
Stuff Gradually
Add stuffing little by little.
Start with the bottom of the body, then work toward the top. Use your fingers or the back of your crochet hook to gently push stuffing into small spaces.
Rotate the project while stuffing so you can check the shape from every direction.
Your goal is a smooth, rounded silhouette rather than a perfectly hard body.
Check Symmetry Before Sewing
Before attaching anything permanently, use pins or loose yarn to hold the pieces temporarily.
Look at your cow from the front, side, and back.
This is especially helpful for the eyes, ears, legs, and horns.
A few extra minutes here can make your finished amigurumi look much more polished.
Fun Ways to Customize Your Crochet Cow
One reason this crochet cow pattern free project makes such a great handmade gift is that you can customize almost every detail.
You don’t have to make your cow look exactly like anyone else’s.
Create a Classic Black-and-White Cow
White or cream yarn combined with black spots creates the instantly recognizable farmhouse cow.
Use several irregular patches around the body rather than placing matching spots on both sides.
You can add a pink muzzle and cream horns for a soft traditional appearance.
Make a Brown Highland-Inspired Cow
Try warm cream with caramel or chocolate patches.
Add slightly fluffier yarn if you want extra texture. This style creates a cozy rustic appearance that looks lovely in farmhouse-inspired rooms.
You can also make the horns slightly darker for more contrast.
Try a Pastel Kawaii Cow
For something completely different, choose pastel shades.
A cream body with soft pink, peach, sage, or lavender spots can create an adorable kawaii plushie.
Keep the facial features simple and slightly oversized for an extra cute effect.
This version makes a lovely handmade birthday gift or nursery decoration.
Troubleshooting Common Amigurumi Problems
Even experienced crocheters occasionally run into a strange-looking stitch, uneven shape, or wobbly face.
Don’t immediately pull everything apart.
Most amigurumi problems have simple solutions.
Why Can I See the Stuffing?
If you can see fiberfill through the stitches, your tension may be too loose.
Try crocheting more firmly or switching to a slightly smaller hook.
You can also use smaller pieces of stuffing rather than packing the body tightly.
Why Does My Cow Look Lopsided?
Uneven increases or decreases can change the shape of your body.
Make sure you mark the beginning of each round. Count your stitches regularly when shaping important pieces.
If one leg sits higher than another, reposition the pieces before sewing them permanently.
Why Does the Face Look Different From the Example?
Facial placement creates a huge difference.
Move the eyes slightly closer together for a younger-looking expression. Move them farther apart for a softer, rounder appearance.
Try placing the pieces temporarily first.
Never underestimate the power of moving an eye by just one stitch.
How to Make Your Crochet Cow a Handmade Gift
A finished cow can become much more than a crochet project.
It can become a birthday gift, baby-shower present, nursery decoration, desk companion, or handmade keepsake.
The recipient may forget how much the materials cost. They probably won’t forget that you spent hours making something specifically for them.
Make a Personalized Cow
Choose colors that match the recipient’s personality.
A favorite color can become the spots, muzzle, or accessories.
You could also make several cows with different color combinations for a cute little collection.
Create a Mini Farm Collection
Your cow becomes even more charming when paired with other farm animals.
Try building a collection with crochet sheep, pigs, chickens, horses, or ducks.
A small handmade farm can become a beautiful nursery display or playroom decoration.
Package It With a Handmade Touch
Place your finished cow inside a simple gift box or fabric bag.
Add a small handmade note explaining that you crocheted the animal yourself.
That tiny detail makes the gift feel personal.
The finished piece doesn’t need expensive packaging. The handmade effort is already the special part.
Best Yarn and Hook Choices for Your Crochet Cow
Choosing the right materials can change both the appearance and feel of your finished amigurumi.
For a structured animal with visible stitches, DK-weight yarn works beautifully.
For a squishy plushie, thicker chenille yarn gives the cow a softer and more cuddly finish.
For Defined Stitches
Paintbox Simply DK yarn works well when you want to see the individual stitches clearly.
It also makes small details easier to control, especially when crocheting horns, ears, legs, and facial pieces.
This option works particularly well for beginners learning how amigurumi shapes come together.
For a Plush Finish
Bernat Blanket yarn creates a soft, thick texture.
It can make your cow look more like a stuffed animal than a traditional crochet piece.
Keep in mind that thicker yarn produces a larger finished animal, so your hook size and stitch tension may need adjustment.
For a Cotton-Blend Feel
Lion Brand Comfy Cotton yarn gives your project a soft texture while keeping the stitches relatively defined.
It’s a nice option when you want something between a structured amigurumi and a plush toy.
If you enjoy making small gifts, keeping several neutral yarn colors nearby can make future animal projects easier.
Frequently Asked Questions About Crochet Cow Pattern Free
How long does it take to crochet a cow?
A small crochet cow can take several hours depending on your experience, yarn thickness, and level of detail. Beginners may need more time while learning amigurumi shaping. Experienced crocheters can often work through the body and smaller pieces more quickly. Plan for several relaxed crochet sessions rather than trying to finish everything at once.
What yarn is best for a crochet cow?
The best yarn depends on the look you want. DK yarn works well for clearly defined stitches and smaller amigurumi. Chenille yarn creates a plush, cuddly finish. Cream, white, black, brown, beige, and pastel shades all work beautifully for a crochet cow.
Is this crochet cow pattern good for beginners?
Yes, this project can work well for beginners who already understand basic crochet stitches. The main challenge involves shaping rounded pieces and attaching the small parts. Work slowly, use a stitch marker, and check the placement of facial features before sewing them permanently.
What size safety eyes should I use for a crochet cow?
The best safety-eye size depends on the size of your finished cow. For a medium amigurumi, 9mm safety eyes create a cute, balanced expression. Smaller cows may look better with 6mm eyes, while larger plush cows can handle 12mm eyes.
How do I keep my crochet cow standing?
Make sure all four legs have similar proportions and attach them evenly around the lower body. Add enough stuffing to the legs and body to provide structure. Before sewing the legs permanently, place your cow on a flat surface and adjust their positions until it stands evenly.
Can I sell cows I make from this pattern?
You can generally sell physical handmade items you create from a crochet pattern, but always check the specific pattern designer’s terms if you use a particular designer’s instructions. If you sell your finished cow, consider describing it as handmade and avoid claiming that you designed the original pattern yourself.
Finish Your Crochet Cow With Confidence
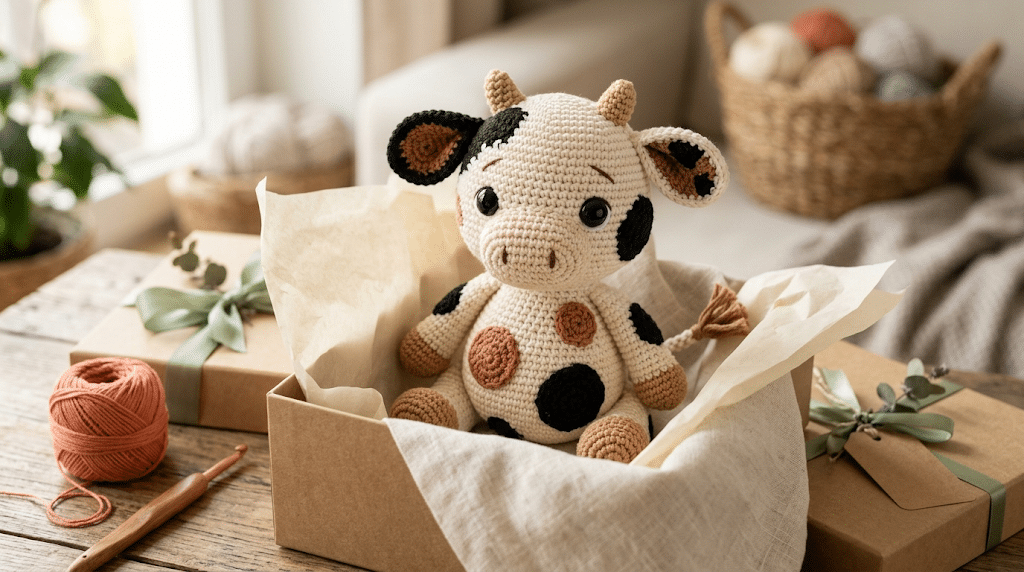
Now that you’ve worked through the body, muzzle, spots, ears, horns, legs, and finishing details, you have everything needed to create an adorable handmade farm friend.
The beauty of this crochet cow pattern free project is that your finished cow doesn’t need to look perfectly identical to another crocheter’s version. Your tension, color choices, facial placement, and little handmade quirks make it yours.
If your first attempt looks slightly different, celebrate it. Every project teaches your hands something new, and your next amigurumi will feel even easier.
Most of all, enjoy the moment when you finally add those tiny eyes and realize that a ball of yarn has turned into a little cow.
That feeling of accomplishment is one of the sweetest parts of crochet.
Save this pin to your crochet board on Pinterest so you can find this pattern anytime!
Looking for more free crochet animal patterns? Visit Yarned Animals for new amigurumi patterns, kawaii plushies and beginner crochet tutorials added every week at yarnedanimals.com