
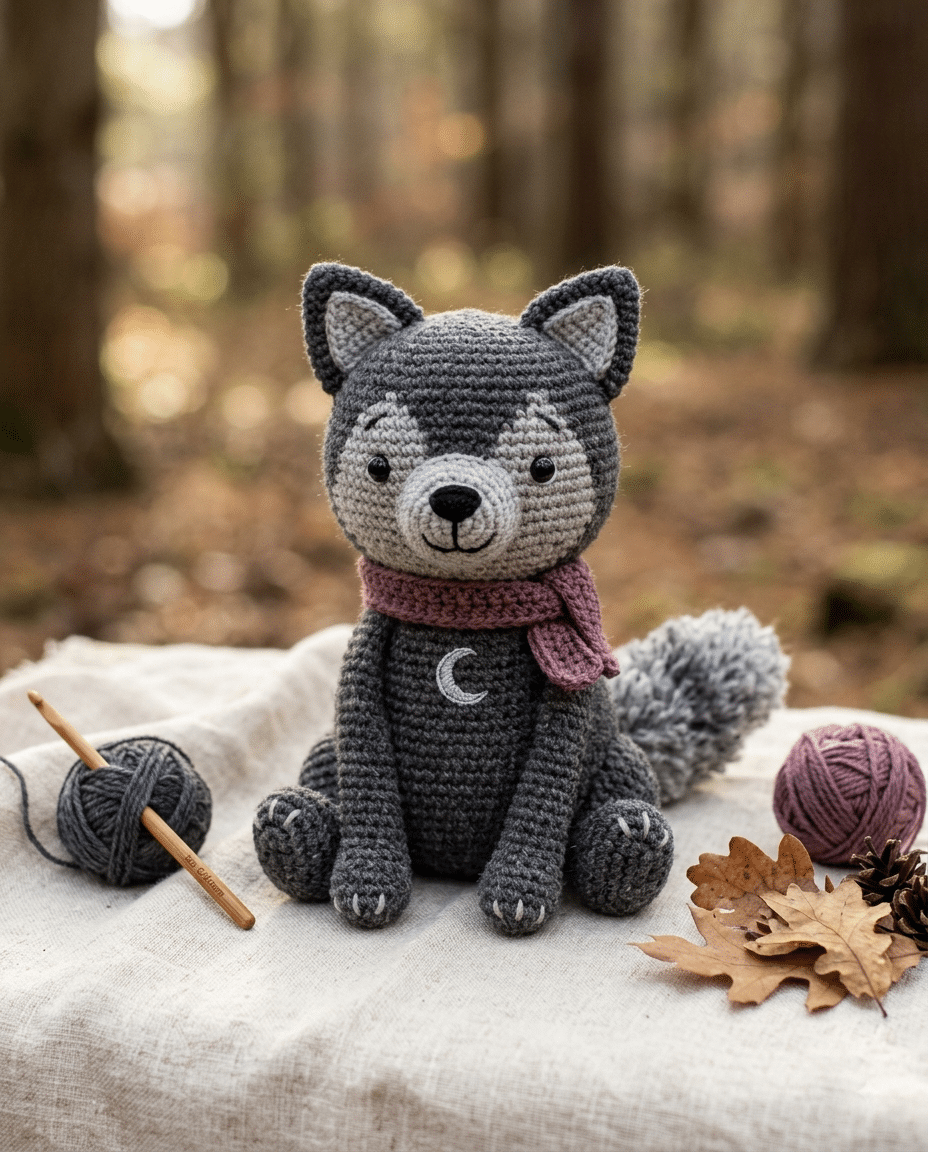
There is something magical about crocheting under a warm lamp while the world outside gets quiet. Add a little moonlight, a few dark yarn colors, and a tiny wolf with pointed ears, and suddenly your craft table feels like a woodland spellbook.
This crochet wolf pattern brings that fantasy feeling to life with a cute amigurumi design that feels mysterious without looking scary. You can make your wolf in classic gray, midnight black, smoky charcoal, or even a magical deep purple.
The design focuses on simple shapes, a chubby body, expressive eyes, pointed ears, and a fluffy-looking tail. You will also find ideas for creating a witchy color palette and adding tiny fantasy details without making the project complicated.
Grab your favorite yarn, settle into your coziest crochet spot, and let’s bring this little moonlit wolf to life.
Table of Contents
Why This Crochet Wolf Pattern Feels So Magical
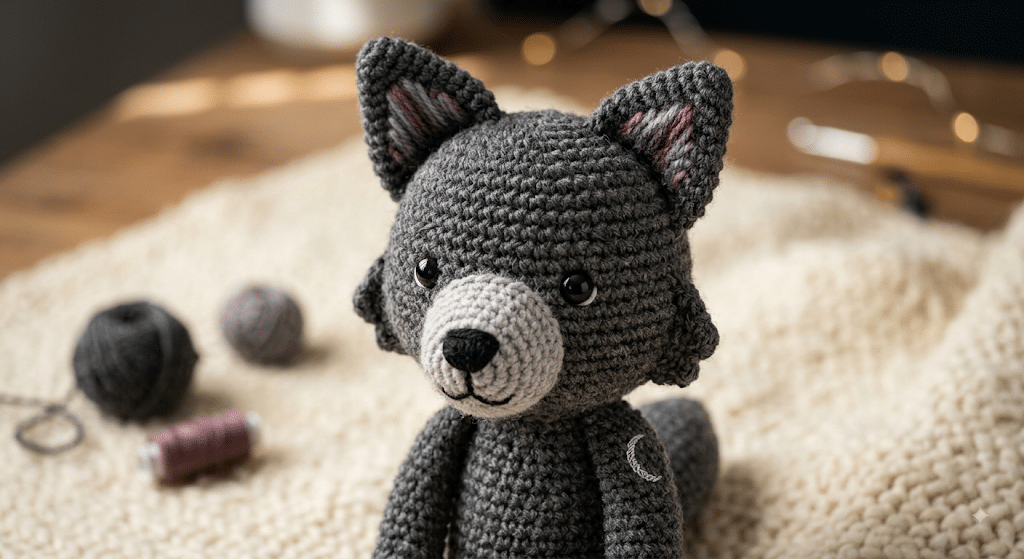
A wolf already has a naturally mysterious look. Its pointed ears, long muzzle, bushy tail, and woodland personality make it perfect for a fantasy-inspired amigurumi project.
This crochet wolf pattern takes those recognizable details and softens them into a cute plushie shape. You get the character of a wild wolf without needing complicated shaping or advanced techniques.
The finished wolf works beautifully as a shelf decoration, desk companion, handmade gift, or cozy addition to a fantasy-themed room. You can even make several wolves in different colors for your own little enchanted forest.
Choose a Moonlit Color Palette
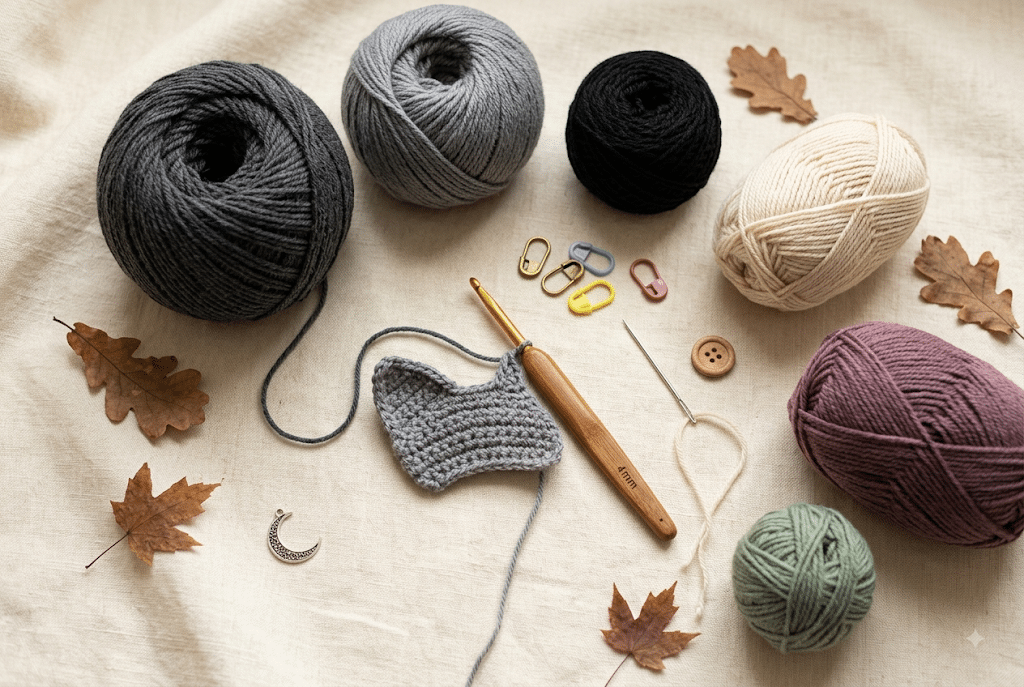
Gray and charcoal yarn create the classic wolf look. For something more mysterious, try black with a silver-gray muzzle.
A deep navy body with pale gray details gives your wolf a moonlit appearance. You could also add muted purple, dusty lavender, or forest green for a subtle witchy touch.
Avoid using too many bright colors if you want that nighttime aesthetic. Two or three shades usually create a much more polished fantasy effect.
Give Your Wolf a Cute Expression
The face makes a huge difference in amigurumi. Small safety eyes create a sweet expression, while slightly larger eyes can make your wolf look extra kawaii.
For a gentle woodland character, keep the eyes fairly close together. A tiny embroidered nose and simple mouth can add personality without making the face busy.
Try changing the expression before you attach everything permanently. A tiny adjustment can make your wolf look curious, sleepy, mischievous, or brave.
Create a Fluffy-Looking Tail
The tail is one of the most recognizable parts of a wolf. You can keep yours simple and slightly curved for an easy beginner-friendly shape.
A few rows of textured stitches can also create the illusion of fur. You do not need complicated crochet techniques to make it look fluffy.
For an especially magical finish, use a slightly fuzzy yarn for the tail tip. Keep the rest of the body smooth so the texture stays controlled.
How to Build Your Crochet Wolf Pattern Step by Step
Now that you know the look you want, it is time to build your wolf from simple crochet shapes.
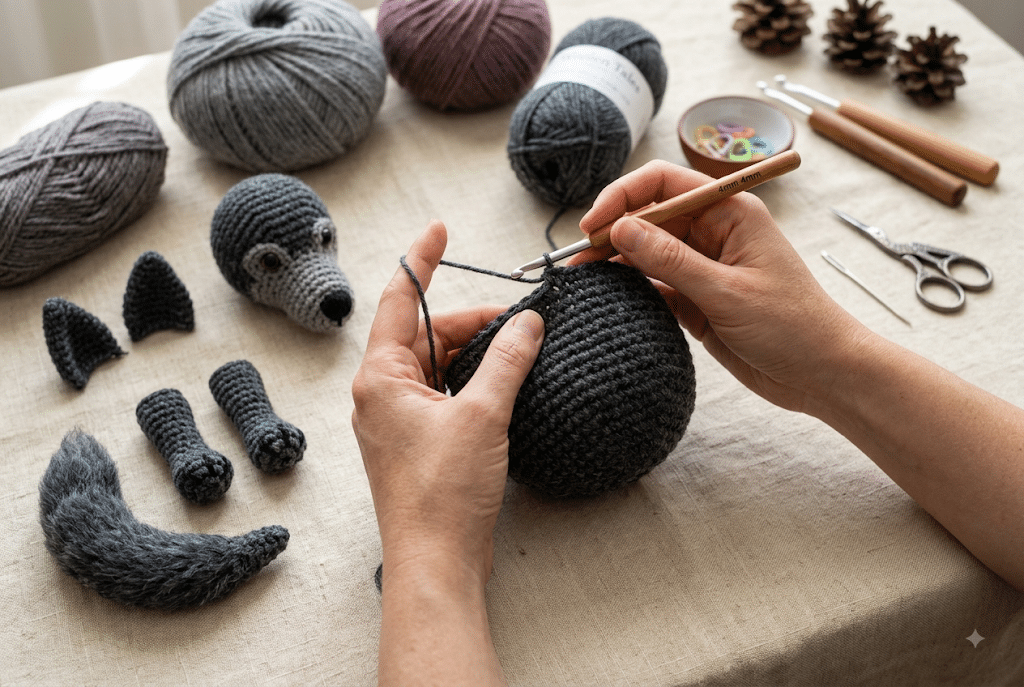
Most amigurumi animals become much easier when you think of them as separate pieces. Instead of trying to understand the entire animal at once, focus on the body, head, ears, legs, tail, and facial details.
This approach also makes your project easier to customize. You can change the proportions, colors, and expressions while keeping the basic structure intact.
Start With the Chubby Wolf Body
Begin with a rounded body shape. The goal is to create a slightly plump silhouette rather than a long, realistic wolf.
A compact body gives your amigurumi that adorable collectible look. Keep your stitches firm so the stuffing stays inside and does not show through.
As the body grows, pause occasionally and check the shape. Your wolf should feel nicely rounded without becoming too narrow at either end.
Before closing the body, add your stuffing gradually. Small amounts help you control the shape better than adding everything at once.
Shape the Wolf Head
The head should have a slightly wider upper area and a softer muzzle. You can create this effect by building a rounded amigurumi shape and adding a separate muzzle section.
Do not overstuff the head. A little softness helps create the friendly expression that makes this fantasy wolf feel cuddly.
If you want a more realistic wolf silhouette, make the muzzle slightly longer. For a kawaii wolf, keep it short and rounded.
Before attaching the head, place it against the body and check the angle. A slightly tilted head can make your wolf look curious and playful.
Add Pointed Wolf Ears
The ears are the feature that instantly tells everyone you made a wolf.
Make two triangular ear pieces with a slightly wider base. Keep them firm enough to hold their shape, but avoid stuffing them heavily.
For a witchy aesthetic, use dark gray on the outside and a lighter gray or muted purple inside the ears. This small color detail can make the character feel much more finished.
Attach the ears near the top of the head. Angle them slightly outward for a relaxed look or upward for an alert woodland wolf.
The Best Details for a Fantasy Amigurumi Wolf
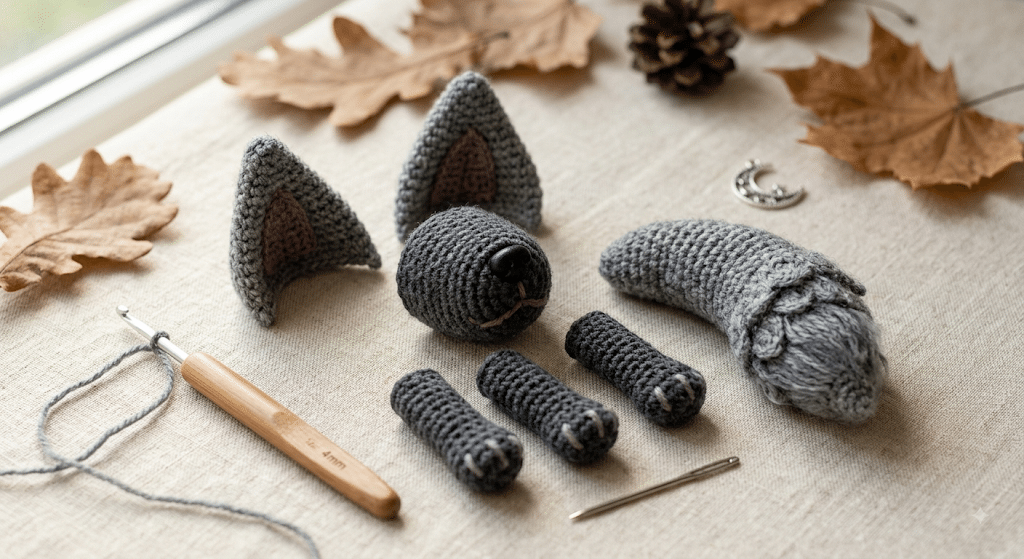
Here is the fun part: turning a simple animal into a tiny fantasy character.
You do not need a complicated costume or dozens of accessories. A few carefully chosen details can completely change the personality of your wolf.
The trick is to keep the base animal simple. Then add one or two magical features that support your theme.
Try a Witchy Moonlight Theme
A dark gray wolf with silver details instantly creates a nighttime mood.
You can embroider a tiny crescent moon onto the body or add a small moon-shaped patch near one shoulder. Keep the design simple so the wolf remains soft and cuddly.
A deep plum scarf can also work beautifully. Choose a muted shade rather than a bright purple for a more sophisticated witchy appearance.
For a subtle magical effect, add a few tiny embroidered stars around the tail or body. Three or four small stars are enough.
Add a Tiny Witchy Accessory
A miniature pointed hat can turn your wolf into a little forest witch.
You can crochet a simple cone-shaped hat separately and place it loosely on the wolf’s head. This makes the accessory removable and lets you use the same wolf for different themes.
A tiny scarf, cape, or collar can work just as well. You could even make several accessories for different seasons.
For an autumn version, use burnt orange and brown. For winter, choose cream and deep blue. For a moonlit version, stick with charcoal, silver, and muted purple.
Choose the Right Safety Eyes
The eyes should match the scale of your wolf. 6mm safety eyes can work well for a smaller design, while a larger wolf may look better with 9mm safety eyes.
Place the eyes before attaching them permanently whenever possible. This lets you experiment with spacing and expression.
I like to make a few tiny paper eye markers first. You can move them around the face until your wolf looks exactly right.
For a mysterious nighttime character, black eyes create a classic look. Dark brown or very deep gray can give you a softer expression.
Yarn and Tools That Make Amigurumi Easier
Before you get too excited about those pointy ears, let’s talk about materials.
The right yarn can make your stitches easier to see and your finished wolf much more consistent. Beginners usually have an easier time with smooth yarn rather than highly textured fibers.
For a classic fantasy wolf, a medium-weight smooth yarn works beautifully. You can mix gray, charcoal, cream, black, and a small accent color.
For a soft everyday option, I often like Paintbox Simply DK because it gives you plenty of color choices for mixing shades. Paintbox Simply DK yarn details
Pick Yarn That Shows Your Stitches
Smooth yarn makes it easier to see individual stitches. That matters when you are still learning how tightly to crochet.
Paintbox Simply DK, Lion Brand Comfy Cotton yarn, and Red Heart Soft yarn can all work nicely for a smooth amigurumi look.
For an extra cuddly wolf, Bernat Blanket yarn creates a plush texture. The larger stitches can be harder to see, though, so beginners may prefer smooth yarn for their first attempt.
The most important thing is consistency. Try to keep your tension steady from the first stitch to the last.
Use a Comfortable Crochet Hook
A comfortable hook makes a long crochet session much more pleasant.
For smaller amigurumi, choose the hook size that creates firm stitches with your chosen yarn. You want the stuffing to stay hidden between the stitches.
I often reach for a Clover Amour crochet hook when I am working through small animal pieces. The shaped grip feels comfortable during longer sessions. Clover Amour crochet hook details
Keep Your Filling Under Control
Poly-fil Premium fiberfill works well for amigurumi because you can add it gradually.
Start with small pieces and push them gently into the corners of the body. Avoid packing the stuffing too tightly.
Overstuffing can stretch your stitches and change the shape of your wolf. A softly firm body usually gives you the cutest result.
Keep extra stuffing nearby while assembling the head and body. You can always add more before closing the final opening.
Assembly Tips That Make Your Wolf Look Professional
Next up, it is time to turn those individual crochet pieces into one little woodland creature.
Assembly can feel intimidating at first. Take your time and use temporary markers before sewing anything permanently.
This is where your wolf’s personality really appears.
Position the Head Before Sewing
Place the finished head against the body and move it slightly from side to side.
A perfectly centered head creates a classic stuffed-animal appearance. A slightly tilted head feels more playful and expressive.
Once you find your favorite position, mark the attachment points with stitch markers.
Then sew around the connection slowly. Take several passes through the fabric for a secure finish.
Attach the Legs Evenly
Place the front legs first. Then check the spacing before adding the back legs.
Your wolf should sit comfortably without leaning too far to one side.
If you want a sitting wolf, place the back legs slightly forward. For a standing-style wolf, position them farther toward the sides.
Do not worry if your first placement looks imperfect. Crochet gives you plenty of flexibility during assembly.
Finish With the Tail
The tail can change the entire silhouette.
Attach it slightly above the bottom of the body if you want a fluffy, lifted appearance. Place it lower for a relaxed sitting wolf.
Angle the tail toward one side for a playful pose.
You can also sew the tail tip slightly upward. That tiny adjustment can make your wolf look alert and energetic.
Easy Ways to Make Your Wolf Look More Magical
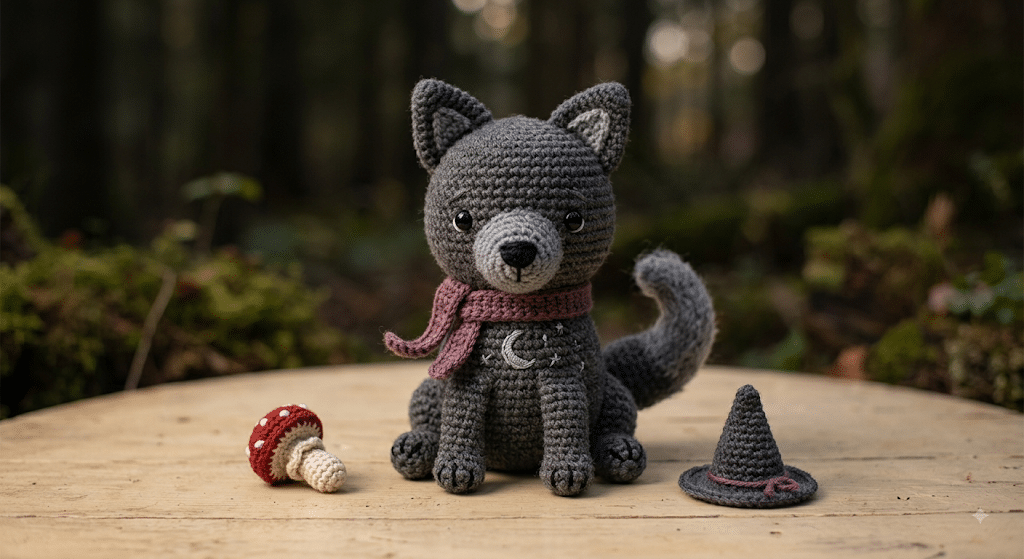
Once the main construction is finished, you can start adding personality.
This is where your creativity gets to take over. Think about the story behind your wolf.
Is it a guardian of an enchanted forest? A moonlit familiar? A tiny witch’s companion? Or simply a sleepy woodland creature?
Create a Moon Guardian Wolf
For a moon guardian theme, use charcoal gray as your main color.
Add pale gray or cream around the muzzle and chest. Then embroider a tiny crescent moon onto the chest.
A few silver-colored embroidered stars can make the design feel magical without becoming overly decorative.
Keep the eyes dark and the expression gentle. This combination creates a calm nighttime character.
Make a Forest Witch Wolf
For a forest witch wolf, combine dark gray with muted green and deep plum.
Add a tiny removable scarf or pointed hat. You could also make a miniature crochet mushroom to place beside your wolf.
This theme works especially well for autumn displays. Place your finished amigurumi beside pumpkins, dried leaves, or other handmade crochet decorations.
Just keep decorative accessories away from young children if the finished piece is intended as a toy.
Turn It Into a Fantasy Familiar
A fantasy familiar can have almost any color combination.
Try smoky gray with lavender ears. Or make a midnight-black wolf with a cream muzzle and purple scarf.
You could even create a magical silver wolf using light gray yarn and dark embroidered details.
The best part is that there is no single correct fantasy wolf. Your color choices can tell the character’s story.
Common Crochet Wolf Pattern Mistakes to Avoid
Even simple amigurumi can have a few tricky moments.
The good news is that most problems come from tension, stuffing, or placement. You can fix many of them before finishing the project.
Watch Your Crochet Tension
Loose stitches can create visible gaps between your stitches.
That becomes especially noticeable after you add stuffing.
Try crocheting a little tighter if you can do so comfortably. If tight stitches hurt your hands, choose a slightly smaller hook instead of forcing your grip.
Your goal is firm fabric, not painful crochet.
Do Not Overstuff the Face
A heavily stuffed head can make your wolf look more like a round bear.
Add filling gradually and shape the muzzle with your fingers.
Look at the head from the front and side before closing it. This simple check can help you create a much more wolf-like profile.
Check Symmetry Before Sewing
Always check both ears and legs before sewing them permanently.
Place the pieces on the body first. Step back and look at your wolf from several angles.
If one ear sits higher, move it before attaching it. Small adjustments can make a surprisingly big difference.
Gift Ideas for Your Finished Wolf Amigurumi
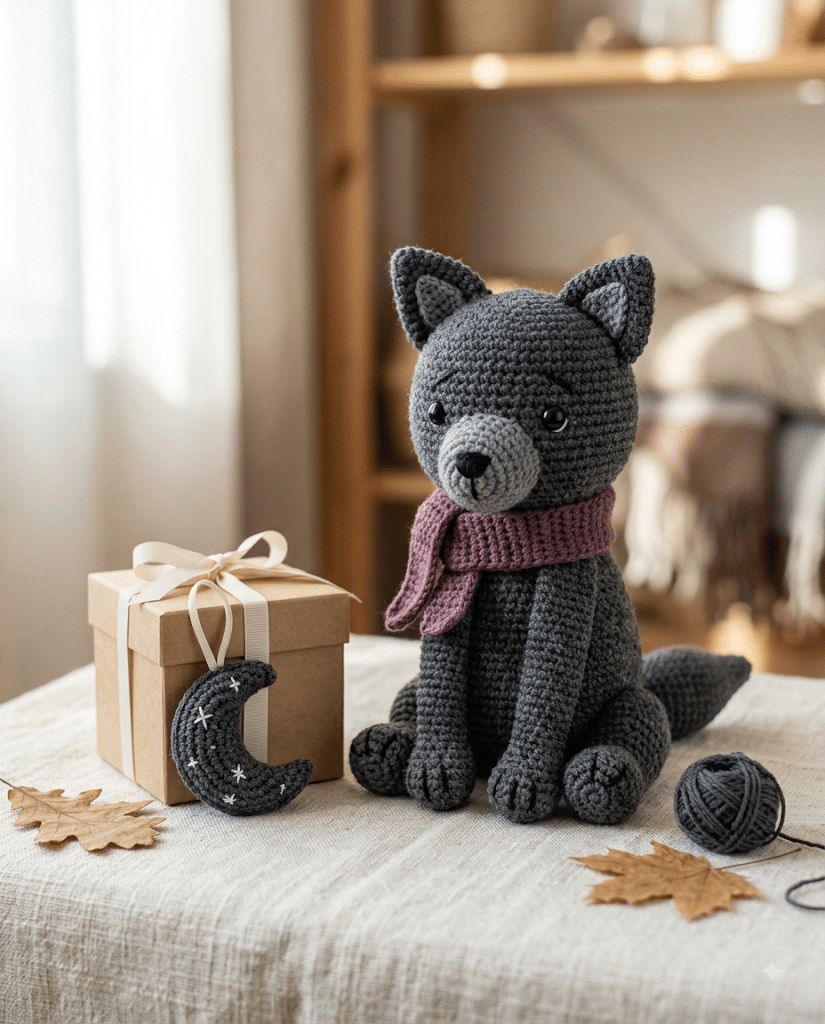
A handmade wolf makes a lovely gift because it feels personal.
You can create one for someone who loves fantasy books, woodland creatures, Halloween decor, or cute handmade plushies.
The nighttime theme also makes this project especially fun for autumn and winter gifting.
Make a Matching Wolf Pair
Create two wolves with different colors.
One could use charcoal and silver. The other could use cream and smoky gray.
Add matching scarves or tiny accessories so they feel like a pair.
This makes a sweet handmade gift for sisters, best friends, couples, or anyone who loves matching collectibles.
Create a Fantasy Gift Set
Pair your wolf with a small crochet mushroom, moon, star, or leaf.
You can place everything inside a simple gift box with tissue paper.
A handwritten note can make the gift feel even more special. Something as simple as “Your new woodland companion” adds a lovely finishing touch.
Make a Personalized Wolf
Choose colors based on the recipient’s favorite shades.
You could also embroider a tiny initial onto the scarf or add a small color detail that reminds you of them.
For an extra personal touch, make the wolf’s expression match their personality. A sleepy wolf feels cozy, while wide eyes create a playful character.
Frequently Asked Questions About Crochet Wolf Pattern
How long does it take to crochet a wolf?
A small wolf amigurumi can take several hours depending on your crochet speed and experience. Beginners may need more time for shaping and assembly.
Plan extra time for sewing the pieces together and adding facial details. The construction usually feels much easier once you become comfortable with basic amigurumi shapes.
What yarn is best for wolf amigurumi?
Smooth acrylic or cotton-blend yarn works well for wolf amigurumi because it makes your stitches easy to see.
Gray, charcoal, black, cream, and muted purple create beautiful fantasy color palettes. If you want a plush texture, chenille yarn can work too, although beginners may find smooth yarn easier to control.
Is a crochet wolf pattern good for beginners?
Yes, especially when the wolf uses simple rounded shapes.
You will practice several useful amigurumi skills, including crocheting in the round, shaping stuffed pieces, attaching parts, and creating facial details.
If you are new to amigurumi, focus on making clean, consistent stitches rather than making your wolf perfect.
What size safety eyes should I use for a wolf?
The best size depends on the finished size of your wolf.
For a small amigurumi, 6mm safety eyes can create a sweet expression. Medium designs often suit 9mm eyes, while larger wolves may need 12mm eyes.
Always check the scale before permanently attaching the eyes.
Can I sell wolves I make from this pattern?
If you are using a pattern with specific designer terms, check the designer’s individual usage policy before selling finished pieces.
For your own original design, you control the terms you choose for finished products. Never claim someone else’s written pattern or photography as your own.
How can I make my wolf look more realistic?
Use a longer muzzle, narrower ears, a larger tail, and darker facial details.
You can also add subtle color changes around the cheeks, chest, and tail.
For a kawaii fantasy wolf, keep the body rounded and the facial features larger. For a realistic-inspired wolf, use more angular shaping and restrained colors.
Final Thoughts on Your Crochet Wolf Pattern
There is something incredibly satisfying about watching a few simple crochet shapes become a tiny character with its own personality.
Your crochet wolf pattern can be classic and cozy, dark and mysterious, or completely magical. The pointed ears, expressive face, fluffy tail, and moonlit colors give you plenty of room to make the design your own.
Most importantly, do not worry about making every stitch perfect. Handmade pieces have personality because you made them by hand.
Whether you create a moon guardian, forest witch familiar, or cuddly woodland wolf, you will finish with something that feels uniquely yours.
Save this pin to your crochet board on Pinterest so you can find this pattern anytime!
Looking for more free crochet animal patterns? Visit Yarned Animals for new amigurumi patterns, kawaii plushies and beginner crochet tutorials added every week at yarnedanimals.com