
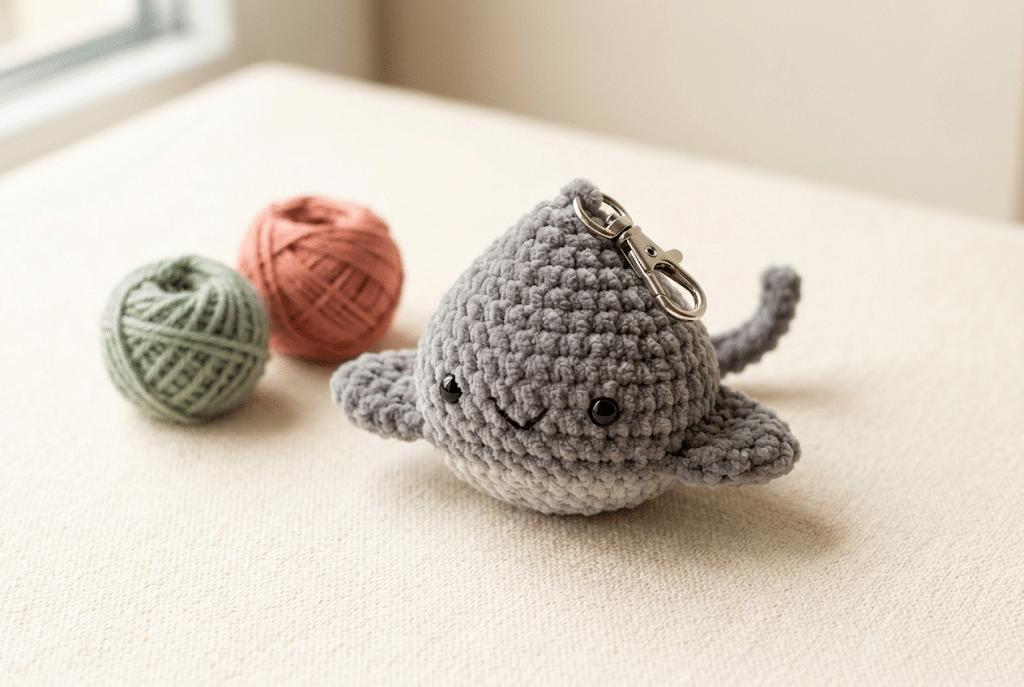
There is something extra special about a tiny crochet creature hanging from your favorite bag. It feels personal, handmade, and just a little bit magical. This crochet stingray bag charm turns simple yarn into an adorable mini ocean friend that you can carry everywhere.
This little stingray has a soft rounded body, wide wings, a sweet face, and a tiny tail. The finished charm works beautifully on backpacks, purses, pencil cases, zipper pulls, and even keys.
You only need basic amigurumi skills to make it. The pattern uses simple stitches, easy increases, and decreases, so you can work through each part without feeling overwhelmed.
Before you grab your hook, let’s get everything ready for your tiny underwater friend.
Table of Contents
Why This Crochet Stingray Bag Charm Is So Adorable
A stingray makes such a fun amigurumi project because its shape looks complicated at first. Once you break it into simple pieces, though, the construction becomes surprisingly manageable.
The body starts with a rounded center and grows outward into soft, wing-like points. A few carefully placed increases create the broad silhouette that makes a stingray instantly recognizable.
The best part is how quickly this project comes together. Because the finished animal stays small, you can enjoy the satisfaction of completing something without committing to a large plushie.
A tiny ocean friend for your bag
This mini stingray crochet design makes a sweet accessory for everyday bags. Choose gray yarn for a realistic ocean-inspired look, or use pastel colors for a more kawaii finish.
You could even make several stingrays in different colors. A lavender stingray, mint stingray, blush pink stingray, and soft blue stingray would look adorable together.
Great for beginners
If you have already made a simple amigurumi ball, you have many of the skills needed for this project.
You will practice single crochet, increases, decreases, working in rounds, stuffing, and simple sewing.
The body also gives you useful practice with shaping. That makes this project helpful if you want to become more confident with small crochet animals.
A sweet handmade gift idea
Tiny crochet accessories make wonderful gifts because they feel thoughtful without requiring a huge project.
Attach your finished stingray to a school bag, tote, purse, or gift package. You could also make matching charms for friends who love marine animals.
For a particularly soft result, I like using chenille-style yarn for plush projects. Bernat Blanket yarn creates a cozy texture and is especially lovely when you want a squishy finish.
Now that you know why this tiny ray is worth making, let’s gather your supplies.
Materials and Simple Crochet Skills You Need
You do not need a large collection of supplies for this stingray bag charm crochet project.
A small amount of yarn goes a long way because the finished animal is intentionally compact. This also makes the pattern perfect for using leftover yarn from previous amigurumi projects.
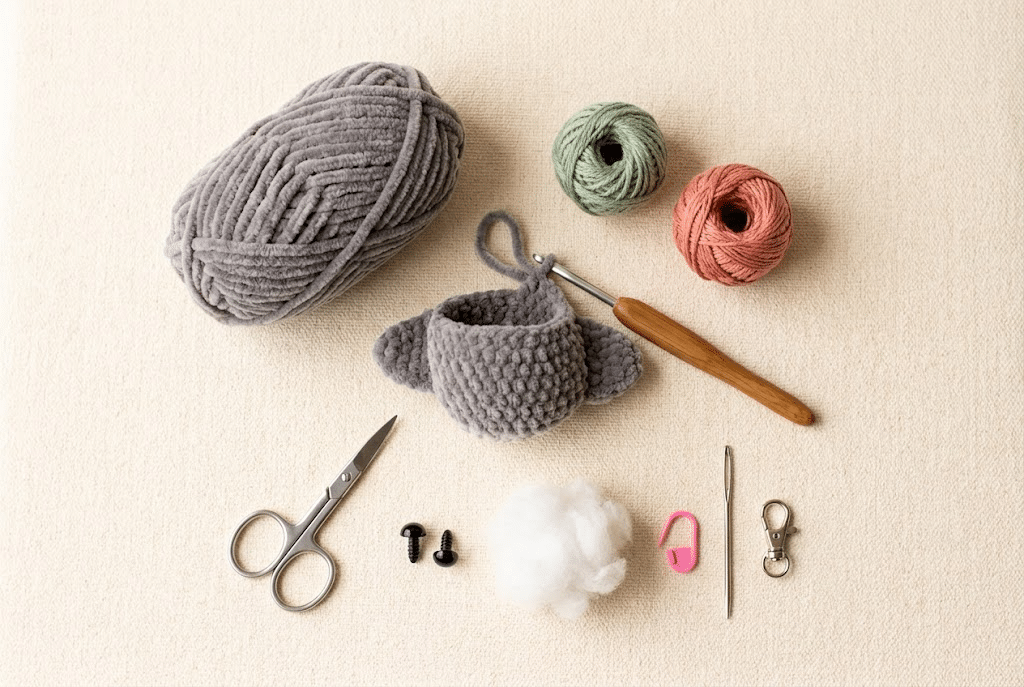
Yarn and hook
Choose a smooth worsted or DK-weight yarn for a more defined stitch texture.
For a softer, plushier charm, choose a chenille yarn. Gray, charcoal, taupe, cream, or dusty blue all work beautifully.
Use a crochet hook that creates firm stitches without large gaps. A smaller hook than the yarn label suggests often works well for amigurumi.
If you prefer an ergonomic handle for small crochet projects, a Clover Amour crochet hook can feel comfortable during repeated single crochet stitches. Clover describes its Amour range as having soft, nonslip grips designed for comfortable handling.
Other supplies
For this pattern, gather:
- DK or worsted-weight yarn
- Small amount of contrasting yarn
- Crochet hook suited to your yarn
- 6mm safety eyes
- Poly-fil Premium fiberfill
- Stitch marker
- Yarn needle
- Scissors
- Small metal bag charm clasp or keychain ring
For very young children, skip safety eyes and embroider the eyes securely instead.
Crochet abbreviations
This pattern uses standard US crochet terms:
- MR = magic ring
- SC = single crochet
- INC = increase
- DEC = decrease
- SL ST = slip stitch
- CH = chain
- ST = stitch
- FO = fasten off
You will work most of the body in continuous rounds. Place a stitch marker into the first stitch of each round to make your progress easier to follow.
Ready to move on? Here is the fun part: making your little stingray.
Crochet Stingray Bag Charm Pattern: 8 Easy Steps
This pattern creates a small, rounded stingray with a wide body, pointed side fins, a narrow tail, and a cute face.
The finished charm measures approximately 3 to 4 inches wide, depending on your yarn and hook size.
Keep your tension firm throughout the body. A tight fabric helps the stuffing stay inside and gives the charm a neat shape.
Step 1: Create the magic ring
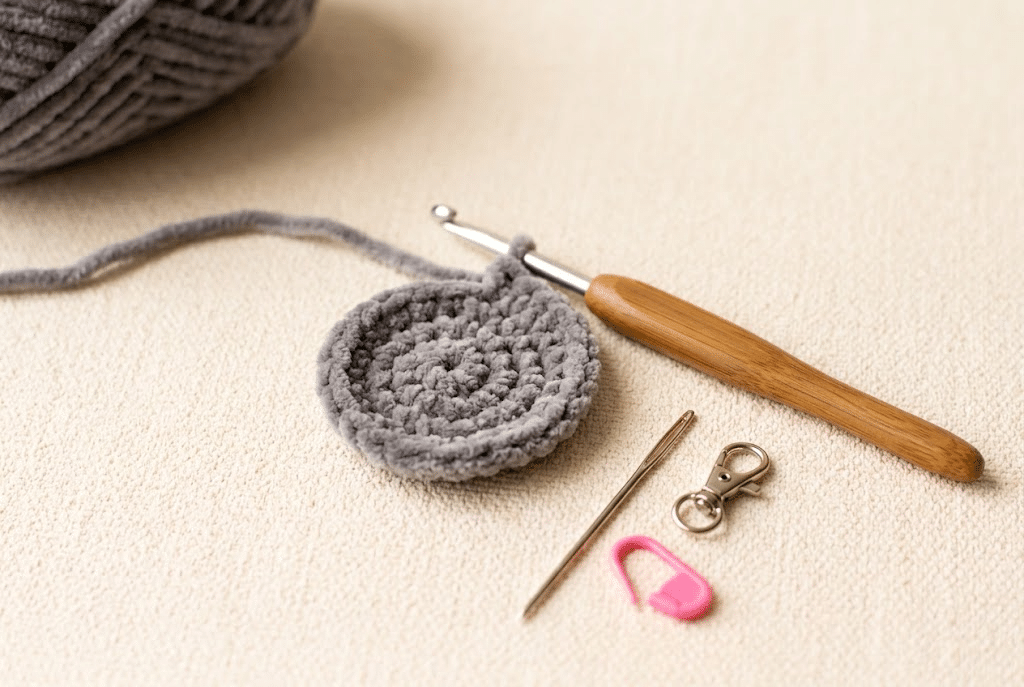
Start with your main stingray color.
Make a magic ring and crochet 6 SC into the ring.
Pull the center closed.
Round 1: 6 SC
Round 2: INC around — 12 SC
Round 3: SC, INC around — 18 SC
Round 4: 2 SC, INC around — 24 SC
Place your stitch marker into the first stitch.
You should now have a small circular center. Do not worry if it looks like a little crochet disc rather than a stingray yet.
The broad shape develops as you add the next rounds.
Step 2: Build the rounded body
Continue working in continuous rounds.
Round 5: 3 SC, INC around — 30 SC
Round 6: SC around — 30 SC
Round 7: 4 SC, INC around — 36 SC
Round 8: SC around — 36 SC
At this point, your crochet piece should look like a small flattened oval.
The stingray needs more width than height, so avoid overstuffing the body.
Step 3: Shape the stingray wings
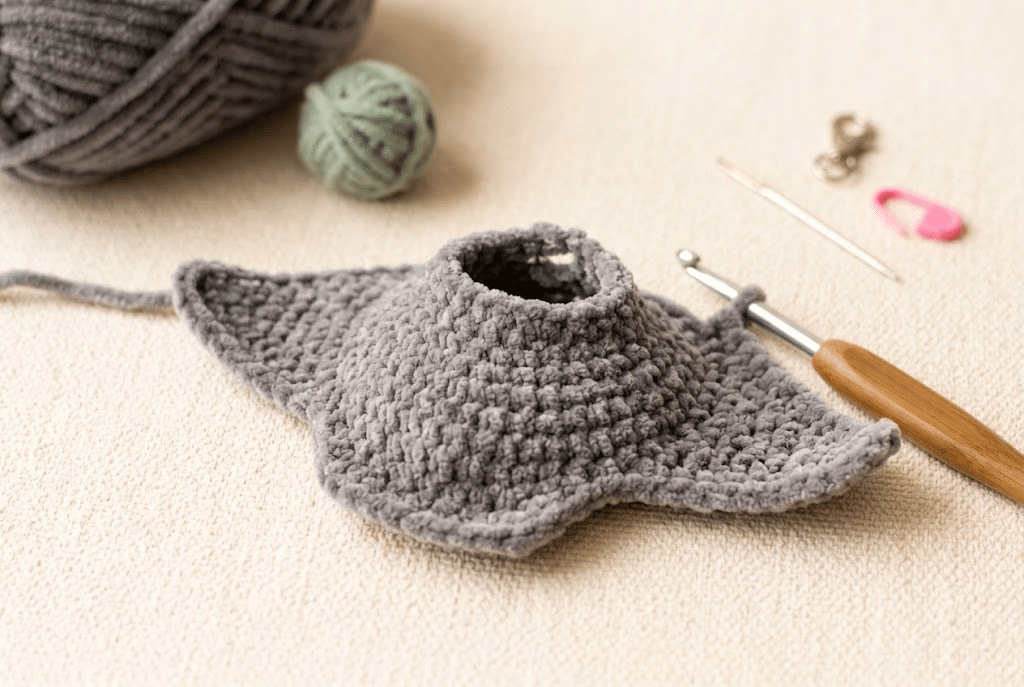
Now you will begin creating the distinctive side wings.
Continue around the body with single crochet.
Round 9: SC around — 36 SC
Round 10: SC around — 36 SC
For the next round, create two wider points by placing controlled increases near opposite sides.
Round 11: 8 SC, INC, 9 SC, INC, 17 SC — 38 SC
Round 12: SC around — 38 SC
The exact appearance can vary slightly depending on your tension.
The important goal is a wide, gently pointed body rather than a perfect circle.
Step 4: Add the face and begin closing
Now it is time to make your stingray look alive.
Position the face toward the front center of the body.
Place two 6mm safety eyes with a few stitches between them. Check the placement before securing the backs.
For a kawaii expression, place the eyes slightly lower than you might expect. This gives the stingray a cute, gentle appearance.
Continue crocheting.
Round 13: 8 SC, DEC around — approximately 34 SC
Round 14: SC around
Round 15: 3 SC, DEC around
Do not close the opening yet.
Add a small amount of stuffing as you work.
Step 5: Stuff the mini amigurumi
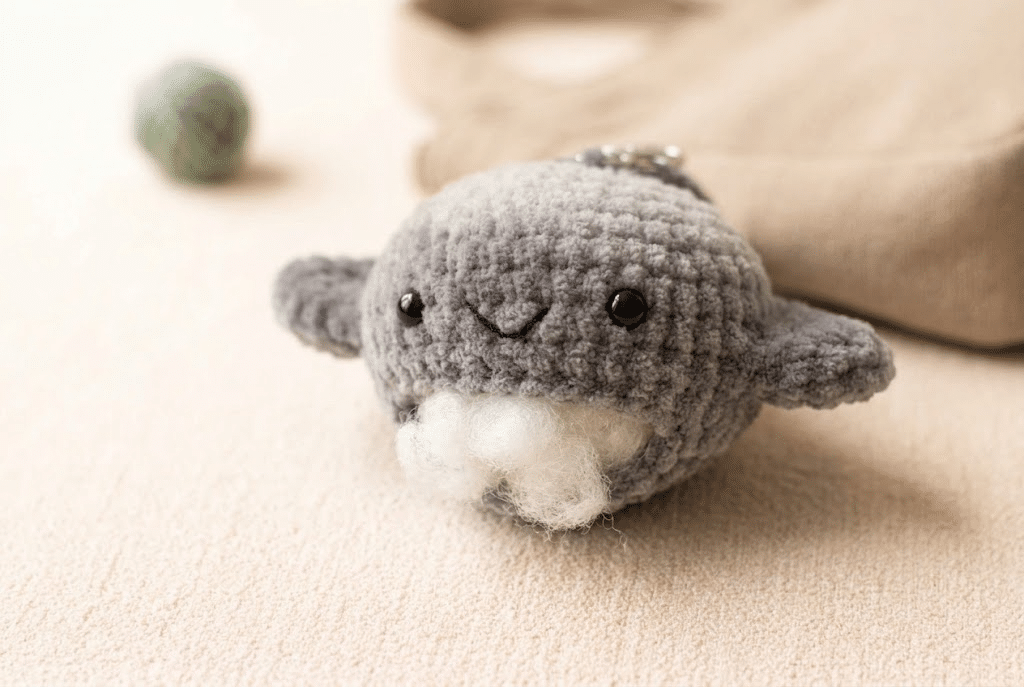
Before closing the body, gently add fiberfill.
Use small pieces rather than one large handful. This lets you control the shape much more easily.
Start around the outer edges and gradually fill the center.
The body should feel soft and lightly squishy, not rock hard.
If you pack it too firmly, the wings may lose their flat shape.
Step 6: Finish the body
Continue decreasing around the opening.
Next round: 2 SC, DEC around
Next round: SC, DEC around
Add a little more stuffing if needed.
Finish with decreases until only a small opening remains.
Cut the yarn, leaving a long tail.
Thread the tail through your yarn needle and weave it through the remaining stitches.
Pull gently to close the opening.
Secure the yarn and hide the remaining tail inside the body.
Your stingray should now have a soft, rounded center with wide sides.
Step 7: Crochet the tail and attach it
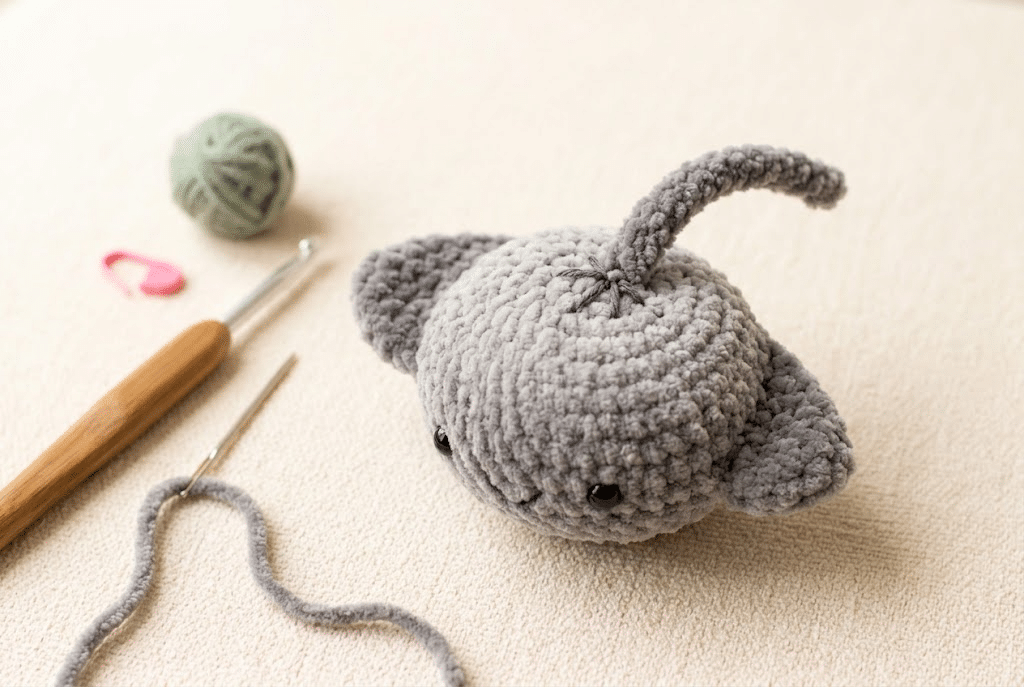
The tail gives your little ocean animal its unmistakable stingray silhouette.
Using your main color, chain approximately 10–14 stitches, depending on how long you want the tail.
Work one SC into each chain back toward the body.
Fasten off and leave a sewing tail.
Place the tail at the back center of the stingray.
Use your yarn needle to sew it securely to the body.
Take several passes through the base.
A bag charm receives more movement than a shelf decoration, so secure attachment matters.
For a curled tail, gently twist the finished chain before sewing it down.
Step 8: Add the bag charm hardware
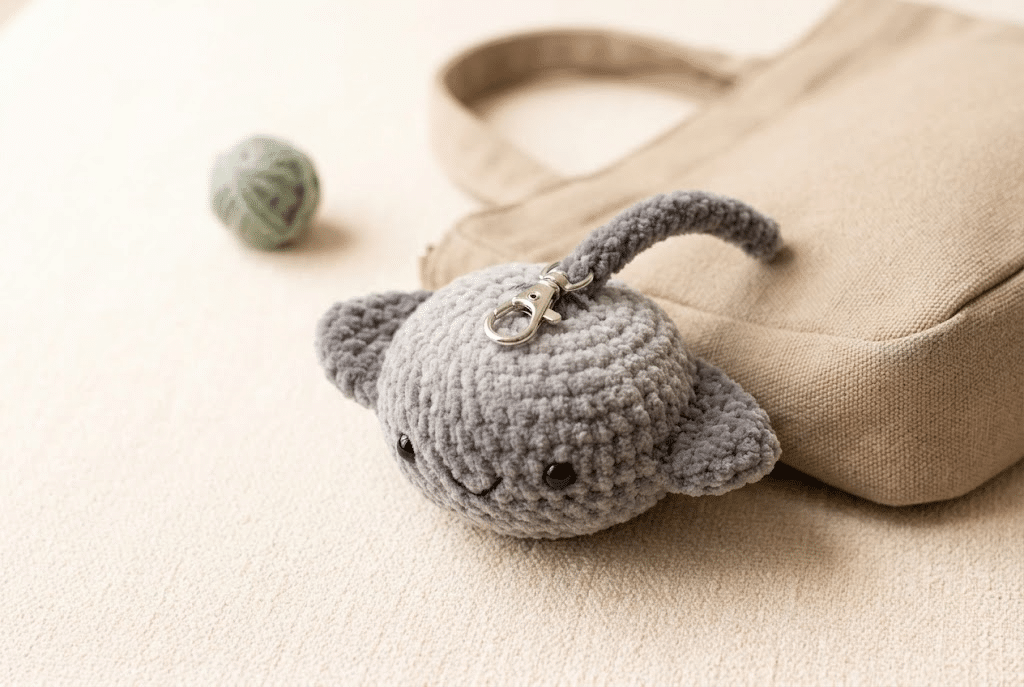
Your tiny stingray is almost finished.
Take a small metal clasp or keychain ring and attach it securely to the top center of the body.
You can sew a small yarn loop onto the stingray first.
For extra strength, pass the yarn through the body several times before knotting it securely.
Trim and hide the ends.
Give the charm a gentle tug before attaching it to your bag.
If the hardware stays firmly attached, your little stingray is ready for its first adventure.
And just like that, your crochet stingray bag charm is finished!
How to Make Your Stingray Look More Kawaii
The basic pattern creates a cute marine animal, but small details can completely change its personality.
This is where you can have fun experimenting with color, facial expressions, and tiny decorations.
Try different color combinations
A realistic stingray could use gray, charcoal, sandy beige, or muted brown.
For a kawaii style, try:
- Soft lavender with cream details
- Sage green with blush pink
- Dusty blue with white
- Warm beige with coral accents
- Light gray with pastel pink
You can also use a contrasting color underneath the body.
A cream belly against a gray top creates a lovely two-tone look.
Change the facial expression
The eyes make a huge difference.
Place them closer together for a baby-like expression.
Move them slightly farther apart for a more playful look.
You can also embroider tiny eyelashes, rosy cheeks, or a little smiling mouth.
For safety, embroidered details work especially well when you plan to give the charm to a young child.
Add tiny embroidered details
A few stitches can create surprisingly charming features.
Try adding:
- Tiny cheek marks
- A small smile
- Decorative dots
- Mini stars
- Small embroidered waves
- A contrasting belly
Keep the details simple.
Because this is a small accessory, too many decorations can make the finished piece look crowded.
Helpful Tips for a Strong Stingray Bag Charm
A bag charm needs slightly different finishing than a plushie that stays on a shelf.
Your stingray will move around, rub against fabric, and occasionally get pulled.
That makes strong stitching especially important.
Keep your amigurumi stitches tight
Loose stitches create visible gaps.
They can also allow stuffing to peek through.
If you notice large spaces between your stitches, try moving down one hook size.
The goal is a firm fabric with enough flexibility to shape the body.
Reinforce the tail
The tail experiences plenty of movement.
Sew it onto the body using several passes.
Instead of sewing through one stitch, spread your stitches across the tail base.
This distributes the tension and makes the attachment stronger.
Secure the bag loop carefully
The hanging loop should connect to the strongest part of the body.
The top center works well.
You can also sew the loop through the body and knot it internally before hiding the yarn tail.
Do not rely on a single loose stitch.
Use sturdy stuffing
Poly-fil Premium fiberfill works well for small amigurumi because you can add tiny amounts and shape them gradually.
When stuffing, use the tip of your crochet hook or yarn needle carefully to push fiberfill into small spaces.
Avoid packing the wings heavily.
A flatter wing gives the stingray its recognizable silhouette.
Creative Ways to Use Your Mini Stingray
Once you finish one stingray, you may immediately want to make another.
That is one reason tiny amigurumi accessories are so addictive.
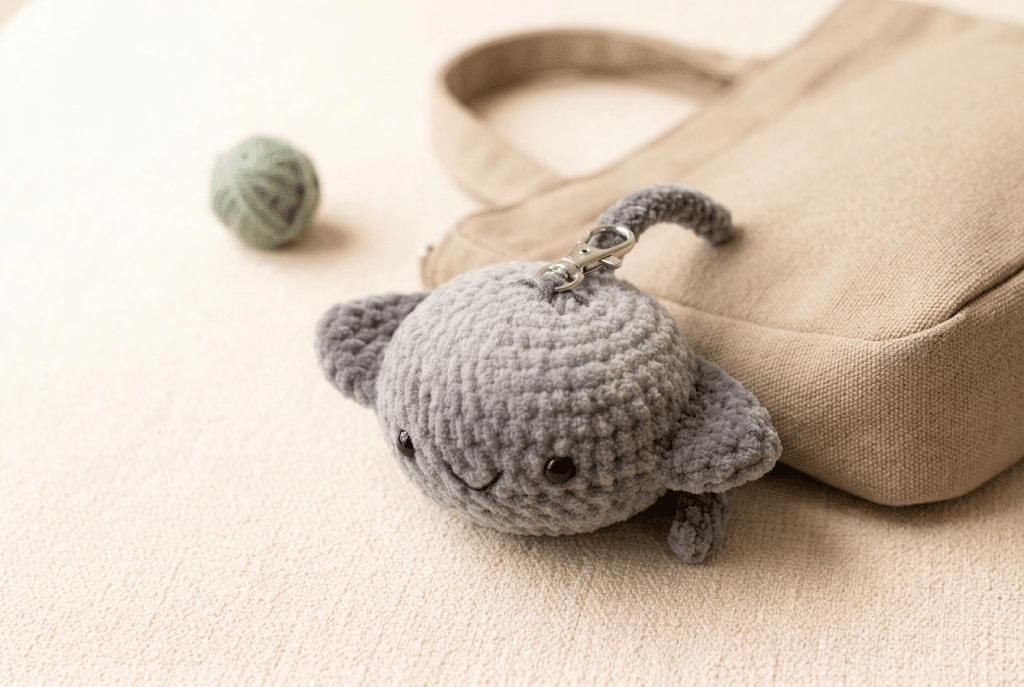
Turn it into a backpack charm
Attach the stingray to a backpack zipper for an instant handmade decoration.
A pastel stingray looks especially cute against a neutral canvas backpack.
Make a matching ocean collection
Create a tiny marine-themed set with different animals.
You could pair your stingray with a whale, turtle, fish, octopus, or seahorse.
Keep the colors coordinated so the collection feels like one little underwater world.
Make handmade gifts
This project works beautifully as a small handmade present.
Add a stingray charm to a birthday gift, crochet basket, handmade card, or gift bag.
You can even make one for each friend using their favorite color.
Decorate pencil cases and pouches
A crochet zipper charm adds personality to everyday accessories.
Attach your stingray to a pencil pouch, makeup bag, crochet project case, or travel organizer.
The tiny size makes it easy to move between accessories whenever you feel like changing your style.
Troubleshooting Your Crochet Stingray
Small amigurumi can sometimes behave differently from larger crochet projects.
A tiny change in tension can affect the final shape.
Here are a few easy fixes.
Why does my stingray look too round?
Your body may need slightly more width.
Check your increases and make sure you worked them in the correct positions.
You can also gently flatten the finished body with your fingers.
The stingray should look wider than it is tall.
Why are my wings curling?
Curling often happens when your tension becomes too tight.
Try relaxing your stitches during the shaping rounds.
You can also gently smooth the wings after stuffing.
Avoid overstuffing the outer edges.
Why can I see the stuffing?
Your stitches may be too loose for your yarn and hook combination.
Try using a smaller hook.
You can also add the stuffing more gradually.
The goal is to fill the body without stretching the crochet fabric.
Why does my tail look too thick?
A tail made with bulky yarn can become surprisingly chunky.
Use a thinner yarn for the tail if you want a delicate look.
You can also reduce the number of chain stitches.
A shorter tail gives your stingray a rounder kawaii appearance.
Frequently Asked Questions About Crochet Stingray Bag Charm
How long does it take to crochet a stingray bag charm?
Most beginners can finish this small project in around one to two hours, depending on crochet speed and yarn thickness. Experienced crocheters may finish it faster. The sewing and finishing stages take a little extra time, especially when attaching the tail and bag hardware securely.
What yarn is best for a stingray bag charm?
Smooth DK or worsted-weight yarn works well for a defined crochet stingray bag charm. Chenille yarn creates a softer plush effect, while cotton blends show your stitches more clearly. Choose yarn that creates firm stitches with your selected hook so the stuffing does not show.
Is this stingray pattern good for beginners?
Yes. This project uses basic amigurumi techniques, including single crochet, increases, decreases, stuffing, and simple sewing. If you can crochet in the round and understand basic shaping, you can work through the eight steps. Beginners should use a stitch marker and check their stitch count regularly.
What size safety eyes should I use for a mini stingray?
6mm safety eyes work nicely for a small stingray charm. They create a cute proportion without overwhelming the face. If your finished stingray is larger because you used thicker yarn, you can choose a larger eye size. Always check the proportions before permanently securing the eyes.
Can I sell stingray charms made from this pattern?
You can generally sell physical items you personally crochet from a pattern, but you should always check the specific designer’s terms before doing so. Do not sell, copy, or redistribute the written pattern itself. For commercial sales, also consider product safety, especially when using small safety eyes.
How do I make my crochet stingray bag charm stronger?
Use tight stitches, secure the tail with multiple sewing passes, and reinforce the hanging loop through the body. Check every attachment before using the charm. If you expect heavy daily use, embroidered eyes and a sturdy metal clasp can also make the finished accessory more practical.
Final Thoughts on This Crochet Stingray Bag Charm
Making a tiny ocean creature from a simple strand of yarn feels incredibly rewarding. Your crochet stingray bag charm may be small, but it has plenty of personality.
You practiced shaping, increases, decreases, stuffing, sewing, and finishing while creating something you can actually use every day.
The finished stingray also makes a sweet handmade gift. Imagine making a whole family of colorful little rays for friends, sisters, kids, or fellow crochet lovers.
Most of all, enjoy the process.
Your first stingray does not need to look perfect. Every stitch gives you more confidence, and your next one will feel even easier.
Save this pin to your crochet board on Pinterest so you can find this pattern anytime!
Looking for more free crochet animal patterns? Visit Yarned Animals for new amigurumi patterns, kawaii plushies and beginner crochet tutorials added every week at yarnedanimals.com