
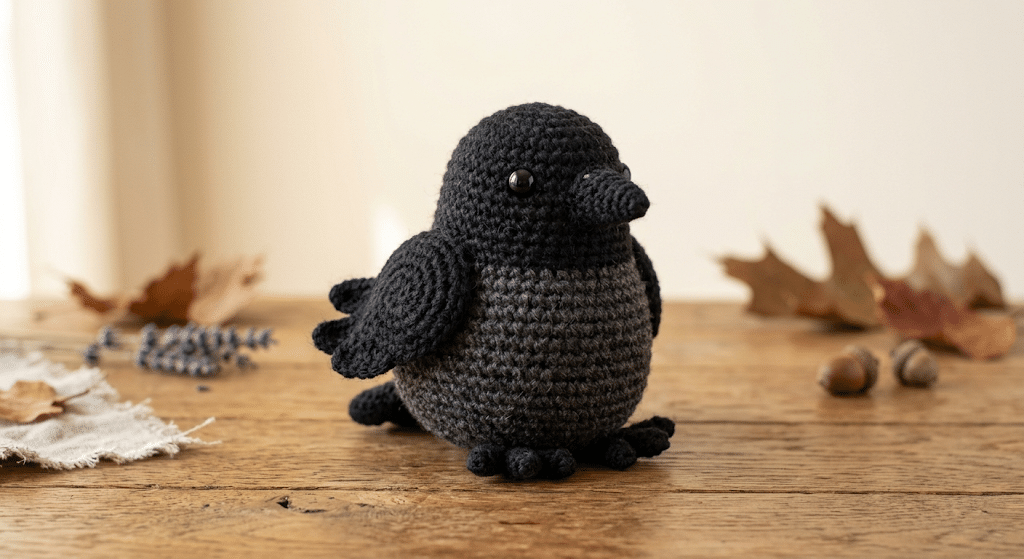
There is something wonderfully mysterious about a little black crow sitting quietly on a bookshelf, especially when it is made from soft yarn. This crochet crow pattern turns that moody woodland feeling into a cute handmade amigurumi you can hold, gift, or display. Its rounded body, tiny wings, pointed beak, and glossy eyes create just the right mix of spooky and sweet.
This beginner-friendly project uses simple amigurumi techniques and clear shaping. You will learn how to build the body, create the wings and beak, add the details, and give your crow that charming dark cottagecore personality. If you enjoy woodland animals, gothic decor, Halloween crafts, or kawaii crochet, this little bird makes a lovely project.
Now, gather your yarn and hook, and let’s bring this tiny feathered friend to life.
Table of Contents
Why This Crochet Crow Pattern Is Perfect for Cottagecore Lovers
Crows have such a beautiful place in cottagecore and woodland-inspired decor. Their dark feathers, clever personalities, and mysterious silhouettes make them especially appealing for handmade projects.
A crocheted crow also gives you plenty of creative freedom. You can make yours completely black for a classic look, or add subtle gray details for a softer woodland style.
A tiny woodland friend with personality
The magic happens when simple shapes come together. A round body creates the cuddly foundation, while small wings and a pointed beak instantly make your project recognizable.
You can also personalize the expression. Place the safety eyes slightly closer together for a sweet kawaii look, or position them a little farther apart for a more curious expression.
Small changes can completely transform an amigurumi animal.
A great project for beginners
You do not need complicated colorwork or advanced shaping for this project. The design focuses on familiar amigurumi techniques that you can practice as you go.
If you already know how to make a magic ring, single crochet, increases, decreases, and basic sewing, you have most of the skills needed.
For beginners, remember this: your stitches do not need to look perfect immediately. Consistent tension comes naturally with practice.
Perfect for gifts and seasonal decor
A handmade crow makes a surprisingly versatile gift. You can give one to a bird lover, gothic decor fan, crochet collector, or someone who enjoys unusual woodland animals.
It also works beautifully as a Halloween decoration. Place several tiny crochet birds around pumpkins, books, candles, or autumn leaves for a cozy display.
Next up, let’s choose the materials that will give your crow its best shape.
Crochet Crow Pattern Materials and Yarn Choices
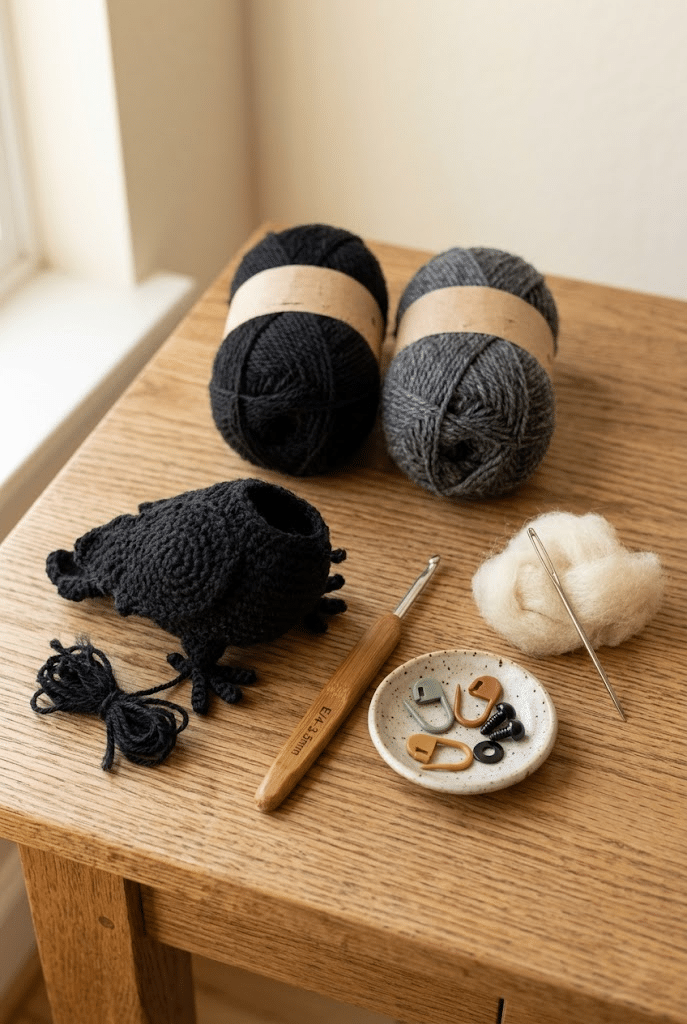
The right materials can make your amigurumi much easier to crochet. For a crow, you want yarn that creates clean stitches while keeping the finished bird soft and structured.
For the main body, choose a smooth black or charcoal yarn. DK-weight yarn works especially well for a small amigurumi because it creates a neat fabric without making the bird too bulky.
Choosing the best yarn
Paintbox Simply DK yarn works beautifully when you want clear stitch definition and a lightweight finished crow. The yarn comes in a wide range of shades, so you can experiment with charcoal, gray, or even deep purple accents.
You can also choose another smooth yarn from the recommended list. Red Heart Soft yarn creates a traditional crocheted finish, while Lion Brand Comfy Cotton yarn gives your bird a softer cotton feel.
If you prefer a very squishy crow, Bernat Blanket yarn creates a much larger and fluffier version. Keep in mind that the finished size will increase when you use bulky yarn.
Choosing your crochet hook
Use a hook that creates tight, firm stitches. Amigurumi looks best when the stuffing does not show through the crochet fabric.
A Clover Amour crochet hook feels comfortable during repetitive rounds. Its ergonomic grip can also make longer crochet sessions easier on your hands.
Your exact hook size depends on your yarn. The goal matters more than the number printed on the hook: your stitches should stay tight enough to hold the stuffing inside.
Small tools that make a big difference
You will also want stitch markers, a yarn needle set, stuffing, and safety eyes.
Poly-fil Premium fiberfill works well for shaping the body because you can add it gradually and control how firm your crow becomes.
For the eyes, 6mm or 9mm safety eyes work nicely on a small bird. A larger version can use 12mm safety eyes.
Ready to move on? Let’s start building the crow from the inside out.
Crochet Crow Pattern: 10 Easy Steps to Shape Your Bird
This is the fun part. You will build your crow in separate pieces before assembling everything into one charming little bird.
Keep your stitches tight and check the shape regularly. Amigurumi rewards patience more than speed.
Step 1: Start the rounded body
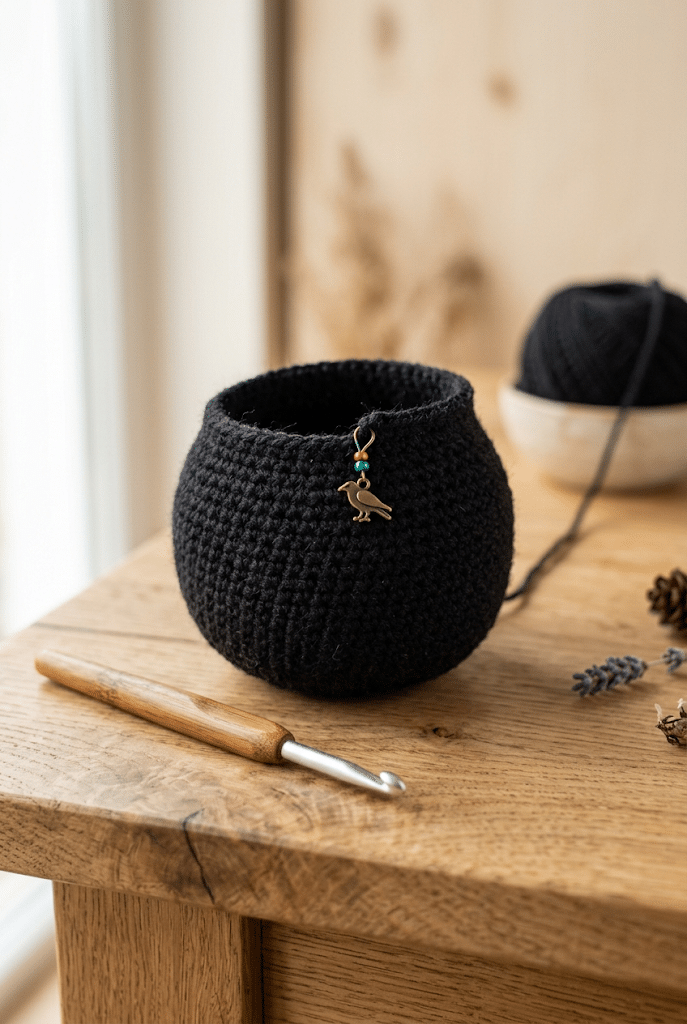
Begin with a magic ring and work single crochet stitches into the center. Continue working in continuous rounds so you create a smooth, seamless shape.
Use a stitch marker to identify the beginning of each round. This small habit can prevent confusion when you reach the later shaping stages.
Gradually increase your stitches until the body reaches its widest point.
Tip: Count your stitches at the end of each round. A missing stitch can change the shape noticeably.
Step 2: Build the crow’s head
Continue shaping upward to create the head and upper body. Think of this section as a rounded egg rather than a perfect sphere.
Keep your tension consistent. If your stitches become loose, the finished crow may look uneven.
You can gently squeeze the piece while crocheting to check its proportions.
Step 3: Add the safety eyes
Choose your eye placement before closing the head.
For a kawaii expression, place the eyes fairly close together and slightly above the center of the face. For a more realistic bird-like appearance, position them farther apart.
Push the safety eyes securely through the stitches before finishing the body.
Always check that the backs are firmly attached.
Step 4: Shape the lower body
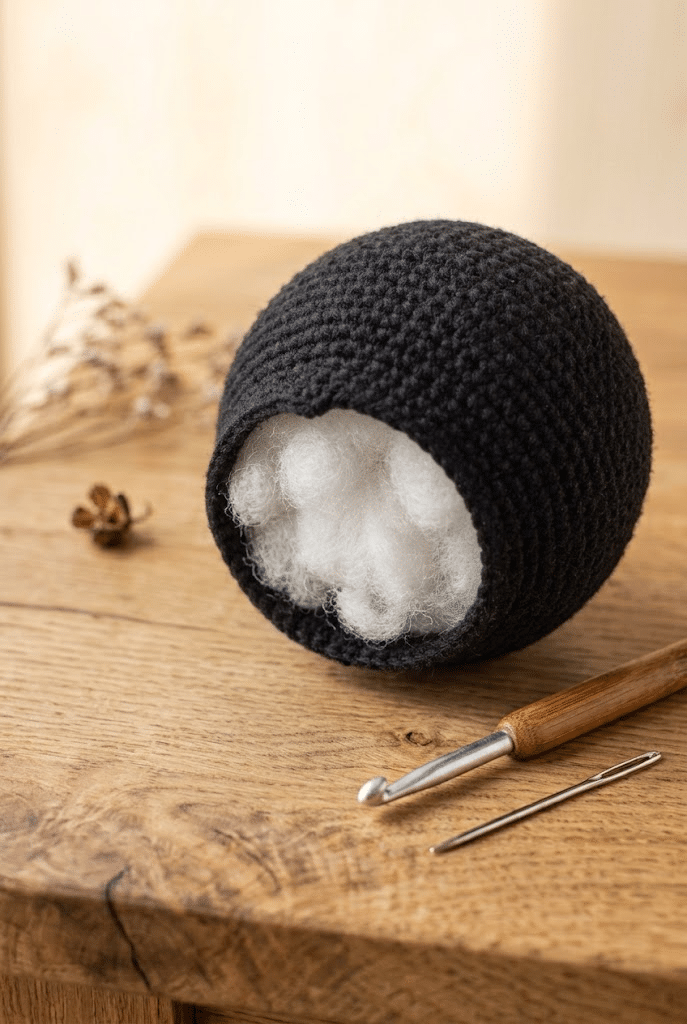
Now begin decreasing the stitches gradually. This creates the rounded belly and narrows the lower section.
Avoid making your decreases all in one area. Spread them evenly around the round for a smooth shape.
Start adding small amounts of stuffing as the opening becomes smaller.
Step 5: Stuff the crow evenly
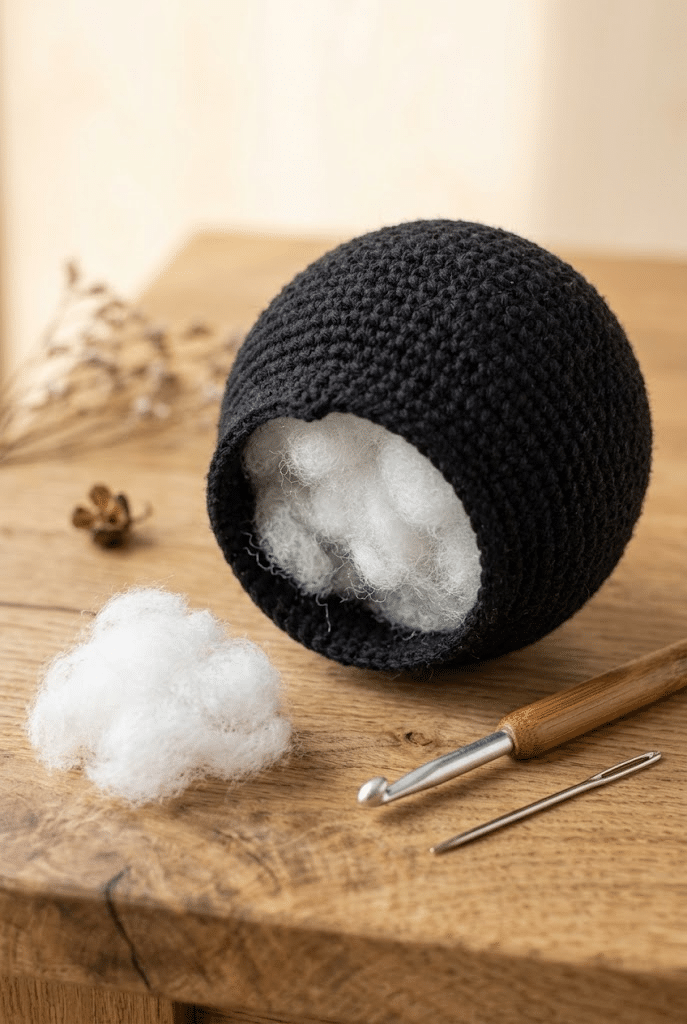
Add fiberfill little by little instead of pushing one large piece inside.
Start at the bottom and work upward. Use your fingers or the blunt end of your crochet hook to gently distribute the stuffing.
The body should feel firm but still soft and squeezable.
Do not overstuff it. Too much pressure can stretch the stitches and create visible gaps.
Step 6: Crochet the wings
Create two small flat or slightly rounded wing pieces using black yarn.
The wings do not need complicated shaping. A simple oval or tapered piece can look surprisingly bird-like once attached.
Keep both wings similar in size. Place them on opposite sides of the body and use pins before sewing.
Pin first, sew second.
This lets you move the wings until you love their position.
Step 7: Create the pointed beak
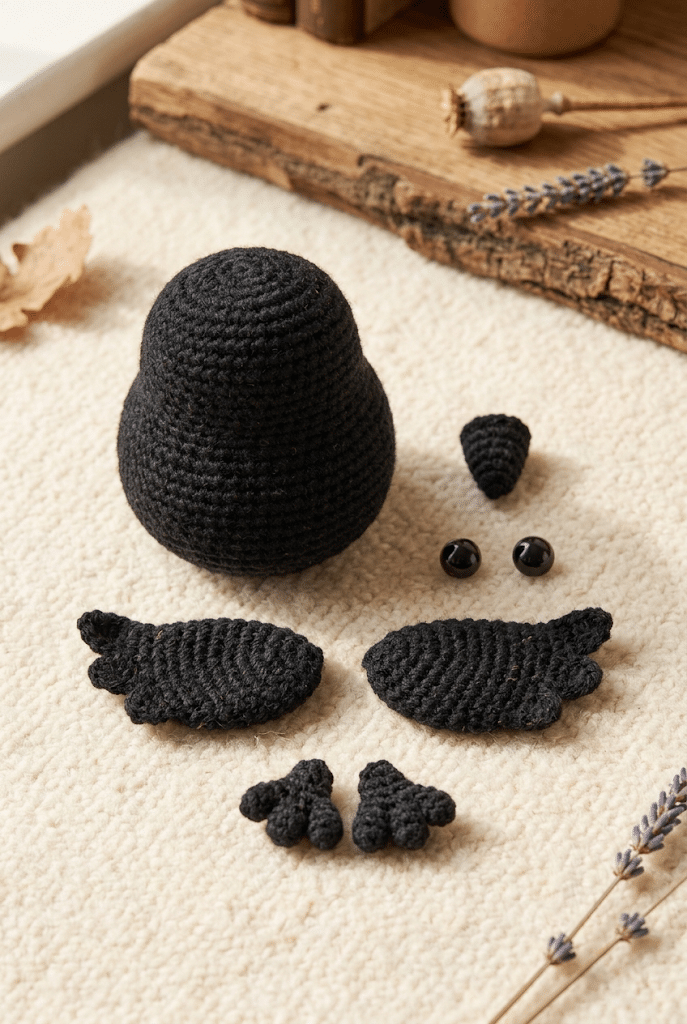
The beak gives your crow its unmistakable personality.
Use black, dark gray, or a very dark brown yarn. Crochet a tiny triangular piece and shape it into a subtle point.
You can make the beak short and rounded for a kawaii crow. A longer point creates a more realistic woodland bird.
Attach it between the eyes and slightly lower on the face.
Step 8: Add the feet
Tiny feet can make your crow look even more adorable.
Create two small legs and attach them near the bottom of the body. You can use black yarn for a monochromatic look or choose dark gray for subtle contrast.
Keep the feet short so the crow remains stable when displayed.
If you prefer a sitting crow, you can skip detailed feet and simply shape the lower body into a rounded base.
Step 9: Sew the pieces securely
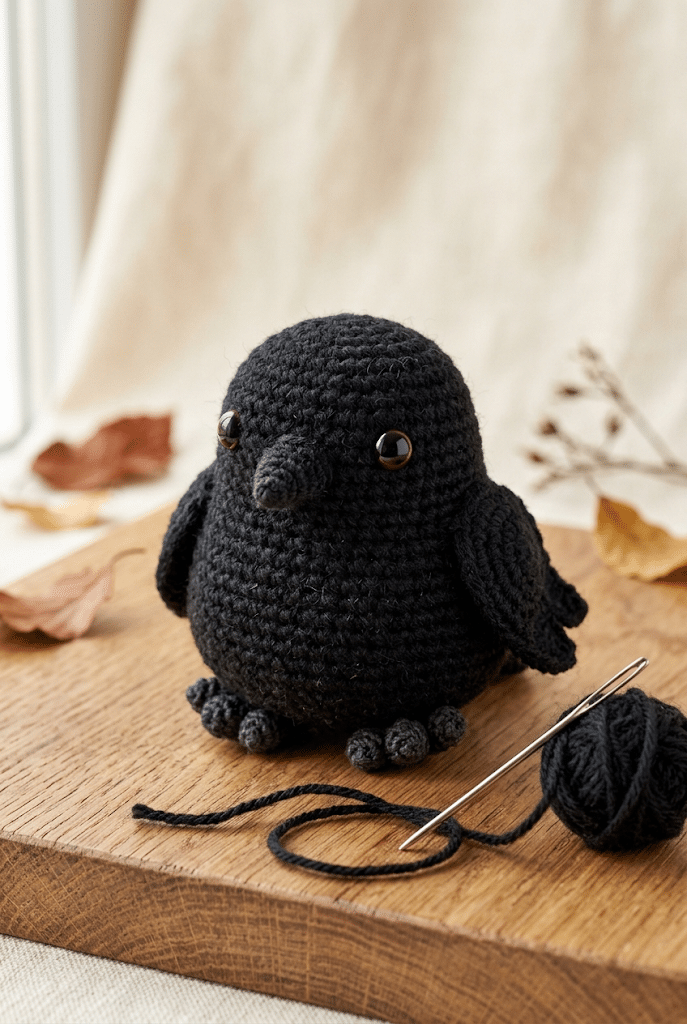
Now attach the wings, beak, and feet using your yarn needle.
Take your time with this step. Good sewing makes an amigurumi look polished.
Work the needle through several stitches instead of attaching each piece with only one or two passes.
Hide your yarn tails inside the body when you finish.
Step 10: Give your crow its final personality
This final step is where your handmade bird becomes your own.
Adjust the wings slightly. Check the eye placement. Smooth the body and gently reshape the stuffing.
You can also embroider tiny details around the beak or add a subtle gray patch beneath the wings.
Here is the fun part: there is no single correct personality for your crow.
Make it mysterious, sleepy, curious, mischievous, or ridiculously cute.
How to Make Your Crochet Crow Look Extra Adorable
Once the basic bird comes together, a few finishing choices can make a huge difference.
The beauty of amigurumi lies in tiny details. A slightly different eye position can turn a serious crow into a cheerful little character.
Create a dark cottagecore color palette
Classic black works beautifully, but you do not have to stop there.
Try combining black with:
- Charcoal gray
- Warm cream
- Deep brown
- Muted plum
- Dusty sage
- Dark forest green
These shades create a cozy woodland palette without making the project feel overly Halloween-themed.
Give the wings a soft curve
Instead of sewing the wings completely flat, gently curve them before attaching them.
Pin the top section firmly and leave a little movement near the lower edge.
This creates a more dimensional silhouette and makes the crow look ready to flap its wings.
Use the eyes to change the expression
Eye placement is one of the easiest ways to customize an amigurumi.
Place the eyes slightly lower for a sleepy expression. Move them closer together for a younger, cuter appearance.
For a curious crow, position the eyes slightly asymmetrically.
Perfect symmetry is not always necessary for personality.
Helpful Tips for a Smooth Crochet Crow Pattern
Even simple amigurumi can feel tricky the first time. A few small habits can make your project much more enjoyable.
Keep your tension consistent
Loose stitches can create gaps where the stuffing becomes visible.
If your stitches look too open, try using a slightly smaller hook. Tight stitches help create the firm fabric you want for stuffed animals.
Stuff gradually
Adding stuffing too early can make the piece difficult to crochet.
Wait until the body has enough room for your fingers. Then add small pieces while continuing the shaping.
Think of stuffing like sculpting. You are building the shape from the inside.
Use stitch markers
Continuous-round amigurumi can become confusing quickly.
Place a stitch marker in the first stitch of every round. Move it upward as you work.
This simple technique helps you keep track of increases and decreases.
Check the shape before sewing
Do not rush into assembly.
Place the wings, beak, and feet temporarily with pins. Step back and look at your crow from the front and side.
If something feels slightly off, adjust it before sewing.
Trust me on this one: five minutes of checking can save much longer unpicking later.
Fun Ways to Customize Your Crochet Crow
Your crow does not need to look exactly like a real bird. Handmade animals become more charming when you give them a little personality.
Make a Halloween crow
Use deep black yarn with tiny orange or purple accents.
Place your crow beside pumpkins, dried leaves, miniature books, or other handmade Halloween decorations.
You could even create several crows in different sizes for a spooky shelf display.
Create a gothic cottagecore crow
For a moodier aesthetic, keep the body charcoal black and add a tiny burgundy or plum accessory.
A miniature scarf, bow, or embroidered detail can make the crow feel like a character from a cozy woodland story.
Make a kawaii pocket crow
Use smaller yarn and a smaller hook to create a tiny version.
Give it oversized safety eyes and a very small beak. The result becomes perfect for a desk, shelf, bag charm, or little handmade gift.
You can even make a family of crows in different sizes.
Where to Display Your Finished Crochet Crow
After spending time making your bird, give it a special place where you can enjoy it.
A crow looks especially charming on a bookshelf surrounded by plants and books. It can also sit beside candles, handmade ceramics, baskets, or autumn decorations.
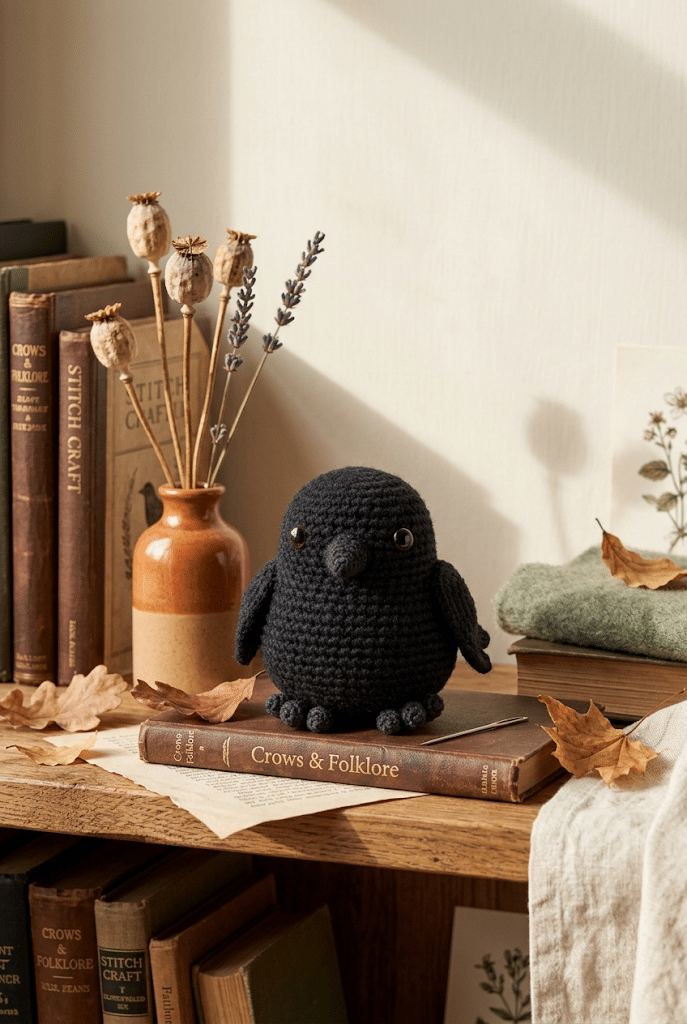
Cozy bookshelf styling
Place your crow between two books with a small plant nearby.
Dark yarn contrasts beautifully against warm cream pages and natural wood.
Autumn and Halloween displays
Use your crow as part of a seasonal arrangement.
Combine it with pumpkins, dried flowers, pinecones, or warm-toned crochet decorations.
The result feels handmade rather than overly commercial.
Handmade gift ideas
A small crocheted crow makes a thoughtful gift because it feels personal.
Pair it with a handwritten note or another small handmade item. You could create matching woodland animals and give the set as a birthday or holiday present.
Handmade gifts carry a little piece of your time and creativity.
Frequently Asked Questions About Crochet Crow Pattern
How long does it take to crochet a crow?
A small crow usually takes several hours, depending on your crochet experience and the size of the project. Beginners may need extra time for shaping and sewing. Experienced crocheters can often move faster once the body construction feels familiar. Take your time, especially during assembly, because careful finishing creates a much more polished amigurumi.
What yarn is best for crow amigurumi?
Smooth DK-weight yarn works especially well for crow amigurumi because it provides clear stitch definition and creates a neat stuffed shape. Black, charcoal, and dark gray are classic choices. You can also experiment with cotton blends or acrylic yarn depending on the texture and finished size you want.
Is a crochet crow pattern good for beginners?
Yes, especially if you already understand basic amigurumi techniques. The project mainly involves simple shapes, increases, decreases, stuffing, and sewing pieces together. If you are completely new to crochet, practice single crochet and magic rings first. Once those techniques feel comfortable, this bird becomes a manageable project.
What size safety eyes should I use for a crochet crow?
For a small crow, 6mm or 9mm safety eyes usually create a balanced appearance. Choose 12mm eyes for a larger amigurumi. Eye size also changes the personality of the bird. Larger eyes create a cuter kawaii appearance, while smaller eyes create a more subtle woodland look.
Can I sell amigurumi I make from this pattern?
You can generally sell finished handmade items you personally crochet, but always check the specific terms attached to the pattern you use. Do not sell, redistribute, or claim the written pattern itself as your own. If you sell your finished crow, mentioning that it was handmade can help customers understand its value and craftsmanship.
Can I make this crochet crow in different colors?
Absolutely. While black creates the classic crow appearance, charcoal, dark gray, brown, and deep plum can create beautiful variations. You can also use small accent colors for the beak, feet, or accessories. Changing yarn colors is an easy way to create a whole flock with different personalities.
Final Thoughts on This Crochet Crow Pattern
Making a little crow from yarn is such a satisfying project. You begin with simple crochet stitches, then slowly watch a rounded body, tiny wings, pointed beak, and expressive eyes become a charming woodland character.
This crochet crow pattern is especially fun because you can make it spooky, sweet, gothic, rustic, or completely kawaii. Every small choice gives your finished bird a little more personality.
Whether you keep it on your bookshelf or give it to someone special, you can feel proud knowing you made it with your own hands. Handmade decorations have a warmth that mass-produced pieces simply cannot recreate.
Save this pin to your crochet board on Pinterest so you can find this pattern anytime!
Looking for more free crochet animal patterns? Visit Yarned Animals for new amigurumi patterns, kawaii plushies and beginner crochet tutorials added every week at yarnedanimals.com