
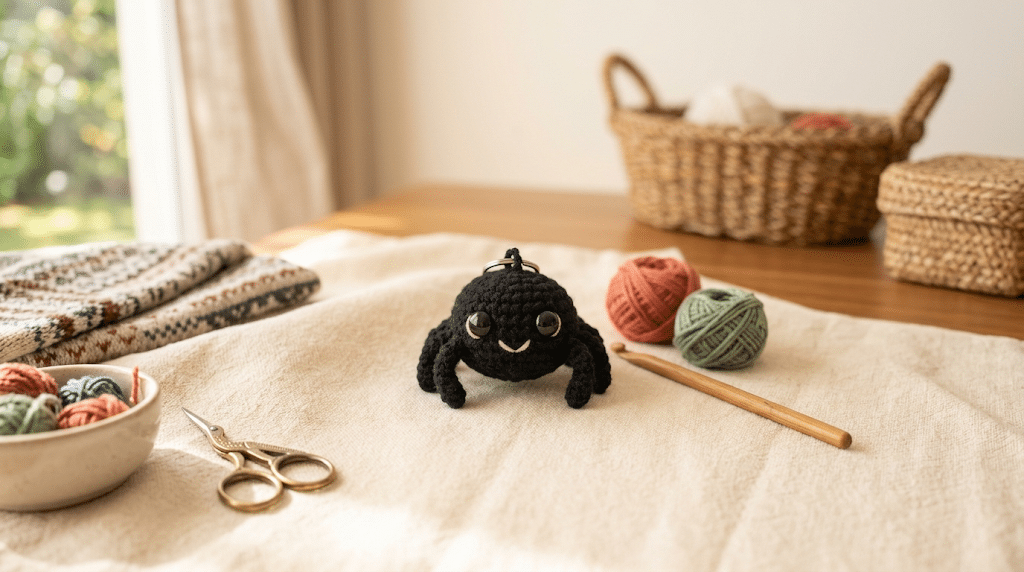
There is something ridiculously cute about turning a tiny spider into a pocket-sized crochet friend. Instead of looking spooky, this little amigurumi spider has a sweet kawaii face, squishy body, and eight tiny legs that make it perfect for bags, backpacks, keys, and gifts. This crochet spider pattern walks you through 10 simple steps to create your own mini keychain, even if you are still learning the basics of amigurumi. You will learn how to shape the body, add the legs, create an adorable face, and attach the keychain securely. For a soft finish, I love using Bernat Blanket yarn when I make larger plushies, while a lighter yarn works beautifully for this tiny project. Now, grab your hook and let’s make the cutest little spider!
Table of Contents
Why This Crochet Spider Pattern Makes Such a Cute Keychain
Tiny crochet animals have a special kind of charm. They are quick to make, easy to personalize, and small enough to take with you anywhere.
This crochet spider pattern turns a creature that many people find scary into a cheerful little companion. The round body and oversized eyes give it that classic kawaii look, while the short legs keep the finished spider compact and playful.
A mini spider also makes a fantastic beginner amigurumi project because you can practice several useful techniques without committing to a large plushie. You will work with simple shaping, stuffing, joining pieces, and basic embroidery.
A tiny project with a big personality
The best part of this spider is how much personality you can create with very few details. Two large safety eyes can make it look curious, sleepy, surprised, or extra mischievous.
You can also change the body color to match your favorite aesthetic. Black creates a classic spider, while purple, pink, orange, brown, cream, or sage green can give your creation a completely different personality.
For another color combination, try a black body with a tiny pastel bow. A bright body with contrasting legs also looks adorable on a backpack.
Why beginners can enjoy this amigurumi
You do not need complicated crochet techniques for this project. Basic stitches such as single crochet, increases, and decreases provide most of the structure.
Keep your stitches fairly tight when crocheting the body. Tight stitches help prevent the stuffing from showing through the fabric.
If you are new to amigurumi, take your time with the first few rounds. Once the body starts taking shape, the construction becomes much easier to understand.
A perfect handmade gift
A finished spider keychain makes a sweet handmade gift for a friend, teacher, coworker, child, or fellow crochet lover.
You can also make several spiders in different colors and give them away as little party favors. They are small enough to fit inside a gift box, greeting card, craft basket, or stocking.
Now that you know why this project is so fun, let’s gather everything you need.
Materials and Simple Supplies for Your Crochet Spider
One reason I love mini amigurumi is that you need surprisingly few supplies. Your spider uses a small amount of yarn, so it is also a great project for using leftover yarn from other crochet creations.
Choose a smooth yarn that lets your stitches remain visible. For beginners, a medium-weight yarn can make the construction easier to see while you practice.
A Clover Amour crochet hook is one of my favorite choices for comfortable crochet sessions because the soft handle feels lovely when you are working several small pieces.
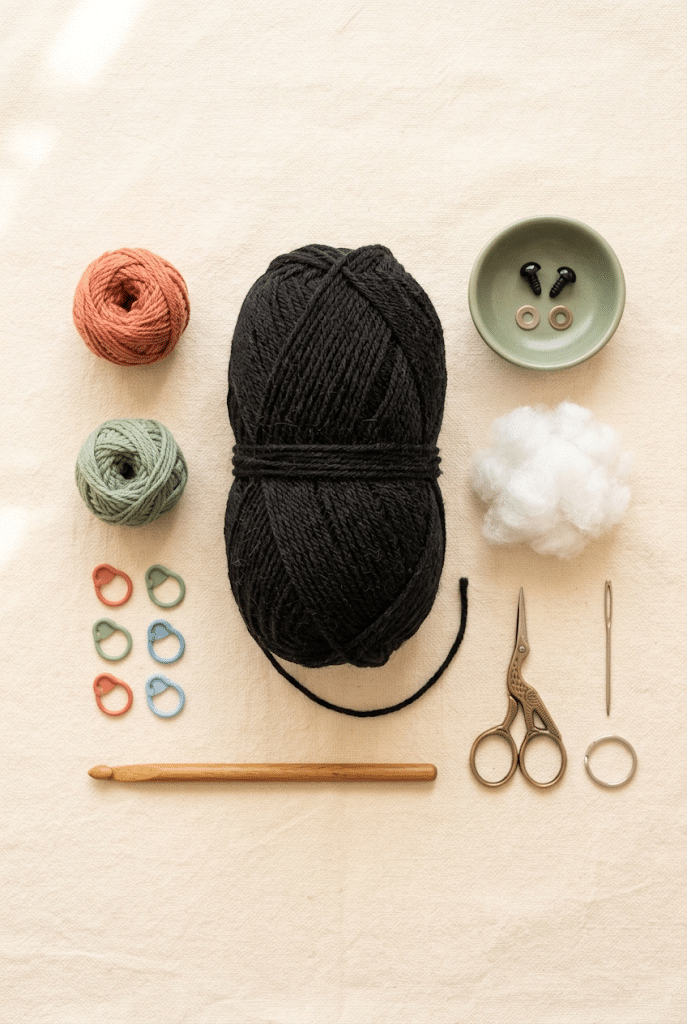
Yarn for the spider body
Choose one main yarn color for the body and another color if you want contrasting legs.
Paintbox Simply DK yarn works nicely for colorful amigurumi because you can choose from many shades and keep the spider lightweight.
You will only need a small quantity for a mini keychain. That makes this project perfect for using yarn scraps.
Crochet hook and stitch markers
Choose a hook that creates a firm fabric with your selected yarn. For most DK-weight yarns, a small crochet hook around the 2.5–3.5 mm range can work well for amigurumi.
Your exact hook size depends on your tension and yarn. The main goal is simple: your stitches should stay tight enough that the stuffing does not escape.
Keep a few stitch markers nearby. They make it much easier to identify the beginning of each round, especially when working continuously.
Safety eyes, stuffing, and finishing tools
For a mini spider, 6mm safety eyes can create a sweet proportion. If you prefer a more exaggerated kawaii face, you can use larger eyes when the body allows enough space.
Poly-fil Premium fiberfill gives the spider a soft, rounded shape without making it overly heavy.
You will also need a yarn needle for sewing and weaving in ends. A small keychain ring or lobster clasp completes the project.
For clean finishing, a yarn needle set gives you different needle sizes for sewing the legs, closing the body, and hiding yarn tails.
Before you start, organize your supplies beside you. It saves time and keeps the tiny pieces from disappearing under your yarn.
Crochet Spider Pattern: Build the Body Step by Step
Here is where your little spider starts coming to life. The body forms the central piece, so concentrate on maintaining even tension throughout the rounds.
The exact stitch count can vary depending on your yarn and hook. Rather than focusing only on numbers, watch the shape of your work as it grows.
Step 1: Create the starting loop
Begin with a magic ring. This technique gives you a tightly closed center without leaving a noticeable hole.
If the magic ring feels difficult, you can use a small chain loop instead. Work your first stitches into the loop and pull the yarn gently to close the center.
Keep the center secure. You want a neat beginning because the body will eventually hold stuffing.
Step 2: Work the first body rounds
Crochet single stitches around the starting ring. Increase evenly as the body grows.
Your piece should gradually look like a small circle rather than a flat rectangle. Keep your stitches firm but avoid pulling the yarn so tightly that your hook becomes difficult to insert.
Tip: Place a stitch marker into the first stitch of each continuous round. This tiny habit prevents many counting mistakes.
Step 3: Shape the rounded body
Continue crocheting around while adding increases where needed. Your flat circle will begin curving upward.
This is the moment when your spider starts looking like an amigurumi rather than a simple crochet circle.
Check your tension regularly. If the fabric looks loose, try a smaller hook. If your stitches feel extremely difficult to work, slightly relax your tension.
Step 4: Add the stuffing gradually
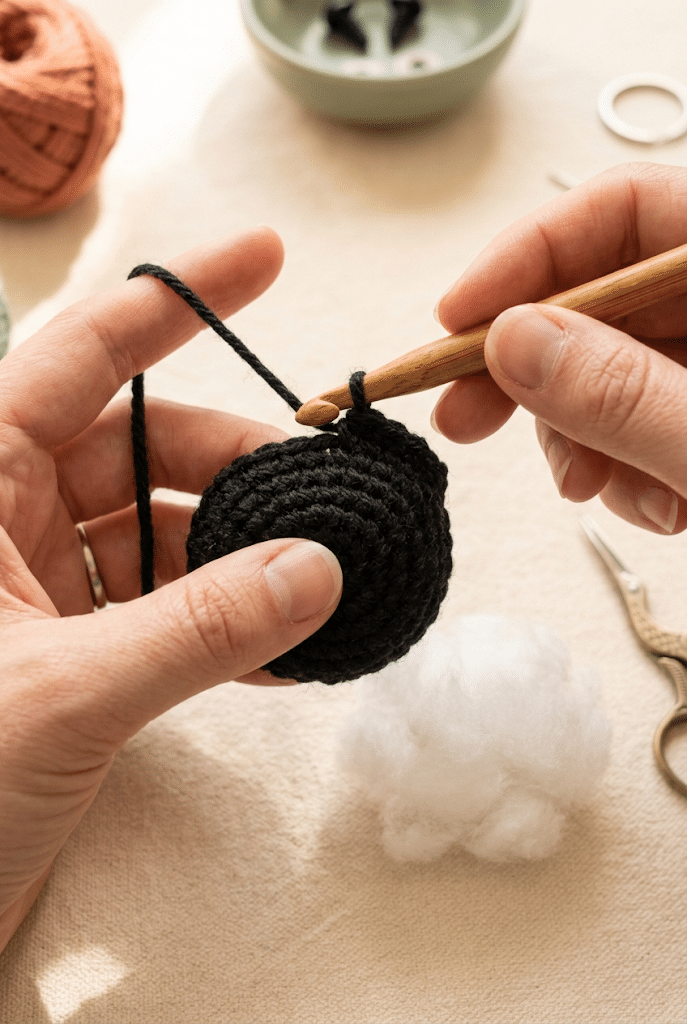
Once the body reaches the desired depth, begin adding small amounts of fiberfill.
Do not add everything at once. Instead, place a little stuffing inside, crochet a few more rounds, then add more.
Gentle stuffing creates a smoother shape. Overfilling can stretch the stitches and make the body look lumpy.
Use the end of your crochet hook or a blunt tool to push stuffing gently into the corners.
Make the Eight Tiny Legs Without the Stress
The legs are what transform your round body into a recognizable spider. They may look complicated at first, but tiny crochet legs can use very simple construction.
You do not need eight completely different pieces. Repeating the same small shape keeps the project manageable and helps all the legs look consistent.
Step 5: Crochet the mini legs
Create eight narrow crochet legs using your chosen yarn.
Keep each leg relatively short because this is a keychain rather than a large plush spider. Short legs also make the finished amigurumi easier to carry.
You can crochet simple chains and work stitches back along them. Another option involves making tiny tubular pieces, depending on the look you prefer.
Try making one leg first. Check its length against the body before creating the remaining seven.
Step 6: Give the legs a playful curve
Straight legs can look cute, but a gentle curve gives your spider more personality.
You can create a subtle bend by changing your stitch placement or by positioning each leg at a slight angle during sewing.
Make the front legs a little more expressive if you want a friendly pose. Slightly raised legs can make the spider look as though it is waving.
Keep the leg lengths similar unless you intentionally want an asymmetrical design.
Step 7: Sew the legs securely
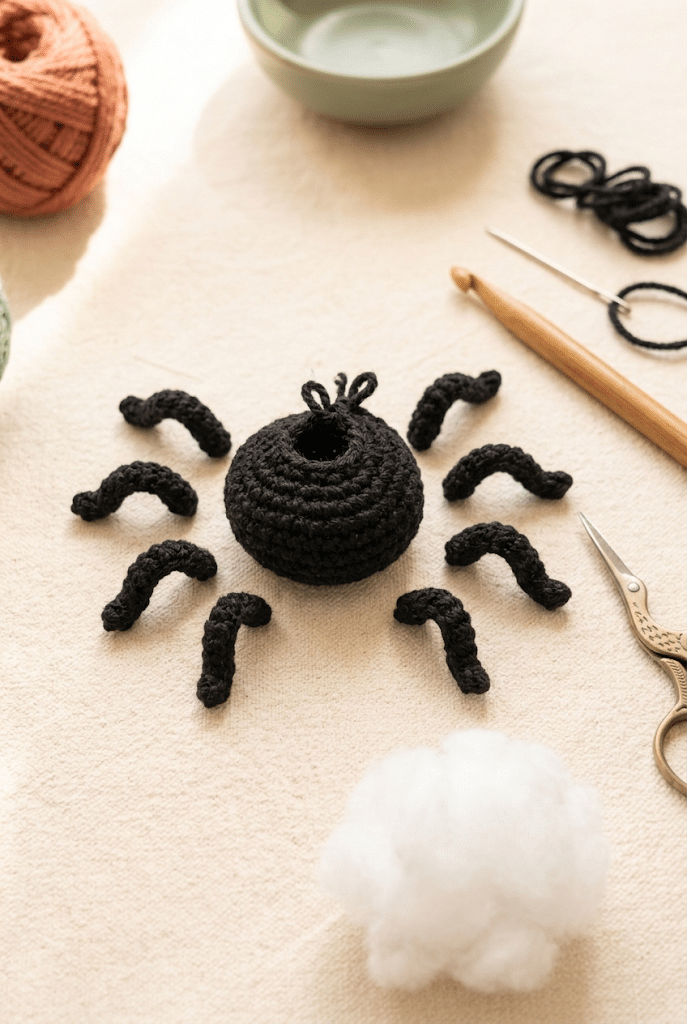
Arrange the eight legs around the body before sewing anything permanently.
This is a useful moment to take a quick look at your spider from different angles. Move the pieces until the spacing feels balanced.
Use your yarn needle to sew each leg firmly into place. Work the needle through the body several times without pulling so tightly that you distort the shape.
For a keychain, secure attachments matter. Your spider will probably move around inside a bag or hang from a backpack, so each leg needs a strong connection.
Add the Kawaii Face and Turn Your Spider Into a Character
The face creates most of the personality. A few tiny details can turn a simple crochet spider into an adorable character that feels completely unique.
Take your time with placement because moving safety eyes after installation can be difficult.
Step 8: Position the safety eyes
Before inserting your safety eyes, hold them against the body and experiment with different positions.
Place them closer together for a younger, cuter expression. Move them slightly farther apart for a more curious appearance.
For a tiny spider, 6mm safety eyes can create a balanced kawaii look. Larger eyes can create a cartoon-style expression if your body has enough space.
If the spider will become a toy for a young child, consider embroidered eyes instead of safety eyes and follow appropriate toy-safety guidance.
Step 9: Add the tiny finishing details
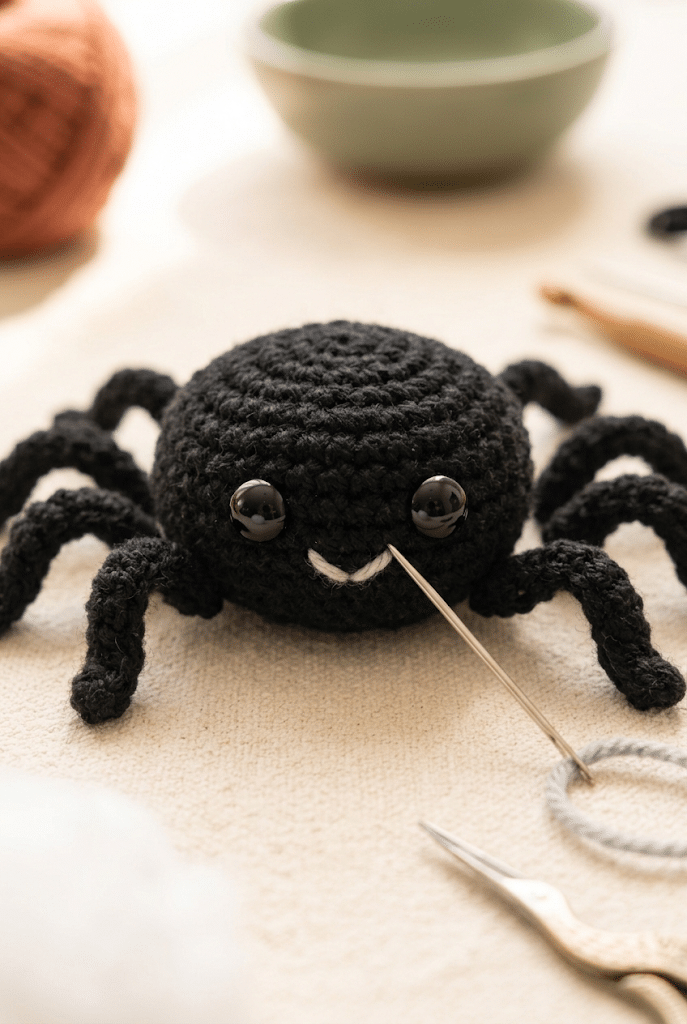
A small embroidered mouth can make the spider look extra friendly.
Use a contrasting yarn color and add a tiny curved smile. Keep the embroidery simple because the body is small.
You can also add little blush marks, eyebrows, or tiny decorative spots. A few stitches can completely change the expression.
For a Halloween version, try a tiny orange bow or a small embroidered pumpkin detail. For an everyday version, pastel cheeks create a softer look.
Now comes the final step: turning your amigurumi into a useful little accessory.
Finish Your Crochet Spider Keychain for Everyday Use
Your spider is almost complete. The final details determine whether it looks like a simple amigurumi or a polished little keychain ready to leave the house.
Take a moment to inspect every attachment before adding the hardware.
Step 10: Attach the keychain hardware
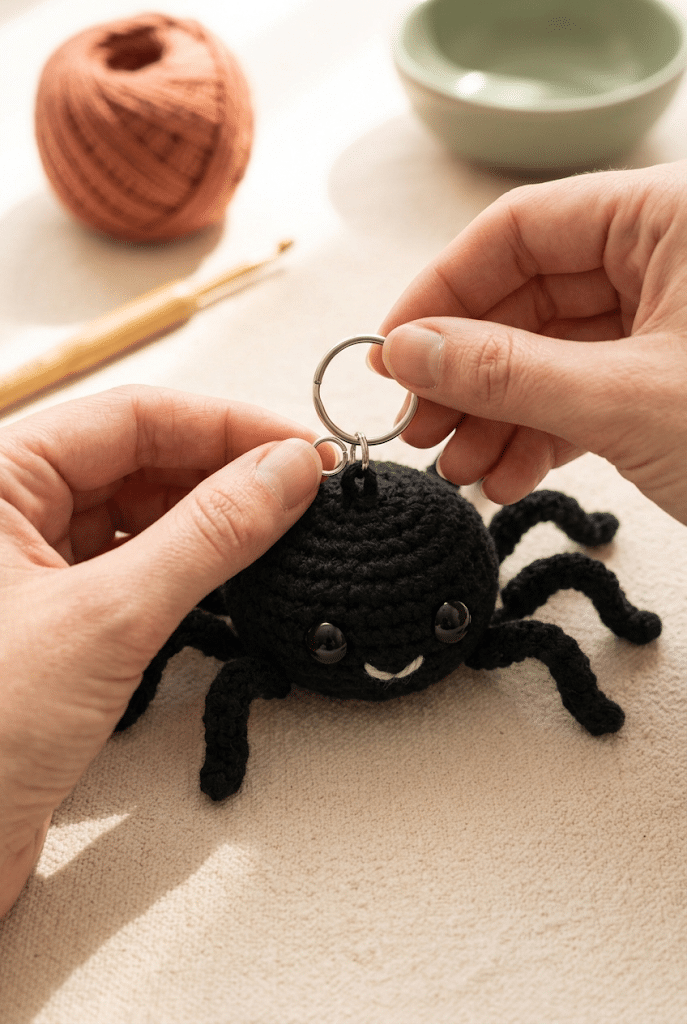
Choose a strong point near the top of the spider’s body for the keychain attachment.
You can create a small yarn loop and connect it to a metal keychain ring or lobster clasp. Sew the loop securely through the body rather than attaching it only to a loose yarn tail.
For extra strength, reinforce the attachment several times with your yarn needle.
Give the keychain a gentle tug before using it. A secure connection should feel firm without stretching the crochet fabric.
Make your spider your own
Now comes the fun part: customization.
Try a classic black spider with bright pink cheeks. Make another in lavender with white eyes. Create a tiny orange spider for Halloween or a pastel rainbow version for a cheerful spring accessory.
You can also vary the leg colors. A dark body with cream legs creates a cute contrast, while matching body and legs gives a more traditional appearance.
If you are making several gifts, give each spider a different facial expression. One can look sleepy, another surprised, and another wonderfully mischievous.
Helpful Tips for a Neat Crochet Spider Pattern
Small crochet projects reward patience. Because the finished spider is tiny, uneven stitches or loose joins can become more noticeable.
The good news is that a few simple habits can dramatically improve your result.
Keep your amigurumi tension consistent
Tension controls the final shape of the spider.
If your tension changes constantly, one side may look larger than another. Try to maintain a steady rhythm rather than pulling every stitch as tightly as possible.
Tight does not mean painful. Your hands should remain comfortable throughout the project.
Count your stitches regularly
Mini amigurumi can become confusing because several rounds look almost identical.
Count your stitches at the end of important rounds, especially after increases and decreases.
A stitch marker can save you from repeatedly recounting the entire body.
Stuff slowly instead of packing the body
A common beginner mistake involves adding too much stuffing.
Small amounts create a smoother, more controlled shape. Add stuffing gradually and gently spread it around the inside.
If you see gaps between your stitches, you probably added too much stuffing or your stitches are too loose.
Keep the legs symmetrical
Before sewing the legs, arrange all eight pieces around the body.
Imagine the spider divided into four sections. Position two legs on each side and adjust the angles until the shape looks balanced.
You can use temporary pins or stitch markers to hold the pieces while you check the placement.
Cute Ways to Customize Your Mini Spider
One of the best things about a simple amigurumi design is how easily you can turn it into something personal.
Once you understand the basic construction, experiment with colors, facial expressions, and accessories.
Create a Halloween spider
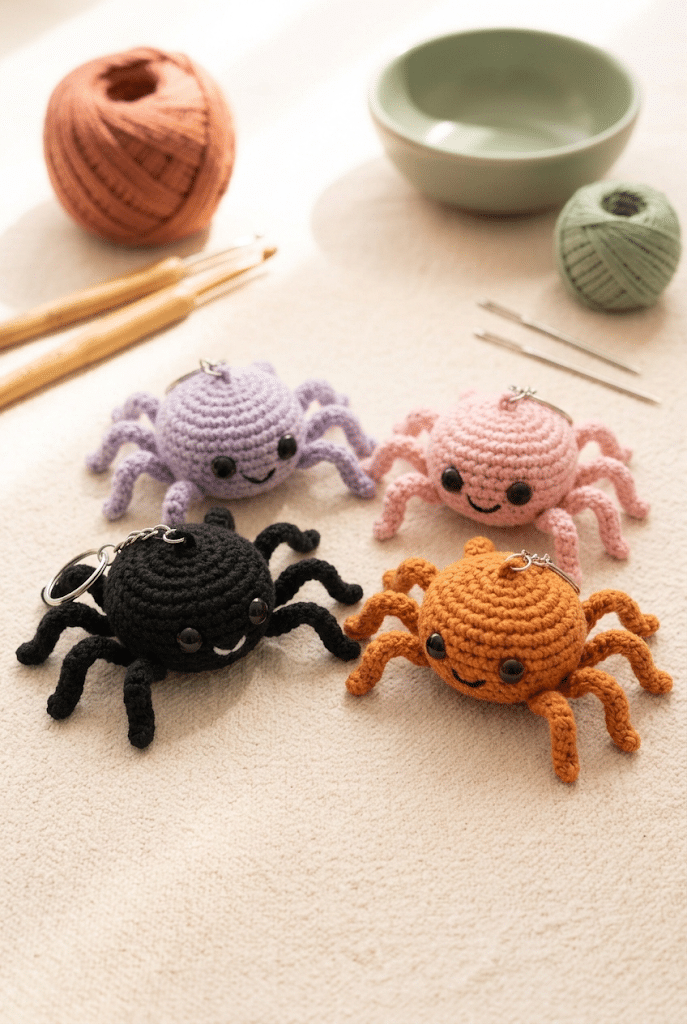
Black, orange, purple, and deep red yarn create an instant Halloween mood.
Add tiny embroidered fangs or a miniature bow for an extra festive touch. You could even make several spiders and use them as Halloween party favors.
A handmade spider can also decorate a trick-or-treat bag or Halloween gift basket.
Make a pastel kawaii spider
For a softer look, choose pastel pink, lavender, cream, mint, or peach.
Add embroidered blush cheeks and oversized eyes. The result looks more like a tiny plush character than a traditional spider.
This version works especially well as a backpack charm or handmade birthday gift.
Turn it into a desk companion
You do not have to attach the keychain hardware.
Leave the spider as a tiny amigurumi and place it beside your crochet supplies, computer, bookshelf, or craft room decorations.
You can even make a little collection with different colors and expressions.
Common Mistakes When Making a Crochet Spider
Small projects can sometimes feel harder than large ones because every stitch has a visible effect.
Don’t worry if your first attempt looks slightly different from the sample. Handmade crochet should have personality.
The body looks too loose
If stuffing shows through your stitches, try a smaller hook or tighten your tension.
Amigurumi generally benefits from a firm fabric because the stuffing needs to stay inside.
The spider looks flat
A flat body usually means you need more shaping or stuffing.
Check that you are following your increases and decreases consistently. Add stuffing gradually as the body closes.
The legs keep moving
Loose legs can happen when you sew them with too little yarn.
Go back through the attachment point several times and weave the yarn securely into the body.
For a keychain, this extra reinforcement makes a big difference.
The face looks uneven
Do not rush the safety-eye placement.
Before permanently installing the eyes, hold them against the body and take a quick photo. Looking at the image can make uneven placement easier to notice.
A slightly different position can completely change your spider’s expression.
How to Use Your Finished Crochet Spider
Your tiny spider does much more than sit on a shelf.
Attach it to your keys, backpack, purse, crochet bag, zipper, or pencil case. Because the project stays small, you can carry your handmade creation almost anywhere.
It also makes a thoughtful handmade gift for someone who loves unusual animals or kawaii accessories.
For a larger handmade collection, make several spiders in coordinated colors. You could create a whole family with different eye colors and expressions.
Handmade gifts feel special because someone can see the time behind them. Even a tiny keychain can carry that personal touch.
Frequently Asked Questions About Crochet Spider Pattern
How long does it take to crochet a mini spider?
A mini spider keychain can often take around one to two hours once you feel comfortable with the stitches. Beginners may need longer while learning the shaping and sewing steps. Your crochet speed, yarn weight, hook size, and experience will affect the final time.
What yarn is best for a crochet spider pattern?
A smooth DK or worsted-weight yarn works well for a beginner-friendly spider. Paintbox Simply DK yarn gives you clear stitches and many color choices. For a softer plush appearance, you can experiment with chenille yarn, although it may make small stitches harder to see.
Is this crochet spider pattern good for beginners?
Yes. This project works well for beginners who already know basic crochet stitches. You will practice a magic ring, single crochet, increases, decreases, stuffing, sewing, and simple embroidery. If the magic ring feels difficult, use a small starting chain loop and continue at your own pace.
What size safety eyes should I use for a spider keychain?
For a small spider, 6mm safety eyes usually create a cute balanced face. You can use larger eyes if your spider has a bigger body. Always check the eye placement before securing them, and consider embroidered eyes when making toys for very young children.
Can I sell amigurumi made from this crochet spider pattern?
You can generally sell finished handmade items you make from a pattern when the pattern’s specific terms allow it. The pattern itself remains separate from the finished item. If you plan to sell your creations, always check the designer’s stated usage terms and avoid presenting the pattern instructions as your own.
Can I make this spider without a keychain?
Absolutely. Simply skip the keychain hardware and leave the spider as a standalone amigurumi. You can use it as a tiny desk decoration, shelf companion, party favor, plush charm, or part of a larger handmade animal collection.
Final Thoughts on This Crochet Spider Pattern
Making a tiny spider from yarn is such a fun reminder that crochet does not have to be complicated to feel special. With a round body, eight little legs, expressive eyes, and a few finishing touches, you can create a handmade character with plenty of personality.
This crochet spider pattern gives you a simple project to practice amigurumi techniques while creating something useful and giftable. Once you finish your first spider, try different colors, expressions, and seasonal versions.
The best feeling comes when you hold that finished little creature in your hand and realize that every stitch came from you. Whether it becomes your new backpack buddy or a handmade gift for someone special, I hope this tiny spider makes you smile.
Save this pin to your crochet board on Pinterest so you can find this pattern anytime!
Looking for more free crochet animal patterns? Visit Yarned Animals for new amigurumi patterns, kawaii plushies and beginner crochet tutorials added every week at yarnedanimals.com